Submerged: A Subnautica Survival Diary – Entry 15: New Horizons, New Problems

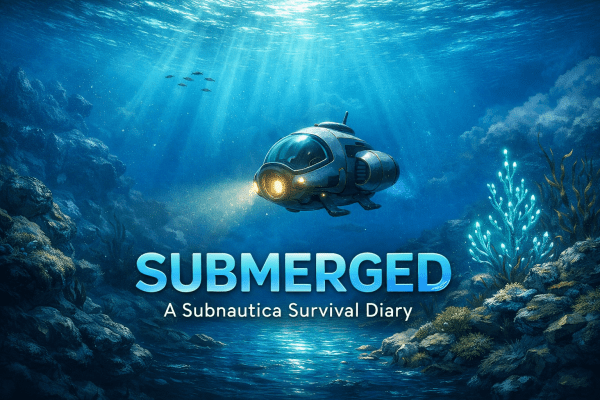
Submerged Entry 15: New Horizons, New Problems

Platform: Steam Deck
Game: Subnautica

Video: Lifepod 7 expedition, Cyclops breakthrough, and selecting the new base location (no commentary)

The first thing on today’s agenda was finally listening to the radio message I had completely forgotten about during the last entry. The signal came from Lifepod 7. The message itself was not exactly precise, but it did give me something useful to work with: approximately one kilometre from the stern of the Aurora, around 200 metres deep.

Valentino could reach that depth without too much trouble. The bigger issue was everything beyond it. If I wanted to keep pushing deeper into the ocean, I was going to need to improve the Seamoth’s depth capabilities properly.

Which meant another trip to the Jellyshroom Caves.

Back Into the Caves

By this point I know the route into the caves well enough that it no longer feels completely alien, although I still would not describe the place as welcoming. Giant glowing mushrooms, abandoned Degassi structures, and the general sense that the entire biome wants to swallow you whole does tend to ruin the atmosphere slightly.

While collecting Magnetite, I noticed a PDA I had somehow missed previously. The logs mentioned another Degassi base deeper within the caves, roughly 250 metres down.

Conveniently, that depth was perfect for Valentino.

Naturally, I went looking for it immediately.

The base itself was partially abandoned, partially destroyed, and still somehow more organised than anything Alterra has left me with so far. I moved through the structure scanning and looting whatever I could find. Amongst the debris were fragments for a Nuclear Reactor, which is potentially useful later, but the real discovery was something else entirely:

A Water Filtration Machine.

That is a massive upgrade for long-term survival. The idea of having a permanent source of clean drinking water inside the base changes things considerably.

Unfortunately, the universe immediately balanced this optimism by informing me the machine requires Aerogel to construct. I still have absolutely no idea how to make that.

So for now, the Water Filtration plans have been pushed onto the increasingly large “future problems” list.

The Stalker Tooth Problem

Returning to base, I turned my attention toward upgrading Valentino properly. The MK2 Depth Module required Enameled Glass, which meant gathering Glass and Stalker Teeth.

Quartz was easy enough to collect. Stalker Teeth were another matter entirely.

At first the Scanner Room refused to cooperate, so I switched the scan to Metal Salvage instead, figuring I could track the Stalkers themselves and wait for a tooth to drop naturally while they played with the scrap.

This approach did not work.

I tried patience. I tried following them around. I even tried encouraging the process slightly more aggressively by ramming them with Valentino and stabbing them with a knife.

Still nothing.

At this point I briefly convinced myself I probably needed a Stasis Rifle for the whole process and headed back toward the Scanner Room in defeat.

Then I noticed it.

The Scanner Room could scan directly for Stalker Teeth.

Suddenly the entire situation became significantly easier.

I switched the scan immediately, headed back outside, and found a tooth almost instantly. Apparently the solution to my problems was simply reading the Scanner Room properly instead of behaving like an underwater caveman for twenty minutes.

Valentino Goes Deeper

With the final materials gathered, the MK2 Depth Module was finally completed and installed into Valentino.

Maximum operating depth: 500 metres.

That is a very significant improvement over the previous 300 metre limit. The deeper parts of the planet suddenly feel far more accessible now, which is either excellent news or a terrible idea.

Probably both.

Lifepod 7

With Valentino upgraded, it was finally time to investigate Lifepod 7 properly. I checked the coordinates again and began making my way toward the stern of the Aurora.

The closer I moved toward the wreck, the more careful I became. I wanted to search thoroughly without drifting too far into open water, particularly considering what lives around the Aurora.

Unfortunately, the local Reaper Leviathan decided to introduce itself anyway.

The thing appeared out of nowhere and chased Valentino for a short distance before somehow losing interest. I still do not entirely understand how we escaped that encounter intact, but I was not about to question my good fortune.

And then, almost immediately afterwards, I saw something far more important resting on the seabed.

The final Cyclops engine fragment.

After all this time, the Cyclops blueprint was finally complete.

Which means I now have another vehicle to eventually construct. More importantly, I now have another vehicle that will eventually require a name.

The Lifepod and the Doll

Eventually I found Lifepod 7 itself, carefully matching the surrounding terrain against the photograph I had been given. Valentino had taken a beating during the earlier encounter, so I stopped briefly to repair the damage before entering the pod itself.

Truthfully, there was not much left inside worth salvaging.

There was, however, one unusual discovery.

A strange doll sitting quietly within the wreckage.

I could not pick it up directly, but I was able to scan it. After checking my blueprints later, it appears I can now build my own version of it.

Something about the doll felt strangely familiar though. It reminded me of someone from another underwater disaster involving another submarine.

If memory serves correctly, things did not end particularly well for them either.

New Base Location

Before heading home, I spent some time surveying the surrounding area carefully. The more I explored near the stern of the Aurora, the more obvious something became.

I need a second base.

The original Mushroom Forest base is still serving me well, but operations are slowly moving further and further away from it. The deeper I push into the planet, the more useful a forward outpost becomes.

Eventually I found the spot I was looking for.

Close enough to the Aurora to support further expeditions. Far enough from the deeper drop-offs to remain manageable. Dangerous enough to feel like a terrible idea.

Perfect.

I dropped a beacon into the seabed and gave it a name:

New Base Location.

That is right.

I am building a new base.

Continue the Journey

Previous Log |
Next Log
Submerged Hub

Super Mario Galaxy 63 Entry 7 – Inside the Igloo

Super Mario Galaxy 63 Entry 7 – Inside the Igloo

Apparently inside the igloo is where the ice itself becomes the problem.


Back Into Snowman’s Land Galaxy

No prizes for guessing where I’m heading for this entry.

Back into Snowman’s Land Galaxy I go, this time for Inside the Igloo.

Hopefully this version is a little different from the one back in Super Mario 64.

I remembered passing the igloo while climbing towards the giant snowman, so I had a feeling there would be a shine sprite hidden in there somewhere.

Would have been disappointed if there wasn’t.


Ice Mario Returns

Before heading inside, I grab the mushroom that gives Mario an extra three hits.

My theory was that the extra health would carry over into the igloo.

It doesn’t.

So already off to a strong start.

Inside the igloo introduces the next power-up for this hack: the Ice Flower.

Which means Ice Mario returns.

Inside the igloo, the frozen floor is basically lava unless I’m using the power-up, so staying Ice Mario becomes fairly important.


Snowballs and Comet Coins

Before long I’m rolling snowballs around to make them larger.

The idea is to push them into the frozen floor so they create paths I can safely cross.

The first Comet Coin takes a few attempts.

That one needs a triple jump into a spin, followed by a wall jump to actually reach it.

The second one isn’t quite as awkward, although I do mess up my timing with the Ice Flower power-up slightly.

Nothing to do with Mario suddenly deciding to show off his acrobatic skills of course.

That mistake does leave me sitting on one health though.


One Health Left

Thankfully, I manage to take that single remaining hit point all the way to the shine sprite.

I do briefly consider immediately going for the final shine sprite in this galaxy while I’m already here.

Then I remember how lucky this run felt at several points.

I decide not to push it.

The shine sprite is mine, and honestly, I’m happy enough taking the win.


The Run

This is how it actually went.


Continue the Journey

← Entry 6: Red Coins on The Summit


Super Mario Galaxy 63 Hub

— All entries in this run.


Super Mario ROM Hacks Archive

— All Mario ROM hack content.


Dolphin Setup Guide

— How this run is even possible.


Entry 8 →

Submerged: A Subnautica Survival Diary – Entry 14: Return to the Aurora

Submerged Entry 14: Return to the Aurora

Platform: Steam Deck
Game: Subnautica

Video: Aurora return, Prawn Suit fragments, and Neptune Rocket plans (no commentary)

Before heading back to the Aurora, I once again spent some time off-camera scavenging for supplies. Mostly lithium this time, as I wanted to make proper use of the Modification Station. The result is a larger oxygen tank, upgraded fins, and a noticeable improvement in how long I can actually survive underwater without surfacing like a panicked fish every thirty seconds.

Three full minutes of oxygen changes a surprising amount.

I also crafted several fire extinguishers because, unfortunately, the Aurora is still very much on fire.

There were two reasons for returning. The first was the Prawn Suit fragments hidden somewhere inside the wreck. The second was Alterra’s supposed “backup plan” for getting me off the planet, which apparently waited behind a locked door inside the Captain’s Quarters.

Whether escaping is actually possible while infected and living under the watchful eye of a giant alien cannon is another matter entirely.

Approaching the Wreck

I climbed into Valentino and made my way toward the Aurora once again. The closer I got, the more the entire wreck seemed to dominate the horizon. Even after previous visits, the thing still feels less like a crashed ship and more like a warning.

At one point I seriously considered turning around altogether. A Leviathan was swimming nearby, somewhere beneath the waterline, and although I do not think it actually spotted me, I had no interest in testing that theory in open water.

Valentino survived the trip regardless, and eventually the familiar wreckage came into view.

Cave Crawlers and Corporate Fire Hazards

The first order of business inside the Aurora was dealing with Cave Crawlers, which mostly involved launching them into the distance using the Propulsion Cannon. I do not think that mechanic will ever stop being entertaining. There is something deeply satisfying about watching tiny hostile creatures suddenly achieve low orbit.

Beyond that came the usual combination of burning corridors, blocked pathways, and scattered debris. I moved crates out of the way, emptied fire extinguishers into active flames, and slowly pushed deeper into the wreck.

Along the way I found a code for a nearby door and, naturally, immediately abandoned all restraint and grabbed everything that was not physically attached to the walls.

Returning with upgraded oxygen capacity also made a noticeable difference. For once, I could actually stop to explore rooms properly instead of constantly checking my remaining air supply every few seconds.

I even found another flashlight, which is reassuring considering my current one has probably suffered enough abuse already.

The Prawn Suit Bay

Eventually I found what I had really come for: the Prawn Suits.

The bay itself was still partially on fire, which meant carefully weaving between flames while scanning fragments as quickly as possible. One by one the blueprints started coming together until, after four scans, the final piece clicked into place.

The Prawn Suit was now fully unlocked.

Which means at some point soon I am going to need to build one. More importantly, I am going to need to think of a name for it.

Somewhere during all this, I also noticed I had another radio transmission waiting back at base. Naturally, I completely forgot about it again until the recording had already finished.

Alterra’s Escape Plan

After securing the Prawn Suit fragments, I continued moving room to room through the Aurora, embracing my role as the ocean’s least qualified salvage expert. If something was not nailed down, it went into my inventory. If it was scannable, I scanned it.

Eventually I reached the Captain’s Quarters, although actually getting inside proved more difficult than expected because I somehow managed to forget where the code was stored despite knowing full well I already had it.

Eventually common sense prevailed, the code was entered correctly, and inside waited Alterra’s emergency solution to the entire situation:

Blueprints for a rocket.

I appreciate the optimism. Unfortunately, there are still several problems with this plan.

Firstly, I am infected with something unpleasant.

Secondly, there is still a giant alien cannon on the island that already demonstrated very clearly what happens to anything attempting to leave the planet.

So while the Neptune Rocket plans are useful, I would not exactly call them an immediate solution.

Return to Base

Eventually I fought my way back through the Aurora and returned to Valentino. The trip back to base was quieter, although the closer I got to home, the more obvious another problem became.

The current base is starting to feel small.

Between the Scanner Room, Moonpool, Bioreactor, storage space, and everything else I keep dragging back from expeditions, the operation is beginning to outgrow the original layout.

I am now seriously considering either heavily expanding the current base or establishing a second outpost somewhere further from the Mushroom Forest.

Before any of that though, I need to figure out exactly what components are required to craft the Prawn Suit.

And perhaps more importantly, I should probably listen to that radio message.

Continue the Journey

Previous Log |
Next Log
Submerged Hub

Super Mario 64 Randomizer – Log 25: Thank You For Playing

Super Mario 64 Randomizer – Log 25: Thank You For Playing

Game: Super Mario 64 Randomizer
Platform: Steam Deck
Format: No Commentary

Video: Final red coins in Bowser in the Sky, 120 stars collected, and the last battle with Bowser (no commentary)


The Final Star

It was time. No sense putting it off any longer. I had 119 stars, and the final one was waiting for me in Bowser in the Sky. One last red coin hunt before the end.

When I jumped into the course I expected the randomizer to throw me somewhere near the end, but instead I spawned close to the beginning. That turned out to be perfect, because it meant I could search the entire level properly from start to finish instead of rushing through it.

I took my time, stopping every so often to move the camera around and make sure nothing was hiding just out of view. Hazy Maze Cave had already taught me that stars and coins could be sitting right in front of me without me noticing if I wasn’t careful.

I also had to fight the instinct to take the shortcuts I would normally use in this level. In the original game I know this course well enough to rush through it, but this wasn’t the original anymore, and I had a feeling if I skipped ahead too quickly I’d leave a coin behind.

120 Stars

The final three coins were waiting near the location where the red coin star appears, right beside the pipe that leads to the final battle. Once I collected them, the star appeared exactly where I hoped it would.

One jump later, and that was it.

All 120 stars of this randomizer seed collected.

Only one thing remained.

The Final Battle

The fight with Bowser didn’t go perfectly at first. I managed to throw him into one bomb, but nerves or bad luck got the better of me after that. I got caught by his fire, stunned, and even managed to fall off the platform. Round one went to him.

The second attempt felt different. I was calmer, more focused. The first throw landed, then the second, and suddenly I was holding him for the final spin.

As I turned Mario around with Bowser in his hands, I couldn’t help but think that this really was the final throw of the run.

It was.

Three clean throws later, Bowser was defeated and the randomizer seed was finished.

The Credits Roll

The familiar cutscene played out, and when the camera showed the castle roof, Yoshi was there waiting, proving that all 120 stars had been collected.

I let the credits roll without skipping. Watching the game show each of the locations again, one after another, reminded me just how much ground this run had covered. Every level, every detour, every moment where I thought I might have made the seed impossible.

And that music… the same credits music I’ve heard so many times over the years still feels exactly the same as it did the first time I heard it.

All that was left was the final line.

Thank you so much for-a playing my game.

And thank you for all the memories you have given me, Mario.

Continue the Journey

← Log 24
Epilogue →

🧢 Mario 64 Randomizer Hub

Super Mario 64 Randomizer logs are written after each recording session. Every journey ends eventually, even the ones you never wanted to finish.

Super Mario Galaxy 63 Entry 6 – Red Coins On The Summit

Super Mario Galaxy 63 Entry 6 – Red Coins On The Summit

Apparently even when I know where I’m going, I still somehow end up finding the wrong objective first.


Back Into Snowman’s Land Galaxy

Back into Snowman’s Land Galaxy I go for Red Coins On The Summit.

Full disclosure, I actually found this shine sprite completely by accident while recording The Big Snowman.

I took the wrong path and somehow ended up right beside the red coin challenge.

This was after doing a practice run specifically to make sure I knew where I was going for the previous shine sprite.

So apparently that worked out well.


Red Coins Return

It’s been a while since I last had to collect red coins.

The last proper red coin challenge I remember doing was back during the Super Mario 64 Randomizer.

Thankfully, I already have a rough idea where most of the coins are here.

There’s also a map nearby if I need it, but I already have a route planned out in my head.

The plan is basically to work my way up the mountain.

Or summit.

The shine sprite name says summit, so I’m counting it as a mountain.


The Hidden Comet Coin

There’s also a Comet Coin hidden here.

And by hidden, I mean properly hidden unless you move the camera around.

It’s floating up in the sky and the only realistic way to reach it is with the help of Cloud Mario.

Thankfully I’ve already had enough practice with the cloud power-up by now that getting to it isn’t too bad.


The Summit

Eight red coins later and the shine sprite appears almost exactly where I landed earlier.

Convenient for once.

I’m not too concerned about fall damage, so I long jump back down towards it and grab the shine sprite.

Honestly, this was a pretty fun shine sprite overall.

It reminded me a lot of the red coin missions back in Super Mario 64.

Maybe that’s just nostalgia talking.

Either way, I had fun with this one and I’m looking forward to seeing what the next shine sprite throws at me.


The Run

This is how it actually went.


Continue the Journey

← Entry 5: The Big Snowman


Super Mario Galaxy 63 Hub

— All entries in this run.


Super Mario ROM Hacks Archive

— All Mario ROM hack content.


Dolphin Setup Guide

— How this run is even possible.


Entry 7 →

Neo Mario Galaxy – Daredevil Edition Entry 5: The Chimp’s Challenge

Neo Mario Galaxy – Daredevil Edition Entry 5: The Chimp’s Challenge

Apparently hidden stars now require advanced movement tech and panic skating.


The Secret Star

So, there is a secret star hidden somewhere within Sweet Treat Galaxy.

I had a feeling I knew where it was.

The problem was getting there.

Every time I entered this galaxy, I noticed those flying ice bird enemies above the starting area, which made me think it had to be possible to reach that platform somehow.

The question was how.

I thought I had an idea.


The Trick

During my research into Mario Galaxy ROM hacks, I’d seen people using a movement trick involving either a triple jump or backflip into a wall.

Before landing on the wall, they spin, jump off it, then spin again for extra height.

I still need a better name for it than “spin, wall jump, spin thing.”

The question was which version I needed here.

I settle on the triple jump.

My theory is that there’s a wall slightly higher than the starting platform. If I can hit the perfect spot with the triple jump, I should get enough height to pull the trick off properly.

That was the theory anyway.


Eventually Getting It Right

It takes quite a few attempts before I finally manage it.

A few times I’m more concerned about the ice bird enemies than the jump itself, mainly because they occasionally decide to swing directly at me.

Not ideal when Daredevil Mode only gives me one health.

Eventually though, I make it up there.

I follow the path and spot a pipe trapped inside a crystal.

Which usually means something unpleasant is waiting for me.

I go in.

The Chimp is there.

Great.


The Skating Challenge

The Chimp gives me a simple challenge: beat his score and I get the star.

Sounds reasonable enough until he tells me I need 500 points in 40 seconds while avoiding spikey enemies.

So naturally this turns into panic skating.

The only realistic way to move fast enough is by skating across the ice.

Regular enemies are worth 10 points each, while the gold enemies are worth 50, which immediately makes them the priority targets.

About halfway through, I’m sitting around 170 points and starting to think this attempt is doomed.

Then more gold enemies start appearing.

I do hit a spikey enemy at one point, which thankfully only stuns Mario instead of ending the run immediately.

With one second left on the clock, I hit one final gold enemy.

530 points.

The Chimp’s Skating Challenge star is mine.

Sweet Treat Galaxy complete.


A New Problem

I don’t really get time to celebrate though.

A prankster comet has appeared back at Galactic Garden Galaxy.

I have absolutely no idea what challenge it’s about to throw at me.

Looks like I’m heading back there next.


The Run

This is how it actually went.


Continue the Journey

← Entry 4: The Chocolate is Lava


Neo Mario Galaxy – Daredevil Edition Archive

— All attempts in this challenge.


Super Mario ROM Hacks Archive

— All Mario ROM hack content.


Dolphin Setup Guide

— How this is even running on Steam Deck.


Entry 6 →

Submerged: A Subnautica Survival Diary – Entry 13: Expanding the Operation

Submerged Entry 13: Expanding the Operation

Platform: Steam Deck
Game: Subnautica

Video: Base upgrades, Scanner Room expansion, wreck exploration, and Modification Station progress (no commentary)

Well, it has been some time since I last sat down to document anything properly, but that is not to say nothing has been happening. Quite the opposite, actually. I simply decided nobody needed to watch several uninterrupted hours of me digging through limestone chunks looking for copper and titanium while muttering at fish.

So before heading back out into the ocean properly, a quick tour of the base is probably in order.

Since the last entry, the place has expanded quite a bit. A few additional rooms have gone up, reinforcements have been installed, the Scanner Room is now fully operational, and perhaps most importantly of all, the base no longer feels like a temporary survival shelter waiting to collapse the moment the lights flicker.

I also finally got a Bioreactor up and running. At the moment I am using Bulbo Trees to keep it supplied, which means the plants are now serving three separate purposes at once: food, water, and power generation. I have accidentally built a surprisingly efficient underwater ecosystem entirely fuelled by leaves and poor decision making.

For the first time since arriving on this planet, the operation feels self-sufficient.

Scanner Room Operations

The Scanner Room has quickly become the centrepiece of the entire base. I still wanted one final upgrade for it though: another Scan Range Module. The idea of turning the thing into a giant underwater radar station was simply too tempting to ignore.

To put it to work, I set the scanner to search for limestone chunks. Technically I could have told it to search directly for Copper Ore, but during testing I realised the scanner mostly highlighted the larger deposits that require a Prawn Suit to drill into. That will be useful later. Right now though, I still needed copper the old-fashioned way.

The current objective was the Modification Station. I had already discovered a wreck during earlier exploration that supposedly contained the fragments I needed. Whether the Scanner Room would actually be able to find it once fully upgraded was another matter entirely, but I had a plan for that if things went wrong.

Return to the Jellyshroom Caves

Before heading for the wreck, I made a detour into the Jellyshroom Caves. I had already placed a beacon there earlier, which meant I could navigate directly back to the entrance without wandering around the ocean floor like a confused tourist.

The target this time was Magnetite. I already knew future upgrades would need it, even if I was not entirely sure how many. In Subnautica, the answer is usually “more than you currently have.”

The caves still feel wrong every time I enter them. The glowing mushrooms, the strange silence, the sense that the entire biome is quietly waiting for something unpleasant to happen. Still, the Magnetite was there, and after grabbing what I could carry, I headed back to base before the local wildlife decided I had overstayed my welcome.

Power Problems That Aren’t Actually Problems Yet

Interestingly, the Bioreactor has not really needed to do much heavy lifting so far. Most of the power demands are still being handled by the solar panels above the base. The reactor mostly sits there quietly, waiting for the day I inevitably expand this place into something far larger than originally intended.

Which, if I am being honest, is probably unavoidable at this point.

The 500 Metre Disappointment

Once the final Scan Range Module was installed, the Scanner Room finally hit its maximum range of 500 metres. Naturally, the first thing I did was set it to search for wrecks.

The wreck I needed was outside the range.

Of course it was.

Thankfully, I already knew roughly where to find it. Along the way, I stumbled across some kind of alien vent structure. I still have absolutely no idea what it actually does, but I scanned it anyway because that is apparently how I deal with ancient alien technology now.

The wreck itself sat just beyond the edge of the Mushroom Forest. Inside, amongst the twisted metal and scattered debris, were exactly the fragments I had been searching for.

The Modification Station was finally within reach.

Technology Recovery Operations

The wreck turned out to be far more useful than expected. Alongside the Modification Station fragments, I also recovered blueprints for a Reinforced Dive Suit and an upgrade module for the Cyclops. The deeper I push into this planet, the more obvious it becomes that the game expects me to start preparing for much harsher environments.

Most importantly though, recovering the Modification Station fragments meant one thing: the Seamoth MK2 Depth Module was now possible.

Well. Almost possible.

Back at base, I realised I was still missing a Computer Chip. Which meant I needed Copper Wire. Which meant another quick trip using the Scanner Room to locate limestone chunks because apparently every major technological breakthrough on this planet eventually comes down to me desperately searching for copper.

Still, after one final scavenging trip, the Modification Station was finally constructed and operational.

Future Plans

I am still debating whether this base eventually needs a second Scanner Room. My current theory is that if I expand the base far enough in the opposite direction, I could effectively create overlapping scan coverage and push the search range even further across the surrounding biomes.

At the moment, that is still just theory.

Next time though, the plan is clear.

I am returning to the Aurora.

The goal is simple: recover enough fragments to finally get a Prawn Suit operational. Because if this planet insists on hiding everything useful in increasingly hostile depths, I may as well start preparing properly for the descent.

Continue the Journey

Previous Log |
Next Log
Submerged Hub

Super Mario 64 Randomizer – Log 24: One Star From the End

Super Mario 64 Randomizer – Log 24: One Star From the End

Game: Super Mario 64 Randomizer
Platform: Steam Deck
Format: No Commentary

Video: Finishing Big Boo’s Haunt before clearing Wet-Dry World and reaching 119 stars (no commentary)


Hunting the Final Red Coin

I was determined to finally locate the missing red coin in Big Boo’s Haunt. My first stop was the roof of the mansion, and sure enough that’s exactly where it had been hiding the entire time. Once I knew where it was, the rest of the red coin hunt turned into a fairly quick sweep through the mansion grounds and rooms.

I did have a brief moment where I forgot where the last coin was, but the mistake corrected itself quickly when I walked into the wrong room and immediately realised where I actually needed to be. A quick correction later and the final star of Big Boo’s Haunt was mine.

The Final Course

With the haunted mansion finally cleared, only one course remained before the final challenge: Wet-Dry World.

If I’m honest, I expected it to give me more of a fight. Instead, the course practically collapsed in front of me. The first two stars came almost immediately as I opened a couple of random boxes and found them sitting inside. I’ll happily take that kind of luck at this stage of the run.

Cleaning Up the World

After the early luck, the rest of the stars became a matter of cleaning up the level methodically. The Secrets in the Shallows and Sky star didn’t take long, and while collecting those secrets I spotted the location of another star, which made the next objective very straightforward.

I also took the opportunity to speak to the pink Bob-Omb to open the cannon, just in case it became useful later on. By the time I finished exploring the upper areas, only three stars remained, and all of them required heading into the town section of the level.

The Final Stars

My first visit to the town went surprisingly smoothly. One of the stars was sitting there waiting for me, so that immediately reduced the list to just two: the 100-coin star and the red coin star.

By the time I began collecting the red coins, my coin total had already reached ninety-nine. That meant the very first red coin I collected pushed the total to one hundred and awarded the 100-coin star instantly.

After that it was simply a matter of collecting the remaining red coins. A brief swim later and the final star of Wet-Dry World was secured.

119 Stars

With Wet-Dry World complete, all fifteen courses have now been cleared. The total stands at 119 stars.

Only one star remains.

The Final Challenge

The next entry may very well be the last.

One final red coin challenge remains before the path opens to Bowser in the Sky. Once that star is collected, there will be nothing left but the final battle.

Continue the Journey

← Log 23
Log 25 →

🧢 Mario 64 Randomizer Hub

Super Mario 64 Randomizer logs are written after each recording session. The end of the journey is now within reach.

Super Mario Galaxy 63 Entry 5 – The Big Snowman

Super Mario Galaxy 63 Entry 5 – The Big Snowman

Apparently going left this time means snow, icy water, and more Comet Coin theories.


A New Galaxy

So Shifting Sand Land Galaxy is complete, which means it’s time to move on.

Seeing as I went right last time, I decide to go left and see what is waiting there.

The painting in the room suggests a snow world, so naturally I assume I’m about to enter Cool, Cool, Mountain Galaxy.

Nope.

Instead, the painting leads to Snowman’s Land Galaxy, and the first shine sprite is The Big Snowman.

I kind of like the nod to the first star from Snowman’s Land back in Super Mario 64.

And honestly, this galaxy would probably look a bit strange without a giant snowman standing in the middle of it.


Comet Coins

The first Comet Coin is basically within jumping and spinning distance from the starting area.

There are crystals nearby that can be destroyed with a spin attack, and inside one of them is the coin, along with a mushroom that gives Mario an extra three hits.

I could have used that last entry.

The second Comet Coin is also nearby.

There’s a Fire Flower and two unlit torches, so I’m sure you can guess what the game expects me to do.

Mario had other ideas though.

Mainly falling into the icy water multiple times while I tried to light them.


The Climb

The path up towards the giant snowman is mostly uneventful.

I do meet a penguin who seems very impressed by a snow Goomba statue someone built nearby.

Naturally, I immediately try to destroy it.

No luck.

During practice runs, I convinced myself there was probably a Comet Coin hidden inside it somewhere, and honestly I’m still not fully convinced there isn’t.

I eventually reach the giant snowman and immediately prepare myself to get blown off the mountain.

Apparently this one is a lot friendlier than the original version.

Instead of trying to launch Mario into the distance, it’s perfectly happy letting me climb all the way to the top.

At this point I start wondering if this snowman is somehow related to Freezeezy Peak from Banjo-Kazooie.

Another brilliant game, by the way.

I grab the third Comet Coin on the way up and eventually reach the top of the snowman itself, which turns out to be the hat.

I do briefly consider jumping off the edge of the hat in case there’s a hidden Comet Coin sitting on the rim somewhere.

I decide against it.

My logic is simple enough: there are still three shine sprites and five Comet Coins left in this galaxy, so they must be spread across the other stars somewhere.

Probably.

I grab the shine sprite and celebrate a job well done.


The Run

This is how it actually went.


Continue the Journey

← Entry 4: The Gravity Scramble


Super Mario Galaxy 63 Hub

— All entries in this run.


Super Mario ROM Hacks Archive

— All Mario ROM hack content.


Dolphin Setup Guide

— How this run is even possible.


Entry 6 →

Neo Mario Galaxy – Daredevil Edition Entry 4: The Chocolate is Lava

Neo Mario Galaxy – Daredevil Edition Entry 4: Chocolate Lava

One hit resets everything. Some surfaces don’t even need to hit you.


Back to Sweet Treat Galaxy

With one more star needed before I can reach the Luma and whatever comes after it, I head back to Sweet Treat Galaxy for Prince Pikante’s Peppery Mood.

And for probably the first time ever, the chocolate is lava.

Touch it, and it’s straight back to the start.

The ice enemies from before are gone, replaced with fire versions, which feels like a fair trade. Not a good one, just a fair one.


Ice Mario

The first job is collecting five star bits.

Two are just along the path. The other three are floating right over the chocolate lava.

Which means it’s time for the Ice Flower.

Ice Mario lets me skate across the lava by creating a path as I move. Without it, those bits aren’t happening.

It works well enough, as long as I don’t panic and overcorrect. That feels like the main risk here.

Five bits collected, launch star unlocked, onto the next section.


Narrow Margins

The next part keeps the Ice Mario, but makes things a bit tighter.

Narrow paths, moving platforms, gaps that are just big enough to matter.

It’s not too bad, but it’s the kind of section where one small mistake would undo everything.

I do think about jumping early for the launch star at one point.

I don’t.

That felt like the right decision at the time.


Prince Pikante

Then it’s time for the boss: Prince Pikante.

He’s riding something, not entirely sure what, but it doesn’t matter too much.

Like Dino Piranha, it’s a three-hit fight.

The difference is the space. There’s a lot more room to move, which helps, because standing still here doesn’t feel like an option.

I spend most of the fight sliding around just to avoid getting cornered.

Turns out the only way to hit him is sending his own watermelons back at him.

Not the flaming ones.

The green ones.

Three hits later, it’s done.

The star is mine.


The Run

This is how it actually went.


What’s Next

This opens the path forward.

The Luma wants 500 star bits, which probably means some farming at some point.

There’s also Gloomy Galleon sitting there with a single star available.

But before that, I noticed something in Sweet Treat Galaxy.

Every time I’ve been through it, there’s been a spot that feels like it leads somewhere.

And there’s still another star listed here.

I think I know where I’m going next.


Continue the Journey

← Entry 3: A Birthday Problem


Neo Mario Galaxy – Daredevil Edition Archive

— All attempts in this challenge.


Super Mario ROM Hacks Archive

— All Mario ROM hack content.


Dolphin Setup Guide

— How this is even running on Steam Deck.


Entry 5 →

Blog at WordPress.com.

Up ↑