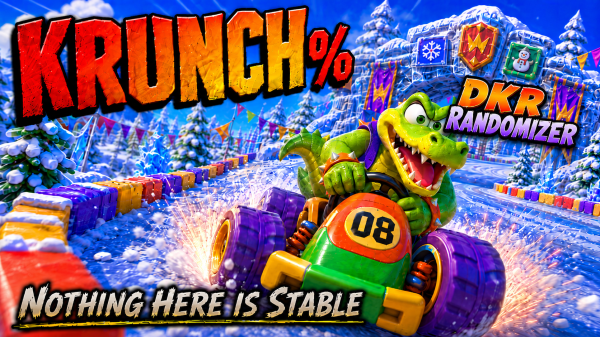
Submerged: A Subnautica Survival Diary – Log 16 | The Descent Begins

Submerged: A Subnautica Survival Diary – Log 16 | The Descent Begins

Platform: Steam Deck
Mode: Survival – No Commentary

Video Entry

The new base is finally operational.

Honestly, I’m pleased with how it turned out. I had a rough vision in my head while building it, and somehow the result actually resembles what I imagined instead of a collection of underwater tubes held together by panic and titanium.

That said, construction was not exactly smooth. The base developed leaks almost immediately after expansion started, which explains why the walls are now covered in reinforcements. I would love to add more windows eventually, but considering the ocean already tried to force its way inside once, restraint may be the smarter option.

The important systems are online. I’ve got hydroponics running, a water filtration unit producing clean water, and a Gel Sack farm outside. For anyone playing along, once you finally find a Gel Sack, hit it with a knife a few times before harvesting it. The seeds can then be planted in an exterior growbed, saving you from repeated trips into increasingly worrying cave systems every time Aerogel becomes necessary.

The Call From Lifepod 2

During the time spent working on the base, another radio message arrived. I deliberately left it alone until this entry. If I’ve learned anything on this planet, it’s that distress calls rarely improve the situation.

This one came from Lifepod 2.

The coordinates placed it roughly 500 metres below sea level, which is now comfortably within Valentino’s range. Since the last entry, Valentino has received a MK3 depth module, allowing him to descend to 900 metres. I also installed sonar. During testing, it picked up a Reaper Leviathan nearby, so at least now I can detect incoming nightmares slightly earlier than usual.

I still had Lifepod 13 sitting on my HUD as well, so I decided to clear that first. Naturally, I got distracted by wreckage along the way, because apparently I cannot pass abandoned technology without investigating it.

The wreck did not offer much, and neither did Lifepod 13. I suspect I had already visited it earlier and simply forgot to remove the marker. Efficient? No. Consistent? Sadly, yes.

Below 500 Metres

Lifepod 2 was exactly as expected: empty.

No survivors. Just another quiet reminder that everyone else who tried to survive this planet appears to have failed.

While using sonar near the pod, I noticed something else nearby. An opening.

Dark. Deep. Wide enough to continue downward.

With Valentino upgraded and the sonar active, I convinced myself this was a good idea.

That confidence lasted until I saw what looked like an enormous crab with an exposed brain. I briefly considered turning back, but I had already come this far, and apparently that now counts as decision-making.

The deeper I travelled, the stranger the environment became. An underwater river flowed through the cavern, with glowing green fog drifting through the darkness. I scanned what I could and picked up anything that looked useful, because if this planet insists on becoming stranger, I may as well keep stealing from it.

The Waterfall Rule

Eventually I found a waterfall.

Years of gaming have taught me that waterfalls are legally required to hide something, so naturally I investigated.

The passage beyond could not take Valentino with it. It looked like there was breathable air inside, or at least something close enough that I was not immediately dying. Unfortunately, I was also sure I had seen a Leviathan somewhere nearby, along with Warpers moving through the area.

Leaving Valentino outside did not feel great.

I parked him as close as I could and went in anyway.

The Structure Beneath The Planet

Behind the waterfall, I found a giant alien structure buried deep beneath the surface.

I looked for a way to power it, scan it, or interact with it in some useful way, but nothing responded. It just sat there in the silence, which was not comforting.

I returned to Valentino much faster than I entered.

Thankfully, he was still there.

By this point, I was around 800 metres down, and it looked like the route continued even deeper. Before leaving, I found something else: a massive skeleton.

The scan identified it as the remains of a Sea Dragon.

That felt like the planet politely suggesting I leave.

I dropped a beacon to mark the route. I can go further this way later, but not yet. I need the ability to go deeper, and I need more than Valentino if I am going to survive what comes next.

New Targets Unaccounted For: 1

Back at base, another message was waiting.

New targets unaccounted for: 1.

I am assuming that “1” is me.

Which means something knows I exist.

That changes things.

The deeper I go, the clearer it becomes that Valentino alone is no longer enough. If I am going to keep descending into these caverns, I need a mobile base. Somewhere to store supplies, recharge equipment, carry resources, and support longer expeditions far below the surface.

And if something down there decides it wants me dead, I would also like something capable of meeting the problem head-on.

So the time has come.

I said I needed to go deeper.

Now I do.

Which means it is finally time to build a Cyclops and a Prawn Suit.


Continue The Journey

Previous Log: Submerged Log 15
Next Log: Coming Soon
Series Hub: Subnautica Hub


Related Subnautica Content

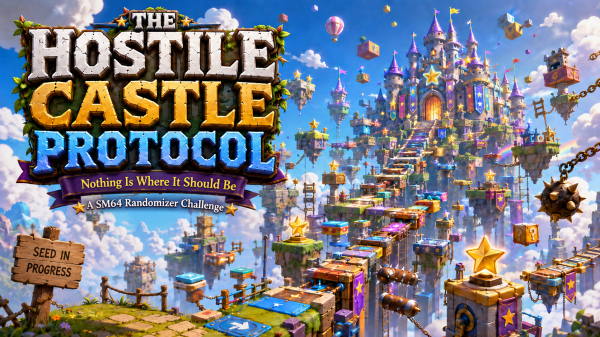
KRUNCH% Entry 1 | Snowflake Mountain Was Not Supposed To Be Here

KRUNCH% Entry 1 | Snowflake Mountain Was Not Supposed To Be Here

Seed: 232968 • Platform: Steam Deck • Character: Krunch • Format: No Commentary


The Island Introduces Itself

The genie of the island greets me by explaining that he is here to help and wishes me good luck. Given the state of the randomizer and my choice of driver, I can only assume this was less encouragement and more a warning.

I begin by collecting the overworld balloons. There are four available immediately, all reachable using the plane, which conveniently gives me a chance to relearn how flying works before the randomizer fully starts dismantling the island around me.

It goes about as well as expected.

I am already crashing into objects I had no intention of crashing into, which unfortunately feels very on-brand for both Krunch and the challenge itself.

One balloon in particular sits near the entrance that should normally lead to Dino Domain. Somehow I manage to collect it cleanly, which may genuinely be the most surprising moment of the episode.


Snowflake Mountain Is Apparently Dino Domain Now

With enough balloons collected, I enter the first available door expecting Dino Domain.

Instead, the randomizer reveals that Dino Domain has been replaced entirely by Snowflake Mountain.

So this is how the island intends to behave.

At this point, my available options are still limited. Two doors remain locked behind additional balloon requirements, leaving only a couple of places to investigate. I enter the first available track and discover Ancient Lake waiting for me.

Except it is not really Ancient Lake anymore.

It is the Adventure 2 mirrored version of Ancient Lake, and the race has been reduced to two laps.

The Dino Domain key is also available.

I briefly consider trying to win the race and collect the key simultaneously before remembering that I am driving Krunch through a mirrored randomizer while relearning how Diddy Kong Racing functions in the first place.

I used to main Tiptup back in the day. Krunch handles like someone replaced the steering wheel with a polite suggestion.


The First Reset

The key attempt immediately turns into a disaster.

I grab a boost balloon, panic slightly, and instead of reversing properly, Krunch launches himself forward like he has suddenly remembered somewhere else he needs to be.

T.T. politely informs me I am going the wrong way while I attempt to recover what little dignity remains.

Attempt number two goes far better. I secure the key successfully, although by that point the race itself is completely lost, so I restart the event and focus purely on survival.

Without the distraction of the key, the mirrored Ancient Lake race becomes surprisingly manageable. I take first place cleanly and secure the Dino Key without much additional trouble.

For a brief moment, the island allows optimism.


Bubbler 2 Appears Far Earlier Than Expected

Door number two immediately removes that optimism.

Behind it waits Bubbler 2.

So apparently we are doing this already.

The race is mirrored again thanks to the Adventure 2 setting, although this time the randomizer grants me four laps instead of two. Given how the fight starts, I absolutely need all four of them.

Fortunately, I feel much more comfortable using the hovercraft than the kart. Even with Krunch handling like an active mechanical dispute, the hovercraft gives me enough control to keep the situation from collapsing completely.

That does not stop me from landing in bubbles repeatedly.

Three laps in and I am still sitting in second place, but I can feel the race stabilising. My mistakes become less frequent each lap, the homing rockets start connecting consistently, and Krunch slowly transforms from an uncontrollable disaster into a very fast uncontrollable disaster.

And once Krunch builds momentum, he builds momentum quickly.

At the start of lap four, I finally overtake Bubbler and manage to hold the lead for the remainder of the race.

The first piece of the Wizpig amulet is mine.


The Car Challenge

Leaving Snowflake Mountain triggers the next event immediately: the car challenge.

Thankfully, the randomizer decides not to become completely unreasonable just yet.

One lap.

Simple enough.

I clear the challenge successfully and secure balloon number six.

For now, progression remains limited, but the next destination is already obvious. There is still one locked door waiting back in Snowflake Mountain, and whatever sits behind it is probably not going to improve the situation.

Still, for a first proper look at KRUNCH%, this was a surprisingly strong introduction to what this randomizer intends to become.

Unstable. Confusing. Occasionally hostile.

And somehow still survivable.


Episode Video


Progress Log

  • Current Seed: 232968
  • Balloons: 6
  • Keys Collected: Dino Key
  • Bosses Defeated: Bubbler 2
  • Wizpig Amulet Pieces: 1
  • Current Threat Level: Controlled instability

Continue the Journey


Krunch% Archive

— All entries in this run.


Super Mario ROM Hacks Archive

— All Mario ROM hack content.

Entry 2 | Darkmoon Caverns and The Five Lap Disaster →

Super Mario Galaxy 63 Entry 8 – Beneath the Snow Blocks

Super Mario Galaxy 63 Entry 8 – Beneath the Snow Blocks

Apparently every frozen floor in this galaxy has collectively decided it wants Mario dead.


One Last Shine Sprite

With one more shine sprite and two more Comet Coins left to collect, it’s time to head back into Snowman’s Land Galaxy for Beneath the Snow Blocks.

I instantly know where this shine sprite is going to be.

As soon as I land, there’s a suspicious set of snow blocks sitting off to the right.

That usually means one thing.

I grab the Fire Flower because I have a feeling spinning into the blocks probably isn’t going to work this time.

Sure enough, burning the blocks reveals a pipe.

Honestly, I was half expecting the shine sprite itself to just be sitting there.

But apparently that would have been too simple.


More Frozen Lava

Inside the pipe is another platforming course built over frozen floors that still somehow count as lava.

At this point I’m just accepting that ice is no longer safe in this galaxy.

The first Comet Coin involves moving platforms and disappearing blocks, which is already enough to make me nervous.

The second coin is even worse.

I have to create a path towards it, but every jump destroys one of the blocks leading up to the coin.

Thankfully I manage to grab it before running out of floor completely.

Probably closer than it needed to be.


The Final Stretch

The final part of the course involves rotating platforms and logs that immediately start sinking into the frozen lava the second I touch them.

Which definitely helps with the stress levels.

Thankfully though, the shine sprite is mine.

Snowman’s Land Galaxy complete.


Three Galaxies Down

Three galaxies down now, and honestly I’ve been having a lot of fun with this hack so far.

I’m pretty sure I’m nowhere near finishing it either.

Honestly, I’m completely fine with that.


The Run

This is how it actually went.


Continue the Journey

← Entry 7: Inside the Igloo


Super Mario Galaxy 63 Hub

— All entries in this run.


Super Mario ROM Hacks Archive

— All Mario ROM hack content.

Dolphin Setup Guide

— How this run is even possible.


Entry 9 →

Super Mario Galaxy 63 Entry 7 – Inside the Igloo

Super Mario Galaxy 63 Entry 7 – Inside the Igloo

Apparently inside the igloo is where the ice itself becomes the problem.


Back Into Snowman’s Land Galaxy

No prizes for guessing where I’m heading for this entry.

Back into Snowman’s Land Galaxy I go, this time for Inside the Igloo.

Hopefully this version is a little different from the one back in Super Mario 64.

I remembered passing the igloo while climbing towards the giant snowman, so I had a feeling there would be a shine sprite hidden in there somewhere.

Would have been disappointed if there wasn’t.


Ice Mario Returns

Before heading inside, I grab the mushroom that gives Mario an extra three hits.

My theory was that the extra health would carry over into the igloo.

It doesn’t.

So already off to a strong start.

Inside the igloo introduces the next power-up for this hack: the Ice Flower.

Which means Ice Mario returns.

Inside the igloo, the frozen floor is basically lava unless I’m using the power-up, so staying Ice Mario becomes fairly important.


Snowballs and Comet Coins

Before long I’m rolling snowballs around to make them larger.

The idea is to push them into the frozen floor so they create paths I can safely cross.

The first Comet Coin takes a few attempts.

That one needs a triple jump into a spin, followed by a wall jump to actually reach it.

The second one isn’t quite as awkward, although I do mess up my timing with the Ice Flower power-up slightly.

Nothing to do with Mario suddenly deciding to show off his acrobatic skills of course.

That mistake does leave me sitting on one health though.


One Health Left

Thankfully, I manage to take that single remaining hit point all the way to the shine sprite.

I do briefly consider immediately going for the final shine sprite in this galaxy while I’m already here.

Then I remember how lucky this run felt at several points.

I decide not to push it.

The shine sprite is mine, and honestly, I’m happy enough taking the win.


The Run

This is how it actually went.


Continue the Journey

← Entry 6: Red Coins on The Summit


Super Mario Galaxy 63 Hub

— All entries in this run.


Super Mario ROM Hacks Archive

— All Mario ROM hack content.

Dolphin Setup Guide

— How this run is even possible.


Entry 8 →

Super Mario 64 Randomizer – Log 25: Thank You For Playing

Super Mario 64 Randomizer – Log 25: Thank You For Playing

Game: Super Mario 64 Randomizer
Platform: Steam Deck
Format: No Commentary

Video: Final red coins in Bowser in the Sky, 120 stars collected, and the last battle with Bowser (no commentary)


The Final Star

It was time. No sense putting it off any longer. I had 119 stars, and the final one was waiting for me in Bowser in the Sky. One last red coin hunt before the end.

When I jumped into the course I expected the randomizer to throw me somewhere near the end, but instead I spawned close to the beginning. That turned out to be perfect, because it meant I could search the entire level properly from start to finish instead of rushing through it.

I took my time, stopping every so often to move the camera around and make sure nothing was hiding just out of view. Hazy Maze Cave had already taught me that stars and coins could be sitting right in front of me without me noticing if I wasn’t careful.

I also had to fight the instinct to take the shortcuts I would normally use in this level. In the original game I know this course well enough to rush through it, but this wasn’t the original anymore, and I had a feeling if I skipped ahead too quickly I’d leave a coin behind.

120 Stars

The final three coins were waiting near the location where the red coin star appears, right beside the pipe that leads to the final battle. Once I collected them, the star appeared exactly where I hoped it would.

One jump later, and that was it.

All 120 stars of this randomizer seed collected.

Only one thing remained.

The Final Battle

The fight with Bowser didn’t go perfectly at first. I managed to throw him into one bomb, but nerves or bad luck got the better of me after that. I got caught by his fire, stunned, and even managed to fall off the platform. Round one went to him.

The second attempt felt different. I was calmer, more focused. The first throw landed, then the second, and suddenly I was holding him for the final spin.

As I turned Mario around with Bowser in his hands, I couldn’t help but think that this really was the final throw of the run.

It was.

Three clean throws later, Bowser was defeated and the randomizer seed was finished.

The Credits Roll

The familiar cutscene played out, and when the camera showed the castle roof, Yoshi was there waiting, proving that all 120 stars had been collected.

I let the credits roll without skipping. Watching the game show each of the locations again, one after another, reminded me just how much ground this run had covered. Every level, every detour, every moment where I thought I might have made the seed impossible.

And that music… the same credits music I’ve heard so many times over the years still feels exactly the same as it did the first time I heard it.

All that was left was the final line.

Thank you so much for-a playing my game.

And thank you for all the memories you have given me, Mario.

Continue the Journey

← Log 24
Epilogue →

🧢 Mario 64 Randomizer Hub

Super Mario 64 Randomizer logs are written after each recording session. Every journey ends eventually, even the ones you never wanted to finish.

Super Mario Galaxy 63 Entry 6 – Red Coins On The Summit

Super Mario Galaxy 63 Entry 6 – Red Coins On The Summit

Apparently even when I know where I’m going, I still somehow end up finding the wrong objective first.


Back Into Snowman’s Land Galaxy

Back into Snowman’s Land Galaxy I go for Red Coins On The Summit.

Full disclosure, I actually found this shine sprite completely by accident while recording The Big Snowman.

I took the wrong path and somehow ended up right beside the red coin challenge.

This was after doing a practice run specifically to make sure I knew where I was going for the previous shine sprite.

So apparently that worked out well.


Red Coins Return

It’s been a while since I last had to collect red coins.

The last proper red coin challenge I remember doing was back during the Super Mario 64 Randomizer.

Thankfully, I already have a rough idea where most of the coins are here.

There’s also a map nearby if I need it, but I already have a route planned out in my head.

The plan is basically to work my way up the mountain.

Or summit.

The shine sprite name says summit, so I’m counting it as a mountain.


The Hidden Comet Coin

There’s also a Comet Coin hidden here.

And by hidden, I mean properly hidden unless you move the camera around.

It’s floating up in the sky and the only realistic way to reach it is with the help of Cloud Mario.

Thankfully I’ve already had enough practice with the cloud power-up by now that getting to it isn’t too bad.


The Summit

Eight red coins later and the shine sprite appears almost exactly where I landed earlier.

Convenient for once.

I’m not too concerned about fall damage, so I long jump back down towards it and grab the shine sprite.

Honestly, this was a pretty fun shine sprite overall.

It reminded me a lot of the red coin missions back in Super Mario 64.

Maybe that’s just nostalgia talking.

Either way, I had fun with this one and I’m looking forward to seeing what the next shine sprite throws at me.


The Run

This is how it actually went.


Continue the Journey

← Entry 5: The Big Snowman


Super Mario Galaxy 63 Hub

— All entries in this run.


Super Mario ROM Hacks Archive

— All Mario ROM hack content.
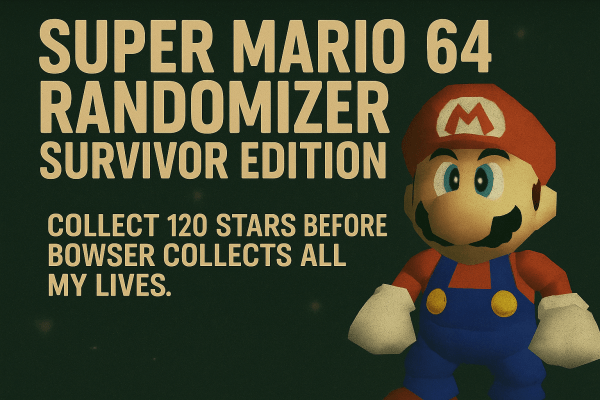

Dolphin Setup Guide

— How this run is even possible.


Entry 7 →

Blog at WordPress.com.

Up ↑