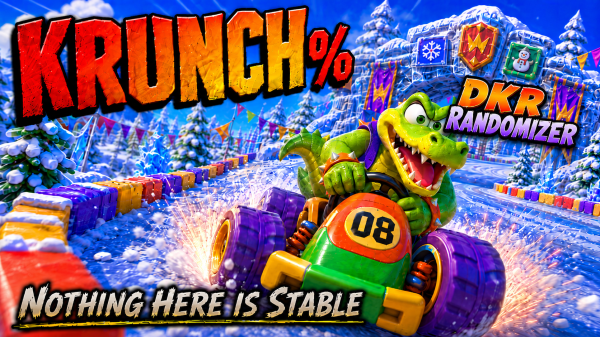
KRUNCH% Entry 5 | The Island Starts Showing Its Hand

KRUNCH% Entry 5 | The Island Starts Showing Its Hand

Seed: 232968 • Platform: Steam Deck • Character: Krunch • Format: No Commentary


Options Are Running Thin

At this point, the island is starting to corner me a little.

I still have not investigated what hides behind the original Sherbet Island and Snowflake Mountain doors, but then I remember something important: I still have the key for the Dragon Forest door.

Which means it is time to head there instead.

Once inside, I decide to investigate exactly what is waiting for me throughout the area.

  • Snowball Valley
  • Frosty Village
  • Greenwood Village
  • Wizpig 1

At least now I finally know where Wizpig is hiding.

I have absolutely no intention of dealing with that problem anytime soon.

For now, I am here for the newly unlocked door:

Everfrost Peak.


Krunch Finally Gets To Fly

At this stage, I am becoming increasingly convinced that most of Snowflake Mountain has somehow migrated directly into Dragon Forest.

There is still one missing course from the world, but honestly, at this rate I would not be surprised if it eventually turns out to be hiding behind Sherbet Island’s door.

Everfrost Peak gives me five laps in the plane.

Which means this is finally one of those rare moments where Krunch feels genuinely dominant.

Once he gets moving in the plane, the sheer speed becomes ridiculous.

So ridiculous, in fact, that I end up lapping every other racer before the race is over.

For once, the randomizer actually feels generous.


Star City Appears

After finishing Everfrost Peak, I decide to finally investigate the Snowflake Mountain door.

Behind it waits Star City.

Which means I have now located two of Future Fun Land’s tracks.

The race itself gives me four laps to survive.

Thankfully, while Star City still contains several tight corners, I am slowly becoming more comfortable controlling Krunch in the car. Not perfectly comfortable, obviously. That would suggest stability, and KRUNCH% appears fundamentally opposed to that concept.

Still, the race itself goes surprisingly smoothly.

And then the island presents me with a problem.


The Silver Coin Dilemma

With fifteen balloons collected, my options are starting to branch in dangerous directions.

Really, I only have two major paths available to me right now:

  • Investigate what lies behind Sherbet Island’s original door.
  • Attempt Star City’s Silver Coin Challenge.

And honestly, after what Darkmoon Caverns Coins did to my hands a few entries ago, I am not entirely convinced I want to immediately throw myself into another high-pressure coin challenge.

Especially not on Star City.

Not yet.

So instead, I decide to stop there for the day and think about the next move carefully.

Because the island is no longer simply shuffling tracks around.

It is starting to ask difficult questions.


Episode Video


Progress Log

  • Current Seed: 232968
  • Balloons: 15
  • Wizpig Amulet Pieces: 2
  • T.T. Amulet Pieces: 2
  • Wizpig 1 Location: Confirmed
  • Current Threat Level: Increasing strategic instability

Continue the Journey


Entry 4 | Krunch Versus Basic Driving ←


Krunch% Archive

— All entries in this run.


Super Mario ROM Hacks Archive

— All Mario ROM hack content.


Entry 6 | →

Retro Reflections: Sonic the Hedgehog (Master System 2)

One of My Earliest Gaming Memories: Sonic the Hedgehog on the Master System 2

Surviving, Not Suffering.

Most people who grew up during the NES, Mega Drive/Genesis, and SNES era probably have a story about the game that introduced them to gaming.

For some it was Mario. For others it was Zelda, Donkey Kong, or one of the countless arcade games that seemed larger than life when viewed through the eyes of a child.

For me, one of my earliest gaming memories, other than playing Super Mario Bros. on an arcade machine, was Sonic the Hedgehog on the Master System 2.

The game came preloaded on the console, meaning there was no cartridge to insert and no collection to build. You simply switched the console on and Sonic was there waiting for you.

Looking back now, it was probably my first real experience of home console gaming.

A Much Bigger Adventure Than I Remembered

Like many childhood memories, the game felt enormous at the time.

Every zone seemed huge. Every level felt like an expedition. Progress felt hard-earned.

When I recently returned to the game after all these years, I completed it in around an hour. Adult me knows the levels, understands platformers better, and generally has far more gaming experience than the child who first picked up that controller.

Yet despite the shorter playtime, the game still felt like an adventure.

Many childhood games lose some of their magic when revisited years later. Sonic the Hedgehog on the Master System never really did.

Searching For Chaos Emeralds

One thing that always stood out to me was how different the Master System version felt from its Mega Drive counterpart.

Most people are familiar with the special stages from the Mega Drive version, where collecting enough rings would give you a chance to earn a Chaos Emerald.

The Master System version took a different approach.

Instead of entering special stages, the Chaos Emeralds were hidden within the levels themselves. You had to explore. You had to search. Sometimes you had to take routes that didn’t look important at first glance.

For younger me, that made the world feel bigger and more mysterious.

Finding a Chaos Emerald wasn’t just about completing a challenge. It felt like uncovering a secret.

Even today, I think it remains one of my favourite approaches to collecting the Emeralds in any Sonic game.

A Journey Across South Island

The zones themselves have stayed with me for decades.

Green Hill Zone remains an iconic starting point. Bridge Zone introduced long stretches over water and collapsing obstacles. Jungle Zone challenged my patience more than once. Labyrinth Zone felt dangerous and intimidating. Scrap Brain Zone signalled that the adventure was nearing its conclusion.

Then came Sky Base Zone.

I always liked how the game made it clear that you were getting closer to Robotnik with every stage you completed. The journey felt like it was building towards something.

Each zone pushed you further forward until eventually there was nowhere left to go except the final confrontation.

For a younger player, that sense of progression was powerful.

Still Worth Playing Today?

Absolutely.

Now, I should probably admit that I am not entirely unbiased here.

This is one of the earliest gaming memories I have.

Nostalgia is undoubtedly part of the experience.

Even so, I genuinely believe the game still holds up. The controls remain responsive, the level design remains enjoyable, and the adventure still feels rewarding from beginning to end.

It may not be as famous as the Mega Drive version, but it deserves to be remembered in its own right.

The Journey

This return to Sonic the Hedgehog on the Master System was recorded as a complete no-commentary playthrough. If you’d like to experience the adventure from beginning to end, you can watch the full playlist on YouTube.

New adventures begin on the Survivor Incognito Facebook page, where videos are released first before joining the weekly YouTube archive.


▶ Watch the complete Sonic the Hedgehog playthrough on YouTube


📘 Follow Survivor Incognito on Facebook

The Blue Hedgehog That Started It All

It’s impossible for me to separate Sonic the Hedgehog on the Master System from my own gaming history.

When I think about where this hobby began, my mind often comes back to that console and that game.

Back then, I had no idea that decades later I would be running a gaming blog, documenting challenge runs, writing survival diaries, and spending far too much time discussing virtual disasters on the internet.

I was simply playing a game about a blue hedgehog trying to stop a mad scientist.

But without that blue hedgehog, I might never have become a gamer at all.

And for that reason alone, Sonic the Hedgehog on the Master System 2 will always hold a special place in my gaming history.

The Hostile Castle Protocol – Entry 4: Mapping The Castle

The Hostile Castle Protocol – Entry 4: Mapping The Castle

Game: Super Mario 64 Randomizer
Platform: Steam Deck
Format: No Commentary

Video: Bob-Omb Battlefield is located, two switch courses are cleared, and Bowser in the Dark World refuses to stay where it belongs.


A Quick Investigation

With Rainbow Ride finally behind me, I decided it was time to start figuring out what the castle was actually hiding.

My first stop was the area that would normally contain the Secret Aquarium.

Instead, the randomizer had placed Bob-Omb Battlefield there.

I had a quick look around, but it didn’t take long to realise there wasn’t much point staying.

A lot of the stars appeared to require the Wing Cap, and since I don’t actually have access to it yet, I decided there was little point forcing the issue.

I’d rather finish a course in one visit than collect a couple of stars and immediately leave again.

With that in mind, I backed out and continued exploring.

The Vanish Cap Switch

Next, I paid a visit to the painting that would normally lead to Jolly Roger Bay.

Inside was the Vanish Cap Switch course.

That was good news.

The switch courses are useful because once they’re done, they’re done.

No wondering whether I missed a star.

No revisiting them later.

Just one objective and a clear result.

The randomizer was fairly kind here. I spawned at the top of the slide, which allowed me to collect red coins as I made my way down. The switch itself was also much closer than usual.

Getting the star turned out to be the difficult part.

The star had spawned close to my starting position, meaning I effectively had to complete part of the course backwards.

That sounds simple enough until muscle memory starts fighting back.

I’m used to travelling through this course in one direction. Suddenly doing the opposite felt surprisingly awkward.

Eventually I reached the star and collected it, putting the first switch course firmly in the completed column.

The Metal Cap Switch

The next stop was the Cool, Cool Mountain painting.

Inside was the Metal Cap Switch course.

At that point I realised I was about to clear two of the three cap courses in a single entry.

Naturally, this made me hopeful that the Wing Cap Switch might be waiting nearby somewhere.

Unfortunately, I remembered my original randomizer run.

The Wing Cap hadn’t appeared until Hazy Maze Cave during that seed, so there was no guarantee it would show up any time soon.

The Metal Cap course itself was fairly straightforward.

I’ve done the red coin route enough times over the years that most of it feels automatic now.

I still needed to make proper use of the Metal Cap in a few places, but nothing caused any major problems.

Before long, the star was collected and a second switch course had been crossed off the list.

The Garden Surprise

My plan for this randomizer has always been to work my way down through the castle before heading upwards.

Technically I could have visited the trapdoor that normally leads to Bowser in the Dark World.

Instead, I wanted to investigate the courtyard first.

The Boos had been waiting there for several entries now, and I wanted to know what they were hiding.

The answer turned out to be Bowser in the Dark World.

Of course it was.

Apparently Bowser’s first stage has decided it would rather spend this seed pretending to be Big Boo’s Haunt.

At least that answers one question.

Unfortunately, it also creates another.

It looks like I’m not getting out of going there after all.

End Of Entry Status

Two switch courses have been completed.

Bob-Omb Battlefield has been located.

Bowser in the Dark World has revealed its new hiding place.

The Wing Cap remains missing.

And the castle continues to make its own decisions regarding sensible level placement.

  • Stars Collected: 16 / 119
  • Lives Remaining: 11
  • Courses Cleared: 2
  • Switch Courses Cleared: 2 / 3

Continue The Journey

← Entry 3
Entry 5 →
The Hostile Castle Protocol Hub
Super Mario 64 Randomizer – Survivor Edition

The Hostile Castle Protocol entries are written after each recording session. Every answer the castle provides usually creates two more questions.

KRUNCH% Entry 4 | Krunch Versus Basic Driving

KRUNCH% Entry 4 | Krunch Versus Basic Driving

Seed: 232968 • Platform: Steam Deck • Character: Krunch • Format: No Commentary


Back To Sherbet Island

Now that I have the key for the Sherbet Island door, I decide it is finally time to pay the place a visit. Naturally, reaching it still requires travelling through Snowflake Mountain and then Dino Domain first, because the island no longer believes in straightforward progression.

I still cannot help wondering what is hiding behind the original Sherbet Island and Snowflake Mountain doors, but for now I am trying to stick to a rough path through the campaign — mostly by prioritising whichever doors I currently have enough balloons to enter.

Once inside, I begin investigating the available routes.

Future Fun Land.

Darkwater Beach.

Boulder Canyon.

Hot Top Volcano.

Honestly, not a bad selection.

Before dealing with any of those properly, however, I notice another unlocked door waiting for me:

Smokey Castle.


Smokey Castle And The Banana Incident

The objective here is simple enough: collect ten bananas before the other racers.

Unfortunately, the race also involves driving a car.

Which means it is time for Krunch to once again demonstrate that he has no interest whatsoever in cooperating with basic steering.

The hovercraft feels manageable.

The plane feels surprisingly comfortable.

The car, however, feels like Krunch is actively improvising his own route through every corner.

To be fair, there are moments where everything suddenly clicks and the speed becomes incredible. Unfortunately, those moments are usually followed by Krunch deciding that the wall looks approachable.

Still, despite the chaos, I eventually secure all ten bananas and earn my first piece of the T.T. amulet.

The second one will not be far behind.


Hot Top Volcano Redemption

Next comes Hot Top Volcano.

Four laps of it.

After spending the last two entries wrestling with Darkmoon Caverns, this course feels genuinely relaxing by comparison.

For once, Krunch and I appear to be in agreement regarding where the plane should actually go.

The race goes so well that I end up lapping at least three of the other racers on my way to securing balloon number twelve.

Honestly, after Darkmoon Caverns, I needed that confidence boost.


Boulder Canyon Fights Back

After Hot Top Volcano, I move on to Boulder Canyon — one of my favourite courses in Diddy Kong Racing.

There is another key available here, so naturally I decide to grab it.

For once, however, Krunch is not the problem.

The course itself is.

To reach the key, I need to ring the bell that raises the drawbridge leading toward it. What follows is an embarrassingly long struggle to actually make that happen consistently.

The other racers eventually lap me while I continue fighting the course itself.

Once the key is finally secured, I reset the race properly and complete yet another four-lap event to secure balloon number thirteen.

At this point, the randomizer appears deeply committed to making every race last as long as possible.


Darkwater Beach

The final stop of the session is Darkwater Beach.

Thankfully, this one is a battle challenge rather than a standard race. The objective is simple: be the last racer standing.

I immediately prioritise red balloons for the homing missiles and spend most of the challenge aggressively firing rockets at anything unfortunate enough to appear nearby.

The strategy works.

I secure victory and earn the second piece of the T.T. amulet.


The Island Continues To Collapse

With more balloons collected, my available routes are beginning to narrow.

Thankfully, I now have the key for the Dragon Forest door, which at least gives me another direction to explore.

Still, I am quickly reaching the point where I will need to investigate the original Sherbet Island and Snowflake Mountain doors properly.

At some stage, the randomizer is going to force me to confront whatever horrors are hiding behind them.

That feels like a problem for future me.


Episode Video


Progress Log

  • Current Seed: 232968
  • Balloons: 13
  • Bosses Defeated: Bubbler 2, Smokey 2
  • T.T. Amulet Pieces: 2
  • Current Threat Level: Krunch versus automotive engineering

Continue the Journey


Entry 3 | Darkmoon Caverns Fights Back ←


Krunch% Archive

— All entries in this run.


Super Mario ROM Hacks Archive

— All Mario ROM hack content.


Entry 5 | →

The Hostile Castle Protocol – Entry 3: Finishing Rainbow Ride

The Hostile Castle Protocol – Entry 3: Finishing Rainbow Ride

Game: Super Mario 64 Randomizer
Platform: Steam Deck
Format: No Commentary

Video: The final three stars of Rainbow Ride, an overdue visit to the big house, and the first completed late-game course of the run.


Back To The Big House

When the recording begins, I’m still standing on the crow’s nest of the floating ship. Unfortunately, staying there forever is not a viable strategy, so I climb down the pole and start trying to work out how I’m supposed to reach the big house without donating half my health bar in the process.

While looking around, I notice the falling logs below me and begin wondering whether they could be used as a shortcut.

I have absolutely no idea if the plan will work.

That has never stopped me before.

I stand on one of the logs and wait for it to descend. To my surprise, it lowers me directly onto the carpet route leading towards the house.

Good to know.

The castle had finally provided me with a safer route.

More Coins, More Questions

Working my way up past the maze, I spot a few extra coins and a pair of boxes sitting nearby.

The coins are what interest me most, so I grab them and realise my red coin total has reached seven.

That leaves only one missing.

At this point I’m assuming the final red coin is either inside the house or somewhere along the carpet route leading towards it.

The boxes are also worth investigating, but after hitting the first one I get blown clean off the platform.

Normally that would be a problem.

This time it actually helps because I needed a way back down anyway.

On the way back up, I pause for a quick look at the course menu just to make sure I haven’t missed anything obvious.

Three stars remain.

No more. No less.

The House In The Sky

It takes a few more trips along the carpets before I finally reach the big house.

Part of that delay comes from wanting to check the second box I’d spotted earlier.

Eventually, though, there is nothing left to do except step inside.

The moment I enter, it feels like I’ve interrupted some sort of gathering.

Almost every enemy in Rainbow Ride appears to be packed into the building together.

Apparently this is where they’ve all been hiding.

More importantly, I spot star number five.

I hop off the carpet to collect it and immediately notice something even more useful.

The final red coin.

One quick collection later and the red coin star appears back at the triangles.

While exploring the house, I also collect the last few coins needed for the 100 Coin Star.

Just like that, only one objective remains.

The red coin star.

After that, Rainbow Ride is finished.

The Final Star

Reaching the final star still requires one more risky move.

I attempt a long jump towards the maze and spend the entire jump wondering whether this is actually a sensible idea.

I’m fairly certain I did something similar during my previous randomizer run, but certainty feels like a luxury in this seed.

Thankfully Mario grabs the ledge.

From there, the rest is simply a matter of staying focused and not making a careless mistake.

I take my time crossing towards the star.

There is no point rushing now.

Not after all the effort it took to reach this point.

A few moments later, the final star is collected.

Rainbow Ride is complete.

Looking Ahead

Before leaving, I check the course menu one final time.

All seven stars have been collected.

The course can officially be crossed off the list.

Back in the lobby, I realise this has opened most of the doors currently available to me.

The light still isn’t shining down from the ceiling, so I clearly haven’t reached the requirement for that area yet.

What lies ahead remains a mystery.

One thing has become obvious, though.

If I’m going to keep track of where I’ve been, what courses I’ve found, and what the randomizer keeps throwing at me, I need to start taking notes.

The castle is only getting stranger.

  • Stars Collected: 14 / 119
  • Lives Remaining: 8
  • Courses Cleared: 2
  • Rainbow Ride Stars Collected: 7 / 7

Continue The Journey

← Entry 2
Entry 4 →
The Hostile Castle Protocol Hub
Super Mario 64 Randomizer – Survivor Edition

The Hostile Castle Protocol entries are written after each recording session. The castle decides the route. Keeping track of it is becoming its own challenge.

KRUNCH% Entry 3 | Darkmoon Caverns Fights Back

KRUNCH% Entry 3 | Darkmoon Caverns Fights Back

Seed: 232968 • Platform: Steam Deck • Character: Krunch • Format: No Commentary


Darkmoon Caverns Round Two

With Darkmoon Caverns still fresh in my mind, I decide it is time to tackle my first silver coin challenge of the randomizer.

For those unfamiliar with Diddy Kong Racing’s silver coin races, the objective is simple in theory: collect all eight silver coins and still finish the race in first place.

Unfortunately, this is KRUNCH%, where nothing is ever allowed to remain simple.

With the randomizer settings active, I have no idea how many laps the game is about to demand. Thankfully, Darkmoon Caverns gives me five laps to work with. Considering the alternative could have been one lap, I am choosing to view this as mercy.


Attempt One Goes Poorly

The first attempt actually goes reasonably well from a coin collection perspective. I manage to locate and collect every silver coin without too much trouble.

The racing itself is the problem.

By lap four, it becomes painfully obvious that the run is collapsing. Krunch is fighting every corner, momentum is inconsistent, and the race no longer feels recoverable.

I decide to restart.

Which, honestly, feels like the correct survival decision.


The Coin That Nearly Ended Me

The second attempt goes significantly better.

I collect seven coins cleanly and know exactly where the final one is waiting. More importantly, I spend a large portion of the race holding first place, which immediately makes the pressure worse.

By the final lap, things begin to unravel slightly.

I drop into second place while still missing the final coin. Thankfully, the racer ahead of me clips one of the craters, allowing me to retake the lead. Suddenly, the race is still alive.

All I need to do is grab the final coin positioned before the second loop.

I drive directly into it.

At that point, I know the race is mine.

I head into the loop already doing victory laps in my head while Krunch somehow continues holding the lead together long enough to survive the final section of the race.

One final corner remains.

I cross the finish line in first place.

I immediately start fist pumping the air in celebration.

The hardest challenge of the randomizer so far is finally complete.

Although somewhere out there, Wizpig 1 is still waiting for me, and I strongly suspect that particular problem is going to be considerably worse.


Crescent Island Appears

With nine balloons collected, I briefly get lost trying to remember where I actually intended to go next.

Eventually, I remember that the nine-balloon door inside Snowflake Mountain still needs investigating.

Behind it waits Crescent Island.

And naturally, the randomizer decides this should be another five-lap race.

At this point, I am beginning to suspect the island simply enjoys watching my hands suffer.

The Sherbet Island key is available here, so I prioritise grabbing that before restarting properly for the race win.

Tiptup proves to be an immediate problem.

Not only are they faster than me, they also appear significantly more capable of driving in a straight line. Meanwhile, Krunch continues narrowly missing boost pads like he has developed a personal grudge against them.

Eventually, I manage to overtake Tiptup and maintain the lead for the remainder of the race.

Thankfully, Crescent Island is nowhere near as physically painful as Darkmoon Caverns. There are still some tight turns, but nothing too severe.

Although I suspect the silver coin challenge here will eventually attempt to change that.


The Hovercraft Challenge

With ten balloons collected, it is finally time for the hovercraft challenge.

Compared to everything else happening in this randomizer, the challenge itself is surprisingly straightforward. Three laps pass without any major disasters.

The real struggle begins when attempting to actually collect the balloon afterwards.

It genuinely feels like the balloon is attempting to actively avoid me.

Eventually, I manage to grab it and secure balloon number eleven.

Which means the door to where Sherbet Island should normally be is now open.

Unfortunately, I still have not investigated the door leading to where Snowflake Mountain itself has ended up.

But that feels like a problem for another day.


Episode Video


Progress Log

  • Current Seed: 232968
  • Balloons: 11
  • Bosses Defeated: Bubbler 2, Smokey 2
  • Silver Coin Challenges Cleared: Darkmoon Caverns
  • Current Threat Level: Increasing mechanical instability

Continue the Journey


Entry 2 | Darkmoon Caverns And The Five Lap Disaster ←


Krunch% Archive

— All entries in this run.


Super Mario ROM Hacks Archive

— All Mario ROM hack content.


Entry 4 | Krunch Versus Basic Driving →

The Hostile Castle Protocol – Entry 2: Rainbow Ride

The Hostile Castle Protocol – Entry 2: Rainbow Ride

Game: Super Mario 64 Randomizer
Platform: Steam Deck
Format: No Commentary

Video: Rainbow Ride becomes the second course of the run, bringing difficult stars, risky jumps, and a growing appreciation for solid ground.


Course Number Two

A quick check of the castle doors revealed that there was only one place I could actually go next.

Normally this doorway would lead to Princess’s Secret Slide.

Instead, the randomizer had other ideas.

Course number two was Rainbow Ride.

Yep. Second course of the entire playthrough and already I was dealing with one of the game’s final levels.

At that point I knew this wasn’t going to be an easy run.

I spawned on the platform that would normally contain the first star in a regular playthrough. Unfortunately the star wasn’t there. What was there was the immediate problem of figuring out how I was supposed to get down.

There was really only one option available, so I checked where the platforms below were, took a leap of faith, and jumped.

I survived the landing.

My health bar didn’t come through quite as well.

Half of it disappeared on impact.

Exploring Rainbow Ride

After that less-than-ideal introduction, I worked my way towards one of the seesaw platforms and found my first star of the session.

I grabbed it and started exploring the area around me, collecting whatever coins I could along the way. Rainbow Ride is not the sort of course where I want to be careless with health, especially when the first thing it did was take half of it away for landing.

A Fly Guy decided to get involved as I reached the falling log platforms on the way towards the triangles. That gave me another hit to think about and a reminder that this course was not short on ways to become a problem.

The triangles were useful at least, since that seemed to be where the red coin star would appear. I made a mental note of that and kept moving.

Once I was satisfied there was nothing else useful nearby, I started working my way back up and spotted another star.

This one was floating above the first carpet route.

I also caught a glimpse of another star over by the maze.

So at least I knew where two of the remaining stars were.

Knowing where they were did not make them comfortable.

Backflips And Bad Ideas

The star above the first carpet looked awkward straight away. The carpet moves, the space is limited, and there wasn’t much room to stand around thinking about better options.

I only had one idea, and no real confidence that it would work.

I went for a backflip.

Somehow, it worked.

I collected the star and landed back on the carpet before the whole idea could become evidence against me.

From there I headed for the maze and used the same basic approach for the next star. Another backflip, another brief moment of concern, and another star collected.

At that point I had exhausted the stars I could clearly see. I checked the maze properly, grabbed the coins available, and looked around for anything else the randomizer might have hidden nearby.

There was nothing obvious left.

Which meant my options were starting to narrow.

The Big House In The Sky

With the easier routes running out, I headed for the big house.

That did not go well.

I failed the route twice and ended up down to two wedges of health. At that point, forcing the issue started to feel less like persistence and more like offering the castle a written invitation to end the run.

I decided to cut my losses and try again later.

There was still another route available, so I changed direction and headed for the floating ship instead.

That is probably the first point in this run where The Hostile Castle Protocol really felt like it was doing what it was meant to do. This was not just about collecting stars. It was about deciding when a route had become too expensive to keep pushing.

The big house could wait.

My remaining health could not.

The Floating Ship

The journey up the carpets towards the floating ship was tense, but it also gave me time to notice something I wasn’t expecting.

Rainbow Ride actually felt better with the background the randomizer had given it.

The music, unfortunately, did not have the same effect. It felt out of place, which is a shame, because the course itself already had enough going on without the soundtrack making things feel stranger.

Still, the route paid off.

I found another star on a box on the platform before the floating ship. Naturally, this one also required another backflip, because apparently Rainbow Ride had decided that was the theme of the session.

The ship itself had plenty of coins, which finally got me back to full health. After spending so much of the recording one bad hit away from serious trouble, that felt like its own reward.

I checked the crow’s nest and looked around the ship, but there was nothing else waiting for me there.

End Of Entry Status

By the end of the session, I had four of Rainbow Ride’s seven stars.

That sounds decent on paper.

It felt less decent while actually doing it.

Three of those stars were in awkward places, and the big house had already taken enough out of me to make it clear that charging ahead was not the smart choice.

Eventually I had to admit there was no getting around it. The big house in the sky would need to be dealt with.

Just not immediately.

After the amount of work it took to collect those four stars, I decided to stop there, pause the run, and compose myself before continuing in the next entry.

Jolly Roger Bay gave me a friendly start.

Rainbow Ride has corrected that misunderstanding.

  • Stars Collected: 11 / 119
  • Lives Remaining: 7
  • Courses Cleared: 1
  • Rainbow Ride Stars Collected: 4 / 7

Continue The Journey

← Entry 1
Entry 3 →
The Hostile Castle Protocol Hub
Super Mario 64 Randomizer – Survivor Edition

The Hostile Castle Protocol entries are written after each recording session. Every seed tells a different story. Some just start making threats earlier than expected.

Submerged: A Subnautica Survival Diary – Log 17 | The Descent Continues

Submerged: A Subnautica Survival Diary – Log 17 | The Descent Continues

Platform: Steam Deck
Mode: Survival – No Commentary

Video Entry

Apparently, the answer has been staring me directly in the face this entire time.

I checked my PDA and noticed something I had completely overlooked before: a clue mentioning a Disease Research Facility located 800 metres down near skeletal remains.

I have already been somewhere with skeletal remains 800 metres below sea level.

So naturally, I’m going back.

I take both my orange and purple tablets with me just in case. At this point I’ve learned that alien doors have a habit of refusing entry unless you happen to be carrying the correct glowing geometry.

One More Stop At The Aurora

Before descending, I decide to stop by the Aurora wreckage one more time. I had a feeling I didn’t properly loot it during my last visit.

Turns out I was right.

I found another hole in the hull leading deeper inside and eventually came across a Cyclops Thermal Module.

Very useful timing considering what I’m preparing for.

The Disease Research Facility

Once I reach the skeletal remains in the Lost River, I head left and finally find the Disease Research Facility.

To make this even worse, I realise I could have discovered this place during my previous visit if I had simply paid more attention. The only reason I found it at all was because I had been hunting for Ruby in the area and didn’t want to properly explore the structure without recording it.

Did I scout for an entrance beforehand?

No.

That would have been sensible.

Eventually I locate a way inside and immediately find somewhere to insert one of my alien tablets. The facility powers up enough for me to access alien data terminals, and suddenly several things become painfully clear all at once.

First: there may actually be a cure for the infection I’m carrying.

Second: the facility containing that cure is approximately 1.4 kilometres below sea level.

That is currently well beyond my capabilities.

For now.

While exploring further I recover Ion Cubes and additional alien data. I also learn something I already suspected: I am the last surviving crew member of the Aurora, and the quarantine enforcement platform is specifically preventing infected lifeforms from leaving the planet.

Good thing I didn’t build the Neptune Rocket yet. That would have been an incredibly brief launch sequence.

I also finally learn the true purpose of the Warpers.

They are effectively hunter-killers designed to eliminate infected targets.

Which means every encounter I’ve had with them suddenly makes a lot more sense.

So now I know what happened to the Aurora crew.

And likely what happened to the Degasi survivors too.

The Time Has Come

But now I finally have direction.

The cure exists.

It is below me.

And if I want to reach it, I need to descend another 600 metres beyond my current limit.

Which means the time has finally come.

I’ve spent the last several entries preparing for this off camera: building infrastructure, gathering materials, expanding the base, stockpiling supplies and trying to make sure I don’t descend into the planet completely unprepared.

I return to my larger base, empty out the lockers containing all the materials I’ve gathered and head for the Mobile Vehicle Bay.

I even wait for sunrise because if I’m about to construct giant survival vehicles, I may as well make it look cinematic.

The Prawn Suit

First up: the Prawn Suit.

It still doesn’t have a proper name or colour scheme yet. That sounds like a problem for future me.

But the important thing is that it exists.

And unlike Valentino, it can already reach 900 metres below sea level without immediately complaining about pressure.

That alone makes it valuable.

The Cyclops Problem

Then came the real objective: the Cyclops.

I press the button and immediately get informed that the water is too shallow.

Excellent start.

I briefly consider dragging everything back to the larger base before remembering my original base should still be located in deeper water.

So naturally I load the Mobile Vehicle Bay onto my back, climb into the Prawn Suit and begin walking across the seabed.

It is slower than travelling in Valentino.

But honestly?

Possibly just as entertaining.

Eventually I reach deeper water and try again.

Attempt number two succeeds.

I officially have a Cyclops.

The onboard AI calmly informs me the vessel is designed for a three-person crew.

Unfortunately for the Cyclops, there is only me.

We will adapt.

Preparing For The Descent

Before ending the expedition, I install a MK1 depth module into the Cyclops to improve its diving range.

Eventually it will need a MK2 or MK3 upgrade if I want to reach the 1.4 kilometre facility.

But for now, the next objective is preparation.

I want both the Cyclops and Prawn Suit outfitted as thoroughly as possible before continuing deeper into the Lost River.

I still have no idea what ultimately waits below the planet.

I only know one thing for certain:

I would rather face it prepared.


Continue The Journey

Previous Log: Submerged Log 16
Next Log: Coming Soon
Series Hub: Subnautica Hub


Related Subnautica Content

Super Mario Galaxy 63 Entry 9 – Bowser in the Dark World

Super Mario Galaxy 63 Entry 9 – Bowser in the Dark World

Apparently Peach’s painting was a trap. Looking back, that probably should have been obvious.


The Double Door

I still have a few options on this floor. There’s a painting I’ve noticed that feels like it probably has something hidden behind it, but I decide to investigate the double door beside the entrance to Bob-Omb Battlefield Galaxy first.

As soon as I see Peach’s painting, I immediately know what is supposed to happen.

Only nothing happens.

I jump.

The painting changes to Bowser.

The floor opens beneath me.

So apparently we’re doing Bowser in the Dark World now.

Or at least this hack’s version of it.


Bowser in the Dark World

And honestly, I really like this course.

For me, it captures that feeling of entering Bowser in the Dark World in Super Mario 64 for the first time and somehow makes it feel even more dangerous.

It genuinely feels like something that could have existed in an official Super Mario Galaxy game.

The only thing that probably could have made it better would have been the original Bowser music, but even then, the music they do use fits this place really well.

It just feels right.


Comet Coins and Checkpoints

I have two Comet Coins to grab here and I sort of immediately know where both of them are going to be once I get close enough.

One floats above two rotating platforms.

The other is sitting on top of a Thwomp.

I also unintentionally activate the checkpoint before Bowser.

I jumped because I thought there was either a hidden path above me or maybe even a shortcut.

There wasn’t.

Still, once that checkpoint activated, I immediately felt a lot more relaxed about the rest of the course.

If I fell now, at least I knew I wasn’t starting from the beginning again.


The First Grand Shine

With the course complete, it’s time to face Bowser.

Of course he delivers the usual villain speech first.

The fight itself is basically the first Bowser fight from Super Mario Galaxy 2, which honestly helped because at least I already knew what I was dealing with.

There’s also a strange symbol on the planet during the fight.

I still have absolutely no idea what it means.

Three hits later and the first Grand Shine is mine.

Only instead of returning to the castle, I get sent somewhere else entirely.

Bowser’s Evil Dome.

Apparently the Grand Shine I just grabbed is cursed.

So I guess I’ve still got a bit more work to do before I can return to the castle grounds.


The Run

This is how it actually went.


Continue the Journey

← Entry 8: Beneath the Snow Blocks


Super Mario Galaxy 63 Hub

— All entries in this run.


Super Mario ROM Hacks Archive

— All Mario ROM hack content.


Dolphin Setup Guide

— How this run is even possible.


Entry 10 →

The Hostile Castle Protocol – Entry 1: Back Into The Castle

The Hostile Castle Protocol – Entry 1: Back Into The Castle

Game: Super Mario 64 Randomizer
Platform: Steam Deck
Format: No Commentary

Video: Jolly Roger Bay, seven stars collected, and the first discoveries about Non-Stop Mode.


Back Into The Castle

I told myself I wouldn’t come back to this anytime soon.

Apparently that plan lasted about as long as most of my attempts at sticking to a schedule.

At the time of writing this, Krunch% is still ongoing, but the more I thought about my original Super Mario 64 Randomizer run, the more I found myself wanting another trip through the castle.

Before long, I was setting everything up again.

This time the difficulty has been increased a little. To keep things fair, I deleted the test save file I’d been using while checking the settings and started fresh.

Non-Stop Mode is enabled this time around, which means once I enter a course, I stay there until I choose to leave, run out of health, or the game decides to remove me from the level.

Given my previous experiences with randomizer chaos, none of those possibilities can be ruled out.

The Castle Opens Its Doors

With the settings chosen, it was time to see what the randomizer had prepared for me.

Its answer was Jolly Roger Bay.

That wasn’t what I expected.

In my original randomizer run, Jolly Roger Bay ended up being one of the more straightforward courses. I wasn’t about to complain, although the course itself seemed determined to make sure I didn’t become too comfortable.

The balancing pillars inside the cavern appeared to have developed a personal interest in my whereabouts and spent much of the session trying to introduce me to the water below.

Despite that, progress came quickly.

Seven Stars In Jolly Roger Bay

One by one the stars started falling.

The objectives themselves weren’t especially difficult, but the randomizer had added just enough uncertainty to keep me paying attention.

While working on the 100 Coin Star, I remembered that I would eventually need to raise the sunken ship guarded by the eel.

My assumption was that collecting the star inside the ship would force me to leave the course and re-enter before I could finish the final objective.

Apparently Non-Stop Mode had other plans.

After collecting the ship star, I was simply placed back into Jolly Roger Bay with the final objective still available.

That left only Can the Eel Come Out to Play?

Convincing the eel to cooperate took a few attempts. During that time I was fully expecting the randomizer to have hidden the star somewhere completely different.

Thankfully, tradition survived the randomization process.

The eel eventually emerged with the star still attached to its tail, allowing me to collect the seventh and final star of the course.

Jolly Roger Bay was officially cleared.

An Unexpected Discovery

With the course complete, I decided to experiment with the menu options.

Choosing to exit the course launched Mario out of the level and immediately cost me a life.

Useful information to have.

Not information I was particularly pleased to discover.

To make sure it wasn’t some strange one-off, I entered the course again and selected the option to return to the lobby instead.

This time Mario simply appeared back inside the castle with no life penalty attached.

Lesson learned.

The castle apparently charges a fee for leaving incorrectly.

End Of Entry Status

The first course is complete and seven stars are already on the board.

I also learned a few important things about how Non-Stop Mode behaves, which is knowledge that will hopefully save me from losing additional lives in the future.

I forgot to check how many stars are required for the various doors throughout the castle, but that’s a problem for the next entry.

I’m also not sure whether the Boos have appeared in the courtyard yet.

Those are both questions for future me.

For now, the castle has been surprisingly cooperative.

I’m sure that won’t last.

  • Stars Collected: 7 / 119
  • Lives Remaining: 5
  • Courses Cleared: 1

Continue The Journey

Entry 2 →


The Hostile Castle Protocol Hub


Super Mario 64 Randomizer – Survivor Edition

The Hostile Castle Protocol entries are written after each recording session. Every seed tells a different story. Some are simply more hostile than others.

Blog at WordPress.com.

Up ↑