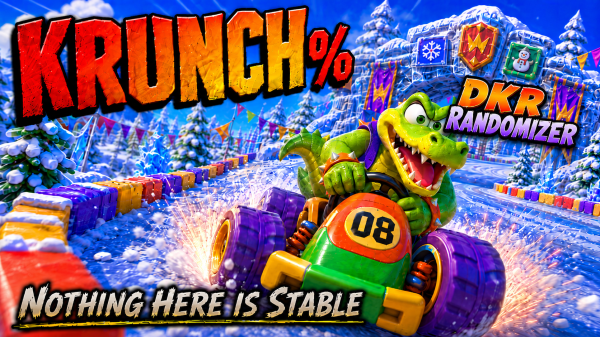
KRUNCH% Entry 1 | Snowflake Mountain Was Not Supposed To Be Here

KRUNCH% Entry 1 | Snowflake Mountain Was Not Supposed To Be Here

Seed: 232968 • Platform: Steam Deck • Character: Krunch • Format: No Commentary


The Island Introduces Itself

The genie of the island greets me by explaining that he is here to help and wishes me good luck. Given the state of the randomizer and my choice of driver, I can only assume this was less encouragement and more a warning.

I begin by collecting the overworld balloons. There are four available immediately, all reachable using the plane, which conveniently gives me a chance to relearn how flying works before the randomizer fully starts dismantling the island around me.

It goes about as well as expected.

I am already crashing into objects I had no intention of crashing into, which unfortunately feels very on-brand for both Krunch and the challenge itself.

One balloon in particular sits near the entrance that should normally lead to Dino Domain. Somehow I manage to collect it cleanly, which may genuinely be the most surprising moment of the episode.


Snowflake Mountain Is Apparently Dino Domain Now

With enough balloons collected, I enter the first available door expecting Dino Domain.

Instead, the randomizer reveals that Dino Domain has been replaced entirely by Snowflake Mountain.

So this is how the island intends to behave.

At this point, my available options are still limited. Two doors remain locked behind additional balloon requirements, leaving only a couple of places to investigate. I enter the first available track and discover Ancient Lake waiting for me.

Except it is not really Ancient Lake anymore.

It is the Adventure 2 mirrored version of Ancient Lake, and the race has been reduced to two laps.

The Dino Domain key is also available.

I briefly consider trying to win the race and collect the key simultaneously before remembering that I am driving Krunch through a mirrored randomizer while relearning how Diddy Kong Racing functions in the first place.

I used to main Tiptup back in the day. Krunch handles like someone replaced the steering wheel with a polite suggestion.


The First Reset

The key attempt immediately turns into a disaster.

I grab a boost balloon, panic slightly, and instead of reversing properly, Krunch launches himself forward like he has suddenly remembered somewhere else he needs to be.

T.T. politely informs me I am going the wrong way while I attempt to recover what little dignity remains.

Attempt number two goes far better. I secure the key successfully, although by that point the race itself is completely lost, so I restart the event and focus purely on survival.

Without the distraction of the key, the mirrored Ancient Lake race becomes surprisingly manageable. I take first place cleanly and secure the Dino Key without much additional trouble.

For a brief moment, the island allows optimism.


Bubbler 2 Appears Far Earlier Than Expected

Door number two immediately removes that optimism.

Behind it waits Bubbler 2.

So apparently we are doing this already.

The race is mirrored again thanks to the Adventure 2 setting, although this time the randomizer grants me four laps instead of two. Given how the fight starts, I absolutely need all four of them.

Fortunately, I feel much more comfortable using the hovercraft than the kart. Even with Krunch handling like an active mechanical dispute, the hovercraft gives me enough control to keep the situation from collapsing completely.

That does not stop me from landing in bubbles repeatedly.

Three laps in and I am still sitting in second place, but I can feel the race stabilising. My mistakes become less frequent each lap, the homing rockets start connecting consistently, and Krunch slowly transforms from an uncontrollable disaster into a very fast uncontrollable disaster.

And once Krunch builds momentum, he builds momentum quickly.

At the start of lap four, I finally overtake Bubbler and manage to hold the lead for the remainder of the race.

The first piece of the Wizpig amulet is mine.


The Car Challenge

Leaving Snowflake Mountain triggers the next event immediately: the car challenge.

Thankfully, the randomizer decides not to become completely unreasonable just yet.

One lap.

Simple enough.

I clear the challenge successfully and secure balloon number six.

For now, progression remains limited, but the next destination is already obvious. There is still one locked door waiting back in Snowflake Mountain, and whatever sits behind it is probably not going to improve the situation.

Still, for a first proper look at KRUNCH%, this was a surprisingly strong introduction to what this randomizer intends to become.

Unstable. Confusing. Occasionally hostile.

And somehow still survivable.


Episode Video


Progress Log

  • Current Seed: 232968
  • Balloons: 6
  • Keys Collected: Dino Key
  • Bosses Defeated: Bubbler 2
  • Wizpig Amulet Pieces: 1
  • Current Threat Level: Controlled instability

Continue the Journey


Krunch% Archive

— All entries in this run.


Super Mario ROM Hacks Archive

— All Mario ROM hack content.

Entry 2 | Darkmoon Caverns and The Five Lap Disaster →

Super Mario 64 Randomizer – Epilogue: Thirty Years Later

Super Mario 64 Randomizer – Epilogue: Thirty Years Later

Game: Super Mario 64 Randomizer
Platform: Steam Deck
Format: No Commentary

Why This One Needed an Epilogue

It has been a while since I last wrote an epilogue, but this run felt like it deserved one.

Nearly thirty years ago we were given the game that set the standard for 3D platformers, and in many ways for games in general. Very few titles can be called truly influential, but Super Mario 64 is one of them. Even decades later people are still playing it, still finding new tricks, and still discovering ways to push the game further than anyone expected.

I have watched world records being broken, seen people complete the game blindfolded, and watched runs that make it look effortless. That was never what this was about for me. I wanted something familiar, but different enough that I couldn’t rely on memory alone.

That is why I chose the randomizer.

Familiar, But Never Safe

I could have played through the original game again without any problems, but the randomizer forces you to slow down and think. Stars are not where you expect them to be, levels don’t behave the way your memory says they should, and suddenly a course you know inside out becomes something you have to learn all over again.

It didn’t take long for the run to remind me of that. Getting Rainbow Ride and Tick Tock Clock early in the run felt like the game was testing me right from the start. Those are not the levels you expect to deal with when you are still trying to figure out where everything is.

And then there was the hunt for the Wing Cap Switch Palace. For a while I genuinely thought it might end up being in the very last place I could possibly check. That search alone made the randomizer worth doing.

The Stars That Fought Back

If there was one type of star that caused the most trouble, it was the red coins. A lot of them turned into puzzles I wasn’t expecting to solve.

Bowser in the Fire Sea was one of the worst. The coins were placed in spots where grabbing them felt like a risk every time. It wasn’t enough to know the level, I had to work out how to reach them without burning Mario in the process.

Rainbow Ride was another one that stuck with me. Collecting the red coins there only to see the star appear at the opposite end of the course felt like the game reminding me that nothing in a randomizer run is ever simple.

Even near the end the run kept finding ways to surprise me. Wet-Dry World being the final course felt a little anticlimactic, but that is the nature of a randomizer. You don’t choose the order. The seed does.

Thirty Years Later, Still Worth Playing

What surprised me the most about this run is how well the game still holds up. Even after all this time, Super Mario 64 is still fun to play, still satisfying to finish, and still able to throw challenges at you when you least expect them.

That is probably why people are still playing it after all these years. Not because of nostalgia alone, but because the game itself is strong enough to keep people coming back.

The Journey Ends

I don’t know if I will do another randomizer run in the future, but I’m glad I did this one. It turned a game I already knew into something unpredictable again, and it made the final credits feel earned in a way they normally wouldn’t.

This journey took longer than I expected, gave me more trouble than I planned for, and reminded me why this game became a classic in the first place.

For now, I’m happy to say the run is finished.

And I had a blast doing it.

Not Quite the End

As much as this feels like the end of the run, it doesn’t feel like the end of the experience.

Super Mario 64 might be finished, but I’m not done with it yet.

So instead of stopping here, I’m taking it further. The same ideas, the same structure, but rebuilt on a much larger scale.

Next, I’m stepping into a version of this game that doesn’t stay contained in a castle.

A galaxy-sized version of it.

Continue the Journey

← Log 25

🧢 Mario 64 Randomizer Hub

Some games never really get old. Sometimes you just need a different way to play them.

Super Mario 64 Randomizer – Log 25: Thank You For Playing

Super Mario 64 Randomizer – Log 25: Thank You For Playing

Game: Super Mario 64 Randomizer
Platform: Steam Deck
Format: No Commentary

Video: Final red coins in Bowser in the Sky, 120 stars collected, and the last battle with Bowser (no commentary)


The Final Star

It was time. No sense putting it off any longer. I had 119 stars, and the final one was waiting for me in Bowser in the Sky. One last red coin hunt before the end.

When I jumped into the course I expected the randomizer to throw me somewhere near the end, but instead I spawned close to the beginning. That turned out to be perfect, because it meant I could search the entire level properly from start to finish instead of rushing through it.

I took my time, stopping every so often to move the camera around and make sure nothing was hiding just out of view. Hazy Maze Cave had already taught me that stars and coins could be sitting right in front of me without me noticing if I wasn’t careful.

I also had to fight the instinct to take the shortcuts I would normally use in this level. In the original game I know this course well enough to rush through it, but this wasn’t the original anymore, and I had a feeling if I skipped ahead too quickly I’d leave a coin behind.

120 Stars

The final three coins were waiting near the location where the red coin star appears, right beside the pipe that leads to the final battle. Once I collected them, the star appeared exactly where I hoped it would.

One jump later, and that was it.

All 120 stars of this randomizer seed collected.

Only one thing remained.

The Final Battle

The fight with Bowser didn’t go perfectly at first. I managed to throw him into one bomb, but nerves or bad luck got the better of me after that. I got caught by his fire, stunned, and even managed to fall off the platform. Round one went to him.

The second attempt felt different. I was calmer, more focused. The first throw landed, then the second, and suddenly I was holding him for the final spin.

As I turned Mario around with Bowser in his hands, I couldn’t help but think that this really was the final throw of the run.

It was.

Three clean throws later, Bowser was defeated and the randomizer seed was finished.

The Credits Roll

The familiar cutscene played out, and when the camera showed the castle roof, Yoshi was there waiting, proving that all 120 stars had been collected.

I let the credits roll without skipping. Watching the game show each of the locations again, one after another, reminded me just how much ground this run had covered. Every level, every detour, every moment where I thought I might have made the seed impossible.

And that music… the same credits music I’ve heard so many times over the years still feels exactly the same as it did the first time I heard it.

All that was left was the final line.

Thank you so much for-a playing my game.

And thank you for all the memories you have given me, Mario.

Continue the Journey

← Log 24
Epilogue →

🧢 Mario 64 Randomizer Hub

Super Mario 64 Randomizer logs are written after each recording session. Every journey ends eventually, even the ones you never wanted to finish.

Neo Mario Galaxy – Daredevil Edition Entry 5: The Chimp’s Challenge

Neo Mario Galaxy – Daredevil Edition Entry 5: The Chimp’s Challenge

Apparently hidden stars now require advanced movement tech and panic skating.


The Secret Star

So, there is a secret star hidden somewhere within Sweet Treat Galaxy.

I had a feeling I knew where it was.

The problem was getting there.

Every time I entered this galaxy, I noticed those flying ice bird enemies above the starting area, which made me think it had to be possible to reach that platform somehow.

The question was how.

I thought I had an idea.


The Trick

During my research into Mario Galaxy ROM hacks, I’d seen people using a movement trick involving either a triple jump or backflip into a wall.

Before landing on the wall, they spin, jump off it, then spin again for extra height.

I still need a better name for it than “spin, wall jump, spin thing.”

The question was which version I needed here.

I settle on the triple jump.

My theory is that there’s a wall slightly higher than the starting platform. If I can hit the perfect spot with the triple jump, I should get enough height to pull the trick off properly.

That was the theory anyway.


Eventually Getting It Right

It takes quite a few attempts before I finally manage it.

A few times I’m more concerned about the ice bird enemies than the jump itself, mainly because they occasionally decide to swing directly at me.

Not ideal when Daredevil Mode only gives me one health.

Eventually though, I make it up there.

I follow the path and spot a pipe trapped inside a crystal.

Which usually means something unpleasant is waiting for me.

I go in.

The Chimp is there.

Great.


The Skating Challenge

The Chimp gives me a simple challenge: beat his score and I get the star.

Sounds reasonable enough until he tells me I need 500 points in 40 seconds while avoiding spikey enemies.

So naturally this turns into panic skating.

The only realistic way to move fast enough is by skating across the ice.

Regular enemies are worth 10 points each, while the gold enemies are worth 50, which immediately makes them the priority targets.

About halfway through, I’m sitting around 170 points and starting to think this attempt is doomed.

Then more gold enemies start appearing.

I do hit a spikey enemy at one point, which thankfully only stuns Mario instead of ending the run immediately.

With one second left on the clock, I hit one final gold enemy.

530 points.

The Chimp’s Skating Challenge star is mine.

Sweet Treat Galaxy complete.


A New Problem

I don’t really get time to celebrate though.

A prankster comet has appeared back at Galactic Garden Galaxy.

I have absolutely no idea what challenge it’s about to throw at me.

Looks like I’m heading back there next.


The Run

This is how it actually went.


Continue the Journey

← Entry 4: The Chocolate is Lava


Neo Mario Galaxy – Daredevil Edition Archive

— All attempts in this challenge.


Super Mario ROM Hacks Archive

— All Mario ROM hack content.

Dolphin Setup Guide

— How this is even running on Steam Deck.


Entry 6 →

Super Mario 64 Randomizer – Log 24: One Star From the End

Super Mario 64 Randomizer – Log 24: One Star From the End

Game: Super Mario 64 Randomizer
Platform: Steam Deck
Format: No Commentary

Video: Finishing Big Boo’s Haunt before clearing Wet-Dry World and reaching 119 stars (no commentary)


Hunting the Final Red Coin

I was determined to finally locate the missing red coin in Big Boo’s Haunt. My first stop was the roof of the mansion, and sure enough that’s exactly where it had been hiding the entire time. Once I knew where it was, the rest of the red coin hunt turned into a fairly quick sweep through the mansion grounds and rooms.

I did have a brief moment where I forgot where the last coin was, but the mistake corrected itself quickly when I walked into the wrong room and immediately realised where I actually needed to be. A quick correction later and the final star of Big Boo’s Haunt was mine.

The Final Course

With the haunted mansion finally cleared, only one course remained before the final challenge: Wet-Dry World.

If I’m honest, I expected it to give me more of a fight. Instead, the course practically collapsed in front of me. The first two stars came almost immediately as I opened a couple of random boxes and found them sitting inside. I’ll happily take that kind of luck at this stage of the run.

Cleaning Up the World

After the early luck, the rest of the stars became a matter of cleaning up the level methodically. The Secrets in the Shallows and Sky star didn’t take long, and while collecting those secrets I spotted the location of another star, which made the next objective very straightforward.

I also took the opportunity to speak to the pink Bob-Omb to open the cannon, just in case it became useful later on. By the time I finished exploring the upper areas, only three stars remained, and all of them required heading into the town section of the level.

The Final Stars

My first visit to the town went surprisingly smoothly. One of the stars was sitting there waiting for me, so that immediately reduced the list to just two: the 100-coin star and the red coin star.

By the time I began collecting the red coins, my coin total had already reached ninety-nine. That meant the very first red coin I collected pushed the total to one hundred and awarded the 100-coin star instantly.

After that it was simply a matter of collecting the remaining red coins. A brief swim later and the final star of Wet-Dry World was secured.

119 Stars

With Wet-Dry World complete, all fifteen courses have now been cleared. The total stands at 119 stars.

Only one star remains.

The Final Challenge

The next entry may very well be the last.

One final red coin challenge remains before the path opens to Bowser in the Sky. Once that star is collected, there will be nothing left but the final battle.

Continue the Journey

← Log 23
Log 25 →

🧢 Mario 64 Randomizer Hub

Super Mario 64 Randomizer logs are written after each recording session. The end of the journey is now within reach.

Super Mario Galaxy 63 Entry 5 – The Big Snowman

Super Mario Galaxy 63 Entry 5 – The Big Snowman

Apparently going left this time means snow, icy water, and more Comet Coin theories.


A New Galaxy

So Shifting Sand Land Galaxy is complete, which means it’s time to move on.

Seeing as I went right last time, I decide to go left and see what is waiting there.

The painting in the room suggests a snow world, so naturally I assume I’m about to enter Cool, Cool, Mountain Galaxy.

Nope.

Instead, the painting leads to Snowman’s Land Galaxy, and the first shine sprite is The Big Snowman.

I kind of like the nod to the first star from Snowman’s Land back in Super Mario 64.

And honestly, this galaxy would probably look a bit strange without a giant snowman standing in the middle of it.


Comet Coins

The first Comet Coin is basically within jumping and spinning distance from the starting area.

There are crystals nearby that can be destroyed with a spin attack, and inside one of them is the coin, along with a mushroom that gives Mario an extra three hits.

I could have used that last entry.

The second Comet Coin is also nearby.

There’s a Fire Flower and two unlit torches, so I’m sure you can guess what the game expects me to do.

Mario had other ideas though.

Mainly falling into the icy water multiple times while I tried to light them.


The Climb

The path up towards the giant snowman is mostly uneventful.

I do meet a penguin who seems very impressed by a snow Goomba statue someone built nearby.

Naturally, I immediately try to destroy it.

No luck.

During practice runs, I convinced myself there was probably a Comet Coin hidden inside it somewhere, and honestly I’m still not fully convinced there isn’t.

I eventually reach the giant snowman and immediately prepare myself to get blown off the mountain.

Apparently this one is a lot friendlier than the original version.

Instead of trying to launch Mario into the distance, it’s perfectly happy letting me climb all the way to the top.

At this point I start wondering if this snowman is somehow related to Freezeezy Peak from Banjo-Kazooie.

Another brilliant game, by the way.

I grab the third Comet Coin on the way up and eventually reach the top of the snowman itself, which turns out to be the hat.

I do briefly consider jumping off the edge of the hat in case there’s a hidden Comet Coin sitting on the rim somewhere.

I decide against it.

My logic is simple enough: there are still three shine sprites and five Comet Coins left in this galaxy, so they must be spread across the other stars somewhere.

Probably.

I grab the shine sprite and celebrate a job well done.


The Run

This is how it actually went.


Continue the Journey

← Entry 4: The Gravity Scramble


Super Mario Galaxy 63 Hub

— All entries in this run.


Super Mario ROM Hacks Archive

— All Mario ROM hack content.

Dolphin Setup Guide

— How this run is even possible.


Entry 6 →

Neo Mario Galaxy – Daredevil Edition Entry 4: The Chocolate is Lava

Neo Mario Galaxy – Daredevil Edition Entry 4: Chocolate Lava

One hit resets everything. Some surfaces don’t even need to hit you.


Back to Sweet Treat Galaxy

With one more star needed before I can reach the Luma and whatever comes after it, I head back to Sweet Treat Galaxy for Prince Pikante’s Peppery Mood.

And for probably the first time ever, the chocolate is lava.

Touch it, and it’s straight back to the start.

The ice enemies from before are gone, replaced with fire versions, which feels like a fair trade. Not a good one, just a fair one.


Ice Mario

The first job is collecting five star bits.

Two are just along the path. The other three are floating right over the chocolate lava.

Which means it’s time for the Ice Flower.

Ice Mario lets me skate across the lava by creating a path as I move. Without it, those bits aren’t happening.

It works well enough, as long as I don’t panic and overcorrect. That feels like the main risk here.

Five bits collected, launch star unlocked, onto the next section.


Narrow Margins

The next part keeps the Ice Mario, but makes things a bit tighter.

Narrow paths, moving platforms, gaps that are just big enough to matter.

It’s not too bad, but it’s the kind of section where one small mistake would undo everything.

I do think about jumping early for the launch star at one point.

I don’t.

That felt like the right decision at the time.


Prince Pikante

Then it’s time for the boss: Prince Pikante.

He’s riding something, not entirely sure what, but it doesn’t matter too much.

Like Dino Piranha, it’s a three-hit fight.

The difference is the space. There’s a lot more room to move, which helps, because standing still here doesn’t feel like an option.

I spend most of the fight sliding around just to avoid getting cornered.

Turns out the only way to hit him is sending his own watermelons back at him.

Not the flaming ones.

The green ones.

Three hits later, it’s done.

The star is mine.


The Run

This is how it actually went.


What’s Next

This opens the path forward.

The Luma wants 500 star bits, which probably means some farming at some point.

There’s also Gloomy Galleon sitting there with a single star available.

But before that, I noticed something in Sweet Treat Galaxy.

Every time I’ve been through it, there’s been a spot that feels like it leads somewhere.

And there’s still another star listed here.

I think I know where I’m going next.


Continue the Journey

← Entry 3: A Birthday Problem


Neo Mario Galaxy – Daredevil Edition Archive

— All attempts in this challenge.


Super Mario ROM Hacks Archive

— All Mario ROM hack content.

Dolphin Setup Guide

— How this is even running on Steam Deck.


Entry 5 →

Super Mario 64 Randomizer – Log 23: Wings and Ghosts

Super Mario 64 Randomizer – Log 23: Wings and Ghosts

Game: Super Mario 64 Randomizer
Platform: Steam Deck
Format: No Commentary

Video: Conquering the Wing Cap red coins before exploring Big Boo’s Haunt and collecting several more stars (no commentary)


The Wing Cap Challenge

It was finally time to tackle the Wing Cap red coins. Out of everything I’ve faced during this run, this one had been sitting in the back of my mind as the biggest hurdle. I had already struggled with the red coins in Bowser in the Fire Sea earlier in the run, so the idea of doing something similar in a stage built entirely around flying didn’t exactly fill me with confidence.

The level wastes no time throwing you into the air. As soon as I entered, Mario was already flying, which meant I had no choice but to try and take mental notes of where each coin was while keeping control of the flight. I could see seven of them fairly quickly, but I knew the eighth would probably reveal itself mid-flight.

Finding the Right Flight

My first attempt didn’t go particularly well. Somewhere during the chaos my brain decided it would be a good idea to create a savestate while I was flying. I’m still not entirely sure why that happened.

The second attempt was slightly better. I managed to line up a few coins, but my altitude was too low to collect some of the others. Rather than force it and lose the run completely, I accepted the attempt as a loss and reset.

The third attempt was the one that mattered. I managed to control Mario just enough to sweep through every coin in a single flight. Once the star appeared, I didn’t hesitate. Unsure of how much time remained on the Wing Cap, I made a direct line for it and secured the star.

The Wing Cap red coins were done. And with that, the final flight challenge of the run was behind me.

Two Courses Remain

After leaving the stage I headed back upstairs in the castle. At this point there were only two courses left before the final challenge: Big Boo’s Haunt and Wet-Dry World.

I had a fifty–fifty choice between the two entrances. I took the right-hand side.

Waiting behind it was Big Boo’s Haunt.

A Haunted Start

The course immediately rewarded me with a bit of luck. After defeating one of the bosses — the Big Eye — I found a star within reach and grabbed it straight away. There are several bosses scattered throughout this level, including the Big Eye and three different Big Boos.

The star from that boss didn’t spawn in a location I was entirely confident about reaching, so I opted to collect the easier one first. On my second visit I tracked down the original star again, and this time it appeared much closer to me.

Ghost Hunting

I knew one of the Big Boos would be waiting near the carousel. My instinct told me that particular encounter wouldn’t be moved somewhere strange given how the room works. Sure enough, after clearing out the smaller Boos, the Big Boo appeared exactly where I expected.

One of the ghosts also mentioned that ghosts never truly die, which at least confirmed the location of another Boo needed for the “Go on a Ghost Hunt” star. While exploring the area I also spotted one of the red coins, giving me another clue for the final collection in this level.

Making the Most of Momentum

With the course practically handing out stars at this point, I decided to attempt the 100-coin star while I was already exploring the mansion. My thinking was simple: collect the 100-coin star along with either the red coin star or the “Go on a Ghost Hunt” star, leaving the remaining objective for my final visit here.

I searched nearly every room in the mansion, deliberately leaving the roof area for later. In fact, I only abandoned that plan because I fell off the roof and ended up back near the carousel. While there I grabbed the nearby red coin and discovered the final Boo needed to trigger the third Big Boo encounter.

With the coin total finally reaching one hundred, I collected the 100-coin star and immediately attacked the first Big Boo I encountered outside the mansion grounds. As luck would have it, it turned out to be exactly the Boo I needed, which meant another star was secured.

The Final Stretch

That leaves the red coin star still waiting in Big Boo’s Haunt. Once that’s finished, only Wet-Dry World remains before the path to Bowser in the Sky opens.

The day ends with the total sitting at 111 stars.

Just eight more before the final course unlocks.

Continue the Journey

← Log 22
Log 24 →

🧢 Mario 64 Randomizer Hub

Super Mario 64 Randomizer logs are written after each recording session. Sometimes the final stretch is filled with ghosts.

Super Mario 74: A Survivor’s Journey Log 9 – Ice-Crystal Tower

Super Mario 74 – Log 9: Ice-Crystal Tower

Platform: Steam Deck
Mode: Original Edition
Rules: No savestates (except between entries)
Format: No Commentary

Video: Ice-Crystal Tower exploration, King Whomp rematch, red coins, and Wing Cap climbs (no commentary)


With Stalagmite Cave done, I stayed in the same room and moved into the next course: Ice-Crystal Tower. Every time I enter, there’s a Goomba waiting to start something. I’ve made a point of ignoring it unless it becomes a problem. So far, that’s worked well enough.

The first task was a rematch with King Whomp. I spent enough time practicing the route up to him that it’s become familiar, even if I wouldn’t trust myself to do it without thinking. The fight itself is different this time. Smaller platform, less room to recover, and if you fall, you’re climbing all the way back up to try again. There is a metal box that can help, but positioning matters more here than anything else.

I’ve seen the trick where you phase through him with a ground pound, but I’ve never managed to make it work consistently, so I stuck with what I know. Wait for him to turn away from the box, move in, ground pound, and reset. It’s slower, but it works. Three clean hits later, the fight was done and the star was mine.

Waters of Pain was next, a section I’d already passed through on the way up. The ice behaves more like lava here, which changes how you approach everything. The star itself sits in a box above a small platform, just out of reach unless you commit to the jumps properly. I didn’t quite get it right, clipped the ice, and ended up bouncing onto the platform anyway. Not clean, but effective enough.

Almost the Top lives up to its name. The climb back up is familiar by this point, but the risk doesn’t really go away. One mistake and you’re either back on the snow or falling out of the level entirely. The Spindrifts are the main problem here, each one placed just well enough to knock you off if you’re not careful. This time they stayed out of the way, and the star was taken without issue.

The red coins came next. Some of the jumps here felt worse than the earlier climb, mainly because there’s less room to recover if anything goes wrong. I started the 100-coin collection at the same time, but it became clear fairly quickly that I wasn’t going to reach the total on that pass. Rather than force it, I settled for the red coin star and moved on, knowing I’d come back to the full collection properly.

How High Can You Get? turned into the real 100-coin attempt. The plan was simple enough — climb as high as possible, then use the Wing Cap to cover the remaining platforms. In practice, it didn’t go cleanly. Two separate mistakes, both costing time and momentum, both forcing me to adjust mid-run. Eventually everything lined up, and I was able to collect the remaining coins before reaching the top. Not perfect, but enough to secure the star.

The final star, Very Well Hidden Star, needed the Wing Cap again. The name isn’t exaggerating. The star sits below the starting platform, easy to miss even if you know it’s there. My first attempt went straight past it, which wasn’t surprising given the angle. The second attempt was better. Adjusted the approach, lined it up properly, and this time the landing worked.

With that, Ice-Crystal Tower was done. Another course cleared, and one less area left hanging over the run.


Continue the Journey

Previous Entry:
Super Mario 74 – Log 8

Next Entry:
Super Mario 74 – Log 10 (coming soon)

Super Mario 74 Hub:

Super Mario 74 – A Survivor’s Journey

Super Mario Galaxy 63 Entry 4 – The Gravity Scramble

Super Mario Galaxy 63 Entry 4 – The Gravity Scramble

Gravity itself has apparently decided to become a problem now.


Back Into Shifting Sand Land Galaxy

One more shine sprite and one more Comet Coin left in Shifting Sand Land Galaxy, so I jump back into the painting and it is time for The Gravity Scramble.

Before I can properly start though, I need to collect five launch star pieces.

Two of them require the Fire Flower, as the only way to grab them is by lighting torches.

In my head, the plan was simple enough: grab both before the fire power ran out.

Unfortunately, that didn’t happen.

So after wasting the first Fire Flower, I had to go back and grab another one before collecting the remaining launch star pieces.

After that little mess up, I get launched over towards a pipe, but before going in, there’s still one final Comet Coin sitting on top of a tree.

So I grab that first.

Shifting Sand Land Galaxy complete. At least I think it is. There could still be a hidden shine somewhere for all I know.


The Gravity Scramble

This is where the shine sprite name starts making sense.

Gravity changes depending on the direction of the arrows, which shift whenever Mario goes up or down slopes.

If I had really committed to the experience, I probably could have rotated the Steam Deck around to match the gravity direction.

I decided against that.

Mainly because things were already awkward enough.

During practice runs, Mario had developed a habit of landing directly on spikes.

Didn’t really matter where they were either.

He kept finding them.

You could argue that was user error.

I’m not entirely convinced.


Upside Down

The worst part comes once gravity flips upside down.

I have to jump between disappearing platforms while avoiding spikes below me.

The platforms follow a rhythm, but that didn’t stop Mario repeatedly finding ways to miss them and land directly on the spikes anyway.

Thankfully, this attempt goes a lot better than the practice runs and I eventually make it through to the next pipe.


The Final Stretch

The final area changes things again.

This time gravity is controlled by octagonal platforms. Depending on which way Mario is facing, gravity changes with him.

The final challenge involves long jumping between three octagons while spikes cover both the floor and ceiling.

I’m sure you can guess what happened here.

Mario and gravity had another disagreement.

The spikes won multiple times.

I do lose a life here, but my next attempt goes much smoother than all the practice runs, so I decide to take the win while I have it.

The shine sprite is mine.

Shifting Sand Land Galaxy complete.


What Comes Next?

Still no sign of any prankster comets.

I honestly don’t know if they exist in this hack or not.

But considering how much Mario has already been struggling with gravity, I’m hoping this shine sprite doesn’t end up getting one later.

I’ve had enough problems with spikes for now.


The Run

This is how it actually went.


Continue the Journey

← Entry 3: Into the Pyramid


Super Mario Galaxy 63 Hub

— All entries in this run.


Super Mario ROM Hacks Archive

— All Mario ROM hack content.


Dolphin Setup Guide

— How this run is even possible.


Entry 5 → Coming Soon

Blog at WordPress.com.

Up ↑