Six Months of Chaos: A Survivor’s Milestone

[Signal detected…]

Six months ago, I started this little corner of chaos thinking I’d maybe post a few survival stories, get a handful of clicks, and quietly freeze to death somewhere in The Long Dark. Back then, it was just me, a Nintendo Switch, and the idea of documenting how many ways I could die before breakfast.

Since then, the blog’s grown far beyond what I expected — from Switch survival diaries to Steam Deck expeditions, from small guides to full-blown playthroughs and embracing chaos. And somehow, it’s still alive — which feels like a small miracle, considering most blogs don’t make it past the first few months. Hundreds of clicks, countless laughs, and a few subscribers later, I’m still here — fuelled by caffeine and questionable decisions.

So first and foremost — thank you. Whether you’ve clicked, read, liked, shared, or just wandered in wondering how someone can die to a rabbit, I appreciate every single bit of support.

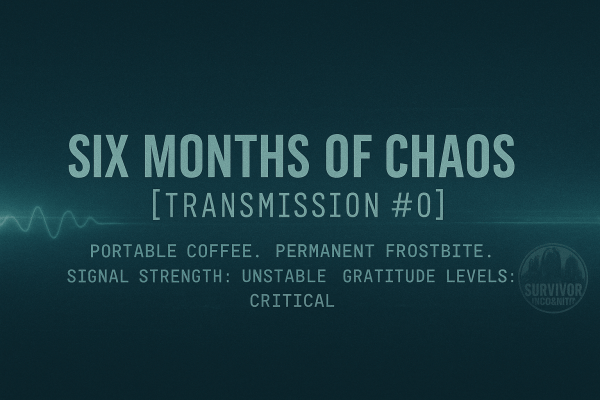
Transmission #0 – Reverse Voice Reveal

To mark the occasion, I decided to put together a short video. Some of you might’ve thought this would finally be my voice reveal. To that I say… really?

A brief burst of static, gratitude, and one very loud Godpigeon scream. Full credit, of course, to the brilliant Animaniacs team for that glorious noise.

Fuel for the Generator

I’ve also quietly launched a Ko-fi page — emphasis on quietly. I didn’t make a big announcement about it because I didn’t want it to feel like a sales pitch. Everything I create will always stay free to read and free to enjoy. That’s a promise.

I know times are tough and not everyone can spare a few pounds — and that’s perfectly fine. Your clicks, comments, and time already mean more than enough. The Ko-fi page is just there for anyone who genuinely wants to toss a tip into the mug to help keep the coffee flowing and the generator humming. Please don’t go overboard; keep the lights on at home first.

Down the line, I might look at adding a few ads on the blog or YouTube channel, but I’ll do my best to keep them minimal and non-intrusive. I’d rather focus on sharing stories and surviving the next storm than filling screens with banners and pop-ups.

Looking Ahead

There’s still a lot left to explore — new games, new disasters, same portable chaos. I’m excited (and mildly terrified) to see what the next six months bring.

So here’s to six months of frostbite, fuel shortages, and unexpected victories — and here’s to making it a full year of portable chaos. Thank you for being part of this weird, wonderful journey.

[Transmission terminated. Coffee levels: critical.]

🩸 Derailed & Doomed: A Choo Choo Charles Survival Diary Log 4: Pickles, Papers, and Payback

Platform: Steam Deck |

Apex Predator Rule: Three strikes to start. Only Charles can take them.
Each egg restores one — never more than three total.

“I knew I shouldn’t have trusted the lady obsessed with pickles. Or the one hunting Slender Man. But hey—scrap is scrap.”

🎥 Survivor’s Reel: Log 4 – Pickles, Papers, and Payback (No Commentary)

The Pickle Lady Cometh

My first stop was a house belonging to someone I can only describe as the Pickle Lady. According to her, there’s “one last jar of pickles” hidden deep in her pickle cave. She wanted me to retrieve it, and honestly, the promise of scrap was enough for me to overlook how absolutely unhinged she seemed.

Charles, mercifully, must have agreed—because he didn’t interrupt this one. Maybe even he thought, “Yeah, she’s crazy,” and decided to give me a pass. Pickles retrieved, reward collected, and my sanity mostly intact.

The Slender Situation

Next up was Sasha, who casually informed me that the Slender Man was also apparently hanging around the island. She’d already collected eight pages and wanted me to grab the next set. Logical, right? Because clearly, one supernatural monster just isn’t enough.

Unfortunately, the universe had other plans. No sooner had I finished talking to her than that familiar whistle pierced the air. Charles. I bolted for my train, but he was faster. The beast blindsided me and shredded my health bar like paper. Charles earns his first win. Two chances left.

Still annoyed—and slightly traumatized—I decided to humor Sasha anyway. I managed to grab three pages before some unseen Slender-like presence told me to “go away.” Quest abandoned. Sanity preserved.

Bridge Over Terrifying Waters

After a quick recovery, I shifted gears and tracked down Santiago’s journal. Delivered it safely—though apparently, I could’ve snooped inside first. Missed opportunities, I guess. My next stop was Eugene’s son, who still believes his father is alive and well on the mainland. I didn’t have the heart to correct him.

He handed me a set of explosives and outlined the island’s master plan: lure Charles onto a wooden bridge, blow it sky-high, and end this nightmare once and for all. It’s a bold plan. Questionable, sure—but bold. I now have the temple key for when it’s time to place the eggs and start the final battle.

Preparing for Round Two

As the day closed, I parked the train near a resident’s home rumored to hold another weapon. After my last run-in with Charles, I’m more than ready to upgrade my firepower. Whether or not I get a moment’s peace to actually do it—that’s another story.

For now, I’ve survived long enough to plan my next move. But I can’t shake the feeling that Charles is circling again, waiting for round two.

Continue the journey:
Log 3: Explosions and Evasion |
Log 5 (Coming Soon)

🩸 Derailed & Doomed: A Choo Choo Charles Survival Diary Log 3: TNT, Torpedoes & Terrible Timing

Platform: Steam Deck
Rule: Apex Predator (Charles must kill me three times for the run to end)

⚙️ Survival Status: 3 Strikes Total
Only Charles can take them away.
Each egg restores a lost strike — but I can’t exceed three.
When the last one’s gone, the run ends.

“If there’s a bad time to use explosives, I’ll find it.”


I start by doing a quick sweep for guards near the mine that’s supposedly holding ammo for the rocket launcher. Thankfully, no one’s around — which is rare, and suspicious. The entrance itself, however, is locked. Naturally.

My map says, “Find a way in.” Okay, fair enough. I look around and find some TNT. Perfect. If that doesn’t open a door, nothing will.

Important survival lesson: stand further back when lighting TNT. I take a chunk of damage from the blast, and I’m pretty sure Charles just got a notification that I’m being an idiot. If he missed that one, don’t worry — I detonate a second explosive down the tracks. More fire, more noise, more damage to me. Subtlety is dead, but the door isn’t. Yet somehow, the mine opens, and I grab the rockets.

Back to John Smith, who hands over The Boomer. I’m officially armed and ready to make even more bad decisions.

Lighthouse Lunacy

My next bright idea: go exploring. I notice a marker close to the island’s edge. Against every instinct I have, I run for it. Turns out it’s a lighthouse, home to a woman named Claire — who needs the breakers fixed.

There’s a shed nearby with four breakers. Easy enough. I sprint over, slot them in, and head back. Apparently, I “missed a step.” Turns out I need to turn them on, and it’s a little puzzle. Thirty seconds later, lights on, job done. Claire thanks me by saying fixing the lighthouse will help others spot us more easily. Yes, Claire. Including Charles.

I make a break for the train. The moment I mark my next stop, I hear it — that whistle. Round two is on.

Round 2: Return of the Rail Demon

Charles is far more persistent this time. I test out The Boomer and land a few solid hits. He claws, rams, and screeches like he’s auditioning for the next Doom soundtrack. Twice, I think he’s gone, and twice, he charges back in. After burning through some scrap for repairs, I finally drive him off. Victory number two to me.

Feeling cocky, I decide to visit another local — Ronny, who seems like he’s gearing up to tell me his life story. Nope. He just wants me to climb some dangerously tall buildings for a box of papers, promising maybe one scrap as a reward. I climb anyway, find a tin of paint for the train (score), but fail a jump and lose a scrap.

Technically, that did count as a “death” — but since it wasn’t at the claws or wheels of Charles himself, it doesn’t break the Apex Predator Rule. Accidental gravity-assisted injuries are free passes in this run.

After a few more attempts, I decide Ronny’s box isn’t worth the spinal injuries. My train, on the other hand, gets a stylish new coat of paint — a well-earned upgrade after surviving two Charles encounters.

Danger on the Hill

Feeling brave — or stupid, jury’s out — I go for Theodore’s supply box next. Unfortunately, the area’s crawling with Cultists. I spot one and think I’ve figured out his patrol pattern. I haven’t. The second guard ambushes me from uphill. I sprint for the train, but pause to open my map — rookie mistake. The cultist scores a hit.

As I’m running, I hear that familiar whistle again. Charles is awake, and maybe it’s a blessing in disguise that I didn’t grab that box. I dive into my train, patch up, and decide both Theodore’s mission and Ronny’s tower of death can wait.

For now, the plan is simple: find the next closest survivor, avoid blowing myself up again, and maybe, just maybe, make it to Log 4 without turning into train food.


Need a guide? Explore every stop, scrap pile, and spider sighting with the Aranearum Island Map Guide — your unofficial atlas to surviving the rails.


Continue the Journey

← Log 2: Flame, Speed, and Fetch Quests | Log 4 →

🩸 Derailed & Doomed: A Choo Choo Charles Survival Diary Log 2: Flame, Speed, and Fetch Quests

🩸 Derailed & Doomed — Log 2: Flame, Speed, and Fetch Quests

“They said ‘force Charles into a fight.’ They didn’t mention the choreography involved.”

⚙️ Survival Status: 3 Strikes Total
Only Charles can take them away.
Each egg restores a lost strike — but I can’t exceed three.
When the last one’s gone, the run ends.

The Setup — Make ‘Em Fight (And Don’t Get Toasted)

After being told I need to force Charles into a fight to the death, I set out to meet the island’s next eccentric resident — a man who clearly enjoys watching things burn. Sgt. Flint greets me in front of his flaming house, which raises more questions than I’m willing to ask.

I find a water tank above his home, twist the valve, and douse the flames. That act of charity apparently doubles as an invitation, because I soon hear the dulcet, horrifying blare of Charles’ horn in the distance. I sprint for my train, ready for chaos — but he never shows. Either I scared him off or he’s waiting for a better entrance. Flint, unbothered, rewards me with his experimental weapon: the Bug Sprayer. Which, of course, is a flamethrower.

Round One — The Firestarter

Not long after, I get my wish: Charles charges in for our first real showdown. I juggle the Bug Sprayer and machine gun — one setting him ablaze, the other perforating his ego. It’s messy, loud, and absolutely glorious. Charles retreats after taking enough damage, and for the first time since stepping onto this cursed island, I feel like I’ve actually won something.

With the immediate threat gone and my train held together by scrap and spite, I decide to take advantage of the quiet. Time to meet the locals — and, inevitably, their problems.

Islanders & Errands — The To-Do List Grows

Island socialising here is just a series of fetch quests disguised as introductions. Everyone has a task, and apparently, I’m the errand boy.

  • Theodore — far too well-dressed for a place that’s one bad day away from Mad Max. Wants a box recovered from a railcar in a nearby canyon. Bandits guard it. I politely file that under “later.”
  • Santiago — prepping to leave the island as soon as rescue arrives, but he’s left his journal at home. Add another fetch quest to the growing pile.
  • John Smith — working on a rocket launcher (finally, someone useful). Needs me to collect the rocket ammo from a nearby bunker. That immediately jumps to the top of the list.
  • Greg — appears to have misplaced his clothing and sense of urgency. Used to work for the mine owner and warns that if the eggs hatch, there’ll be three more Charles-like horrors running around. He hands me the key to the second mine. Great. Just what I needed.

So far, my to-do list looks like this:

  1. Collect rocket ammo from the bunker (top priority — rocket launcher > everything else).
  2. Retrieve Theodore’s box from the canyon railcar (expect bandits).
  3. Fetch Santiago’s journal from his house (return it before he reconsiders leaving).
  4. Investigate the second mine (Greg’s key in hand, nerves not included).

Next Stop — The Bunker

With Charles licking his wounds somewhere in the wilderness, I make my way toward the bunker where John Smith’s rocket ammo supposedly waits. The island is eerily quiet now — no horn, no tracks shaking, just the wind and my engine’s occasional complaint. Perfect time to loot everything not nailed down and add more scrap to my emergency stash.

I haven’t seen Charles again since our fight, but I know he’s out there. Watching. Waiting. Probably still smouldering a little.

Log Observations & Survival Notes

  • Scrap is life: It’s your health, armour, and upgrade material all in one. Pick up every piece you see — it’s never enough.
  • Weapon swapping works: Flamethrower to make Charles back off, machine gun for consistent hits. Alternate, repair, survive.
  • Speed upgrades are essential: The faster your train, the smaller your funeral.
  • Quiet moments lie: If you don’t hear Charles, it’s because he’s planning something.

Pro Tips (Apex Rookie Friendly)

  • Always keep scrap handy — repairs and upgrades are instant, but you’ll burn through metal faster than ammo.
  • Mark every quest on your map. It’s easy to get lost between rail spurs and regret.
  • The Bug Sprayer is for Charles only. Do not waste fuel showing off. It’s not that kind of game.
  • When Charles retreats, use that window to explore. The peace never lasts long.

Need a guide? Explore every stop, scrap pile, and spider sighting with the Aranearum Island Map Guide — your unofficial atlas to surviving the rails.


SnowRunner Survival: The Permagear Diaries – Driver Log Fourteen: Suspension Trials & Chevy Rescue Plans

SnowRunner Survival: The Permagear Diaries – Driver Log 14: Suspension Trials & Chevy Rescue Plans


Frank’s New Legs

With Frank’s brand-new raised suspension fitted, I decide today’s the day to finish up The Essentials.
One small problem: Frank’s pointing the wrong way.
The boulder-clearing job from before opened a fresh path, so I follow it — partly to see where it goes, partly to avoid the awkward Austin Powers-style manoeuvring. It leads me to something familiar: another Chevrolet, the very same model I started my SnowRunner journey with.

The Stranded Chevy

I park Frank up alongside and jump in for a look. It’s going to need some upgrades before it’s worth driving… and then I notice the real problem.
It’s in no state to move at all — repairs come first. That makes this a job for Red. For now, I hop back into Frank, wiggle the wheel a few times, and get him facing the right way back toward the garage.

Warehouse Run

Back at the garage, I remember there’s a warehouse in this region with wooden planks. That’s exactly what I need for the farm delivery, and it’s perfect for two reasons:
1. I can see exactly how much fuel Frank burns on a long run.
2. I can avoid those soul-draining loading screens from switching regions.

The road’s a good test for the new suspension too. Frank does take a couple of damage points — entirely my fault for forgetting to flick on AWD — but otherwise glides over the bumps. By the time we reach the warehouse, the fuel gauge says I’ve burned about 45–50 litres. Not bad at all.

Planks on Board

I load Frank up with the planks and set off toward the farm, confident the suspension upgrade was worth every bolt.

The trip back is uneventful until I reach the flooded road leading to the farm. I spot an unflooded road I could have taken… and promptly ignore it, because this is a perfect water test for Frank.
The difference is night and day compared to before — he still struggles a little, but nothing like the swamp-crawling misery of old. The planks are dropped off, and The Essentials is finally complete.

Hungry Workers, Hungrier Roads

With Frank proving himself, I decide to tackle the Hungry Workers task next. Back to the garage for a full tank, then back to the farm for consumables. The road isn’t exactly Frank’s favourite terrain, but we reach the Drilling Site in one piece — and ding! Rank 6 unlocked.

That means one thing: new tyres. All we have to do is get back to the garage.

The Italian Job (SnowRunner Edition)

On the way back, I take an alternate route. Frank decides this is the perfect time to audition for a role in a remake of The Italian Job. One quick winch later, and I save him from early retirement.

Back at the garage, I reward him with a fresh set of All-Terrain Tyres — the perfect ending to a busy, productive day.


Continue the Journey

Day 13 | Day 14 (You Are Here) | Day 15

More from SnowRunner Survival: The Permagear Diaries

Submerged: A Subnautica Survival Diary – Log 2: The Depths of Progress

Submerged: A Subnautica Survival Diary – Log 2: The Depths of Progress

Difficulty: Survival (Steam Deck Survival)
Optional Features: Grav Trap Deployed for Science and Snacks

“Silver is rarer than common sense on this planet.”

After yesterday’s fire-fighting and frantic crafting, I started the day with a new radio message: Lifepod 17 had also crashed somewhere nearby — right next to the Seamoth Bay, apparently. But priorities are priorities, and since Lifepod 3 radioed me first, they got first rescue attempt.

Priorities, Podcasts, and PDAs

Lifepod 3 wasn’t exactly a rescue success.
I did, however, find a blueprint for a compass — the kind of thing that makes you wonder why your pod didn’t come with one pre-installed. I added it straight to the “to-craft-once-I-can-see-straight” list, along with a PDA I’ll read later when I’m not holding my breath underwater. No survivors… unless you count me, which I do, enthusiastically.

Back at my pod, I realised something important: I can’t see a damn thing once it gets dark. So I finally crafted a torch — apparently the galaxy’s most underrated invention — along with a survival knife because there’s nothing like a little sharp-edged comfort in an ocean full of unknown lifeforms.

Lifepod 17 and the Great Seamoth Discovery

Next stop: Lifepod 17.
Predictably, it was another empty seat arrangement, but I did strike technological gold — enough Seamoth fragments to unlock the blueprint. I just need a Mobile Vehicle Bay now, which sounds easy enough until you remember I’m surviving on cooked bladderfish and spite.

While exploring the wrecks, I also found the last few materials to upgrade my O₂ tank. More air equals more curiosity, and more curiosity usually equals more trouble, so that’s a win all around.

Incoming Messages and Explosive Warnings

Just as I was feeling productive, I got a new transmission — this time from the Sunbeam. They wanted a response, but my comms system is, and I quote, “irreparably damaged.” Translation: I’m talking to myself for the foreseeable future.

With no one to call and no Netflix subscription in sight, I built a Grav Trap and tossed it outside the Lifepod to watch it work. Instant sushi buffet. Fish helplessly drawn into an invisible vortex of doom. It’s oddly soothing.

Science in Motion

Full gameplay log below — forty minutes of exploration, crafting, and the occasional panic swim. Featuring Grav Trap testing, Lifepod 17 dives, and my ongoing battle with visibility and oxygen management.

Watch on YouTube

I even had enough parts for a Rebreather, further extending my underwater escapades. Everything was going fine… right up until the PDA told me the Aurora will explode in approximately two hours.
Sure. Two hours to stop a planet-sized reactor meltdown with nothing but a knife and optimism. Sounds totally achievable.

Silver, Sunbeam, and Sinking Realisations

I spent the rest of the day chasing one thing: silver. I’d convinced myself it didn’t exist anymore, that I’d mined the planet dry earlier. But after far too many dives and muttered curses, I finally found some glimmering salvation among the sandstone outcrops.

Back at the Lifepod, another message awaited — the Sunbeam again. They’ve spotted the wreckage of the Aurora and are coming to investigate. They’ll be here within the week.

So not all doom and gloom then. Just mild existential dread… and a new compass freshly crafted to help me get lost in the right direction next time.

Continue the Journey:
Log 1 |
Log 3

Survivor Log #1 – October 2025

🪵 Survivor Log #1 – October 2025: Riding the Rails of Terror

“The trains are running again. Unfortunately, so are the screams.”

Back on Track

The Survivor Logs are officially back — revived, refuelled, and just in time for Halloween. It’s been a while since the last campfire catch-up, so let’s dive straight into what’s coming down the tracks.

Derailed & Doomed Takes the Spotlight

Choo Choo Charles has pulled into the station, and it’s hungry. October’s focus is firmly on Derailed & Doomed: A Choo Choo Charles Survival Diary, running under the Apex Predator Rule. Three lives, one monstrous train, and plenty of tracks to regret walking down. Expect new logs throughout the month — assuming I survive long enough to post them.

Other Series on Standby

While Charles hogs the spotlight, the rest of the Survivor Incognito universe is catching its breath. Alien: Isolation and Subnautica entries will appear intermittently, but October’s chaos belongs to the rails. Once the screams die down (or I do), we’ll see which world gets the next diary spotlight.

Looking Ahead

I’m keeping this month’s log short and sharp — like the claws of a certain spider-train hybrid. Expect the next Survivor Log once the Halloween smoke clears, complete with reflections on the run, blog milestones, and maybe a few hints of what’s waiting in November’s frost.

Continue the Journey

SnowRunner Survival: The Permagear Diaries – Driver Log Eleven: Red’s Day Out

SnowRunner Survival: The Permagear Diaries – Driver Log 11: Red’s Day Out

Today was Red’s time to shine. No trailers, no urgent deliveries — just exploration, practice, and a bit of light road-conquering in the name of science.


Finding the Quarry (and Trouble)

I started by taking Red along a road I hadn’t explored yet, which eventually led me to a quarry. Always good to know where the future cargo headaches will be coming from. I tried following the road deeper in, but it came to a natural stop, so I turned back and tried another route.

The “Road” That Was Mostly Water

This second route led to a flooded stretch of road. The map confirmed it was indeed a road — apparently someone at the Department of Transport here has a sense of humour. I was convinced Red would sink or stall, but to my surprise he waded through like a champ, slow but steady. On the way, I even found a raised suspension upgrade for him. I thought I already had it installed, but hey — spares are spares.

Watchtowers, Fuel Stops, and Mystery Upgrades

At the end of the flooded road, I had a choice: plunge into the unknown or head for a nearby Watchtower. No prizes for guessing which option I took. The tower revealed an upgrade, but before I could investigate, Red needed a refuel. Thankfully, I’d given him fuel cans in an earlier upgrade, so one quick pit stop later and we were good to go.

The upgrade turned out to be an engageable AWD… for something. I forgot to check which vehicle. Classic me.

Low+ and Loving It

Another Watchtower was on the map, so we headed there. This is where Red’s sweet spot revealed itself: Low+. He still bounced, but it was more of a playful hop than a chaotic pogo stick. I reached the tower, got briefly excited when I thought I’d found a second fuel station in Smithville Dam, then realised the map was upside down and it was just the same one I already knew about. Disappointment levels: high.

More Upgrades and a New Task

The tower also revealed another upgrade, perched right at the water’s edge. Given Red’s aquatic performance today, I wasn’t worried. We collected it — raised suspension for the Scout — which might just drag him out of retirement. While I was at it, Red got another refuel before heading back to the garage, where I discovered he’d been on stock suspension all this time. No wonder he’d been so bouncy. Raised suspension went on immediately.

“Boulders” and the To-Do List

Before calling it a day, I checked out a new task called Boulders. It involves two service spare parts to clear a road — easy enough in theory, but the waterlogged section leading there will be a problem until Frank gets his own raised suspension. I’m adding that one to the to-do list for now.

All in all, Red outdid himself today. From quarries to questionable road conditions, he handled everything without a tow truck rescue. He’s earned a well-deserved rest.


Continue the Journey

Day 10 |
You Are Here |
Day 12

More from SnowRunner Survival: The Permagear Diaries

Seven Days to Survive – Day 3: Honey, Zombies, and Home Improvements

Difficulty: Default Survival
Optional Rules: Permadeath, one horde night per week
“If you ever find yourself cornered by two zombies in a stranger’s living room, just remember: honey is nature’s antibiotic. Who knew bee juice would keep me alive?”

The Fetch Quest of Doom

The morning began with me jogging toward the latest house that Trader Rekt wanted looted for supplies. From the outside, it looked quiet — shutters drawn, roof sagging slightly, just another abandoned suburban home. But this is 7 Days to Die, so I knew the interior would be less “suburban charm” and more “screaming corpses.”

Sure enough, as soon as I hit the flag at the back of the property and stepped inside, the soundscape turned into a zombie alarm clock. Two of them barreled toward me, cutting off my escape. I managed to fight my way out, but not without a parting gift: infection. Perfect.

After clearing the stragglers and pocketing the supplies, I searched my pack for antibiotics. Nothing. A return trip to Papaw Residence confirmed the same — unless you count decorative piles of junk and a near-useless jar of murky water. But buried in a chest was salvation: honey. Exactly the right cure for my low-level infection. Bee magic saves the day.

Medical Centre Run

I staggered back to Rekt’s, handed over the supplies, and chose skill books as my reward. Then I spent some coin on more honey, because clearly zombies see me as a chew toy. Another fetch quest? Why not. This one sent me toward what looked like a pop-up medical centre — white tarps, overturned stretchers, and the distinct impression that the last patients didn’t leave voluntarily.

The zombies inside were fewer and slower, which suited my still-throbbing wounds. Looting the shelves, I stumbled on something that felt like Christmas morning: a cooking grill. Finally, the days of choking down charred snake meat are behind me. Now I can prepare food that doesn’t taste like it came out of a campfire accident.

I cleared the building, snagged the supplies, and returned to Rekt. My reward? Charred meat. Honestly, I think the man is trolling me. “Here’s some food, survivor.” Yes, Rekt, I literally just looted the thing that makes your reward obsolete. Thanks for nothing, champ.

Dew Collector Dreams

Back at Papaw, I started eyeing my supplies. Between yesterday’s scavenging and today’s haul, I realised I was close to crafting a Dew Collector. After a bit more rummaging and resource-gathering, the parts came together. I placed the contraption outside, whispered a hopeful prayer to the condensation gods, and waited.

After five minutes of staring at a metal bucket with mesh, I admitted that Dew Collectors are not exciting to watch in real time. With thirst still an issue, I decided to channel my boredom into base-building. The first layer of the horde base is now fully cobblestone. The second layer is patchwork, half cobble, half wood. The third layer? Still dreams and dust. At least I can say progress is being made, even if it looks more like a construction site than a fortress.

Thirst, the Silent Killer

The Dew Collector is great in theory, but water production is glacial. By mid-afternoon I was dehydrated again — stumbling around with blurry vision like I’d been on a pub crawl with the undead. Tomorrow, water is priority number one. Either the trader sells me a stash, or I’m boiling every murky puddle I find.

Still, the looming problem isn’t just thirst. It’s the horde night clock. Day 4 is practically here, and my base is still an empty shell. If I don’t switch gears soon, the zombies will be less “contained threat” and more “unwanted guests knocking down my half-finished walls.” Tomorrow, the hammer and cobblestone get priority — fetch quests can wait.

Continue the Journey

Day 2 | Day 3 (You Are Here) | Day 4 (Coming Soon)

SnowRunner Survival: The Permagear Diaries – Driver Log Ten: Bridges, Bumps, and Broken Dreams

SnowRunner Survival: The Permagear Diaries – Driver Log 10: Bridges, Bumps, and Broken Dreams

Mode: Permagear Rules | Optional Features: Winch-assisted woodland detours

Back to the Dam

I start the day by taking Red back to the Smithville Dam garage to decide on my next move. Both of my current main objectives need wooden planks, and as far as I can tell, the only viable source is back in Black River. The plan: build the bridge first, then worry about the rest.

I hop into Frank for the job, only to be faced with the first challenge — actually getting him there. Instead of taking the standard road, I opt for a less-beaten path through the trees, using the winch liberally and clambering over rocks like a determined mountain goat in truck form. If Frank had feelings, I’d say he was trying to prove something.

Frank: The Reliable Workhorse

Once in Black River, I load up the planks and head back to Smithville Dam. Along the way, I can’t help but admire Frank’s handling — reliable, sturdy, and never letting you down. He’s the truck equivalent of that one friend who always brings snacks and never cancels plans.

I top him up at the fuel station as a precaution (he probably didn’t need it, but who doesn’t like a full tank?). Crossing the Dam, I briefly flash back to the Dam level in GoldenEye 64, half-expecting to see polygons of Soviet guards wandering about.

Bridge Complete

The delivery goes smoothly, and with the wooden planks in place, the bridge is now a reality. Objective one: done. Frank earns a well-deserved rest while I swap into Red for some post-bridge exploration.

Red’s Bouncy Adventure

Immediately, I’m reminded of the difference in handling: Frank sticks to the ground like he’s got magnetic tyres; Red prefers to bounce along it like an over-caffeinated pogo stick. Past the bridge, I find a promising-looking track and decide to follow it.

The path is a mix of mud, stones, and one dodgy river crossing that all but confirms Red will need a raised exhaust if such a thing exists. After wrestling through, I spot an upgrade ahead and let my hopes soar — could this be the elusive raised suspension for Frank I’ve been searching for? In my head, I’m already firing him up for a triumphant drive back to the garage.

Reality Check

It isn’t. Instead, it’s Engageable AWD for a White Star truck — a vehicle I don’t own. Still, at least it’s unlocked for the future. I follow the road and, somewhat anticlimactically, end up back on the other side of the bridge.

That’s where I call it for the day. Tomorrow, Red will keep exploring, and maybe — just maybe — I’ll finally complete The Essentials task.

Continue the Journey

Day 9 | Day 10 (You Are Here) | Day 11

Blog at WordPress.com.

Up ↑