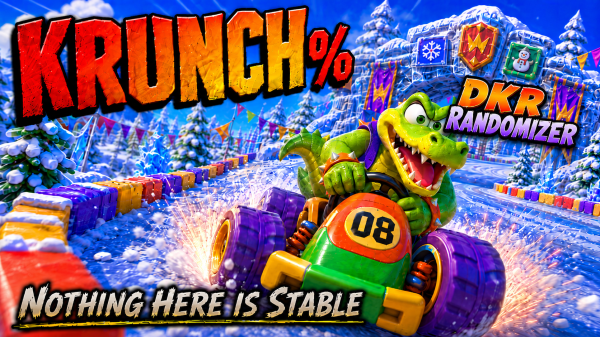
KRUNCH% Entry 7 | The Wizpig Wall Finally Falls


KRUNCH% Entry 7 | The Wizpig Wall Finally Falls

Seed: 232968 • Platform: Steam Deck • Character: Krunch • Format: No Commentary


The Race I Kept Avoiding

There is something I have been putting off for a while now.

Something waiting patiently for me in Dragon Forest.

Wizpig 1.

For those unfamiliar with Diddy Kong Racing, Wizpig 1 is one of the biggest walls in the entire game. The race itself sounds simple enough on paper:

  • Three laps
  • No balloons
  • Only zippers

In reality, it is one of the toughest skill checks in the game.

And Wizpig does not care how well the randomizer has treated you beforehand.

I have watched speedrunners destroy this race with T.T., the character many consider the best racer in the game.

The last time I personally beat Wizpig 1 was years ago on Adventure 2 using Tiptup.

This time?

I am doing it with Krunch.

Arguably the worst racer in the game.

At this point, I genuinely just want to prove to myself that it can actually be done.


Attempt After Attempt

Thankfully, the randomizer decides not to become completely evil here and gives me the standard Wizpig race.

Three laps.

Wizpig himself, however, shows absolutely no mercy.

Before starting, I establish a small rule for myself:

Five attempts maximum.

If I fail all five attempts, I reload the save state and reset mentally before trying again.

Simple.

Reasonable.

Probably necessary.

What follows is over an hour of learning how Krunch actually works under pressure.

Every failed attempt teaches me something new:

  • Be gentle with the control stick
  • Do not panic steer after zippers
  • Let the kart settle naturally
  • Know when to release the A button and when to accelerate again

More than anything else, the race becomes about consistency.

You do not need a perfect run where every zipper is flawless.

But you need to get dangerously close to one.

One bad correction.

One bad angle.

One missed zipper.

And Krunch immediately reminds you why most people do not pick him.


Attempt 7

Then Attempt 7 happens.

I get the blue boost at the start.

Good.

I need that if I want any chance of staying near Wizpig.

I hit the zippers cleanly and move into lap two right behind him.

Then, on the first zipper of lap two, I take the lead.

By lap three, I am somehow still ahead.

Not comfortably.

Not safely.

Just enough to keep believing this might actually happen.

Then the final zipper arrives.

Wizpig slips back ahead after I spend most of lap three in first place.

I hit the purple zipper.

The kart surges forward.

The finish line appears.

1st place.

Honestly, I still do not fully know whether Wizpig pushed me across the line or not.

It was that close.

A complete photo finish.

And honestly?

I do not care.

I had just beaten Wizpig 1 with Krunch.


Tears At The Finish Line

Wizpig 1 is already considered one of the toughest races in Diddy Kong Racing.

Beating him with Krunch feels like a genuine flex in anybody’s book.

I let the cutscene and credits roll while sitting there crying tears of joy.

Years ago, when I first booted up Diddy Kong Racing on the Nintendo 64, I never imagined I would one day come back and beat one of childhood gaming’s biggest walls using the character most people would never willingly choose for it.

Back then, Tiptup was enough.

Now?

Krunch survived.


The End Of Seed 232968

And honestly, this feels like the right place to end this particular randomizer.

Seed 232968 has taken me through Smokey 2, Darkmoon Caverns, Star City, Silver Coin Challenges, and more than a few moments where I questioned whether the randomizer was actively trying to ruin my day.

Most importantly, it taught me things about Diddy Kong Racing that I had never really needed to learn before.

A-tapping.

Better drifting.

Split timings.

How much speed can be gained or lost through tiny mistakes.

Then came Frosty Village.

A one-lap Silver Coin Challenge that became the wall of the entire run.

Could it be beaten?

Probably.

Given enough time, enough attempts, and enough stubbornness, I suspect Krunch could eventually force his way through.

But Survivor Incognito has always been built around one simple idea:

Surviving, Not Suffering.

The challenge stopped being an adventure and started becoming a grind.

So rather than spend weeks throwing Krunch at the same obstacle, I decided to call this run where it felt complete.

At Wizpig 1.

The wall that had been waiting for me since the beginning.

The race I kept avoiding.

The race that finally fell.

Seed 232968 may not be fully complete, but it achieved exactly what I wanted it to achieve.

Krunch survived.

And somewhere beyond the finish line, a brand new randomizer seed is already waiting.


Episode Video


Progress Log

  • Current Seed: 232968
  • Balloons: 18
  • Wizpig Amulet Pieces: 2
  • T.T. Amulet Pieces: 2
  • Bosses Defeated: Bubbler 2, Smokey 2, Bluey 1, Wizpig 1
  • Current Threat Level: Chapter complete

Continue the Journey


Entry 6 | Somehow, Star City Went Well ←


KRUNCH% Archive

— All entries in this run.

Next: KRUNCH% – DKR Randomizer 2.0 begins soon.


Super Mario ROM Hacks Archive

— All Mario ROM hack content.
Super Mario 64 Randomizer – Log 14: Wrong Turn, Right Reward

Progress: Wing Cap Unlocked
Platform: Steam Deck
Settings: Vanilla Mario & Music

“This was not the route I planned. It was, however, the route I needed.”

With access to the Tiny-Huge Island paintings finally unlocked, I head in expecting something useful.

Instead, I arrive in Hazy Maze Cave.

This is a course I actively dislike. I would genuinely take any other level over this one.

That said, there is one reason not to immediately leave: this is where the Metal Cap switch normally lives.

If the randomizer has put anything important here, this is where it would be.

Hazy Maze Cave: Reluctant Progress

Before committing to the cap route, I pick up a couple of stars tied to the swimming beast in the cavern.

While doing that, I start mentally tracking Red Coin placements.

Future me is going to regret this level.

Eventually, I reach the metal-cap transition.

It isn’t the Metal Cap.

It’s the Wing Cap switch.

The Wing Cap: Problem Solved

I wasn’t prepared for this.

Still, there’s no chance I’m leaving without activating it.

I hit the switch, unlock the Wing Cap, and leave immediately.

No exploring. No celebration. Just exit.

Just to Be Sure

Out of curiosity, I check the other painting in the area.

It also leads to Hazy Maze Cave.

Noted.

What This Changes

Finding the Wing Cap clears several long-standing blocks:

  • Shifting Sand Land can now be completed
  • Bob-Omb Battlefield is no longer locked behind flight
  • The Basement Wing Cap stage is now accessible

That’s a large chunk of the castle back on the table.

Before finishing up, I do some light scouting and manage to grab one more star.

Log 14 Status

  • Wing Cap: Found
  • Major Blocks: Removed
  • Hazy Maze Cave: Still unpleasant

I’m not sure where the next log will focus, but this finally feels like proper progress again.

YouTube – Log 14 Video

After all this time, Mario can finally leave the ground.

Continue the Journey

Previous Log | Next Log

Super Mario 64 Randomizer Hub

Game: Super Mario 64

Super Mario 64 Randomizer – Log 13: Red Coins and Sunken Progress

Progress: 70+ Stars Reached
Platform: Steam Deck
Settings: Vanilla Mario & Music

“Today’s plan was simple. The execution, less so.”

I went in with one goal: finish Jolly Roger Bay and Dire, Dire Docks. Two courses I’d already poked at, now ready to be properly cleared.

Jolly Roger Bay: Chests, Coins, and Precision Jumping

First up was the treasure chest star. Finding the first chest took less time than expected, which immediately made me suspicious.

Chests two and four were conveniently paired together. Chest three, naturally, required a cannon.

With the chests dealt with, only the Red Coin Star and the 100-Coin Star remained.

The 100-coin star was painless. No drama. No surprises.

The red coins were another matter.

One coin sat in a position that rejected every sensible solution I tried. Triple jumps failed. Cannon angles failed. Repeated attempts achieved nothing except frustration.

In the end, the answer was a backflip. One precise position. One clean jump.

It worked immediately.

Jolly Roger Bay: cleared.

Dire, Dire Docks: Clean Water, Better Decisions

Next stop was Dire, Dire Docks.

This time, I changed approach. I focused on collecting all the red coins first, or at least most of them, before worrying about the 100-coin star.

The level behaved itself. No forced exits. No sudden ejections back to the castle.

I didn’t get sucked out of the course this time, which confirms that last log was just bad luck rather than punishment.

With the red coins secured, the 100-coin star followed naturally.

Dire, Dire Docks: finished without incident.

Log 13 Status

  • Total Stars: Past 70
  • Courses Cleared This Log: Jolly Roger Bay, Dire Dire Docks
  • Remaining Stars: 50
  • Wing Cap: Still missing

Two more courses off the board. The castle is opening up fast now.

Fifty stars left.

YouTube – Log 13 Video

Steady progress. Fewer exits. Still no Wing Cap.

Continue the Journey

Previous Log | Next Log

Super Mario 64 Randomizer Hub

Game: Super Mario 64

Super Mario 64 Randomizer – Log 12: Every Door Is a Trick

Super Mario 64 Randomizer – Log 12: Every Door Is a Trick

Progress: 60 Stars Reached
Platform: Steam Deck
Settings: Vanilla Mario & Music

“The castle is technically helping. It’s just doing it in the worst possible way.”

I set off with a clear goal: the Snowman’s Land door.

On the way, I try the Tiny-Huge Island painting. Still locked. Still mocking me.

Back to Snowman’s Land. I open the door, jump in, and immediately realise something’s wrong.

Behind the painting is Dire Dire Docks.

At this point, I’ve stopped being surprised.

Dire Dire Docks: Progress, Eventually

I start with the chests. I get distracted by coins almost instantly, then remember why I’m here.

Most of the chests are grouped together, which makes this far easier than expected. One is awkward, but manageable.

Next up: the Manta Ray.

I miss rings in ways that feel intentional. Bad angles. Poor timing. Repeated failure.

Eventually, I abandon the attempt and swim into the other area of the docks.

Bowser’s submarine isn’t there. He’s clearly moved on.

That at least makes grabbing stars painless.

Stars, Water, and Poor Decisions

With the sub gone, I clean up:

  • A floating water star
  • The Jet Stream star

I give the Manta Ray another go. This time it works immediately, because of course it does.

That pushes me to 60 stars. Halfway through the run.

Only two stars remain here:

  • Red Coin Star
  • 100-Coin Star

I decide to clear them while I’m here.

The water has other ideas and ejects me straight out of the level and into the castle pond.

I take the hint.

The Basement: Nothing Is Where It Should Be

I head downstairs.

First job: MIPS. No trouble at all.

Next up is the entrance that should be familiar by now.

Instead of what I expect, I get Jolly Roger Bay.

The randomizer is clearly enjoying itself.

One chest is placed somewhere deeply inconvenient. I find two in the cave, not four.

The missing one stays hidden, but there’s a star nearby, so it’s not a total loss.

I move on to Plunder in the Sunken Ship.

I almost die twice trying to coax the eel out without getting electrocuted. Eventually, it behaves.

Log 12 Status

  • Total Stars: 60
  • Dire Dire Docks: 5 / 7 stars complete
  • Jolly Roger Bay: 3 stars collected
  • Wing Cap: Still missing

The castle keeps opening up. Progress is real. Directions are optional.

YouTube – Log 12 Video

Sixty stars in. Still grounded.

Continue the Journey

Previous Log | Next Log

Super Mario 64 Randomizer Hub

Game: Super Mario 64

Super Mario 64 Randomizer – Log 8: Lava Coins & Cold Comfort

Run Type: Mario 64 Randomizer

Controller: Not an N64 controller, and it shows

Log 8 – Video

Bowser in the Fire Sea – Red Coins First, Regret Second

  • Two attempts to collect the red coins
  • Zero elegant jumps
  • One unavoidable lava tax

The star itself was worse than the coins. No safe angle.
A lost life was mandatory. I paid it and moved on.

Upstairs Confusion & Painting Roulette

  • Bob-Omb Battlefield → Bowser in the Dark World
  • Cool, Cool Mountain (allegedly)
  • Secret Slide (already done)
  • Whomp’s Fortress → actually Cool, Cool Mountain

Cool, Cool Mountain – Making It Work

Red coins were half-found and poorly remembered, so I pivoted to the
100 Coin Star. That meant slides, exits, re-entries,
and the game gently mocking me.

After exiting again, the first star appeared right in front of the big penguin,
as if it felt sorry for me.

Session Results

  • Bowser in the Fire Sea – Red Coin Star cleared
  • Cool, Cool Mountain – 3 / 7 stars
  • Lives lost: accepted

Continue the Randomizer

Randomizer Hub |
Log 7: Bowser in the Fire Sea Was Not the Plan |
Log 8 |
Log 9: Coming Soon

Super Mario 64 Randomizer – Log 7: Bowser in the Fire Sea Was Not the Plan

Super Mario 64 Randomizer Log 7: Bowser in the Fire Sea Was Not the Plan

Mode: Randomizer
Lives Remaining: 17
Stars Collected: 38
Stars Remaining: 82

With Tick Tock Clock finally behind me, I head back downstairs to see what’s lurking behind the entrance that should lead to Hazy Maze Cave. The answer, apparently, is Bowser in the Fire Sea.

To make matters worse, a quick look around confirms the red coins are floating over lava. That problem can wait.

Bowser First, Questions Later

After a few failed attempts getting my bearings, I respawn right next to the Bowser fight entrance. I briefly consider going for the red coins first, then decide against it. Survival comes first.

This somehow turns into the only time I’ve ever failed this fight. I misjudge my position, step where I shouldn’t, and Mario drops straight into the lava.

The second attempt goes as expected. Bowser goes down, the key is mine, and we all agree not to talk about the first try.

The Red Coins Problem

With upstairs now unlocked, I return to the Fire Sea red coins. Several attempts later, it’s clear this set is going to be a nuisance. Precision jumps over lava with a randomizer twist are not something to rush.

I leave them for another session — and another video.

Video

Run Status

  • Lives Remaining: 17
  • Stars Collected: 38
  • Stars Remaining: 82
  • Next Goal: Explore upstairs and see what the randomizer has moved.

Continue the Randomizer

Randomizer Hub |
Log 6: Time Stops for No Mario |
Log 7 |
Log 8

Blog at WordPress.com.

Up ↑