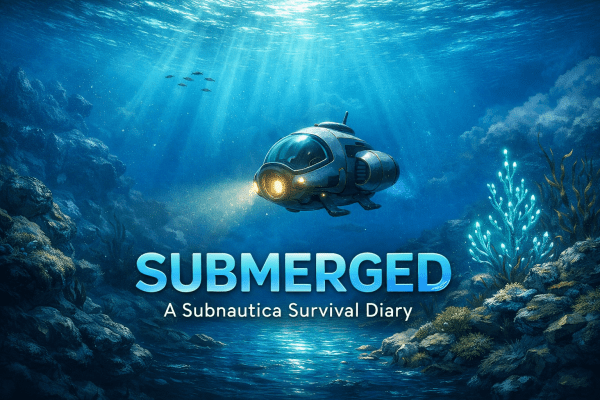
Super Mario 64 Randomizer – Log 19: Secrets, Wigglers, and a Vanishing Star

Super Mario 64 Randomizer – Log 19: Secrets, Wigglers, and a Vanishing Star

Game: Super Mario 64 Randomizer
Platform: Steam Deck
Format: No Commentary

Video: Returning to Tiny-Huge Island to defeat Wiggler, clear the Five Itty Bitty Secrets, race Koopa the Quick, and attempt the Piranha Plant star (no commentary)


Back to the Island

It was time to head back to Tiny-Huge Island. By this point I was starting to get used to the slightly unpredictable nature of the entrance. Sometimes I would spawn on the tiny island, sometimes on the huge one. It seemed random enough that I stopped worrying about it and simply used the opportunity to learn the layout properly, especially the pipes that allow you to switch between the two versions of the island.

I have to admit I appreciate how those pipes are contained entirely within this level. Given that reaching the Wing Cap stage in this seed requires a detour through Hazy Maze Cave, having something straightforward for a change felt like a welcome break.

Taking the Easy Win

My original plan was to start by collecting the Five Itty Bitty Secrets, but once I was inside the level I realised I had a chance to deal with Wiggler first. It’s one of those stars that rarely causes trouble once you reach it, so it felt like a quick and easy one to tick off the list.

Sure enough, the fight went exactly as expected. A few well-timed jumps later and the star was mine without any real drama.

Secrets Found

After that I turned my attention back to the Five Itty Bitty Secrets. With the locations already mapped out from the previous visit, this one didn’t give me any trouble either. It was one of those moments where preparation pays off and the star falls into place quickly.

Naturally, that’s when things started to become a little more complicated.

An Unexpected Race

While trying to plan my route for the next objective, I found myself thinking about the Piranha Plants scattered around the island. There are five of them in total, and I was trying to visualise the best order for dealing with them.

Before I could fully commit to that plan, though, I ran into Koopa the Quick and ended up accepting his rematch. The race itself was closer than I expected. In fact, I’m fairly certain that if he hadn’t nudged me toward the flag near the end, I might have lost that one.

The Piranha Plant Problem

With the race finished, I went back to dealing with the Piranha Plants. It took a few attempts to get all five of them cleared, but eventually the star appeared. As tends to happen in this level, it launched itself to another part of the island rather than landing conveniently nearby.

My solution seemed simple enough. I switched to the tiny island to move closer to where the star had landed, intending to switch back to the huge island once I was in the right position.

That’s where things went wrong.

The Star That Disappeared

When I returned to the huge island, the star was nowhere to be seen. I couldn’t tell whether I had completely forgotten where it landed, somehow managed to miss it while staring right at it, or whether switching between island sizes had caused it to despawn entirely.

I searched the island repeatedly, circling the area far more times than I’d like to admit. Eventually I had to accept that something had gone wrong. Whether it was my memory or the mechanics of the level, the result was the same: the star wasn’t there anymore.

Accepting the Loss

In the end I decided the sensible option was to cut my losses. I exited the course and left Tiny-Huge Island for another visit later. If nothing else, the lesson was clear enough.

Next time I’ll collect the star first before switching between islands.

Continue the Journey

← Log 18
Log 20 →

🧢 Mario 64 Randomizer Hub

Super Mario 64 Randomizer logs are written after each recording session. Sometimes the biggest challenge is remembering where the star actually landed.

Super Mario 74: A Survivor’s Journey Log 5 – Azure-Abyss Cleared

Super Mario 74 – Log 5: Azure Abyss Cleared

Platform: Steam Deck
Mode: Original Edition
Rules: No savestates (except between entries)
Format: No Commentary

Video: Azure Abyss red coins, 100-coin star, Metal Cap puzzle, and Wall of Failure attempts (no commentary)


Back to Azure Abyss, and straight into what I knew was going to be a longer task — the red coins, or Red Treasure Hunt as this one is called, along with the 100-coin star on top of it. The layout of this course makes it awkward to rush anything. It’s deeper than it first looks, and the last thing I wanted was to be scrambling for air because I got careless. So I took it slower, moving between the land sections and the underwater routes, trying to keep things controlled rather than efficient.

Somewhere along the way I realised my swimming had improved without me really noticing. I’m not about to claim anything close to speedrunner level, but there was a rhythm to it that I don’t remember having before. Funny how that happens just by playing more. It made the coin collection smoother, even if it didn’t make it any shorter.

The red coin star itself sits safely above the water, which helps, but by the time I had all eight coins I was still short on the total. That’s when it turned into a bit of a hunt. I hit 97 coins and started running out of places to check. I didn’t want to spend more time swimming if I could avoid it, so I went after one of the flying enemies, hoping it would drop what I needed. It dropped two coins. 99. Close enough to be frustrating.

I eventually tracked down the final coin, though it took longer than it should have, and with that both the red coin star and the 100-coin star were done. Not difficult, just drawn out enough to make every mistake feel like wasted time.

Next was Heavy Metal Required, and the name doesn’t leave much to guess. I needed the Metal Cap. I’ve seen this done without it, but I’m not interested in making things harder than they need to be, so I stuck with the intended route. With the cap active, I could sink properly underwater and push the purple switch, which brought out the timed blocks.

Everything felt fine at first. The jumps were clean, the timing felt right, and then right at the end I walked straight off the final block. No complicated mistake, no bad angle, just walked off. The second attempt went the way the first one should have, and the star was mine without any further issues.

That left one final star in the course: Wall of Failure. The name fits. I knew exactly what I needed to do — get onto the platform, long jump, grab the ledge — and in theory it’s simpler than the alternative route. In practice, it took far longer than it should have. I lost count of the attempts. Too much distance, not enough distance, missing the ledge entirely, every variation you can think of showed up at least once.

When it finally worked, it wasn’t clean or dramatic, it just… worked. Mario grabbed the ledge, pulled himself up, and the star was there. That was Azure Abyss done.

Even with the course complete, I’m still two stars short of opening the next star door in this area. That means next time I’ll be heading through the double doors instead. I already have the key from Bowser, so it’s time to open up more of the castle and see what else this hack has waiting.


Continue the Journey

Previous Entry:
Super Mario 74 – Log 4

Next Entry:
Super Mario 74 – Log 6

Super Mario 74 Hub:
Super Mario 74 – A Survivor’s Journey

Stranded: A Minecraft Survival Diary – Log 9: Finding the Village Again

Stranded – Log 9: Finding the Village Again

Platform: Steam Deck
Mode: Survival
Format: No Commentary

Video: Mining for iron, creeper damage at the base, wandering trader visit, and finally finding the village again (no commentary)


Back to the mine again. I was determined to find at least some iron, and if I’m honest, this style of mining has become a good way of clearing my head. It’s repetitive, predictable, and for the most part nothing unexpected happens. Naturally that means I find more copper than I know what to do with. I’ve accepted at this point that copper is everywhere, but at least it means I can keep making tools and replacing armour without worrying too much about running out.

Eventually the mine gives me what I was actually looking for. Iron. Not much, only five blocks, but I’ll take what I can get. That’s enough for a better weapon and a shield, which feels like a real upgrade. I normally go straight for a sword, but while deciding what to craft I noticed the axe actually does more damage, so I decide to go with that instead. The problem is I need wood, which means going back to the house, and of course it’s night time and raining when I finally leave the mine.

I take the chance anyway and run straight across Copyright Bridge back to the house. No incidents this time, which almost feels suspicious. I spend the night inside and wait for morning.

When the sun comes up, I watch a few monsters burn away in the daylight, but some of them have armour and seem completely unaffected. I spot a creeper nearby and for a moment I consider testing the new axe on it, but a skeleton quickly convinces me that my armour isn’t good enough for that kind of experiment. I retreat back inside and decide I might need to expand the fence, add more light, or both. Things are getting a little too close to the house at night for my liking.

I head out to tend the farm and almost immediately the creeper makes another attempt at ending the run. This time it only destroys part of the fence, but it’s still enough to be annoying. I replant the wheat, grab some wood, and start repairing the damage. Past me had already made spare fence pieces, which feels like a rare moment of good planning.

While I’m fixing things, I notice a spider sitting on the roof of the house. During the day it isn’t aggressive, so I decide to leave it alone. I’m not a fan of spiders in games or in real life, but this one isn’t causing trouble, so it can stay where it is.

Not long after that, a Wandering Trader shows up with two llamas and decides my house is apparently a good place to live. I’m not sure what they expect from me, but I’m not building anyone a spare room. For now they can stand outside and do whatever wandering traders do.

With the base repaired, I decide the next goal is finding the village again. I know it exists, I just don’t know exactly which direction I went before. I remember heading right last time and getting nowhere useful, so this time I go left instead, keeping roughly the same path but changing the direction slightly.

After a short walk, I spot something in the distance that looks familiar. As I get closer, I realise it is the village. Somehow the villagers seem to be handling the monsters better than I am, or they’re very good at rebuilding after creepers visit. I don’t know much about villagers yet, or what their different outfits mean, but just finding the place again feels like a win.

I make sure I know the way back before doing anything else. The last thing I want is to lose the village again after finally finding it. This time the return trip goes smoothly, and before long I’m back at the house with no problems at all.

The Wandering Trader is still there, which makes me wonder if they’re planning to stay permanently. As far as I know they don’t get squatters’ rights unless they move inside, so for now I leave them alone.

I think about going out again to see what else is nearby, but night is coming and I don’t feel like testing my luck. There’s still plenty to do at the base anyway. I want to expand the farm, start growing cocoa beans properly, and make the fence a bit larger so things stop getting quite so close at night.

Finding the village again was enough progress for one day. I head to bed and call it there.

Continue the Journey

Previous Log |
Next Log


Stranded Hub

Submerged: A Subnautica Survival Diary – Log 12: Growing Up

Submerged – Log 12: Growing Up

Platform: Steam Deck
Mode: Survival
Format: No Commentary

Video: Floating Island farming run, lifepod sweep, wreck exploration, and base expansion (no commentary)


I had a lightbulb moment today. I’m fed up of chasing fish.

Every time my hunger dips, I stop what I’m doing, grab the knife, and head outside like I’ve never planned further than the next five minutes. It works. It keeps me alive. It also feels temporary.

The island has fruit. The fruit grows on trees. Trees can be replanted.
The solution has been sitting there the entire time.

If I’m here for the long haul, I need to act like it.

I headed back to the island with one job: harvest what I need and leave. No sightseeing. No heroic dives. Just infrastructure.

As soon as I arrived, I noticed a distress signal directly below the island. Of course there was. I added it to the list and focused on the plants first. Priorities.

I moved through the vegetation carefully. Some of it looks useful and isn’t. Then I found the Bulbo Trees.

Knife out. Controlled hits. Samples collected.

Once cut, they’re on a timer. That’s all I could think about as I made a quick detour down to the lifepod beneath the island. Inside, I picked up a PDA that helpfully informed me the Aurora meeting point was… the island I was just standing on.

Great. Glad we cleared that up.

I didn’t hang around. Back to base.

Titanium gathered. Indoor growbed fabricated. Crops planted immediately. No hesitation.

I stood there longer than I expected, watching them settle into place. It felt different. Less scrambling. More planning.

If this works, food stops being a daily chore. Water still needs attention, but solving one problem at a time is how this becomes manageable.

With farming underway, I checked my signals properly. Two lifepods stood out. One near the Aurora. Another roughly four hundred metres away and one hundred metres down.

I followed the first coordinate carefully. Adjusted for the compass. Reached it.

It was already looted.

I’ve clearly been there before. I don’t remember recording it. At some point in the past, I must have visited, taken what I could, saved, and moved on. Not ideal. From now on, cleared pods get marked properly.

On the way to the second lifepod, I found a wreck and went inside. I can’t help myself. Inside, I found a Battery Charger fragment and another Bioreactor fragment.

The charger is the real win. I’ve been rationing batteries like they’re rare artefacts. One more fragment and that changes completely.

The second lifepod was intact but empty. I had a small laugh at how it had all ended. The ocean has a sense of humour. I took what I could and left.

Back at base, I decided to expand. A tunnel. Another room. The fabricator and I had a brief disagreement about placement, but eventually it cooperated.

The base feels less like a crash shelter now and more like something intentional. At the same time, hull integrity keeps dropping with every addition. The bigger it gets, the weaker it becomes. Reinforcement is climbing the list quickly.

The crops are growing.

That alone changes the tone of everything.

I still need to head back to the Aurora and see what’s waiting in the Captain’s Quarters. That will be deliberate. Planned.

For now, though, survival feels… easier.

I don’t trust that feeling entirely.

But tonight, I’m not chasing fish.

I’m growing them out of the equation.

Continue the Journey

Previous Log |
Next Log
Submerged Hub

Super Mario 64 Randomizer – Log 18: Clearing the Battlefield and Finding the Missing Course

Super Mario 64 Randomizer – Log 18: Clearing the Battlefield and Finding the Missing Course

Game: Super Mario 64 Randomizer
Platform: Steam Deck
Format: No Commentary

Video: Finishing Bob-Omb Battlefield with the 100-coin and red coin stars before discovering Tiny-Huge Island hidden in an unexpected place (no commentary)


One Last Trip to the Battlefield

Much like with Shifting Sand Land before it, the time had come to finish up Bob-Omb Battlefield. I didn’t go in with any particular plan other than knowing there were three stars left to collect here. My thinking was simple enough: whichever of the two main stars I managed to grab first would decide what the next objective would be.

During the process I finally discovered where the Bob-Omb who opens the cannons had been hiding. After all that searching in the previous visit, I now had access to the cannons in the level. A little late perhaps, but still useful to have available.

Flying Through the Battlefield

I decided to aim for the fifth star first. In a normal run this is the one where you fly through the rings of coins, but here the areas were scattered around the map. Fortunately they weren’t too difficult to locate. I made a brief stop on the floating island to collect the final ring and, while I was there, took note of where a few red coins were sitting.

My earlier instinct turned out to be correct. The Wing Cap was going to be necessary to reach them.

Collecting that star brought my total up to ninety stars, which meant I had officially reached three quarters of the total needed for the run. With that milestone in place, I headed back in to deal with the remaining stars.

Coins Before Red Coins

The next task was the red coin star, but before chasing those I decided to tackle the 100-coin star. The reason was simple: wherever the hundredth coin is collected, that’s where the star appears. I didn’t want to risk it spawning high in the air where I would be forced to grab it using the Wing Cap.

I was already planning to use the Wing Cap for the red coins anyway, but this approach meant I could control where the star appeared and keep things simple. It also gave me some extra flight practice. Between the Wing Cap switch course and another red coin stage still ahead, I figured any extra time getting used to the controls would help.

Thankfully the plan worked out cleanly. I gathered the coins I needed, secured the 100-coin star, and then collected the red coins without too much trouble. With those done, Bob-Omb Battlefield was finally complete.

Looking for What I Missed

With the battlefield cleared, the next step was to start checking areas I either hadn’t visited yet or wasn’t entirely sure I had explored properly. I knew there were two entrances upstairs that still needed investigating, but before heading there I decided to check somewhere else first.

The area where Bowser in the Dark World normally sits.

When I jumped in, the answer to the missing course mystery finally revealed itself. The stage waiting there was Tiny-Huge Island.

A Rough Welcome

My first attempt didn’t last very long. The level gave me a fairly direct welcome by ejecting me from the stage almost immediately. The second attempt went better, though, and I managed to grab one of the stars before things got out of hand.

Something else I noticed fairly quickly was that spawning into the stage isn’t consistent. Sometimes I appeared on the tiny island, other times on the huge version. My assumption is that it’s a fifty-fifty chance, although I seemed to land on the huge island more often than the small one during this session.

Mapping the Island

Progress in the level was limited this time around, but it wasn’t completely unproductive. I managed to locate where the five itty-bitty secrets are positioned and also identified the areas where the Piranha Plants can spawn. Even if I didn’t collect many stars here yet, having that information will make the next visit far more efficient.

The Goal Gets Closer

With Bob-Omb Battlefield finished and one more star collected from Tiny-Huge Island, the run now sits at ninety-three stars. Each entry brings the end goal closer, and the castle is slowly running out of places to hide the remaining ones.

Continue the Journey

← Log 17
Log 19 →

🧢 Mario 64 Randomizer Hub

Super Mario 64 Randomizer logs are written after each recording session. Plans rarely survive contact with the castle.

Submerged: A Subnautica Survival Diary – Log 11: Copper, Caves, and Structural Regret

Submerged Log 11: Copper, Caves, and Structural Regret

Platform: Steam Deck

Video: Base upgrades, lifepod dive to 250m, cave panic, and Seamoth improvements (no commentary)


I was going to chase the black box. Then I remembered the giant alien laser. Priorities shifted.

The plan had been simple: head back to the Aurora, find the black box data, and pretend I wasn’t about to get shot out of the sky by an alien cannon.

Reality check: I’m not leaving this planet anytime soon.

If I’m here for the long haul, the base needs to stop feeling like a damp hallway with ambition.

Bulkheads, Flooding, and The Game Laughing Directly at Me

I started by looking at a bulkhead, because in my head that means “less flooding” and “more responsible adult survival.”
In practice, the game basically laughed and told me to enjoy living in a fish tank.

So I pivoted to the upgrades that actually move the needle:
more power and medical supplies.

Solar Power and the Medkit Fabricator: A Short Story About Suffering

Goal one: another solar panel.
Goal two: a medkit fabricator, because I’m tired of treating “hope” as a healing item.

Then I checked what I needed and immediately had a new enemy: creepvine samples.
Not because they were hard to get.
Because I already had them.
And then I ate them.

So off I went to replace the snacks I shouldn’t have treated as snacks.

Radio Interruptions: Lifepod 4 Joins the To-Do List

Mid-upgrade, I got a distress signal from Lifepod 4, with the helpful advice to wear a radiation suit.
Which is fair.
But I’ve already handled that situation.

So Lifepod 4 gets added to the list of places I will absolutely go to…
once I’m done putting out the current fires I set myself.

Copper: The Myth, The Legend, The Personal Insult

Copper remains elusive.
I’m finding diamonds more often than copper, which feels like the planet is doing comedy at my expense.

All of this because I need copper wire for a computer chip.
Which means the moment I want to build something “basic,” the universe decides I need to earn it.

At this point I’m seriously considering a scanner room, purely so I can stop living my life like a metal detector with legs.

Medkit Fabricator Online (Finally)

Once the medkit fabricator was up and running, I moved on to a quality-of-life upgrade I should have made ages ago:
a beacon.

I named it “base”, because:

1) it is a base

2) I would like to find it again

3) I don’t need to overthink this

Valentino Goes Deep: The 250m Lifepod Run

With “base” now marked like a sensible person would do, I took Valentino for a drive to a lifepod sitting around 250m down.

Naturally: no survivors.
The ocean doesn’t do happy endings.

But I did come away with something useful: a blueprint for a Repulsion Cannon.
I still need a Modification Station before I can get too excited, but I’ll take a win when it shows up.

The Beautiful Cave That Immediately Became A Problem

Next up: a cave near another lifepod location.
The cave itself is gorgeous.
It’s also the kind of place where you realise, mid-swim, that you have no idea where the exit is.

And that’s when I moved “make a beacon” from “good idea” to “non-negotiable survival requirement.”

I eventually found my way back out, and I didn’t drown in a glowing underwater postcard, so that counts as success.

Valentino’s New Problem: He Can’t Go Anywhere Without Taking Damage

Back at base, I had a new priority: hull reinforcement for Valentino.
He couldn’t so much as breathe underwater without scraping something and taking damage.

So I did what any reasonable person would do:
I went hunting for diamonds.
For armour.
On a submarine scooter.
Completely normal.

Eventually I got lucky and upgraded Valentino with:

  • Hull Reinforcement
  • Storage Module

Now he’s tougher, roomier, and slightly less likely to come home looking like he lost a fight with a rock.

Next Time (If Copper Stops Playing Hard To Get)

  • Hit Lifepod 4 (radiation warning acknowledged, thanks)
  • Seriously consider a Scanner Room to end the copper scavenger hunt
  • Start working toward the Modification Station so that Repulsion Cannon isn’t just a tease
  • Revisit the Aurora plan… after accepting I’m probably getting shot down anyway
Continue the journey:

Log 10 | Log 11 (You are here) | Log 12

Black Tides – A Dredge Survival Diary Log 1: Fog, Favors, and Fishing on Borrowed Time

Black Tides – Log 1: Fog, Favors, and Fishing on Borrowed Time

Platform: Steam Deck
Mode: Normal
Format: No Commentary

Video: Shipwreck, first days in Greater Marrow, loan boat upgrades, special orders, fog panic, and the red light sighting (no commentary)


We begin on a boat with no context and a single instruction: Angler Wanted. Before I can decide whether that was a good idea, the sea answers for me. Fog rolls in thick and immediate. Rocks appear too late. The hull gives way without ceremony. The next thing I know, I’m waking beside a lighthouse that apparently exists more for decoration than navigation.

The town is called Greater Marrow. The mayor meets me at the dock as if shipwrecked strangers are part of the morning routine. He’s calm, helpful, almost like he rehearsed it. He replaces my ruined vessel with another and suggests I fish to get my bearings. One instruction matters more than the rest: return before dark. I don’t question it. I head out, fill the hold with whatever bites, and turn back while the sky still holds light.

Back at port, the mayor informs me my original boat is beyond repair. The replacement is mine on loan. I sell my catch to the fishmonger, and part of the earnings go toward the debt. Fifty dollars. Manageable. Survival often is, at first.

The mayor hands me a research part and points me toward the shipwright. They deal in upgrades and repairs. I install an extra engine and use the research to unlock an improved outboard. Day one ends with a slightly faster boat and a slightly smaller debt.

Day two begins smoother. The new engine makes a difference immediately. I fish efficiently and find a note sealed inside a bottle. It feels deliberate. I suspect there will be more of them. I stay out later than intended. Darkness creeps in faster than expected. Behind Greater Marrow, a red pillar of light cuts into the sky. It stands there, patient. I ignore it for now.

The fishmonger has a special order: a gulf flounder and a grey eel. That means new equipment. I dent the loan again, visit the shipwright, and purchase the required rod. Preparation ends the day.

On the third morning, the lighthouse keeper questions my presence. I tell her I’m here to fish. She listens, but I don’t think she believes that’s the whole story. The mayor asks for a simple delivery to Little Marrow. It’s a short crossing. The dockworker pays me with a book on sustainable fishing. Useful. It reads itself as I travel.

I catch two stingray. They occupy more space than they’re worth, but they clear my remaining debt when sold. The mayor opens access to the dry dock, though upgrades require materials I don’t yet have. Expansion will have to wait.

I return to finish the fishmonger’s order. Arrow squid and black grouper follow. The squid shift locations as if aware they’re being hunted, or perhaps the fog distorts more than visibility. Panic rises when I linger in it too long. I learn quickly that staying out after dark carries consequences that aren’t always visible.

The eel is delivered. Another special order replaces it. Then another. This time: crabs. I’m handed a crab pot and instructed to wait. Patience becomes part of the trade.

Before ending the third day, I strengthen the boat further. A more powerful light. An upgraded engine. Small advantages against a coastline that doesn’t feel entirely natural.

Three days in, the debt is cleared. The boat is faster. The sea is watchful. And the red light remains.


Continue the Journey

Next Entry:
Black Tides – Log 2

Black Tides Survival Diary:

View the full Black Tides series

Dredge Survival Hub:

Visit the Dredge Survival Hub

Super Mario 74: A Survivor’s Journey Log 4 – Toxic Stars & Unexpected Progress

Super Mario 74 – Log 4: Toxic Stars & Unexpected Progress

Platform: Steam Deck
Mode: Original Edition
Rules: No savestates (except between entries)
Format: No Commentary

Video: Metal Cap switch course cleared, Toxic-Switch of Danger stars, and first stars in Azure-Abyss (no commentary)


With Bowser beaten, I could have moved straight into the next area, but there were still a couple of places left in this overworld that I hadn’t touched yet. One of them was the pipe leading to the Metal Cap course, Toxic-Switch of Danger. Technically I could have gone here right at the start of the hack, but I wanted to give myself a bit of a warm-up first. I remembered this level having toxic gas everywhere, and the only way to move through it safely is with the Metal Cap, which meant I already knew this was going to be one of those courses where you either stay calm and get through it, or you rush and fall straight into a hole.

There are five stars in this course, so I decided I might as well deal with all of them while I was here. Like before, I’m using the names from the wiki since the game itself doesn’t show them, and the first thing I did was go for the easier ones before even activating the switch. The first star, The Correct Hole, looks like a trap at first. The level is full of bottomless pits, and one of them has a coin floating over it, which usually means you shouldn’t trust it. This time though, it actually was the right one. I dropped down, grabbed the coin, and came out with the star without any problems, which was a good sign considering how this level is supposed to go.

The next star, Behind the Switch, is exactly where the name says. It sits in a small alcove directly behind the Metal Cap switch itself, which makes it easy to miss if you don’t know it’s there, but also one of the simplest stars in the course once you do. With those two done, there wasn’t really any reason to avoid it anymore, so I activated the switch and made the Metal Cap blocks active, including the one inside this level that I was about to be using a lot more than I expected.

Pillar Jumping was next, and it’s exactly what it sounds like. I went for a long jump to the pillar and followed it with a wall kick to grab the ledge. Apparently the intended way is to triple jump, but the long jump and wall kick worked for me, so I stuck with that rather than trying to be clever. One more jump after that and the star was mine, which left the two I remembered giving me trouble years ago.

Toxic Wall Kicks was the one I had been thinking about before I even entered the course. Back when I first played this hack, this star caused me more problems than I care to remember, and part of the reason I didn’t come here first this time was because I didn’t want to get stuck on it straight away. Somehow though, this time it just worked. One attempt, no panic, no missed jumps, and the star was collected before I really had time to expect anything to go wrong.

That only left the red coins, and that’s where the level finally decided to push back a little. The first attempt ended almost immediately when I misjudged a jump for the very first coin and dropped straight into a hole. Second attempt went much better. The coins are scattered across small platforms and narrow ledges, and a few of them hang just far enough over pits to make you think twice before jumping. Most of them came together without much trouble, but the last one slowed me down. To reach it I had to land on a small platform, then jump to another even smaller one, and every time I thought I had the angle right, Mario would come up just short or drift a little too far. That meant more trips back to the Metal Cap block, because I wasn’t about to risk running out of time in the gas while trying to fix my own mistakes. Eventually the jump worked, the last coin was collected, and with it the final star of the course.

Finishing that level with less trouble than I remembered honestly surprised me, so instead of stopping there I decided to keep going and head straight into Course 3, Azure Abyss. For some reason I had it in my head that this level had a lighthouse and was much darker than it actually is, which makes me think I’m mixing it up with another hack, but once I got inside it was clear I wasn’t remembering it quite right.

The Deepest Dive was the first star, and it’s exactly what it sounds like. Straight into the water, swim down to the bottom, grab the star, done. Cave Exploration was similar, but this time with a hidden passage to find before the star shows up. Once I spotted the opening it didn’t take long, and by that point I was already thinking about whether I should go for one more before stopping.

I decided on Pillars of Precision, which thankfully didn’t involve another long swim, just a short dive into a cave with three narrow pillars waiting at the end. I fully expected to miss at least one jump and have to repeat the whole thing, but somehow everything lined up perfectly and the star was collected on the first try. That was the point where I stopped and just sat there for a moment wondering what was going on, because years ago this hack gave me serious trouble, and now I had just cleared the Metal Cap course and taken three stars from the next level without much resistance at all.

I’m not going to get overconfident. I know this hack well enough to know it will push back sooner or later. But for now, I can honestly say I’m having a blast playing this again, and I don’t remember the last time I got through this much of Super Mario 74 without feeling like the game was trying to throw me out of the castle.


Continue the Journey

Previous Entry:
Super Mario 74 – Log 3

Next Entry:
Super Mario 74 – Log 5

Super Mario 74 Hub:

Super Mario 74 – A Survivor’s Journey

Super Mario 64 Randomizer – Log 17: Quicksand Flights and a Missing Bob-Omb

Super Mario 64 Randomizer – Log 17: Quicksand Flights and a Missing Bob-Omb

Game: Super Mario 64 Randomizer
Platform: Steam Deck
Format: No Commentary

Video: Red coin hunt in Shifting Sand Land, risky Wing Cap flights over quicksand, the 100-coin star inside the pyramid, and Bob-Omb Battlefield exploration (no commentary)


Choosing the Right Star

With only two stars left in Shifting Sand Land, I knew exactly which one I wanted selected on the menu screen: In the Talons of the Big Bird. The logic behind that choice was simple. The bird only bothers you once the star is loose. If it’s already holding the star, it tends to keep to its usual route and leaves you alone. That meant I could focus on everything else in the level without worrying about being harassed mid-jump.

Naturally, I forgot to do that as, because the star I actually selected to tackle was the red coin star. So I was already off to a fantastic start.

Two Coins Missing

The real problem was that I didn’t know where two of the red coins were. On previous visits I had already located six of them, which meant the final pair had to be somewhere I had overlooked. As soon as I entered the course, though, I spotted them. Both coins were hovering near the platforms above the quicksand.

Close enough to see clearly, but not close enough that I could simply grab the edge of a platform and hang down to collect them. The moment I saw their position, it was obvious this was going to require a slightly more creative solution.

The Wing Cap Gamble

I ran through the possible options and quickly came to the conclusion that there really was only one way to do this. The Wing Cap. I would have to fly low enough to clip the coins, but still high enough to avoid landing in the quicksand beneath them. The margin for error wasn’t exactly generous.

While moving around the level, I also discovered something I hadn’t noticed before. Standing under the tree triggers a warp that takes you over near the cannon area. Useful information, but it also strips away the Wing Cap, which makes it less helpful for what I needed right now. So I warped back and prepared for the flight.

The first coin went surprisingly smoothly. I lined up my approach, dipped just low enough to grab it, and then pulled away before gravity could do anything unpleasant. The second coin was a little more nerve-wracking. I clipped it successfully, but my landing was low enough that if Mario had touched down in the wrong place, he would have been swallowed by the quicksand immediately.

Thankfully that didn’t happen. One more short flight later, the red coin star appeared.

The Bird Gets Involved

Of course, the big bird still managed to make itself part of the situation. On one of its passes it snatched my hat, which meant I had to wait for it to circle back so I could give it a well-timed boot and reclaim it. Hat recovered, star collected, and one more problem solved.

The 100-Coin Question

That left the 100-coin star. I wasn’t completely sure how many coins I would need before entering the pyramid, so I started with the Pokey enemies. Each segment drops a blue coin, which meant twenty coins almost immediately. A good start.

During this process I also discovered something else: there’s a green shell in this level. That would have been incredibly useful information before I started performing aerial gymnastics over quicksand, but at least I know about it now.

Once I felt confident that my coin total was high enough, I entered the pyramid and gathered the remaining coins needed to push the total to one hundred. With the star secured, Shifting Sand Land was finally complete.

Since the course itself was finished, there wasn’t much reason to grab another star inside the pyramid. I exited the level and turned my attention to Bob-Omb Battlefield.

The Missing Cannon Bob-Omb

The next task seemed straightforward: find the Bob-Omb who opens the cannons. In a normal run they’re hard to miss, but the randomizer has a habit of moving things around in ways that make the obvious suddenly harder to locate.

I found the Bob-Omb who tells me I need to find the cannon operator, and I even spoke to him twice just in case he might suddenly decide to help me. No luck.

While searching the level, I did manage to find the star tied to the floating island in the sky. In fact, it was sitting almost directly behind where the normal spawn point for the level would be. That made one more star for the total.

A Detour to the Island

I decided to try one more time to locate the cannon Bob-Omb. I’m not entirely sure I’ll actually need the cannons in this seed, but having them available always feels safer than not having them.

My suspicion was that the Bob-Omb might be on the floating island itself. I wasn’t particularly confident about jumping there, so I grabbed another Wing Cap and flew across instead.

No Bob-Omb waiting for me, but there was another star sitting there. At that point it would have been rude not to collect it.

Closing the Gap

That leaves the run sitting at eighty-nine stars collected, with thirty-one still out there somewhere in the castle. The randomizer has already shuffled enough things around that every familiar level still manages to hold a few surprises.

And somewhere in Bob-Omb Battlefield, there’s still a cannon-opening Bob-Omb that has decided to go missing.

Continue the Journey

← Log 16
Log 18 →

🧢 Mario 64 Randomizer Hub

Super Mario 64 Randomizer logs are written after each recording session. The plan rarely survives contact with the level.

Super Mario 74: A Survivor’s Journey Log 2 – Skyward Slopes Cleared

Super Mario 74 – Log 2: Skyward Slopes Cleared

Platform: Steam Deck
Mode: Original Edition
Rules: No savestates (except between entries)
Format: No Commentary

Video: Skyward Slopes stars, red coins, 100-coin star, and first star door unlocked (no commentary)


With Dice-Fortress currently being uncompletable for the moment, the best option was to move on to another course.
There are three available right now, and two of them can be completed without needing anything else, so I did a mental coin toss and chose
Course 2: Skyward Slopes.

The first star is another test of my wall jumping skills: To The Top of the Tower.
To even reach the tower, I need to climb some steep slopes, which I used to think required triple jumps back in the day.
Now I know that holding the jump button while pressing kick lets Mario climb steep slopes without any trouble.

Before heading up, I check the nearby sign which simply says 32.
No explanation, no hint, just the number. I have no idea why, but I’m sure it means something.

After wall jumping up the tower and grabbing the star, it was time for 8 Dangerous Red Coins.
This is where I lost my first life of the run after misjudging a jump.
Most of the coins are either floating in the air or placed dangerously close to edges, so one mistake is all it takes.

The red coins themselves weren’t the real problem though.
The real trouble came while going for the 100-coin star.
As I got closer to the total, I realised I was running out of coins to collect and had a brief moment where I wasn’t sure if I had missed some.
Then I remembered the tower had coins, so after a few more wall jumps I was able to grab enough to collect both the red coin star and the 100-coin star.

Next was The Outer Wall, which surprisingly didn’t give me much trouble at all.
I know this is still early in the hack, so I’m sure things will get harder later,
but past me definitely struggled with these courses more than current me is.

After that came No Time To Waste.
Seeing a purple switch usually means timed blocks, which normally means multiple attempts,
but somehow I managed to get this one first try, which I’m fairly sure would impress past me.

I could have collected Flotation Technology Box during the 100-coin run,
since the blue coins in this course lead straight to it,
but I decided to grab it separately, and it turned out to be another easy star.

The final star was Master of Jumping,
which is actually a bit misleading because the star itself doesn’t involve anything too difficult,
at least not for current me.
Past me might disagree.

With that star collected, Skyward Slopes is complete.
That also means I now have enough stars to open the first star door of the hack,
since that only requires ten.

So by finishing one course,
I’ve just unlocked another one to worry about.


Continue the Journey

Previous Entry:

Super Mario 74 – Log 1

Next Entry:

Super Mario 74 – Log 3

Super Mario 74 Hub:

Super Mario 74 – A Survivor’s Journey

Blog at WordPress.com.

Up ↑