Welcome to your all-in-one breakdown of every single region and transition zone in The Long Dark. Whether you’re a new survivor picking your first spawn or a returning veteran who still hasn’t forgiven Timberwolves, this post walks you through what to expect, why you’d go there & recommended bases.
—
Note:
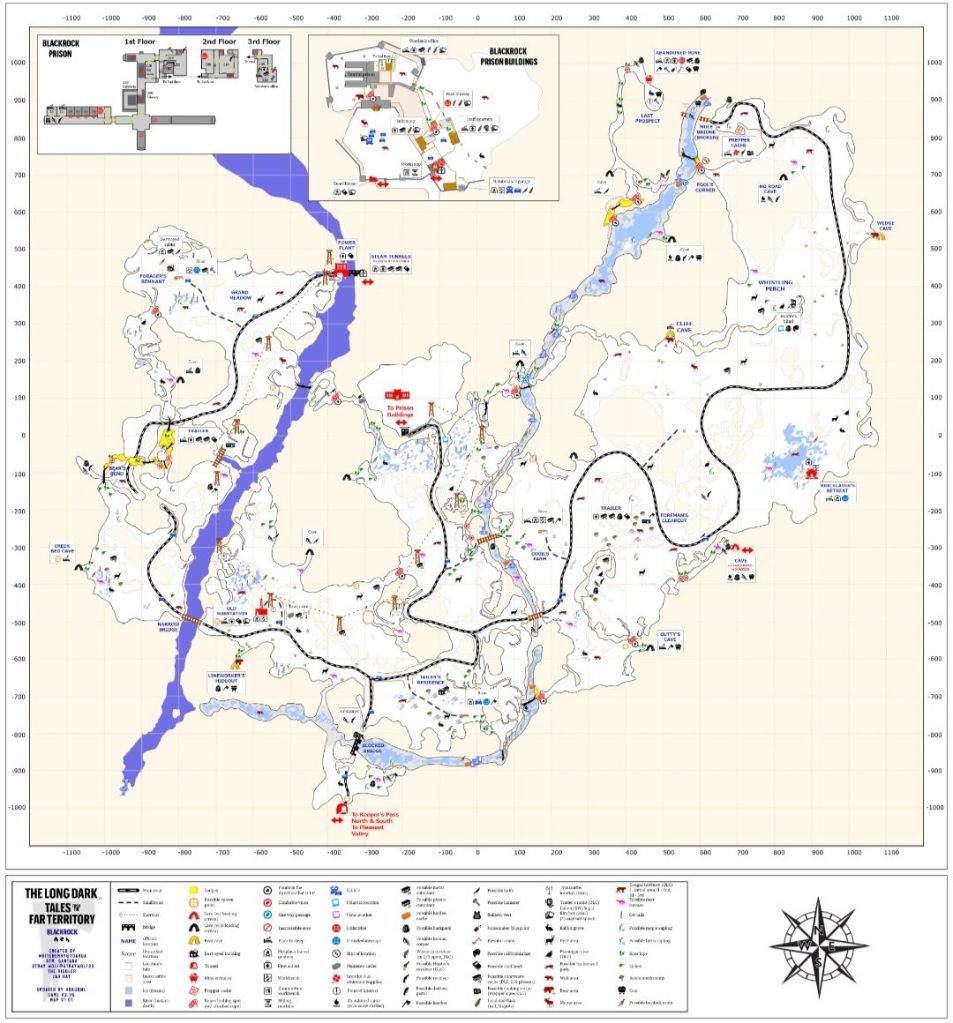
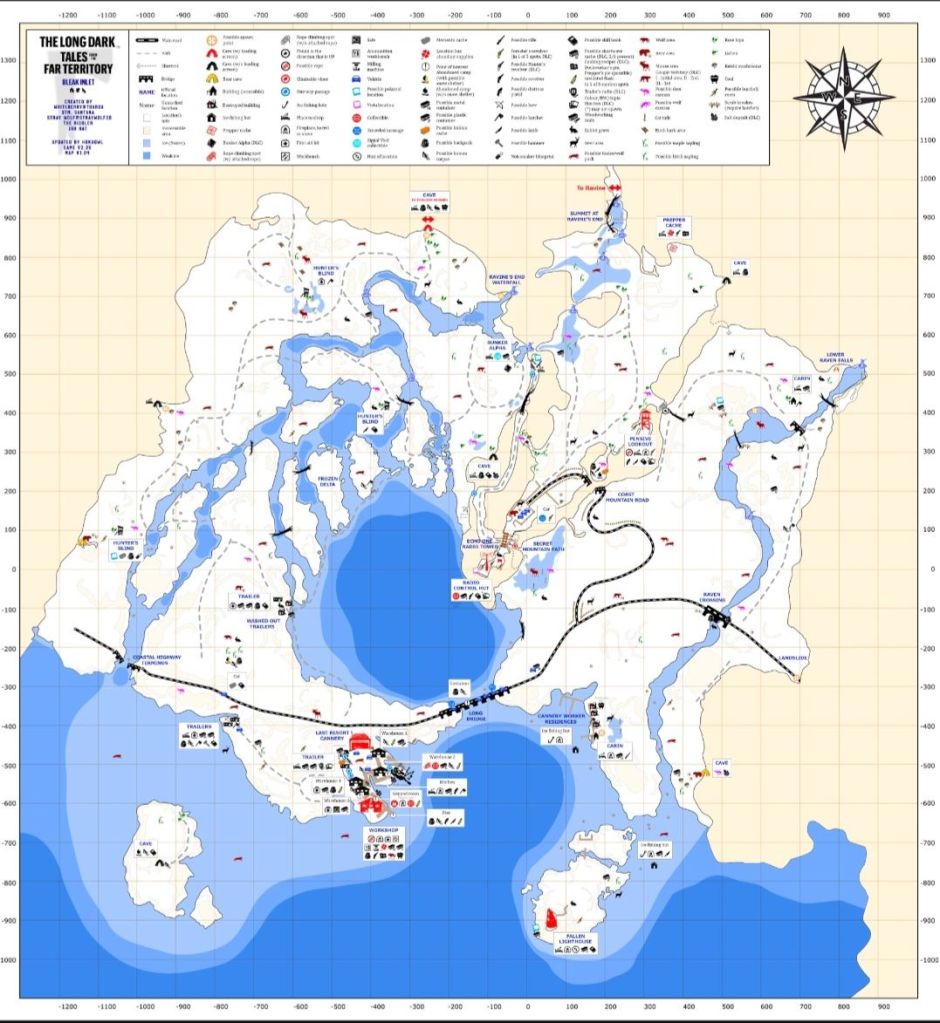
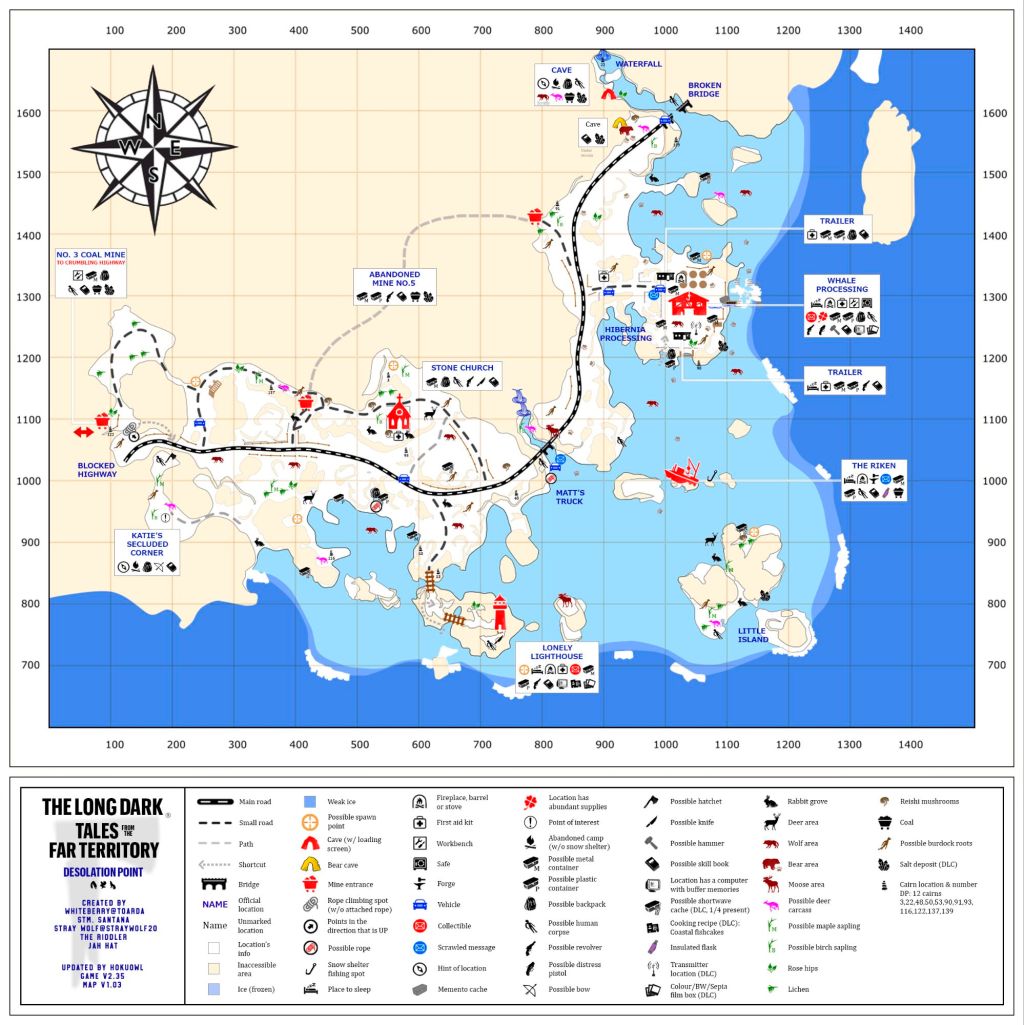
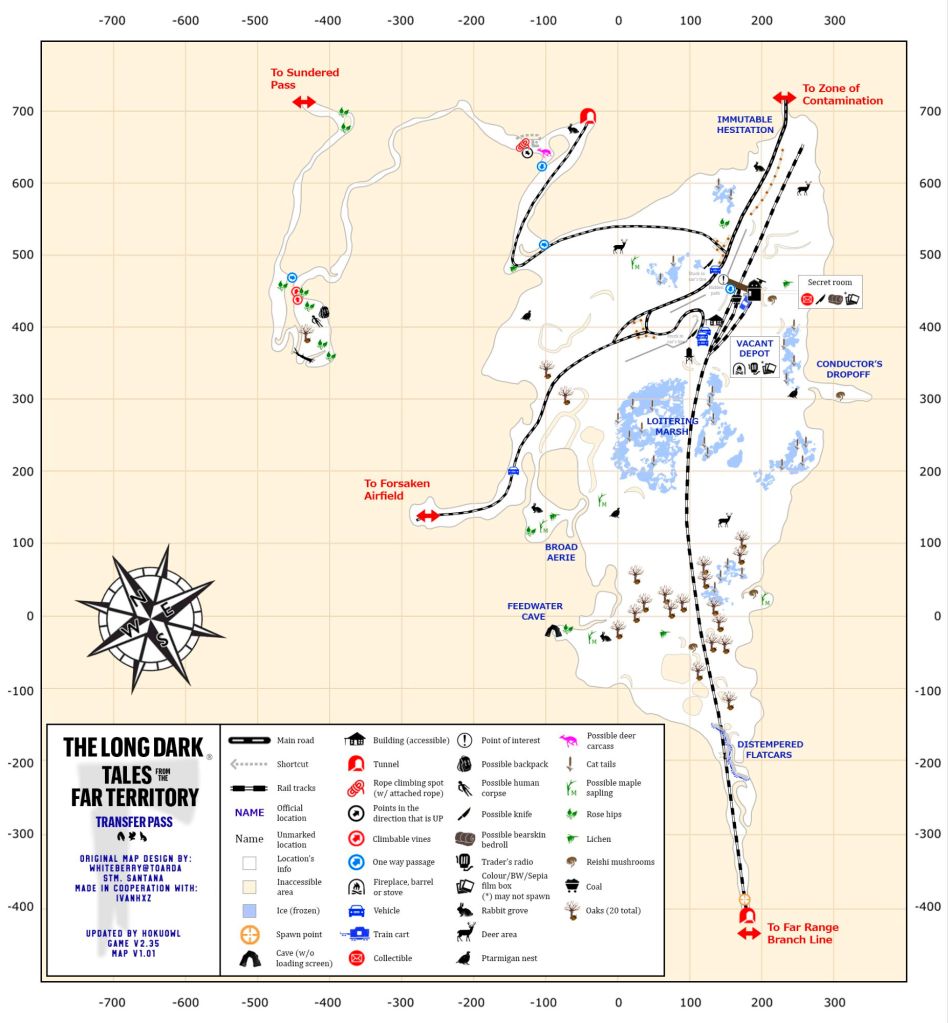
Click on any map below to view information about that region. These maps are tailored for Pilgrim, Voyageur, and Stalker difficulty levels. I’m currently in the process of adding Interloper/Misery maps to any regions that have them.
General Tips:
Preparation: Always carry essential supplies: food, water, fire-starting tools, and a bedroll.
Navigation: Use landmarks and maps to avoid getting lost.
Weather: Monitor conditions; blizzards can be deadly.
Wildlife: Learn animal patterns; avoid unnecessary confrontations.
Crafting: Utilize forges and workbenches to maintain equipment.
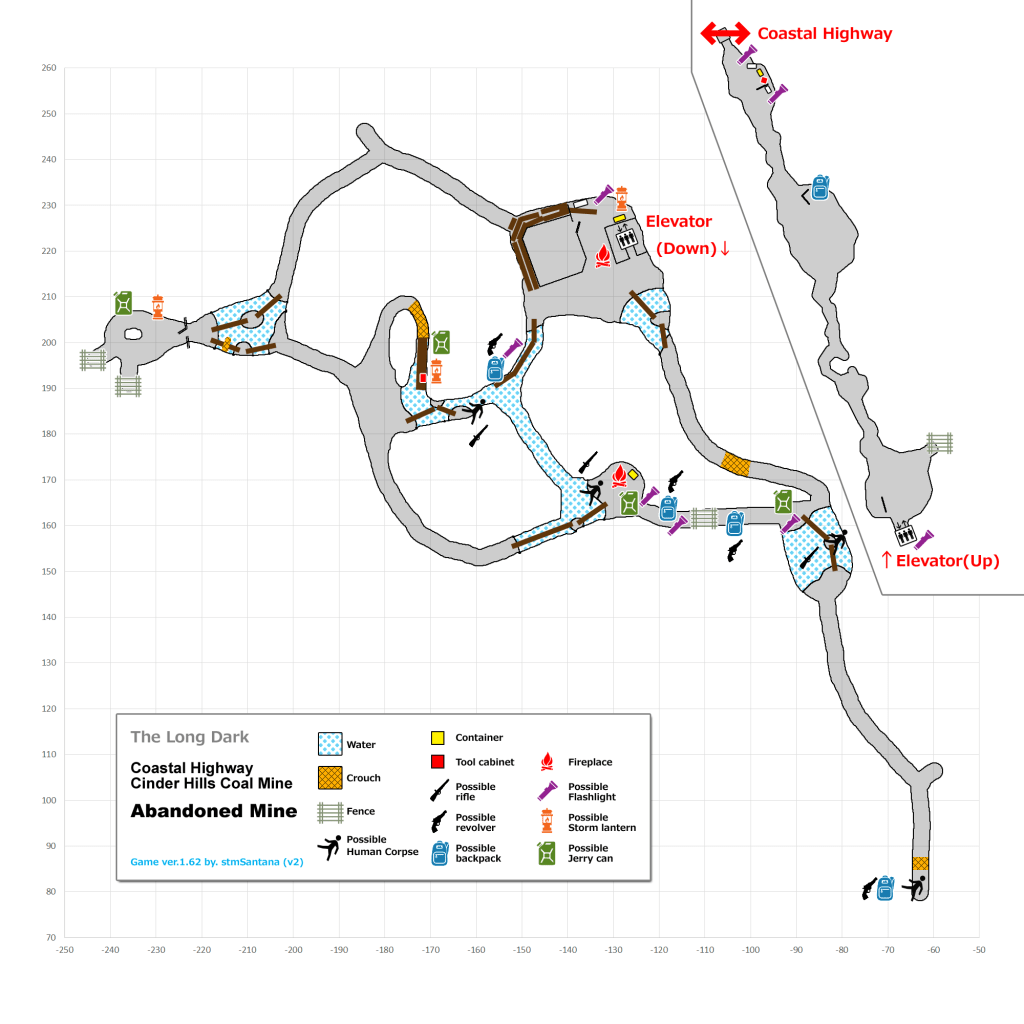
About Cave & Mine Transitions
Most caves and mines in The Long Dark function as linear passageways between regions. They often contain:
Minimal loot (firewood, coal, occasional supplies)
Shelter from weather and predators
One or two branching paths, but usually a clear point A to point B route
Tips:
Always bring a light source (lantern, torch, or flare)
Cold caves may require fire-starting gear
Expect tight inventory space—loot is sparse, but coal is heavy
Map Accuracy & RNG
These maps are sourced from the most up-to-date versions available at the time of writing.
Some item locations shown are guaranteed spawns. Others are subject to RNG.
For example, matches may appear in a house on one save file, then be completely absent in another.
Use maps as navigation aids, not guarantees.
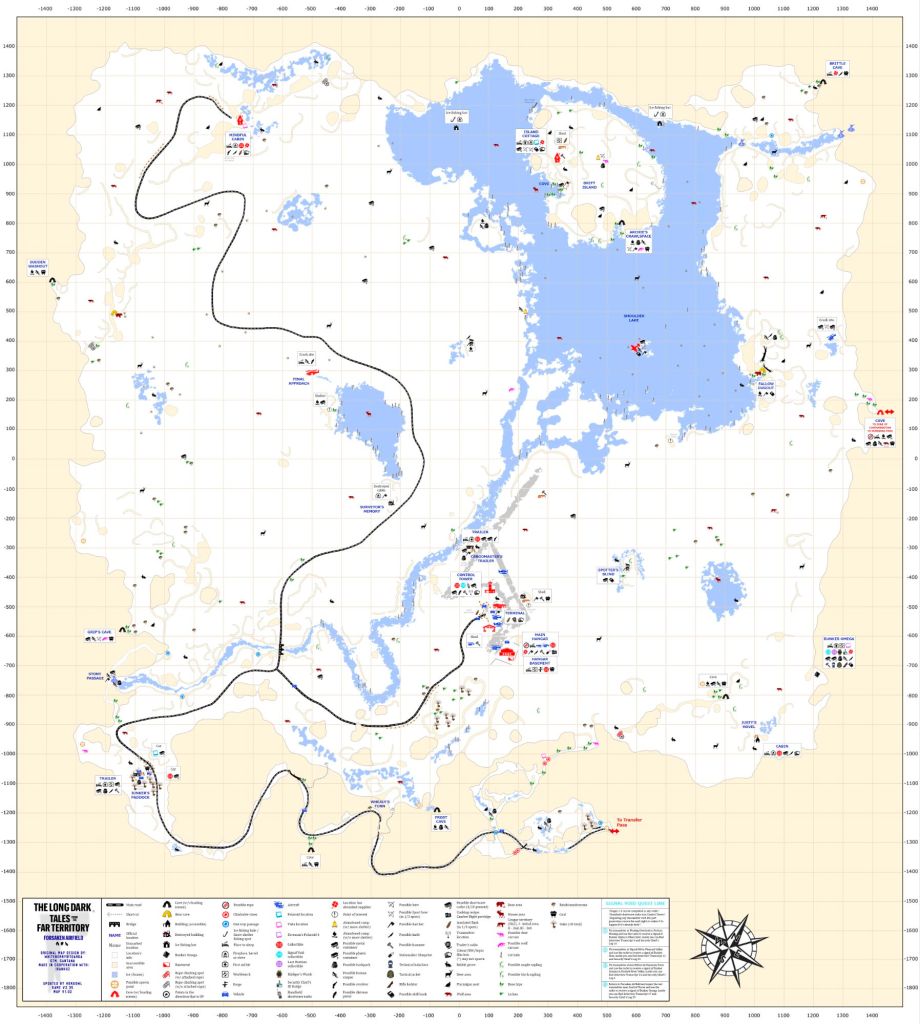
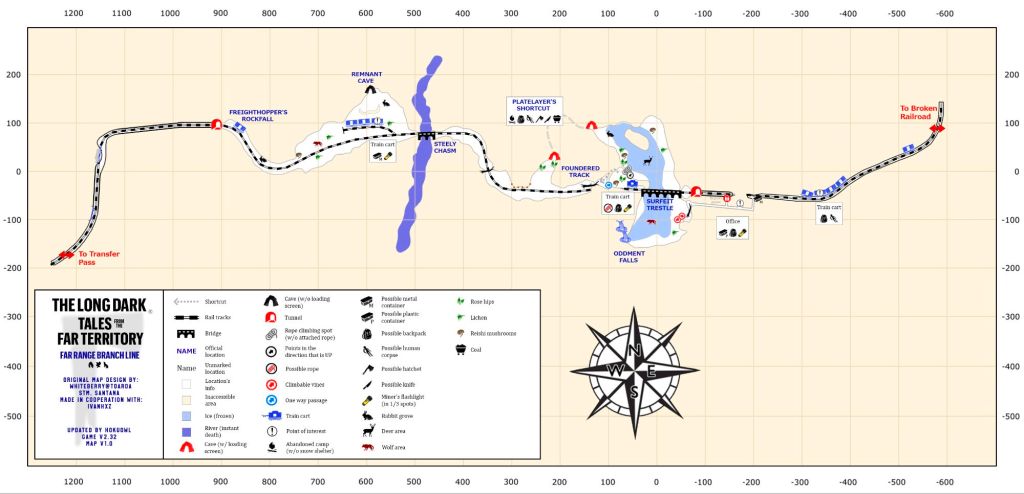
Regions
Great Bear Island Transition Regions
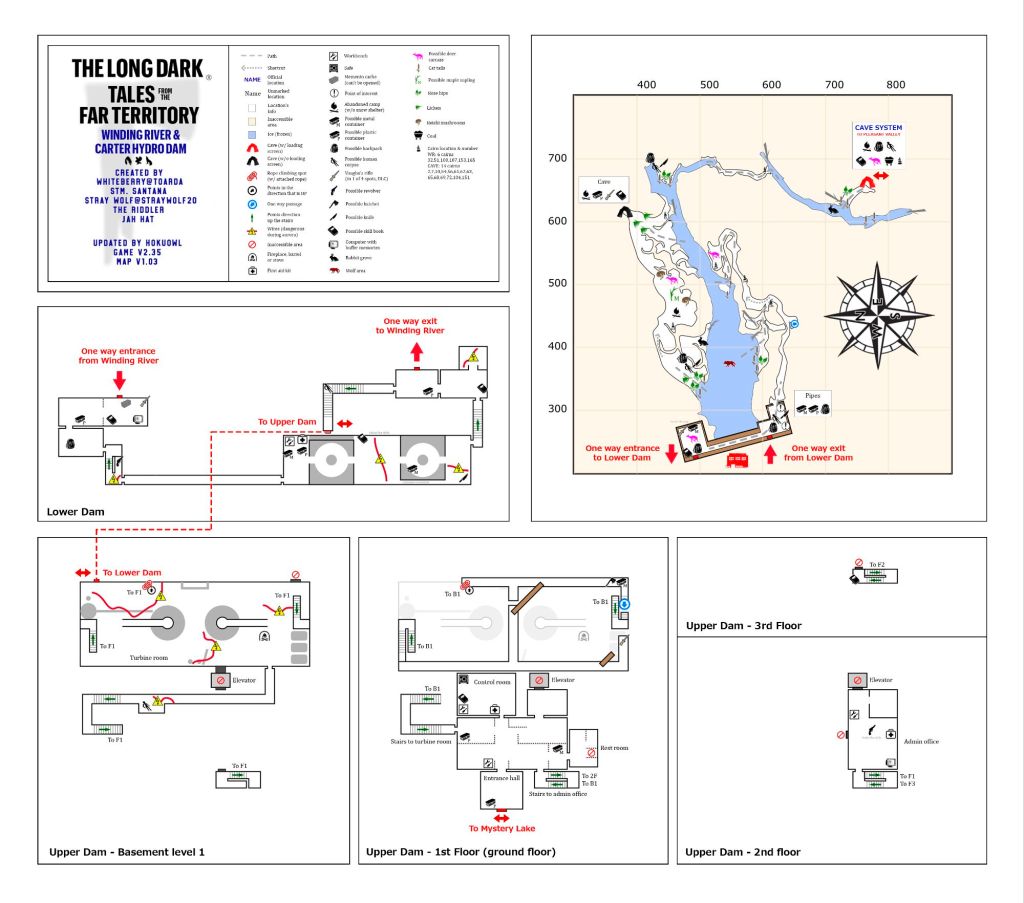
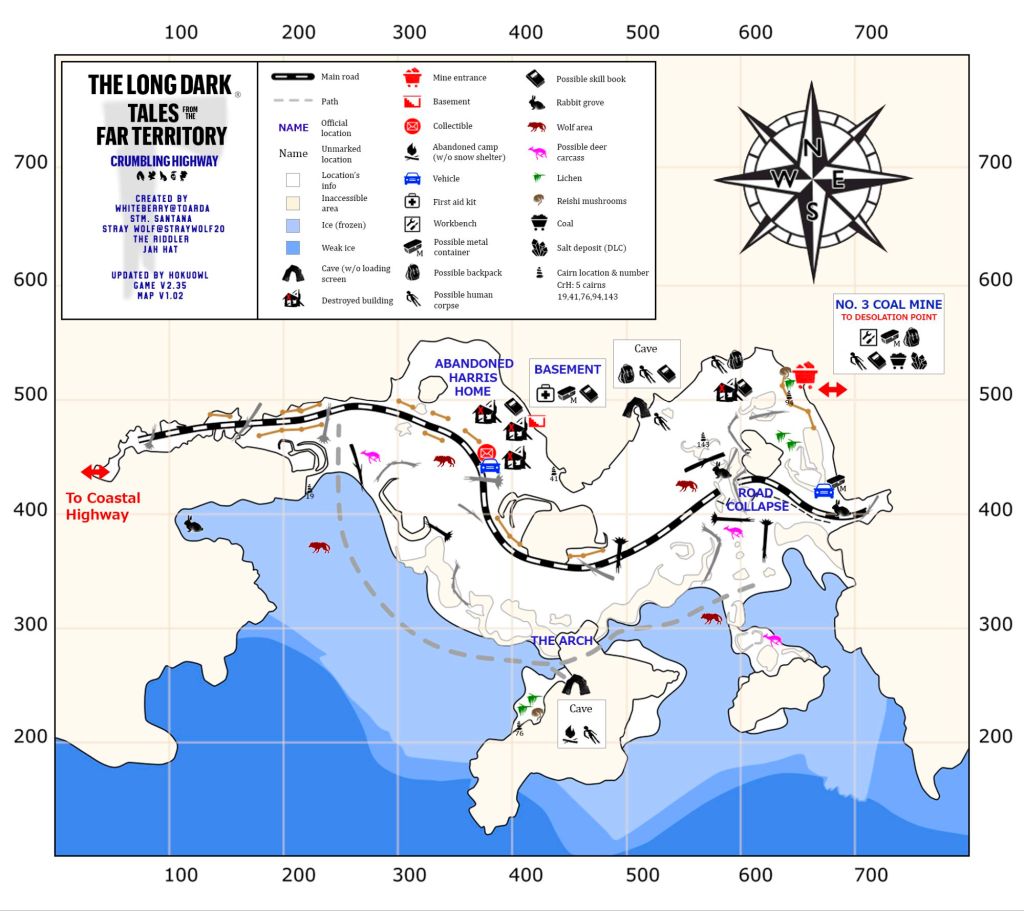
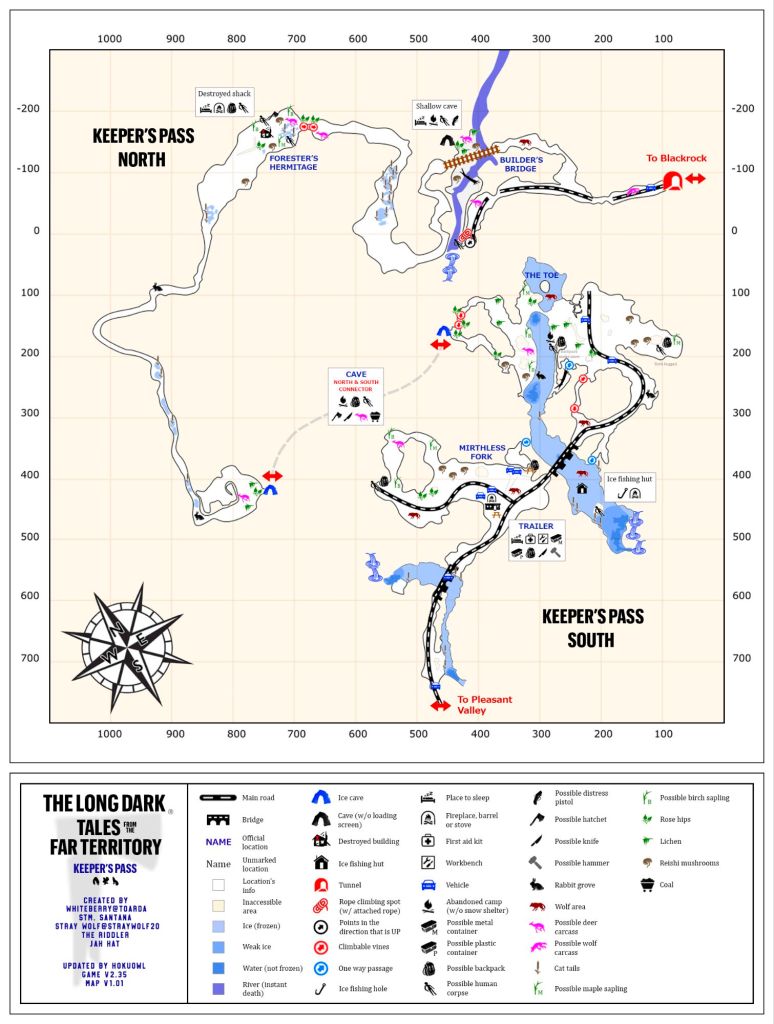
Far Territories Transition Regions
Great Bear Island


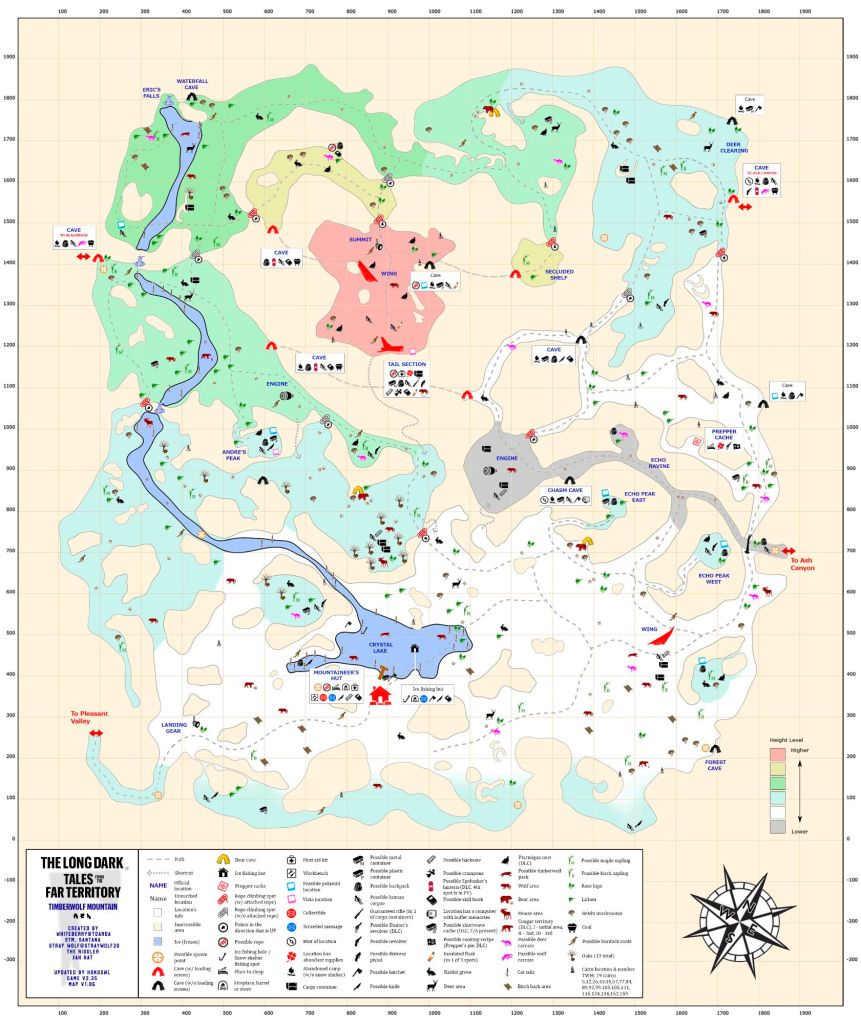
Great Bear Island Transition Regions

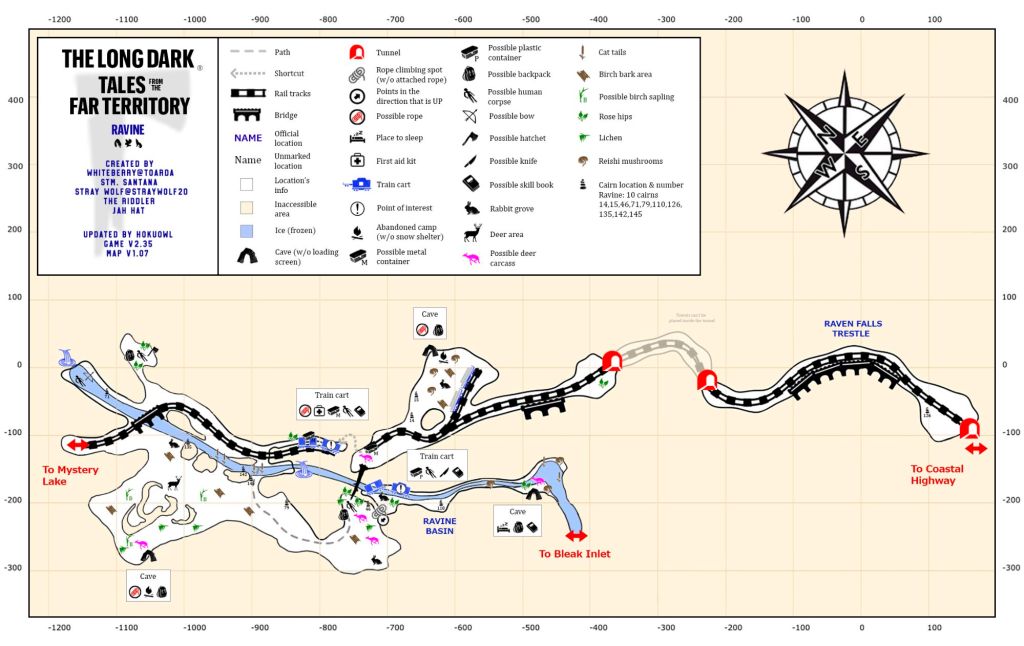
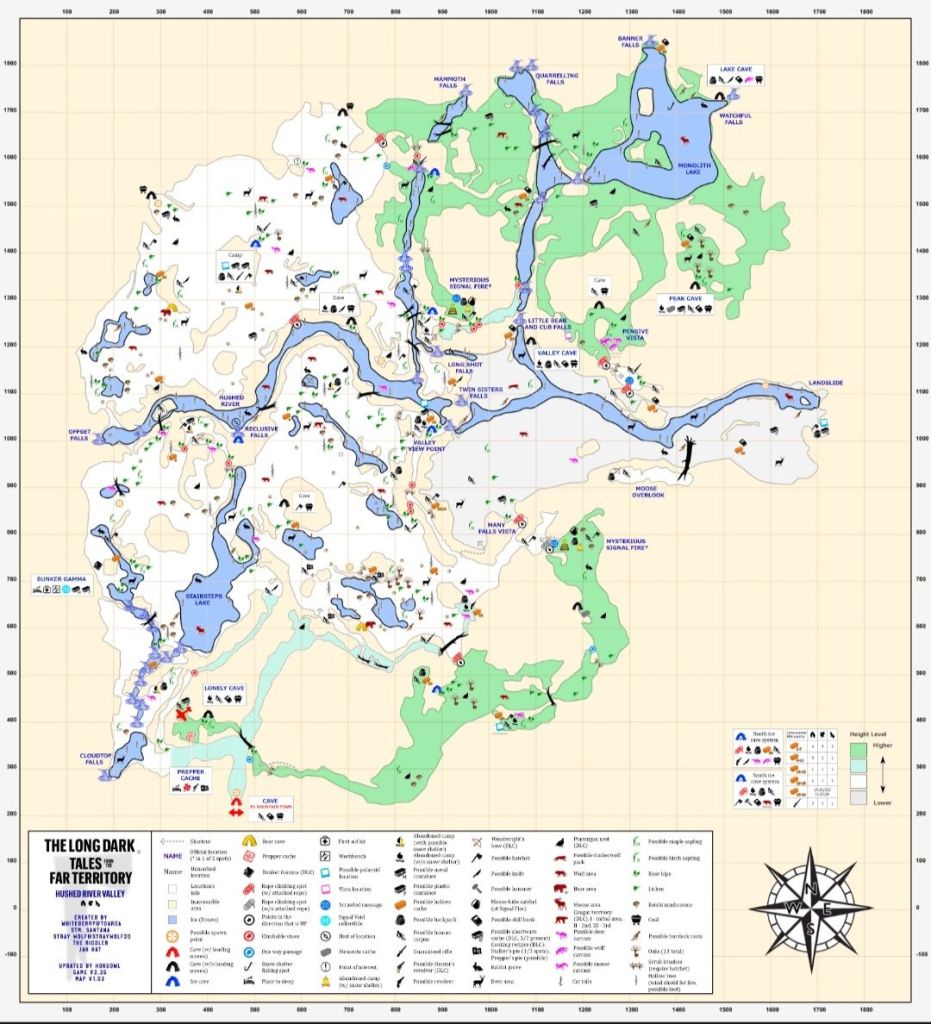
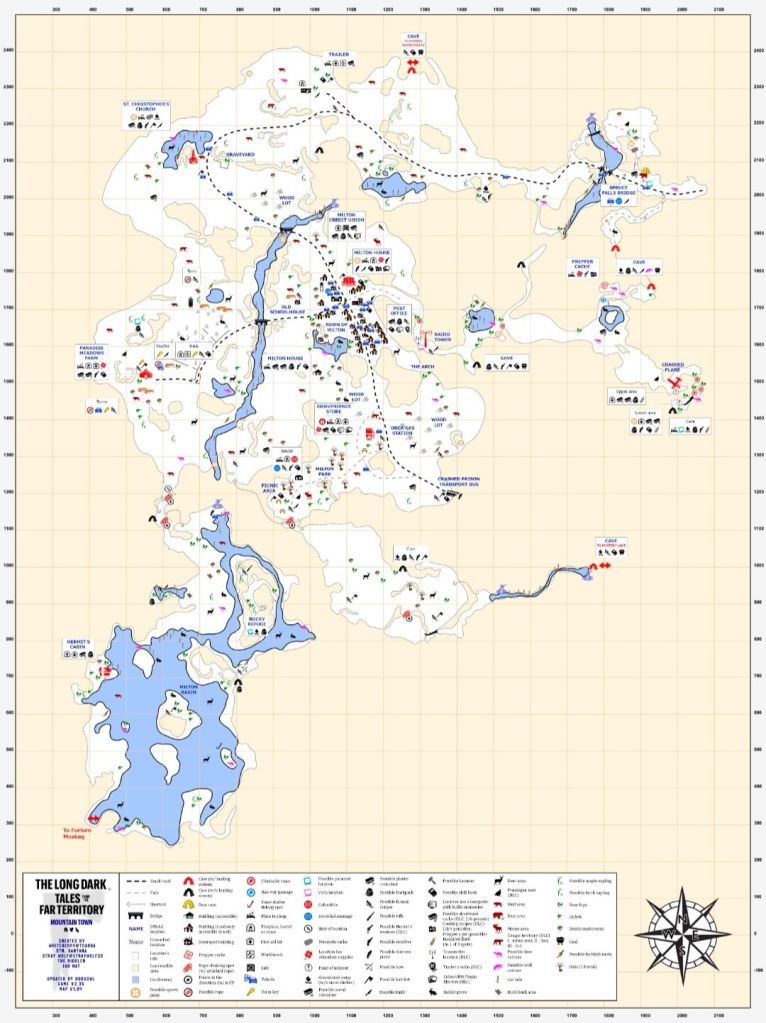
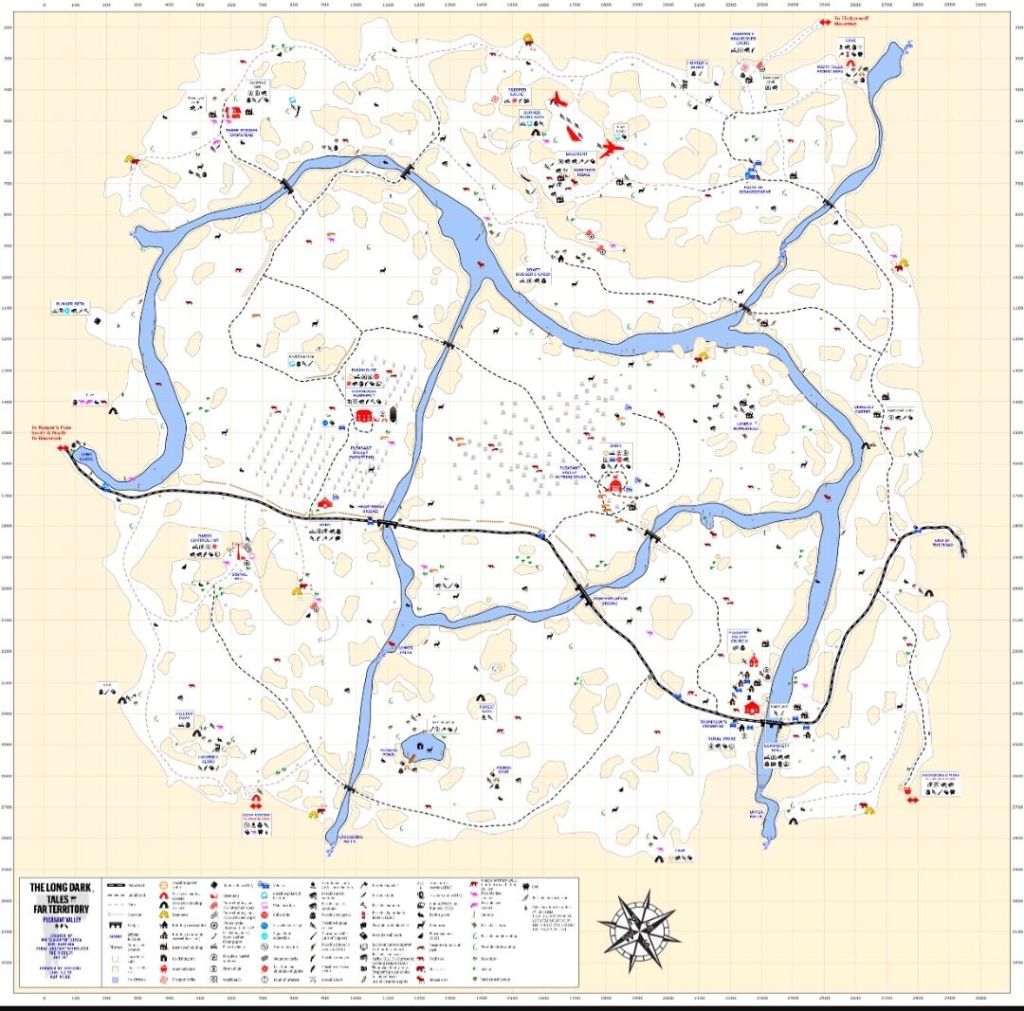
Far Territories

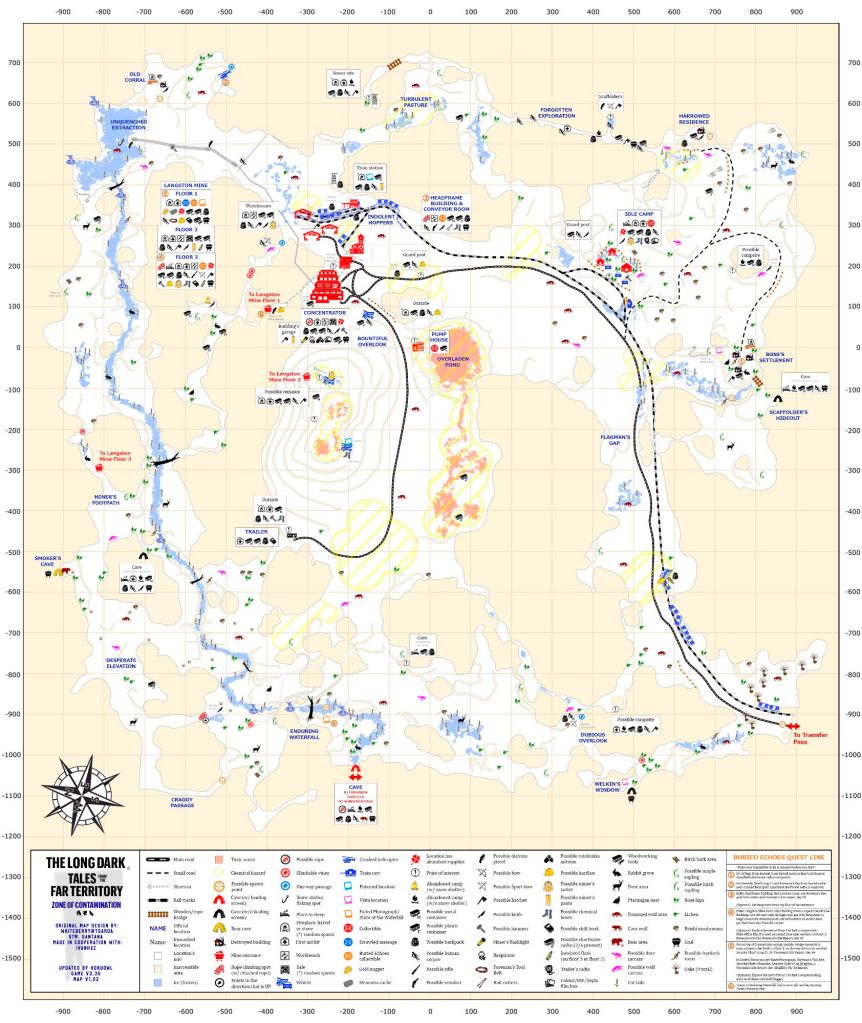
Far Territories Transition Regions
High-Resolution Community Maps (External)
If you want higher-resolution versions of region maps with zoom support, the community-maintained map archive on The Long Dark Fandom is available below.
View High-Resolution Maps on The Long Dark Wiki
Note: These maps are best used online for zooming and reference. For quick access, offline use, and route planning by difficulty, the static maps on this page are often more practical.
If you’re looking for more The Long Dark content, including guides, playthroughs, and survival notes, you’ll find it collected here:
Last Updated: 19th January 2026

