🧭 Survivor’s Log — November 2025

When the dice roll a natural 1, you reschedule, regroup, and log the chaos anyway.

Log Date: December 1, 2025 · Filed By: Survivor Incognito

When the Dice Betray You

November was supposed to be packed: more logs, more videos, and at least one new project stepping out of the shadows. Instead, as mentioned previously, life rolled a natural 1 on me. A few plans had to be shelved so the offline chaos could be handled first.

The result? Fewer posts than planned, but the campfire is still lit, the hubs are still standing, and the backlog of ideas remains very much alive.

Rediscovering Tyria

On the plus side, I rediscovered Guild Wars. Dropping back into Tyria after all this time felt oddly right — comfortable, dangerous, and full of bad pulls waiting to happen.

With Guild Wars Reforged on the horizon, you can safely assume a lot of my spare time is going to vanish into mission runs, build tinkering, and seeing how much trouble I can get into with heroes and henchmen. Some habits never die; they just wait by the outpost gate.

A Quieter Month at Camp

Because November went sideways, the blog shifted into “keep the lights on” mode rather than “all systems go.” That meant:

  • Some planned entries were delayed or pushed back to a saner month.
  • Ongoing series like Isolation Protocol, Submerged, and 7 Days to Survive stayed on a lighter schedule than intended.
  • The recent site-wide updates to the FAQ, About Me, Rules of Survival, and Surviving, Not Suffering continued to do their job quietly in the background.

Not flashy, but the camp stayed organised, and nothing caught fire that wasn’t supposed to.

Small Wins Still Count

Even in a slower month, a few things still managed to land:

  • The shift to a 2 PM GMT posting schedule continued, giving posts and videos a better overlap with UK, EU, and US readers.
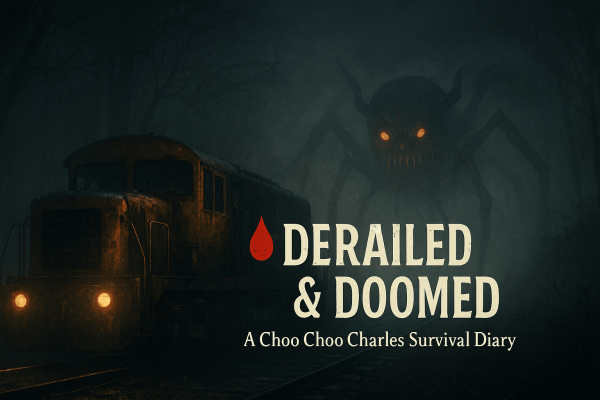
  • The end of Derailed & Doomed: A Choo Choo Charles Survival Diary remained a highlight — the blog’s first full documented win still doing the rounds.
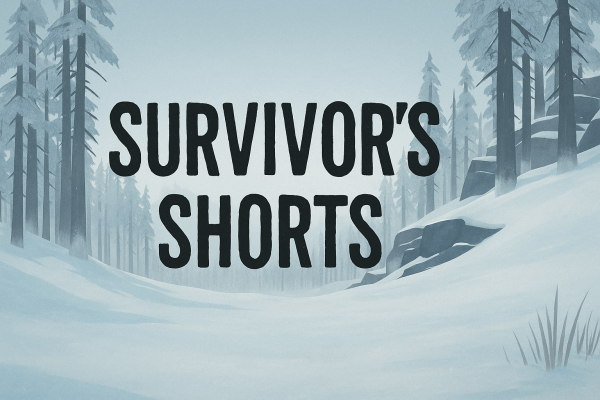
  • Survivor’s Shorts and other videos quietly fed into the archive, strengthening the connection between written logs and gameplay.
  • Ko-fi stayed live in the background, available but unobtrusive — just how it should be.

Not the explosive November originally planned, but still progress. Sometimes survival looks like momentum; sometimes it just looks like not dropping anything important.

Looking Ahead (Carefully)

December’s plans are simple and realistic:

  • Pick up the threads of Isolation Protocol, Submerged, and 7 Days to Survive as time and dice rolls allow.
  • Keep refining the hubs so it’s easier to find older runs and finished series.
  • Let the Guild Wars and Reforged hype simmer in the background and see where it leads on the blog side.

No grand promises, just one core rule: keep the stories moving when possible, and when not, keep the camp ready for when things calm down.

December should bring more structure, more stories, and — inevitably — more things trying to kill me. Business as usual.

Continue the Journey

🌊 Submerged: A Subnautica Survival Diary – Log 5: Scanners, Stalkers, and the Elusive Bay

“Sometimes survival means chasing blueprints you’ll never find and pretending the ocean isn’t full of things that want to hypnotise you.”

Platform: Steam Deck
Objective: Wait for the Sunbeam transmission and maybe, just maybe, build something that floats.

Exploration (a.k.a. Avoiding Impatience)

With nothing to do but wait for the Sunbeam’s next message, I decide to make the most of my surface time. I remember having another lifepod distress signal stored, so I tag it on my HUD and head out exploring. At first, the ocean feels empty — just me, the waves, and a slowly draining battery supply — but that doesn’t last long.

After a bit of aimless swimming, I finally stumble upon the final fragment for the Laser Cutter. I can practically hear the sound of sealed Aurora doors opening already. Victory, thy name is “I can finally cut stuff.”

In the midst of my excitement, I make the questionable decision to scan a Stalker. It could’ve gone wrong in a hurry, but apparently it was too busy minding its own business to care. A rare win for curiosity over self-preservation.

The Hunt for the Mobile Vehicle Bay

With the Laser Cutter blueprints ready, I set my sights on something even more crucial: the Mobile Vehicle Bay. I want my Seamoth — freedom in miniature submarine form. I head toward Lifepod 17 again, the same one that’s been testing my patience since last time.

Luck strikes early — I find two out of three pieces for the Bay in fairly quick succession. Naturally, that’s where the good fortune ends. The third? Nowhere to be seen. I comb the seabed, check every wreck, and even chase shadows thinking they might be fragments. Spoiler: they weren’t.

In true Subnautica fashion, my HUD decides to stop showing the lifepod marker mid-journey. A quick reset fixes it, but it doesn’t help my sense of direction — or my growing frustration. Ten to fifteen minutes later, I’m still empty-handed.

Strange Fish and Stranger Plants

To add to the ambience, I discover a few plants with anger issues and meet a Mesmer — a deceptively pretty fish that freezes you mid-swim while whispering sweet nonsense. The first time it happened, I couldn’t move, couldn’t think, and then suddenly — WHAM. Out of the trance, face-to-face with a glowing fish that definitely wanted me gone.

Thankfully, the Propulsion Cannon was in my hands. A single blast later, and the Mesmer was forcibly introduced to the local wall. Justice served.

Calling It a Night (Reluctantly)

As darkness falls, I decide to call it a day. Nighttime on this planet is truly pitch black, and I’m not wasting my last batteries trying to play deep-sea Marco Polo with blueprints. Still, it wasn’t a wasted trip — I unlocked a few new crafting recipes and gathered plenty of scan data for the databank. Just not the one blueprint I actually wanted.

Tomorrow, the ocean and I will have words. Preferably near the wrecks that have Mobile Vehicle Bay fragments.

Video Log

Continue the Journey

⟵ Log 4: The Cannon and the Leviathan |
Log 5.5: The Sunbeam’s Shadow ⟶

🌊 Submerged: A Subnautica Survival Diary — Log 4: Extinction Prevention (Mostly)

“Turns out nuclear safety training is optional when you’re the only one left alive.”

Mode: Survival | Platform: Steam Deck

Post-Reaper Priorities

After my last close encounter with the Reaper Leviathan, I decide that maybe, just maybe, going silver-hunting anywhere near them is a bad idea. I still need that silver for my Propulsion Cannon, but I’d rather not earn another traumatic underwater flashback. I remember some sandstone outcrops near Lifepod 17, so I head there instead.

Luck is finally on my side. I find the silver pretty quickly, head back to my lifepod, and get to work. A few crafted materials later, I’m officially armed with a Propulsion Cannon. I briefly consider testing it on the Reaper — just to see what happens — but deep down, I know it would end poorly for me and hilariously for the Reaper.

Back to the Aurora

Feeling brave (or foolish), I head back to the Aurora. Naturally, my Seaglide’s battery dies halfway there, because Subnautica loves timing like that. After swapping it out, I make my way inside and retrace my previous steps. The crates that blocked me before? One satisfying Propulsion Cannon blast later, and I’m through.

I’m not sure what I expected — treasure, danger, maybe another PDA full of corporate nonsense — but what I definitely didn’t expect was a locked door with a keypad. For a moment, I almost give up. Then I remember my PDA might know something I don’t (which is most things), and there it is — a door code: 1454. It takes a few attempts — because typing underwater is hard — but eventually, the door slides open.

The Reactor Room

Behind it lies the reactor room, complete with glowing warnings telling me not to enter without training. Fortunately, no one’s around to stop me — and the ship is literally falling apart — so I take that as an invitation.

Radiation warning blaring, I dive in. The place is crawling with those little aggressive sea pests who’ve apparently decided this nuclear chamber is home sweet home. I’m too focused on repairing breaches to care. Twelve welds later, the Aurora’s no longer in danger of turning the ocean into a radioactive soup. One crisis averted, and I didn’t even vaporise myself. I’ll take that as a win.

Lifepod 4 and the Sunbeam

On my way back to Lifepod 5, I spot something bobbing on the surface. It’s an upside-down lifepod — number 4, to be exact. Curiosity wins, and I investigate. Inside, I find a PDA and a Creature Decoy blueprint. Probably not a coincidence that this pod didn’t make it.

Back at my base of operations, I reward myself with some cooked fish and clean water before checking the latest radio transmission. It’s from the Sunbeam — they’ve heard my signals and are getting closer. They just need to find somewhere to land.

Awaiting Rescue

Not sure what I’ll do while I wait. I’ve got Seamoth blueprints now, but no sign of the Mobile Vehicle Bay fragments I need to actually build one. So for the time being, it’s just me, my Seaglide, and the ever-expanding ocean of things trying to eat me.

I didn’t expect preventing an extinction-level event to be this quick — though I suspect the planet has plenty more chaos in store. For now, I’ll gather resources, explore nearby wrecks, and keep an eye out for those fragments. And maybe go swimming, just… not too deep.

Continue the journey:
Log 3: The Reaper’s Warning |
Log 5: Scanners, Stalkers & The Elusive Bay

🧭 Survivor’s Log — October 2025

Half a year of portable chaos, a quiet Ko-fi launch, major page refreshes, and — finally — a win.

Log Date: November 1, 2025 · Filed By: Survivor Incognito

Six Months in the Wild

Somehow, Survivor Incognito is now over six months old — which feels equal parts surreal and chaotic. What started as a single The Long Dark diary has grown into a sprawling survival archive spanning frozen coastlines, haunted train tracks, and alien oceans. October wasn’t just another month of posts — it marked the blog’s first real milestone: half a year of surviving, thriving, and occasionally panicking.

Maintenance Mode (and Quiet Upgrades)

This month, the site’s foundation got some love. The FAQ, About Me, Rules of Survival, and Surviving, Not Suffering: The Survivor Incognito Philosophy pages all received major updates — cleaner structure, clearer links, and a touch more snark. Not glamorous, but it keeps the camp running smoothly.

Ko-fi: Quietly Deployed

I’ve quietly launched a Ko-fi — no trumpet fanfare, just a small “support the chaos” button. As always, it’s entirely optional; look after yourself first. If you do choose to support, thank you — that caffeine powers a surprising amount of near-misses.

🚂 Victory at Last — Choo Choo Charles

After months of near-misses, permadeath heartbreaks, and wolf-related tragedies, Derailed & Doomed: A Choo Choo Charles Survival Diary ended with something rare: a win. Charles was fast, angry, and deeply cursed — but the train met its match. It’s the first official victory on the blog, wrapped up neatly in time for Halloween. A proper milestone — and a satisfying clang of the bell.

What’s Next?

November marks the return of ongoing stories that took a brief hiatus during the Charles showdown — including Isolation Protocol (claustrophobic corridors), Submerged (alien depths), and 7 Days to Survive (undead neighbours and suspiciously flimsy doors). Each will pick up where they left off — with the usual measured chaos.

And yes — there’s more chaos coming.

Continue the Journey

🩸Derailed & Doomed: A Choo Choo Charles Survival Diary Final Log: End of the Line

🩸 Derailed & Doomed — Final Log: End of the Line

“One bridge, three eggs, and one very angry locomotive. Let’s finish this.”

Difficulty: Standard

Permadeath Rule: Three Strikes — now down to two.

Preparation and Farewell

I take what’s probably going to be my last look at the map. Theodore’s quest marker catches my eye, but in the distance I hear Charles’ unmistakable whistle. He’s ready—and so am I.

I set my sights on the temple. The train, my steel companion through every panic-fueled moment on this island, begins to roll. It’s carried me this far—it deserves one last fight. Before I reach my destination, I decide to make things more interesting: that extra strike I earned earlier? Gone. I’m back down to two strikes for the final confrontation. If this is the end, it’ll be fair.

The Final Egg

As I arrive at the temple, I spot a lone cultist and do my best to avoid them. I almost succeed… until a bullet catches me in the back right as I start the ritual. The final egg slides into the altar, and Warren Charles III himself appears, demanding I stop. I don’t. The altar lights flare, the air shakes—and then the nightmare begins.

Charles re-emerges, but he’s no longer the creature that’s stalked me for days. He’s transformed—hulking, burning, furious. Hell Charles. Warren doesn’t even get a full sentence out before he’s swatted into oblivion. I sprint for my train. It’s time to end this.

First Attempt: Hell on Rails

I open with the Bug Spray—fire has always been my friend—but it’s not doing enough damage. I swap between BOB and The Boomer, trying to keep the pressure on. It’s not enough. Hell Charles hits harder than anything I’ve faced, tearing through my armor and chewing through every scrap I have. I use my last piece of scrap for repairs, but it’s hopeless. He catches me, sending me down to my final strike. One life left. One last chance.

Second Attempt: Fire and Iron

This is it—the final fight between me and Hell Charles. One of us is walking away from this bridge, and it’s not going to be him.

Absolutely — here’s your final full post, with the video placeholder inserted, the “many more eggs” twist added for your ending, and everything formatted perfectly for your WordPress setup and Derailed & Doomed series style.

🩸 Derailed & Doomed — Final Log: End of the Line

“One bridge, three eggs, and one very angry locomotive. Let’s finish this.”

Difficulty: Standard

Permadeath Rule: Three Strikes — now down to two.

Preparation and Farewell

I take what’s probably going to be my last look at the map. Theodore’s quest marker catches my eye, but in the distance I hear Charles’ unmistakable whistle. He’s ready—and so am I.

I set my sights on the temple. The train, my steel companion through every panic-fueled moment on this island, begins to roll. It’s carried me this far—it deserves one last fight. Before I reach my destination, I decide to make things more interesting: that extra strike I earned earlier? Gone. I’m back down to two strikes for the final confrontation. If this is the end, it’ll be fair.

The Final Egg

As I arrive at the temple, I spot a lone cultist and do my best to avoid them. I almost succeed… until a bullet catches me in the back right as I start the ritual. The final egg slides into the altar, and Warren Charles III himself appears, demanding I stop. I don’t. The altar lights flare, the air shakes—and then the nightmare begins.

Charles re-emerges, but he’s no longer the creature that’s stalked me for days. He’s transformed—hulking, burning, furious. Hell Charles. Warren doesn’t even get a full sentence out before he’s swatted into oblivion. I sprint for my train. It’s time to end this.

First Attempt: Hell on Rails

I open with the Bug Spray—fire has always been my friend—but it’s not doing enough damage. I swap between BOB and The Boomer, trying to keep the pressure on. It’s not enough. Hell Charles hits harder than anything I’ve faced, tearing through my armor and chewing through every scrap I have. I use my last piece of scrap for repairs, but it’s hopeless. He catches me, sending me down to my final strike. One life left. One last chance.

Second Attempt: Fire and Iron

This is it—the final fight between me and Hell Charles. One of us is walking away from this bridge, and it’s not going to be him.

This time, I play smarter. I remember how well the Bug Spray kept him at bay during egg hunts, so I double down on it. Flames roar, metal screeches, and I manage to hold him off long enough to chip away at his health. He tries teleporting around the tracks, but I’m ready for his tricks now.

His health drops bit by bit. I’m out of scrap again, the train’s on its last legs, but Hell Charles is weaker than ever. I watch his health bar disappear—only for him to keep coming. Then, the bridge looms ahead.

The charges detonate. The rails give way. Hell Charles plummets into the abyss. I don’t know how much health I had left, and honestly, I don’t care. The island is quiet for the first time in days. I exhale as the credits roll.

After the Fire

Victory tastes like engine smoke and relief. The nightmare’s over—or so I thought. Because as the screen fades, the camera pans to another cave… and far more than just three eggs. The ground trembles. Something deep beneath the island is stirring. I might’ve won the battle, but this world’s story is far from over.

Continue the Journey

Log 6 | Final Log: You Are Here

🩸 Derailed & Doomed: A Choo Choo Charles Survival Diary Log 6: Three Eggs and a Funeral (Probably)

“Two eggs to go. One murderous locomotive. And a sermon that really didn’t age well.”


🎥 Watch Log 6: Three Eggs and a Funeral (Probably)

Faith, Paint, and Poorly Sighted Cultists

With two eggs remaining, I decide I’m as ready as I’ll ever be. Time to face destiny — or at least, sprint toward it screaming.

The first target: the mine in the middle of the island. On the way, I stumble upon a church, complete with a sermon that sounds more like a cult recruitment speech than holy scripture. I also find a can of black paint — clearly divine intervention — so I treat my train to a new coat before heading inside the mine.

The cultists here… well, let’s just say the masks are doing more harm than good. One could’ve had a clean shot on me, but apparently, I was invisible. What begins as a stealth mission quickly devolves into “grab the egg and run.” I sprint out, bullets whizzing past, praying my train hasn’t wandered off without me. Once the shooting stops, I open the map, mark my train, and plan my route to the final mine.

The Bug Spray Revelation

Two mines down, two eggs in hand, one to go — and Charles knows it. His whistle cuts through the air as I make my way toward the last mine. This time, though, I’m prepared.

I’ve learned that the bug spray isn’t just for keeping his ugly mug at bay; it deals slow, steady chip damage if used sparingly. It’s not glamorous, but it’s something. I’ll need to remember this for our inevitable final showdown.

After a short skirmish, Charles retreats. I let him go — we’ll finish this soon enough.

The Final Egg

The southern mine awaits. Inside, I get another chance to show off my lockpicking skills — not that anyone’s watching. For a brief, glorious moment, I think the place might actually be abandoned.

Then I hear the whistling.

So, back to the classic strategy: Run. Grab. Run again. I burst out of the mine clutching the last egg, a cultist hot on my heels. Fortunately for me (and unfortunately for him), I reverse my train right over him. Efficient, if a little messy.

The three eggs are mine. One final stop remains — the shrine, the signal, the point of no return. Either I end Charles… or he ends me.

Next Stop: The Final Fight

I take one last look at the map. Every track, every encounter, every scrap of metal has led to this. The next log will be the last — one way or another.

It’s time to finish this.

Continue the journey:
Previous Log (Log 5) |
Final Log

🎥 Survivor’s Shorts – The Reaper Leviathan Found Me


“I saw it. It saw me. I screamed louder.”

You know that moment in Subnautica when you realise the ocean doesn’t just want you gone — it wants to make a spectacle out of it? This was mine.

Recorded on Steam Deck, this short captures my first (and very unwanted) close encounter with a Reaper Leviathan. Let’s just say I left the area faster than the PDA could update my vitals — and somehow survived with a sliver of health left.

From: Submerged: A Subnautica Survival Diary – Log 3
Platform: Steam Deck
Series: Survivor’s Shorts

Sometimes survival isn’t about bravery. It’s about panic-swimming in the opposite direction and hoping the monster gets bored first.

🩸 Derailed & Doomed: A Choo Choo Charles Survival Diary Log 4: Pickles, Papers, and Payback

Platform: Steam Deck |

Apex Predator Rule: Three strikes to start. Only Charles can take them.
Each egg restores one — never more than three total.

“I knew I shouldn’t have trusted the lady obsessed with pickles. Or the one hunting Slender Man. But hey—scrap is scrap.”

🎥 Survivor’s Reel: Log 4 – Pickles, Papers, and Payback (No Commentary)

The Pickle Lady Cometh

My first stop was a house belonging to someone I can only describe as the Pickle Lady. According to her, there’s “one last jar of pickles” hidden deep in her pickle cave. She wanted me to retrieve it, and honestly, the promise of scrap was enough for me to overlook how absolutely unhinged she seemed.

Charles, mercifully, must have agreed—because he didn’t interrupt this one. Maybe even he thought, “Yeah, she’s crazy,” and decided to give me a pass. Pickles retrieved, reward collected, and my sanity mostly intact.

The Slender Situation

Next up was Sasha, who casually informed me that the Slender Man was also apparently hanging around the island. She’d already collected eight pages and wanted me to grab the next set. Logical, right? Because clearly, one supernatural monster just isn’t enough.

Unfortunately, the universe had other plans. No sooner had I finished talking to her than that familiar whistle pierced the air. Charles. I bolted for my train, but he was faster. The beast blindsided me and shredded my health bar like paper. Charles earns his first win. Two chances left.

Still annoyed—and slightly traumatized—I decided to humor Sasha anyway. I managed to grab three pages before some unseen Slender-like presence told me to “go away.” Quest abandoned. Sanity preserved.

Bridge Over Terrifying Waters

After a quick recovery, I shifted gears and tracked down Santiago’s journal. Delivered it safely—though apparently, I could’ve snooped inside first. Missed opportunities, I guess. My next stop was Eugene’s son, who still believes his father is alive and well on the mainland. I didn’t have the heart to correct him.

He handed me a set of explosives and outlined the island’s master plan: lure Charles onto a wooden bridge, blow it sky-high, and end this nightmare once and for all. It’s a bold plan. Questionable, sure—but bold. I now have the temple key for when it’s time to place the eggs and start the final battle.

Preparing for Round Two

As the day closed, I parked the train near a resident’s home rumored to hold another weapon. After my last run-in with Charles, I’m more than ready to upgrade my firepower. Whether or not I get a moment’s peace to actually do it—that’s another story.

For now, I’ve survived long enough to plan my next move. But I can’t shake the feeling that Charles is circling again, waiting for round two.

Continue the journey:
Log 3: Explosions and Evasion |
Log 5 (Coming Soon)

SnowRunner Survival: The Permagear Diaries – Day Fifteen: Tyres, Tests, and a Tempting Task

SnowRunner Survival: The Permagear Diaries – Day 15

Truck of the Day: Frank (Fleetstar F2070A)
Primary Objective: Complete Steel River Supplies and Riverside Repair tasks

Tyres, Tests, and a Tempting Task

With Frank sporting his brand-new tyres, I couldn’t resist giving him a proper shakedown. Scanning my task list, Steel River Supplies caught my eye. Not only would it send me back to Black River, but it would also let me grab consumables from the farm here in Smithville Dam — a perfect excuse to see how he’d handle water crossings now.

The last time Frank tackled this road, the flooded section was a serious obstacle. This time? Just a mild inconvenience. Consumables loaded, I spun him around and headed for Black River.

Three Routes, One Choice

Once in Black River, I checked my map. To complete the task, I’d need to drop off consumables, pick up wooden planks, and deliver a fuel carrier trailer. My options:

  1. Consumables → Wooden Planks → Trailer
  2. Consumables → Trailer → Wooden Planks
  3. Trailer first, then haul it alongside the consumables straight to the destination

I chose Option 3. Why? Simple — I wanted to see what Frank could do now. If he’d dragged a large fuel carrier trailer to the warehouse before upgrades, surely he could do even better now.

Frank Goes Amphibious

Plotting my course, I took the same route Scout had previously tackled. It turns out Frank is now amphibious — or at least close enough that he handles water without drama. Good to know.

Reaching the trailer, we looped back toward our starting point. The mud tried to slow us, but with all his upgrades, Frank treated it like an irritating speed bump. No winching, no stalling — just steady progress.

Delivery Without Drama

We rolled into the destination without a hitch, dropped off the trailer and consumables, then headed for the lumber mill. Wooden planks loaded, one final short trip sealed the deal. Steel River Supplies completed with minimal hassle and maximum satisfaction. Frank’s test run? A resounding success.

Riverside Repair: The Real Test

I decide to tackle one more task: Riverside Repair. This would be the ultimate test of Frank’s mud and water handling. As expected, he took on the terrain slowly but steadily. Then I stumbled upon a small trick — if I angled the camera just right, I could see a path under the water. Handy.

Then came the real obstacle: barriers and a sign that read Water Over Road. Understatement of the year — it was a full-on river over the road. Frank pushed through, but the climb on the other side was another story. Thick mud locked him in place. Time passed. Progress was a crawl. I was creeping forward, sliding back, winching, and repeating. Just when I thought Frank was doomed to live here forever, this happened:

Yep, he somehow managed to free himself. I feel like he took that notification as a personal attack. The rest of the journey went off without a hitch, although I made sure to take the long way round back. Once I completed Riverside Repair, I turned off Frank’s engine and celebrated a job well done.

Continue the Journey

Day 14 | You are here | Day 16 (Coming Soon)

More from SnowRunner

Submerged: A Subnautica Survival Diary – Log 3 | The Aurora Problem (and the Leviathan Bigger Problem)

Platform: Steam Deck | Difficulty: Survival

“The Aurora is going to explode…” — my PDA, several minutes before the actual explosion.

Apparently the end of the world comes with buffering. The PDA warned me of the Aurora’s imminent detonation, but the ship took its sweet time about it. Still, that gave me the perfect window to craft my shiny new radiation suit from some creepvine samples. Nothing like the warm embrace of woven seaweed to make you feel safe from lethal fallout.

Once kitted out, I stocked up on the essentials: food, water, fire extinguisher, medkits — the usual “I might die but want to look prepared” loadout. Then, off to the Aurora I went, scanning everything I passed: beacons, Propulsion Cannon fragments, office chairs (because if I’m stranded on an alien ocean planet, I’m at least going to sit comfortably).

The Aurora Expedition

I reached the crash site and was immediately greeted by its new inhabitants — aggressive little crab things who were less than impressed with my knife-waving diplomacy. My PDA informed me I’d need a laser cutter to get deeper inside. Excellent. Another tool I don’t have. Add that to the “future me” problem list right under “stop the Aurora from exploding in 24 hours.”

Current me, however, had a far more pressing issue: I’d lost my flashlight. Somewhere inside the Aurora. One second I’m lighting the way through twisted corridors, the next my light vanishes into the void. After several minutes of frantic backtracking and muttering, I found it lying on the deck. Then, like the professional survivor I am, I immediately dropped it again while trying to equip it. Future me might solve radiation — present me still can’t handle basic inventory management.

The Leviathan Encounter

Deciding I couldn’t progress without a Propulsion Cannon, I returned to the Lifepod to craft one — only to discover I was missing a wiring kit. Which needs silver. Which I didn’t have.
Silver lives in sandstone outcrops, and the area near the Aurora wreck seemed like a logical place to search.

That was a mistake.

Because instead of silver, I found something much bigger. A Leviathan. Don’t ask me which type — I was too busy screaming to file a report. It was fast, loud, and apparently decided I looked like lunch. I bolted. It chased. My health bar became a decorative sliver, and then, for reasons only it knows, it broke off the attack.

I didn’t wait to question my luck. I burned through medkits and bolted home, heart pounding louder than the Aurora’s reactor. The silver can wait. I’m alive, and that’s enough for today — though after my close encounter with the Reaper Leviathan (I finally remembered what it was called), I’m not sure how many more “near misses” my nerves can take.

Log 3 Summary (Steam Deck Edition)

  • Crafted the Radiation Suit before the Aurora explosion
  • Scanned multiple new blueprints, including the Propulsion Cannon
  • Lost my flashlight inside the Aurora (twice)
  • Confirmed: Leviathans exist, and they are very fast
  • Survived a close encounter with one — barely
Continue the journey:
Log 2 |
Log 4 Coming Soon

Blog at WordPress.com.

Up ↑