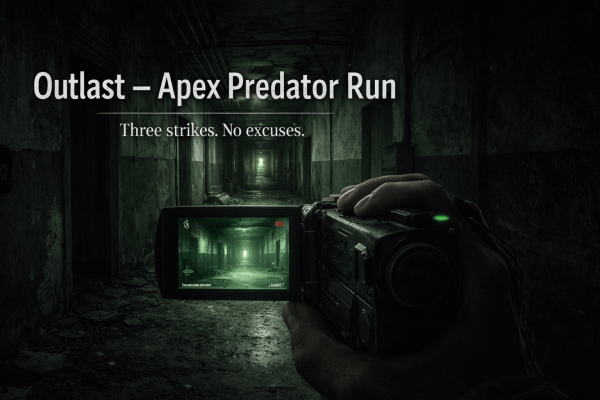
Survivor’s Log: Two in the Pipeline

Survivor’s Log: Two in the Pipeline

This is another short pipeline note rather than an announcement. Just a record of what’s coming next and why.

There are two games lined up, both relatively contained, and both chosen because they fit the kind of survival experiences I want to document right now.

Slender: The Arrival

The first is Slender: The Arrival.

I originally played it when it first released. Since then, it’s received a 10th Anniversary update that effectively rebuilds the experience and introduces new content, including an additional location.

Because of that reset, this isn’t a nostalgia run. It’s closer to approaching a familiar idea in a form that’s changed enough to warrant a fresh look.

This will sit under Survivor’s Dread, recorded as a single-attempt run, with the logs reflecting how the attempt unfolds rather than aiming for a specific outcome.

Iron Lung

The second is Iron Lung.

Interest around it has increased recently because of the upcoming film adaptation, which is what initially put it on my radar.

What actually held my attention was hearing how personal the project was, and how much of the atmosphere and intent came directly from the game itself.

I’ve been aware of the creator behind the adaptation for a while, but I’ve never followed their content directly. What stood out wasn’t who was making the film, but the decision to make a film at all.

Choosing to adapt a small, largely unknown game suggested there was something specific in the source material that made it worth that level of commitment.

That curiosity is what led me here — to the game itself, rather than the adaptation built around it.

This will be treated as a one-off survival horror run. A single attempt, recorded without embellishment, documenting the experience as it unfolds.

Nothing Locked In

There are no dates attached to either of these yet. They’ll be recorded and published when there’s space, rather than being slotted in to chase relevance.

As always, the point isn’t to follow momentum elsewhere. It’s to document things that feel worth documenting at the time.

Surviving, Not Suffering

The Outlast Trials – Log 9: Kill the Politician (The Kress Twins)


Prime Asset: The Kress Twins
Trial: Kill the Politician
Difficulty: Standard
Grade: A


Back to The Outlast Trials hub

Thanks to Prime Asset Roulette, I was assigned the Kress Twins.
Which means I now have two problems instead of one.

My only available option for this log was Kill the Politician,
so that’s what we’re doing.

I’m keeping this on Standard too,
because the last few trials have been a bit of a disaster and I’m not in the mood to press my luck.

Things started off simple enough.
I accidentally found a fuse, got a prompt to pick it up,
and realised I’d just stumbled into the task required to get inside the shopping mall.

I grabbed the second fuse and was allowed in.

Cue more fuse hunting.
I could already see the pattern forming.

I also got my first proper look at the Twins.
Pretty sure they didn’t see me, but I’m not loving the fact they seem to have
360 degree vision.

Which means stealth isn’t optional.
I need to stay hidden…
or, to put it another way:
I need to stay Incognito.

Three fuses later, I was allowed into the department store.
This time, my objective was to spend $40.

There were multiple boxes scattered around the store, each with a different price.
I didn’t even notice that at first.

So I was about $10 in before realising I could have made smarter choices.
Classic.

The Twins were also inside the store with me,
and it was oddly interesting hearing them speak to each other.
From what I could gather, they don’t like Easterman,
and they want out of whatever hell they’ve been put into.

I also couldn’t help noticing something in their dialogue.
It isn’t just “villain banter”.
There’s something uncomfortable about it — the kind of vibe where you start wondering what exactly their relationship is meant to be.

Whatever it is, it adds a whole extra layer of unease.
And frankly, I’d have preferred not to notice it.

It does make me wonder how the Prime Assets are treated outside the Trials.
I’m guessing the answer is “badly”.

Once I hit $40, I was finally allowed to join the political rally.

And then I was told to go fix the water pressure.

At this point, I’m convinced Murkoff is preparing me for employment once I graduate.
I’m not being brainwashed.
I’m being trained as a handyman.

You’d think the valves would be close together, because that would make sense.
They were not.

Four different spots across the mall.

So now I’m running around doing:

  • map reading
  • basic maths for each valve
  • trial survival, on top of plumbing

Again: handyman.

Once that was handled, it was finally time to deal with the actual goal:
spraying the politician with acid.

Naturally, I had to prime the acid first.
And naturally, this required playing a carnival-style game.

I thought electrocuting the Snitch was bad.
I was wrong.

And I’m fairly sure the Twins have been chatting with Coyle,
because they also felt the need to ambush me during this part.

I had to loop the mall a few times, hide a few times,
and basically accept that my life now consists of sprinting away and making bad decisions at speed.

Eventually, I completed the objective.
Politician: solved.

Then it was time to leave.
And the Twins also decided it was time to leave —
because they were waiting at the shuttle area like they were running security.

I hid, waited them out, and once they finally moved off,
I slipped past and escaped.

In the end, I walked away with an A.

That’s an improvement —
and I’m choosing to believe it’s because I’m learning.
Not because the mall temporarily took pity on me.

Video

Surviving, not suffering.

Survivor’s Log – The Outlast Trials – Murkoff Handyman Training

The Outlast Trials: I’m Not Being Brainwashed… I’m Being Trained as a Handyman

I’m starting to suspect Murkoff isn’t reprogramming me.

They’re training me for employment.

Think about it.

  • Fix the water pressure.
  • Locate and install fuses.
  • Turn valves using maths I haven’t used since school.
  • Power generators like I work in maintenance.

All while being chased by the worst people imaginable.

By the time I’m finished with these Trials, I won’t be “reborn”.
I’ll be qualified to repair a shopping centre with nothing but a wrench and trauma.

Honestly, I’ve played a lot of horror games.
None of them have made me do so much plumbing.

The Outlast Trials hub:

The Outlast Trials


Surviving, not suffering.

The Outlast Trials – Log 8: Poison the Medicine (Franco Barbi)

Prime Asset: Franco Barbi
Trial: Poison the Medicine
Difficulty: Standard
Grade: C+


Back to The Outlast Trials hub

This was my first trial using Prime Asset Roulette.

I didn’t choose who I was facing next — I was assigned a Prime Asset,
and the trial choice had to follow from that.

This time, the assignment was Franco Barbi.
I’d heard his name, but I hadn’t properly met him yet.
And if I’m about to be introduced to someone new in this game, I’d rather not do it on a difficulty setting that punishes curiosity.

So I kept this one on Standard and went for Poison the Medicine.

The trial started off almost suspiciously calmly.
It was quiet enough that I actually had to double check I was on the right difficulty.

Then I met Franco.

And by “met”, I mean I didn’t even realise he was there until I pushed a button —
and the second I did, it felt like I’d just punched a clock.
As if that interaction was my way of politely informing Franco that his shift had begun.

A big part of The Outlast Trials is being reminded you’re never really alone.
Franco just has a more direct way of making the point.

Once I reached the laboratory, the job was straightforward:
move the drugs from point A to point B.

Done.

Except it wasn’t done, because I was then told to go collect more.
Which tells me whoever delivered the first two batches has already been fired —
or “reassigned” — for incompetence.

Either way, it looks like I’m the delivery driver now.

I had to push a trolley to collect the remaining drugs,
and I was given a decoder to help with the task.

It took me a moment to figure out what it was actually doing,
but I noticed the numbers would spin faster the closer I got to the correct symbols.

That helped me find the second one quickly enough.

The third one, on the other hand, felt like the game had moved it
purely to ensure I stayed humble.

Eventually though: drugs collected, drugs delivered, objectives moving.

And then the trial remembered what it was.

Next objective: poison the medicine.

The first bottle was easy enough to locate.
The remaining two?
Not so much.

I spent a lot of time wandering with the sort of confidence that only comes from having no idea what you’re doing.
I’m fairly sure the game started helping me because it realised I was going to spend the rest of the evening circling the same corridor.

The bottles also did a nice little extra thing where they poisoned me while I carried them.
Which, again, feels fair.
Murkoff wouldn’t want me getting ideas about comfort.

And just to keep it lively, I managed to set off traps left, right and centre.
I’m not sure if the traps were genuinely everywhere, or if I was simply magnetised to them.

Once the medicine was poisoned, it was time to transport it to the cargo hold.

Franco made another appearance around this point,
just in case I’d started thinking the trial was back under control.

That’s the thing about this game — you can do everything correctly,
but if someone decides they’re interested in you, you’re suddenly making very different decisions.

I got the drugs into the hold.
I started stashing them.
I felt like I was getting on top of it.

And then I realised I had absolutely no idea how to get out.

For a moment, I thought I’d managed to trap myself in the cargo hold.
Which would be a very “me” way to end the trial.

Then it clicked:
if Franco found his way in, there must be another entrance.

Sure enough, there was.
Not only was there another way in — it was obvious enough that I felt personally judged by the architecture.

Drugs stashed.
Exit located.
Sprint away before anything else happens.

In the end, I escaped with a C+.

Honestly?
Fair.

I survived, I completed the objectives, and I didn’t get permanently adopted by Franco.
That feels like success.

I probably could have done better if I wasn’t personally responsible for most of the trap activations in the facility,
but we’re learning.

Video

Surviving, not suffering.

Outlast – Entry 1: Red Flags as a Route Map

Platform: Steam Deck
Run Type: Apex Predator Rule (3 strikes and I’m out)
Location: Mount Massive Asylum
Status: Alive, unsettled, and still walking forward

Series Hub:

Outlast – Apex Predator Run Hub


I’m driving toward Mount Massive Asylum with a camera on the passenger seat and an email from a whistleblower glowing like a warning label.

The message is simple: bad things are happening here. Come see it for yourself.

My character treats this less like a warning and more like a treasure map.

The red flags stack up quickly. Trespassing. Isolation. A building that looks abandoned even when it isn’t.

I break in. The asylum responds by killing the lights almost immediately.

I continue onward anyway.

The First Hint (Ignored)

The atmosphere is wrong. Not just old or decayed — more like the building is aware I’m here.

I find a man impaled on a massive spike. He’s still alive long enough to give me advice.

“Get out.”

It’s the clearest instruction I’ll receive all night. I ignore it.

I try to leave. I can’t. The only way forward is through the security room.

Going back the way I came is no longer an option. Horror logic has made that decision for me.

Chris Walker Makes a Point

I don’t reach the security room before the asylum escalates.

A very large, half-naked man appears, calls me “little pig”, and throws me through a window.

I land one floor below, alive, shaken, and very aware that my camera is not a weapon.

He doesn’t chase me.

That somehow makes it worse.

A Higher Calling

Not long after, I encounter a man dressed like a priest — or at least someone borrowing the aesthetic.

He tells me I have a higher calling.

Then he leaves me alone in the dark.

I explore further. The inmates are hostile. Interviews are cancelled.

Eventually, I find what I actually need: the keycard for the security office.

Security Room Problems

I swipe the keycard and prepare for progress.

Instead, the religious man reappears. He knows I’ve been watching him through the cameras.

To prove the point, he shuts down the generator.

The asylum drops onto backup power.

Objective: restart the generator in the basement.

The game tells me to hide.

I listen.

Through the door comes the large man again. I record him, because my character keeps confusing documentation with safety.

Files I’ve picked up finally give him a name.

Chris Walker.

I now need to go to the basement.

I have a feeling Chris Walker will be there first.

Video

Apex Predator Rule Reminder

  • Every death counts as one strike.
  • Three strikes ends the run.
  • Panic, curiosity, and bad decisions are not exemptions.

Continue the journey:
Outlast – Entry 1 (You are here) |
Outlast – Entry 2

Survivor’s Log: The Outlast Trials – Prime Asset Roulette (Rule Update)

The Outlast Trials – Prime Asset Roulette (Rule Update)

This is a quick update for The Outlast Trials series.

Why I’m Changing the Format

After completing several trials, I realised I was falling into a pattern:
choosing what felt manageable, avoiding what didn’t, and slowly turning the Trials into something predictable.

That’s not really what this game is supposed to feel like.
And it’s definitely not what Murkoff would allow.

Prime Asset Roulette

Going forward, I’m introducing a simple twist:
I’m no longer choosing which Prime Asset I face next.

Instead, I get an external pick (because naturally I’m outsourcing my survival decisions),
and I choose my next trial based on that assignment.

  • I don’t choose the Prime Asset.
  • I choose the trial based on whoever I’m assigned.
  • If the assignment isn’t available or isn’t unlocked, I reroll.

Optimisation is no longer the point.
Unpredictability is.

Is Anyone Else Doing This?

I had a quick look around to see if anyone else was running this exact format.

People are definitely doing roulette-style runs in The Outlast Trials
randomised Trial Maker setups, and other “roulette” ideas —
but I couldn’t find anyone doing this specific version:
Prime Asset Roulette, where the Prime Asset is assigned first and the trial choice is made based on that.

So, either this is genuinely uncommon… or I’m just bad at searching.
Both are possible.

Where This Fits

This series sits under Survivor’s Dread, and the whole point is documenting survival under pressure.
Prime Asset Roulette keeps that pressure intact, even when I’d rather not deal with it.

In other words: Murkoff picks who hunts me next.
I just try to leave with my organs still inside my body.

The Outlast Trials hub:


Outlast Trials Main Hub

Surviving, not suffering.

The Outlast Trials – Log 7: Feed the Children


Location: Orphanage
Trial: Feed the Children
Difficulty: Standard
Grade: A


Back to The Outlast Trials hub

After spending some points upgrading my X-ray rig, I decided to stick with Standard difficulty for one more trial.

I’ll be honest — this decision was influenced by having a fairly miserable time on Day 5 of my
Stalker Instinct run in The Long Dark.
Sometimes you don’t need to make things harder.

This time, the trial was Feed the Children.

Going purely by the name, this one sounded… nice.

It was not.

I was tasked with feeding the children soup.
Not just any soup — one made with a corpse, and finished off with a generous amount of bleach.

My upgraded X-ray rig helped a lot here.
I’d upgraded it enough that it recharged my night vision and provided objective information.

What it didn’t help with was the ex-pop.

Every time I spotted a bottle, an ex-pop seemed to appear out of nowhere.
They got hold of me more than once, and did a fair amount of damage.

Thankfully, Hide and Heal pulled its weight.
The X-ray rig did too.
I’ll need to experiment with the other rigs eventually, but this one definitely earned its keep.

I’d like to say things got easier after collecting two bottles.

They did not.

I somehow managed to walk into the same ex-pop at least twice —
both times in the exact same area.

Once I finally fed the children, I had a feeling Mother Gooseberry was going to make an appearance.

She did.

I managed to sneak past her once again, and make my way out.

After everything that happened, I was genuinely surprised to walk away with an A.

I was fully expecting a B at best.

Watch the Trial

Surviving, not suffering.

The Outlast Trials – Log 6: Cleanse the Orphans


Location: Orphanage
Trial: Cleanse the Orphans
Difficulty: Standard
Grade: A+


Back to The Outlast Trials hub

I’m getting a bit fed up of the police station.

I know I still have a couple of trials to do there, but I’m ready for a change —
and, if I’m honest, I’m ready for a break from Coyle.
I want to meet some of the other Prime Assets.

So I head to the Orphanage and decide to properly meet
Mother Gooseberry.
I encountered her during the tutorial, but this would be my first real trial with her.

I only have one option available: Cleanse the Orphans.
I’m not entirely sure what that means, but I’m about to find out.

My first task is to enter the Orphanage.
Easy enough.

Mother Gooseberry is there to welcome me.
Helpful of her to make sure I know she’s around.

Next, I need to broadcast the religious station,
followed by tuning radio receivers in the dorms.
I check the map more than once here — mostly to make sure I know where I actually am.

I even get a brief appearance from Mother Gooseberry during this section,
but I’m hiding in the dark and she doesn’t see me.

After that, I’m tasked with swapping film reels.
I struggle with this for a bit, mostly because I have no idea where they are.

Eventually, the game takes pity on me and points me in the right direction.

Next up is stopping the blasphemers in the church.
That part is simple enough — just smash the jukebox.

I’m a little concerned about how much noise I made,
so I hide.
Probably unnecessary, as the next thing I know,
a man appears on a cross and gives me my next objectives.

I’m told to power the generator and find the saw handle keys.

This time, I make sure to check the TVs before heading out —
mostly because there are no Big Grunts chasing me around this time.

I struggle a bit with the generator,
but during that process I discover a random button.
The game tells me that if I find a second button,
I’ll unlock a secret room.

It takes a few attempts thanks to being chased and juggling the generator,
but I eventually find both buttons and access the secret room.

Once again, the game helps me by showing possible key locations.
I head back to the chapel and prepare to
Serve the Body of Christ.

I thought electrocuting the Snitch was bad.
This felt worse.
Probably even more so if I were religious.

Once that’s done, it’s time to head for the shuttle —
but not before Mother Gooseberry makes another appearance.

I throw an item at her.
No idea if it connected,
because I immediately ran out of the chapel and shut the door behind me.

I eventually make my way back to the shuttle,
getting one final look at Mother Gooseberry before leaving.

Grade: A+

My first one.

More importantly, this trial taught me something:
I think it’s time to increase the difficulty for the next run.

Video

Surviving, not suffering.

The Outlast Trials – Log 5: Release the Prisoners


Difficulty: Standard
Trial: Release the Prisoners
Grade: B+


Back to The Outlast Trials hub

I’m still sticking with Standard difficulty.
This time the trial was Release the Prisoners.

The first problem was finding the key to the security room.
It reached the point where the game had to tell me exactly where it was —
all I had to do was bash a door down to get it.

The second problem was finding the security room itself.
I got lost.
Completely.

That meant dealing with various ex-pop along the way,
including the fire-wielding lunatic from the previous trial,
and someone who claimed they could see me in the dark.

Thankfully, not in my hiding spot.

No trial in the police station would be complete without Coyle,
but before I got to see him again,
an ex-pop decided to give me an extreme dose of hallucinogenics.

I genuinely thought I was going to need to find an antidote,
but thankfully it wore off on its own.

Eventually, I found a sign — an actual sign — with an arrow pointing to the security room.
From there, I managed to free the prisoners.

Then it was time to leave.

Naturally, I was given another dose of hallucinogenics.
Entirely my fault.
I could see the box was trapped.
I chose to ignore it.

I somehow survived that.
I nearly didn’t survive a third dose,
until I remembered I still had a bandage and used it to heal.

I have no idea how I found the exit area.
I just did.

Of course, Coyle was waiting for me.
I called the shuttle and got zapped by him yet again.
One more hit and I would have been done.

While waiting for the shuttle, I ran him around a parked car and hoped for the best.

In the end, I finished with a B+.

I could have done better.
But it could have been a whole lot worse.

Video

The Outlast Trials – Trial Log #4: Sabotage the Lockdown

Difficulty: Standard
Trial: Sabotage the Lockdown
Prime Asset: Coyle
Grade: A-


Back to The Outlast Trials hub

I’m sticking with Standard difficulty for another trial.
No need to press my luck yet.

This time it’s Sabotage the Lockdown.
The task sounds simple enough: reach the exit.

What the briefing neglected to mention is that I’d be carrying a gas canister the entire way.
Or that Coyle would be on my tail for the whole trial.

I didn’t even make it two rooms in before Coyle spotted me.
So I did the sensible thing.
I ran straight back to the start and hid.

Once I was sure he was gone, I went back for the canister.
Naturally, an ex-pop decided to appear at that exact moment,
so I returned to my hiding spot again.

Progress was slow, but methodical.

At one point, I was convinced I’d have to throw something at Coyle and make a break for it.
All he had to do was turn left.

He didn’t.

I’m choosing to believe the sunglasses aren’t helping him.

I eventually reached the generator, but even then, the slightest noise had me diving into corners to hide.
Once it was powered up, the exit was right there.

Somehow, after all that, I finished with an A-.
I was close to an A+, but I’ll take it.

Video

This run continues to reinforce the same lesson:
slow progress beats reckless confidence.

Related series:

Outlast – Apex Predator Run

Surviving, not suffering.

Blog at WordPress.com.

Up ↑