I found out a few days ago that Guild Wars Reforged is coming out soon.
Updated UI. Steam Deck support pending. All campaigns bundled.
And the line that hooked me: existing players keep all their progress.
That was all it took.
I needed to know if my original account still existed.
If my characters were still there.
If anything I did almost twenty years ago survived.
So I turned the Steam Deck into a tiny PC again.
Installed Lutris.
Pulled down the old Guild Wars client.
Ran the full -image download.
Waited.
Then held my breath at the login screen.
And it worked.
Every character I made loaded instantly. Nightmare Venom. Spirits of Evil. I Evil Arrow I.
All exactly where I left them.
Then I opened my friend list.
Every name hit me harder than I expected.
These were people I grouped with, explored with, wiped with, laughed with.
People I haven’t seen online in almost two decades.
Most of them probably don’t play anymore.
A few might not even remember Guild Wars at all.
But seeing that list again reminded me what this game meant to me.
So if anyone from that list ever finds this blog — even by pure accident — thank you for being part of my journey back then. You left more of a mark than you probably realise.
And if you do recognise me, please don’t mention my real name. Online names are more than enough here.
If you remember me and want to say hello, feel free to drop me an email at survivorincognito@gmail.com.
Guild Wars Reforged releases soon.
And for the first time in a long time, I feel like I’ve come home.
Platform: Steam Deck Settings: Vanilla Mario & Music — chaos left entirely intact.
“Gravity and Chuckya joined forces today. I call it a hate crime.”
Fresh off the high of conquering Bowser and the Secret Slide, I decided to revisit Shifting Sand Land. One more star there couldn’t hurt, right? A quick trip across some quicksand later, I added another to the tally and figured it was time to see what lay below the castle.
That’s when I wandered into the Boo garden — home to ghostly giggles, hidden secrets, and one particularly smug Boo concealing a course entrance. I gave chase, stomped the spook, and jumped straight into the portal. The result? Tall, Tall Mountain. Great name. Terrible welcome.
Watch Log 2:
Thrown Off the Deep End
My very first spawn placed me in arm’s reach of a Chuckya. Before I could even process what I was looking at, the purple menace grabbed me and threw me off the mountain. Ten seconds in, one life down, ego shattered. I went back in for a rematch because apparently I enjoy suffering.
Round two went much better. I methodically climbed the slopes, dodged monkey theft, narrowly avoided falling logs, and picked up six of the seven available stars. Not bad for a course that literally tried to throw me away on entry.
The lone survivor is the 100 Coin Star, which I’ll tackle next time—assuming I can convince myself that collecting loose change while balancing on ledges is “fun.”
Log 2 Summary
Stars Collected: 13
Stars Remaining: 107
Lives: 8
After the sandstorms and the mountain’s murderous intent, I’m learning that no amount of preparation can outmatch the randomizer’s sense of humour. Still, progress is progress—and at least this time I didn’t get flung into the void twice in a row.
Platform: Steam Deck Settings: Vanilla Mario & Music — because some chaos speaks for itself. “Somewhere between turning to metal and getting launched at Bowser before lunch, I realised the randomizer doesn’t believe in pacing.”
The Super Mario 64 Randomizer wastes no time reminding you that reality is optional. My first warp dropped me straight into the Metal Cap stage — a place I had no right being this early on, but apparently this version of Mario is a trendsetter. After a brief moment of “wait, how did I get here?”, I grabbed the cap, collected what I could, and escaped before the chaos decided to double down.
Moments later, I opened another door… and there he was. Bowser in the Dark World, staring back at me with that “you’re not supposed to be here yet” kind of energy. Naturally, I went in anyway.
Watch Log 1:
Early Bowser, Early Panic
I wasn’t mentally or physically prepared for an early Bowser fight. My hands were still in “collect coins and admire textures” mode, not “avoid spinning platforms over the void” mode. But somehow, it worked out. Bowser got tossed into oblivion, my confidence went up by about 10%, and my sense of direction dropped by 80%.
From there, I stumbled into Shifting Sand Land. You know, the one full of quicksand and angry wildlife. Not exactly where I expected to end up next, but at least it looked warm. A few exploratory jumps later, I realised I’d achieved very little besides confirming that sand hurts — so I retreated to something more comforting: the Secret Slide.
The Slide Before the Storm
Ah, the Secret Slide — the calmest, most reassuring part of this randomizer so far. No enemies, no bottomless pits, just gravity and mild regret. I took the scenic route (read: I fell off twice), grabbed both stars, and left feeling momentarily competent.
Naturally, that feeling didn’t last. My next warp took me back to Shifting Sand Land, which seems determined to be my home base now. Between the quicksand, whirlwinds, and the constant threat of instant death, it’s a lot like visiting a beach if the beach actively wanted you gone.
Log 1 Summary
Stars Collected: 6
Stars Remaining: 114
Lives: 4
Areas Cleared: Metal Cap, Secret Slide, Bowser in the Dark World
For a first outing, this randomizer threw everything at me except the kitchen sink (and let’s be honest, that might still show up later). Metal Mario, Bowser, sandstorms, slides — it’s been a full day’s work in about half an hour. I’ve no idea what the next warp will bring, but I’m bringing extra lives and zero expectations.
Lessons from Log 1
Metal Mario early is fun — until gravity remembers he’s heavy.
Bowser fights don’t need context to cause panic.
Shifting Sand Land: 10/10 for sun exposure, 0/10 for safety.
Secret Slide remains the only form of therapy in this castle.
“Turns out nuclear safety training is optional when you’re the only one left alive.”
Mode: Survival | Platform: Steam Deck
Post-Reaper Priorities
After my last close encounter with the Reaper Leviathan, I decide that maybe, just maybe, going silver-hunting anywhere near them is a bad idea. I still need that silver for my Propulsion Cannon, but I’d rather not earn another traumatic underwater flashback. I remember some sandstone outcrops near Lifepod 17, so I head there instead.
Luck is finally on my side. I find the silver pretty quickly, head back to my lifepod, and get to work. A few crafted materials later, I’m officially armed with a Propulsion Cannon. I briefly consider testing it on the Reaper — just to see what happens — but deep down, I know it would end poorly for me and hilariously for the Reaper.
Back to the Aurora
Feeling brave (or foolish), I head back to the Aurora. Naturally, my Seaglide’s battery dies halfway there, because Subnautica loves timing like that. After swapping it out, I make my way inside and retrace my previous steps. The crates that blocked me before? One satisfying Propulsion Cannon blast later, and I’m through.
I’m not sure what I expected — treasure, danger, maybe another PDA full of corporate nonsense — but what I definitely didn’t expect was a locked door with a keypad. For a moment, I almost give up. Then I remember my PDA might know something I don’t (which is most things), and there it is — a door code: 1454. It takes a few attempts — because typing underwater is hard — but eventually, the door slides open.
The Reactor Room
Behind it lies the reactor room, complete with glowing warnings telling me not to enter without training. Fortunately, no one’s around to stop me — and the ship is literally falling apart — so I take that as an invitation.
Radiation warning blaring, I dive in. The place is crawling with those little aggressive sea pests who’ve apparently decided this nuclear chamber is home sweet home. I’m too focused on repairing breaches to care. Twelve welds later, the Aurora’s no longer in danger of turning the ocean into a radioactive soup. One crisis averted, and I didn’t even vaporise myself. I’ll take that as a win.
Lifepod 4 and the Sunbeam
On my way back to Lifepod 5, I spot something bobbing on the surface. It’s an upside-down lifepod — number 4, to be exact. Curiosity wins, and I investigate. Inside, I find a PDA and a Creature Decoy blueprint. Probably not a coincidence that this pod didn’t make it.
Back at my base of operations, I reward myself with some cooked fish and clean water before checking the latest radio transmission. It’s from the Sunbeam — they’ve heard my signals and are getting closer. They just need to find somewhere to land.
Awaiting Rescue
Not sure what I’ll do while I wait. I’ve got Seamoth blueprints now, but no sign of the Mobile Vehicle Bay fragments I need to actually build one. So for the time being, it’s just me, my Seaglide, and the ever-expanding ocean of things trying to eat me.
I didn’t expect preventing an extinction-level event to be this quick — though I suspect the planet has plenty more chaos in store. For now, I’ll gather resources, explore nearby wrecks, and keep an eye out for those fragments. And maybe go swimming, just… not too deep.
Six months ago, I started this little corner of chaos thinking I’d maybe post a few survival stories, get a handful of clicks, and quietly freeze to death somewhere in The Long Dark. Back then, it was just me, a Nintendo Switch, and the idea of documenting how many ways I could die before breakfast.
Since then, the blog’s grown far beyond what I expected — from Switch survival diaries to Steam Deck expeditions, from small guides to full-blown playthroughs and embracing chaos. And somehow, it’s still alive — which feels like a small miracle, considering most blogs don’t make it past the first few months. Hundreds of clicks, countless laughs, and a few subscribers later, I’m still here — fuelled by caffeine and questionable decisions.
So first and foremost — thank you. Whether you’ve clicked, read, liked, shared, or just wandered in wondering how someone can die to a rabbit, I appreciate every single bit of support.
Transmission #0 – Reverse Voice Reveal
To mark the occasion, I decided to put together a short video. Some of you might’ve thought this would finally be my voice reveal. To that I say… really?
A brief burst of static, gratitude, and one very loud Godpigeon scream. Full credit, of course, to the brilliant Animaniacs team for that glorious noise.
Fuel for the Generator
I’ve also quietly launched a Ko-fi page — emphasis on quietly. I didn’t make a big announcement about it because I didn’t want it to feel like a sales pitch. Everything I create will always stay free to read and free to enjoy. That’s a promise.
I know times are tough and not everyone can spare a few pounds — and that’s perfectly fine. Your clicks, comments, and time already mean more than enough. The Ko-fi page is just there for anyone who genuinely wants to toss a tip into the mug to help keep the coffee flowing and the generator humming. Please don’t go overboard; keep the lights on at home first.
Down the line, I might look at adding a few ads on the blog or YouTube channel, but I’ll do my best to keep them minimal and non-intrusive. I’d rather focus on sharing stories and surviving the next storm than filling screens with banners and pop-ups.
Looking Ahead
There’s still a lot left to explore — new games, new disasters, same portable chaos. I’m excited (and mildly terrified) to see what the next six months bring.
So here’s to six months of frostbite, fuel shortages, and unexpected victories — and here’s to making it a full year of portable chaos. Thank you for being part of this weird, wonderful journey.
You know that moment in Subnautica when you realise the ocean doesn’t just want you gone — it wants to make a spectacle out of it? This was mine.
Recorded on Steam Deck, this short captures my first (and very unwanted) close encounter with a Reaper Leviathan. Let’s just say I left the area faster than the PDA could update my vitals — and somehow survived with a sliver of health left.
Apex Predator Rule: Three strikes to start. Only Charles can take them.
Each egg restores one — never more than three total.
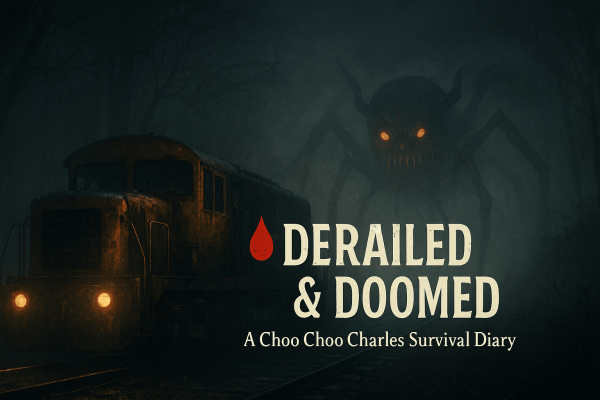
“I knew I shouldn’t have trusted the lady obsessed with pickles. Or the one hunting Slender Man. But hey—scrap is scrap.”
🎥 Survivor’s Reel: Log 4 – Pickles, Papers, and Payback (No Commentary)
The Pickle Lady Cometh
My first stop was a house belonging to someone I can only describe as the Pickle Lady. According to her, there’s “one last jar of pickles” hidden deep in her pickle cave. She wanted me to retrieve it, and honestly, the promise of scrap was enough for me to overlook how absolutely unhinged she seemed.
Charles, mercifully, must have agreed—because he didn’t interrupt this one. Maybe even he thought, “Yeah, she’s crazy,” and decided to give me a pass. Pickles retrieved, reward collected, and my sanity mostly intact.
The Slender Situation
Next up was Sasha, who casually informed me that the Slender Man was also apparently hanging around the island. She’d already collected eight pages and wanted me to grab the next set. Logical, right? Because clearly, one supernatural monster just isn’t enough.
Unfortunately, the universe had other plans. No sooner had I finished talking to her than that familiar whistle pierced the air. Charles. I bolted for my train, but he was faster. The beast blindsided me and shredded my health bar like paper. Charles earns his first win. Two chances left.
Still annoyed—and slightly traumatized—I decided to humor Sasha anyway. I managed to grab three pages before some unseen Slender-like presence told me to “go away.” Quest abandoned. Sanity preserved.
Bridge Over Terrifying Waters
After a quick recovery, I shifted gears and tracked down Santiago’s journal. Delivered it safely—though apparently, I could’ve snooped inside first. Missed opportunities, I guess. My next stop was Eugene’s son, who still believes his father is alive and well on the mainland. I didn’t have the heart to correct him.
He handed me a set of explosives and outlined the island’s master plan: lure Charles onto a wooden bridge, blow it sky-high, and end this nightmare once and for all. It’s a bold plan. Questionable, sure—but bold. I now have the temple key for when it’s time to place the eggs and start the final battle.
Preparing for Round Two
As the day closed, I parked the train near a resident’s home rumored to hold another weapon. After my last run-in with Charles, I’m more than ready to upgrade my firepower. Whether or not I get a moment’s peace to actually do it—that’s another story.
For now, I’ve survived long enough to plan my next move. But I can’t shake the feeling that Charles is circling again, waiting for round two.
“The Aurora is going to explode…” — my PDA, several minutes before the actual explosion.
Apparently the end of the world comes with buffering. The PDA warned me of the Aurora’s imminent detonation, but the ship took its sweet time about it. Still, that gave me the perfect window to craft my shiny new radiation suit from some creepvine samples. Nothing like the warm embrace of woven seaweed to make you feel safe from lethal fallout.
Once kitted out, I stocked up on the essentials: food, water, fire extinguisher, medkits — the usual “I might die but want to look prepared” loadout. Then, off to the Aurora I went, scanning everything I passed: beacons, Propulsion Cannon fragments, office chairs (because if I’m stranded on an alien ocean planet, I’m at least going to sit comfortably).
The Aurora Expedition
I reached the crash site and was immediately greeted by its new inhabitants — aggressive little crab things who were less than impressed with my knife-waving diplomacy. My PDA informed me I’d need a laser cutter to get deeper inside. Excellent. Another tool I don’t have. Add that to the “future me” problem list right under “stop the Aurora from exploding in 24 hours.”
Current me, however, had a far more pressing issue: I’d lost my flashlight. Somewhere inside the Aurora. One second I’m lighting the way through twisted corridors, the next my light vanishes into the void. After several minutes of frantic backtracking and muttering, I found it lying on the deck. Then, like the professional survivor I am, I immediately dropped it again while trying to equip it. Future me might solve radiation — present me still can’t handle basic inventory management.
The Leviathan Encounter
Deciding I couldn’t progress without a Propulsion Cannon, I returned to the Lifepod to craft one — only to discover I was missing a wiring kit. Which needs silver. Which I didn’t have.
Silver lives in sandstone outcrops, and the area near the Aurora wreck seemed like a logical place to search.
That was a mistake.
Because instead of silver, I found something much bigger. A Leviathan. Don’t ask me which type — I was too busy screaming to file a report. It was fast, loud, and apparently decided I looked like lunch. I bolted. It chased. My health bar became a decorative sliver, and then, for reasons only it knows, it broke off the attack.
I didn’t wait to question my luck. I burned through medkits and bolted home, heart pounding louder than the Aurora’s reactor. The silver can wait. I’m alive, and that’s enough for today — though after my close encounter with the Reaper Leviathan (I finally remembered what it was called), I’m not sure how many more “near misses” my nerves can take.
Log 3 Summary (Steam Deck Edition)
Crafted the Radiation Suit before the Aurora explosion
Scanned multiple new blueprints, including the Propulsion Cannon
Lost my flashlight inside the Aurora (twice)
Confirmed: Leviathans exist, and they are very fast
Platform: Steam Deck Rule: Apex Predator (Charles must kill me three times for the run to end)
⚙️ Survival Status: 3 Strikes Total Only Charles can take them away.
Each egg restores a lost strike — but I can’t exceed three.
When the last one’s gone, the run ends.
“If there’s a bad time to use explosives, I’ll find it.”
I start by doing a quick sweep for guards near the mine that’s supposedly holding ammo for the rocket launcher. Thankfully, no one’s around — which is rare, and suspicious. The entrance itself, however, is locked. Naturally.
My map says, “Find a way in.” Okay, fair enough. I look around and find some TNT. Perfect. If that doesn’t open a door, nothing will.
Important survival lesson: stand further back when lighting TNT. I take a chunk of damage from the blast, and I’m pretty sure Charles just got a notification that I’m being an idiot. If he missed that one, don’t worry — I detonate a second explosive down the tracks. More fire, more noise, more damage to me. Subtlety is dead, but the door isn’t. Yet somehow, the mine opens, and I grab the rockets.
Back to John Smith, who hands over The Boomer. I’m officially armed and ready to make even more bad decisions.
Lighthouse Lunacy
My next bright idea: go exploring. I notice a marker close to the island’s edge. Against every instinct I have, I run for it. Turns out it’s a lighthouse, home to a woman named Claire — who needs the breakers fixed.
There’s a shed nearby with four breakers. Easy enough. I sprint over, slot them in, and head back. Apparently, I “missed a step.” Turns out I need to turn them on, and it’s a little puzzle. Thirty seconds later, lights on, job done. Claire thanks me by saying fixing the lighthouse will help others spot us more easily. Yes, Claire. Including Charles.
I make a break for the train. The moment I mark my next stop, I hear it — that whistle. Round two is on.
Round 2: Return of the Rail Demon
Charles is far more persistent this time. I test out The Boomer and land a few solid hits. He claws, rams, and screeches like he’s auditioning for the next Doom soundtrack. Twice, I think he’s gone, and twice, he charges back in. After burning through some scrap for repairs, I finally drive him off. Victory number two to me.
Feeling cocky, I decide to visit another local — Ronny, who seems like he’s gearing up to tell me his life story. Nope. He just wants me to climb some dangerously tall buildings for a box of papers, promising maybe one scrap as a reward. I climb anyway, find a tin of paint for the train (score), but fail a jump and lose a scrap.
Technically, that did count as a “death” — but since it wasn’t at the claws or wheels of Charles himself, it doesn’t break the Apex Predator Rule. Accidental gravity-assisted injuries are free passes in this run.
After a few more attempts, I decide Ronny’s box isn’t worth the spinal injuries. My train, on the other hand, gets a stylish new coat of paint — a well-earned upgrade after surviving two Charles encounters.
Danger on the Hill
Feeling brave — or stupid, jury’s out — I go for Theodore’s supply box next. Unfortunately, the area’s crawling with Cultists. I spot one and think I’ve figured out his patrol pattern. I haven’t. The second guard ambushes me from uphill. I sprint for the train, but pause to open my map — rookie mistake. The cultist scores a hit.
As I’m running, I hear that familiar whistle again. Charles is awake, and maybe it’s a blessing in disguise that I didn’t grab that box. I dive into my train, patch up, and decide both Theodore’s mission and Ronny’s tower of death can wait.
For now, the plan is simple: find the next closest survivor, avoid blowing myself up again, and maybe, just maybe, make it to Log 4 without turning into train food.
Need a guide? Explore every stop, scrap pile, and spider sighting with the Aranearum Island Map Guide — your unofficial atlas to surviving the rails.
“They said ‘force Charles into a fight.’ They didn’t mention the choreography involved.”
⚙️ Survival Status: 3 Strikes Total Only Charles can take them away.
Each egg restores a lost strike — but I can’t exceed three.
When the last one’s gone, the run ends.
The Setup — Make ‘Em Fight (And Don’t Get Toasted)
After being told I need to force Charles into a fight to the death, I set out to meet the island’s next eccentric resident — a man who clearly enjoys watching things burn. Sgt. Flint greets me in front of his flaming house, which raises more questions than I’m willing to ask.
I find a water tank above his home, twist the valve, and douse the flames. That act of charity apparently doubles as an invitation, because I soon hear the dulcet, horrifying blare of Charles’ horn in the distance. I sprint for my train, ready for chaos — but he never shows. Either I scared him off or he’s waiting for a better entrance. Flint, unbothered, rewards me with his experimental weapon: the Bug Sprayer. Which, of course, is a flamethrower.
Round One — The Firestarter
Not long after, I get my wish: Charles charges in for our first real showdown. I juggle the Bug Sprayer and machine gun — one setting him ablaze, the other perforating his ego. It’s messy, loud, and absolutely glorious. Charles retreats after taking enough damage, and for the first time since stepping onto this cursed island, I feel like I’ve actually won something.
With the immediate threat gone and my train held together by scrap and spite, I decide to take advantage of the quiet. Time to meet the locals — and, inevitably, their problems.
Islanders & Errands — The To-Do List Grows
Island socialising here is just a series of fetch quests disguised as introductions. Everyone has a task, and apparently, I’m the errand boy.
Theodore — far too well-dressed for a place that’s one bad day away from Mad Max. Wants a box recovered from a railcar in a nearby canyon. Bandits guard it. I politely file that under “later.”
Santiago — prepping to leave the island as soon as rescue arrives, but he’s left his journal at home. Add another fetch quest to the growing pile.
John Smith — working on a rocket launcher (finally, someone useful). Needs me to collect the rocket ammo from a nearby bunker. That immediately jumps to the top of the list.
Greg — appears to have misplaced his clothing and sense of urgency. Used to work for the mine owner and warns that if the eggs hatch, there’ll be three more Charles-like horrors running around. He hands me the key to the second mine. Great. Just what I needed.
So far, my to-do list looks like this:
Collect rocket ammo from the bunker (top priority — rocket launcher > everything else).
Retrieve Theodore’s box from the canyon railcar (expect bandits).
Fetch Santiago’s journal from his house (return it before he reconsiders leaving).
Investigate the second mine (Greg’s key in hand, nerves not included).
Next Stop — The Bunker
With Charles licking his wounds somewhere in the wilderness, I make my way toward the bunker where John Smith’s rocket ammo supposedly waits. The island is eerily quiet now — no horn, no tracks shaking, just the wind and my engine’s occasional complaint. Perfect time to loot everything not nailed down and add more scrap to my emergency stash.
I haven’t seen Charles again since our fight, but I know he’s out there. Watching. Waiting. Probably still smouldering a little.
Log Observations & Survival Notes
Scrap is life: It’s your health, armour, and upgrade material all in one. Pick up every piece you see — it’s never enough.
Weapon swapping works: Flamethrower to make Charles back off, machine gun for consistent hits. Alternate, repair, survive.
Speed upgrades are essential: The faster your train, the smaller your funeral.
Quiet moments lie: If you don’t hear Charles, it’s because he’s planning something.
Pro Tips (Apex Rookie Friendly)
Always keep scrap handy — repairs and upgrades are instant, but you’ll burn through metal faster than ammo.
Mark every quest on your map. It’s easy to get lost between rail spurs and regret.
The Bug Sprayer is for Charles only. Do not waste fuel showing off. It’s not that kind of game.
When Charles retreats, use that window to explore. The peace never lasts long.
Need a guide? Explore every stop, scrap pile, and spider sighting with the Aranearum Island Map Guide — your unofficial atlas to surviving the rails.