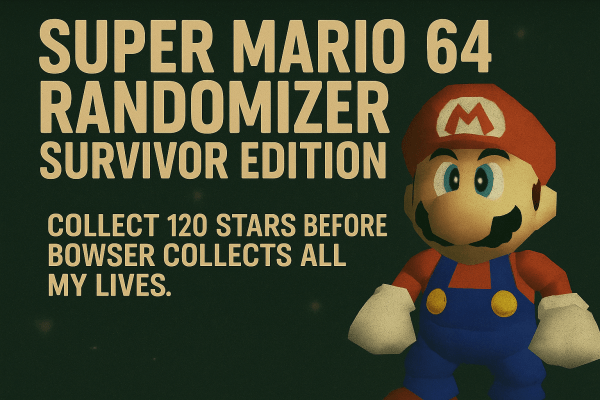
Super Mario 64 Randomizer – Log 12: Every Door Is a Trick

Super Mario 64 Randomizer – Log 12: Every Door Is a Trick

Progress: 60 Stars Reached
Platform: Steam Deck
Settings: Vanilla Mario & Music

“The castle is technically helping. It’s just doing it in the worst possible way.”

I set off with a clear goal: the Snowman’s Land door.

On the way, I try the Tiny-Huge Island painting. Still locked. Still mocking me.

Back to Snowman’s Land. I open the door, jump in, and immediately realise something’s wrong.

Behind the painting is Dire Dire Docks.

At this point, I’ve stopped being surprised.

Dire Dire Docks: Progress, Eventually

I start with the chests. I get distracted by coins almost instantly, then remember why I’m here.

Most of the chests are grouped together, which makes this far easier than expected. One is awkward, but manageable.

Next up: the Manta Ray.

I miss rings in ways that feel intentional. Bad angles. Poor timing. Repeated failure.

Eventually, I abandon the attempt and swim into the other area of the docks.

Bowser’s submarine isn’t there. He’s clearly moved on.

That at least makes grabbing stars painless.

Stars, Water, and Poor Decisions

With the sub gone, I clean up:

  • A floating water star
  • The Jet Stream star

I give the Manta Ray another go. This time it works immediately, because of course it does.

That pushes me to 60 stars. Halfway through the run.

Only two stars remain here:

  • Red Coin Star
  • 100-Coin Star

I decide to clear them while I’m here.

The water has other ideas and ejects me straight out of the level and into the castle pond.

I take the hint.

The Basement: Nothing Is Where It Should Be

I head downstairs.

First job: MIPS. No trouble at all.

Next up is the entrance that should be familiar by now.

Instead of what I expect, I get Jolly Roger Bay.

The randomizer is clearly enjoying itself.

One chest is placed somewhere deeply inconvenient. I find two in the cave, not four.

The missing one stays hidden, but there’s a star nearby, so it’s not a total loss.

I move on to Plunder in the Sunken Ship.

I almost die twice trying to coax the eel out without getting electrocuted. Eventually, it behaves.

Log 12 Status

  • Total Stars: 60
  • Dire Dire Docks: 5 / 7 stars complete
  • Jolly Roger Bay: 3 stars collected
  • Wing Cap: Still missing

The castle keeps opening up. Progress is real. Directions are optional.

YouTube – Log 12 Video

Sixty stars in. Still grounded.

Continue the Journey

Previous Log | Next Log

Super Mario 64 Randomizer Hub

Game: Super Mario 64

Super Mario 64 Randomizer – Log 11: Red Coins, Bad Maths, and Tactical Death

Progress: Snowman’s Land Cleared
Platform: Steam Deck
Settings: Vanilla Mario & Music

“Sometimes the problem isn’t finding the star. It’s reaching it once you do.”

With two stars left in Snowman’s Land, my first question is simple: where are the red coins?

I’d like to confidently say none of them are inside the igloo. I cannot say that with confidence.

At the same time, I decide to roll the Red Coin Star and the 100-Coin Star into one attempt. This is an old habit from vanilla Super Mario 64. It usually saves time.

Coin Counting in a Frozen Economy

Finding the red coins isn’t the hard part. The real issue becomes obvious very quickly: where do 100 coins come from in this course?

The answer is the igloo.

I head inside and clear out every coin I can find. Outside, I mop up enemies wherever possible. Eventually, the numbers add up and the 100-Coin Star appears.

That’s when problem number three shows up.

The red coin star is there. I can see it. I just can’t reach it.

Everything Except Shouting at the Screen

I try:

  • Standard jumps
  • Awkward camera angles
  • The cannon

Nothing works.

Eventually, it clicks. This star wants a Koopa Shell.

There’s just one issue: I already used the shell earlier in the run.

Rather than exit the course, I take a deliberate death. It’s faster, and at this point, efficiency matters more than pride.

The Shell Gamble

One more trip into Snowman’s Land.

I head straight for the box I hope contains the Koopa Shell. There’s no guarantee. The seed could absolutely ruin me here.

Thankfully, the shell is exactly where it should be.

I slow everything down. No risks. No clever movement. Just controlled progress.

The shell does its job. The red coin star is collected.

Snowman’s Land is finished.

Next Move: Chasing Familiar Ground

With the course cleared, I make a mental note for the next castle visit.

I want to head toward where Snowman’s Land normally sits in vanilla Mario 64. At this point, I’m nearly halfway through the star count, and momentum matters.

This seed hasn’t been kind, but it has been fair. I want to keep that balance on my side.

YouTube – Log 11 Video

One shell, one reset, and one course fully crossed off the list.

Log 11 Summary

Course Snowman’s Land
Stars Cleared 7 / 7
100-Coin Star Collected
Red Coin Star Collected (with shell)
Tactical Deaths 1 (on purpose)
Next Objective Follow vanilla paths, keep momentum

Sometimes progress means knowing when to reset instead of forcing a bad situation.

Continue the Journey

Previous Log | Next Log

Super Mario 64 Randomizer Hub

Game: Super Mario 64

Super Mario 64 Randomizer – Log 9: Penguins, Battlefield, and Missing Wings


Progress: Stars Increasing | Lives Intact (Somehow)
Platform: Steam Deck
Settings: Vanilla Mario & Music

“Sometimes progress is skill. Sometimes it’s guessing the right penguin and hoping for the best.”

With only four stars left in Cool, Cool Mountain, I decided to finish the job before the seed could get any funny ideas.

Cool, Cool Mountain: Cleanup Duty

First target: the Red Coin Star. I knew where six coins were. The last two? Found them easily enough. Getting them was another matter.

That’s when I remembered an old trick. The first attempt failed — badly — but that was fine. Sometimes a failed run resets the rhythm. The second attempt clicked. Clean movement. No panic. Star secured.

Next problem: the baby penguin.

A straight 50/50 guess. I picked one. It was the right one. No skill involved. I’ll take it.

Big Penguin Race and Snowman’s Lost His Head followed without drama. Just solid execution. One course fully cleared and crossed off the list.

YouTube – Log 9 Video

Red coins, penguin roulette, and a continued refusal by the Wing Cap to reveal itself.

Secret Slide Surprise: Not What I Expected

With CCM done, I checked what was hiding behind the Secret Slide entrance.

The answer: Bob-Omb Battlefield.

Still no Wing Cap switch. That’s becoming a theme.

I handled King Bob-omb first and grabbed his star. While scouting the rest of the level, it became clear that full completion here absolutely requires the Wing Cap.

Rather than force it, I settled for Koopa the Quick, grabbed the star, and called it. No point bleeding lives for stubborn pride.

Log 9 Summary

Course Cleared Cool, Cool Mountain
Risk Taken Red Coins via old-school trick
Luck Factor Correct baby penguin (first try)
Wing Cap Status Still missing
Bob-Omb Battlefield Partially cleared

One full course done. One classic stage half-finished. The Wing Cap continues to dodge me.

Continue the Journey

Previous Log | Next Log

Super Mario 64 Randomizer Hub

Super Mario 64 Randomizer – Log 8: Lava Coins & Cold Comfort

Run Type: Mario 64 Randomizer

Controller: Not an N64 controller, and it shows

Log 8 – Video

Bowser in the Fire Sea – Red Coins First, Regret Second

  • Two attempts to collect the red coins
  • Zero elegant jumps
  • One unavoidable lava tax

The star itself was worse than the coins. No safe angle.
A lost life was mandatory. I paid it and moved on.

Upstairs Confusion & Painting Roulette

  • Bob-Omb Battlefield → Bowser in the Dark World
  • Cool, Cool Mountain (allegedly)
  • Secret Slide (already done)
  • Whomp’s Fortress → actually Cool, Cool Mountain

Cool, Cool Mountain – Making It Work

Red coins were half-found and poorly remembered, so I pivoted to the
100 Coin Star. That meant slides, exits, re-entries,
and the game gently mocking me.

After exiting again, the first star appeared right in front of the big penguin,
as if it felt sorry for me.

Session Results

  • Bowser in the Fire Sea – Red Coin Star cleared
  • Cool, Cool Mountain – 3 / 7 stars
  • Lives lost: accepted

Continue the Randomizer

Randomizer Hub |
Log 7: Bowser in the Fire Sea Was Not the Plan |
Log 8 |
Log 9: Coming Soon

Super Mario 64 Randomizer – Log 7: Bowser in the Fire Sea Was Not the Plan

Super Mario 64 Randomizer Log 7: Bowser in the Fire Sea Was Not the Plan

Mode: Randomizer
Lives Remaining: 17
Stars Collected: 38
Stars Remaining: 82

With Tick Tock Clock finally behind me, I head back downstairs to see what’s lurking behind the entrance that should lead to Hazy Maze Cave. The answer, apparently, is Bowser in the Fire Sea.

To make matters worse, a quick look around confirms the red coins are floating over lava. That problem can wait.

Bowser First, Questions Later

After a few failed attempts getting my bearings, I respawn right next to the Bowser fight entrance. I briefly consider going for the red coins first, then decide against it. Survival comes first.

This somehow turns into the only time I’ve ever failed this fight. I misjudge my position, step where I shouldn’t, and Mario drops straight into the lava.

The second attempt goes as expected. Bowser goes down, the key is mine, and we all agree not to talk about the first try.

The Red Coins Problem

With upstairs now unlocked, I return to the Fire Sea red coins. Several attempts later, it’s clear this set is going to be a nuisance. Precision jumps over lava with a randomizer twist are not something to rush.

I leave them for another session — and another video.

Video

Run Status

  • Lives Remaining: 17
  • Stars Collected: 38
  • Stars Remaining: 82
  • Next Goal: Explore upstairs and see what the randomizer has moved.

Continue the Randomizer

Randomizer Hub |
Log 6: Time Stops for No Mario |
Log 7 |
Log 8

Blog at WordPress.com.

Up ↑