🩸 Derailed & Doomed: A Choo Choo Survival Diary Epilogue: The Train That Didn’t

🩸 Derailed & Doomed — Epilogue: The Train That Didn’t

“Somehow, I lived. Charles didn’t. And yes, I’m framing that sentence.”

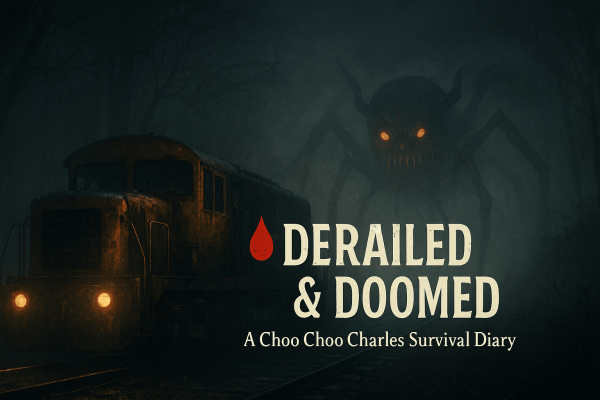
Series complete — one survivor, one destroyed monster, zero refunds for train tickets.

Final Whistle: What Victory Looked Like

The last chase was part boss fight, part scrap economy, part improvised flamethrower cookout.
I juggled weapons, patched a screaming locomotive with spare metal like a field surgeon with duct tape,
and learned that momentum beats panic nine times out of ten. On the tenth time, you just pray your train is pointing the right way.

Charles tried the usual: ambush, vanish, reappear somewhere inconvenient. I answered with speed upgrades,
a trigger-happy finger, and the stubborn belief that if I kept the train moving, fate would have to jog to keep up.
When the smoke cleared, only one of us was still on the tracks. Spoiler: it was me.

Why This Game? (And Why Now?)

I first saw Choo Choo Charles on TikTok while it was still in development — one of those “this shouldn’t work, but it absolutely does” moments.
It stuck with me. When I started Survivor Incognito, Charles rolled back onto my radar like a bad idea with great marketing.
This run was me finally cashing that ticket: a strange, scrappy, horror-tinged road trip that fit my brand of portable chaos a little too well.

Triumph, But Make It Practical: What I’d Tell Future Me

  • Speed first, always. You can’t out-tank what you can outrun.
  • The bug spray is your friend. It doesn’t just slow Charles down — it buys you breathing room, literally.
  • Scrap is a second health bar. Hoard it like snacks before a boss rush.
  • Plan your egg route. Less sightseeing, more line-of-best-fit between objectives.
  • Permadeath rule kept me honest. Every choice mattered because strikes mattered.

Lore-ish Debrief: Aftermath on the Island

With Charles gone, the island felt louder in a different way — wind in the trees instead of whistles in the dark.
The tracks creaked like they’d finally exhaled. People came out of their houses and stopped pretending the storm was “just weather.”
It’s not a fairy-tale ending. It’s a train line with fewer teeth marks.

What the Run Meant (to Me and the Blog)

This wasn’t just a boss fight; it was my first proper win added to the blog’s record — proof that I don’t just curate chaos,
I occasionally navigate it. It’s also a reminder that Survivor Incognito isn’t about masochistic difficulty;
it’s about tension you can feel and choices you can live with (even if some of them involve flaming arachnid locomotives).

Supercut: Coming Soon

I’m assembling a full-series supercut — the whole journey from first toot to final kaboom — so you can watch the story unfold without jumping between posts.
It’ll land here when it’s ready.

Credits, Thanks, & Tracks Ahead

Thanks for riding along — in comments, on the blog, and across the socials. Next up: more survival, more diaries, and definitely more poor decisions told with a straight face.
If you’re new here, the hub has everything in one place.

Continue the Journey

🔙 Read the Final Battle Log |
🗂️ Derailed & Doomed — Series Hub |
👀 Survivor’s Dread — Horror Series Hub

🩸Derailed & Doomed: A Choo Choo Charles Survival Diary Final Log: End of the Line

🩸 Derailed & Doomed — Final Log: End of the Line

“One bridge, three eggs, and one very angry locomotive. Let’s finish this.”

Difficulty: Standard

Permadeath Rule: Three Strikes — now down to two.

Preparation and Farewell

I take what’s probably going to be my last look at the map. Theodore’s quest marker catches my eye, but in the distance I hear Charles’ unmistakable whistle. He’s ready—and so am I.

I set my sights on the temple. The train, my steel companion through every panic-fueled moment on this island, begins to roll. It’s carried me this far—it deserves one last fight. Before I reach my destination, I decide to make things more interesting: that extra strike I earned earlier? Gone. I’m back down to two strikes for the final confrontation. If this is the end, it’ll be fair.

The Final Egg

As I arrive at the temple, I spot a lone cultist and do my best to avoid them. I almost succeed… until a bullet catches me in the back right as I start the ritual. The final egg slides into the altar, and Warren Charles III himself appears, demanding I stop. I don’t. The altar lights flare, the air shakes—and then the nightmare begins.

Charles re-emerges, but he’s no longer the creature that’s stalked me for days. He’s transformed—hulking, burning, furious. Hell Charles. Warren doesn’t even get a full sentence out before he’s swatted into oblivion. I sprint for my train. It’s time to end this.

First Attempt: Hell on Rails

I open with the Bug Spray—fire has always been my friend—but it’s not doing enough damage. I swap between BOB and The Boomer, trying to keep the pressure on. It’s not enough. Hell Charles hits harder than anything I’ve faced, tearing through my armor and chewing through every scrap I have. I use my last piece of scrap for repairs, but it’s hopeless. He catches me, sending me down to my final strike. One life left. One last chance.

Second Attempt: Fire and Iron

This is it—the final fight between me and Hell Charles. One of us is walking away from this bridge, and it’s not going to be him.

Absolutely — here’s your final full post, with the video placeholder inserted, the “many more eggs” twist added for your ending, and everything formatted perfectly for your WordPress setup and Derailed & Doomed series style.

🩸 Derailed & Doomed — Final Log: End of the Line

“One bridge, three eggs, and one very angry locomotive. Let’s finish this.”

Difficulty: Standard

Permadeath Rule: Three Strikes — now down to two.

Preparation and Farewell

I take what’s probably going to be my last look at the map. Theodore’s quest marker catches my eye, but in the distance I hear Charles’ unmistakable whistle. He’s ready—and so am I.

I set my sights on the temple. The train, my steel companion through every panic-fueled moment on this island, begins to roll. It’s carried me this far—it deserves one last fight. Before I reach my destination, I decide to make things more interesting: that extra strike I earned earlier? Gone. I’m back down to two strikes for the final confrontation. If this is the end, it’ll be fair.

The Final Egg

As I arrive at the temple, I spot a lone cultist and do my best to avoid them. I almost succeed… until a bullet catches me in the back right as I start the ritual. The final egg slides into the altar, and Warren Charles III himself appears, demanding I stop. I don’t. The altar lights flare, the air shakes—and then the nightmare begins.

Charles re-emerges, but he’s no longer the creature that’s stalked me for days. He’s transformed—hulking, burning, furious. Hell Charles. Warren doesn’t even get a full sentence out before he’s swatted into oblivion. I sprint for my train. It’s time to end this.

First Attempt: Hell on Rails

I open with the Bug Spray—fire has always been my friend—but it’s not doing enough damage. I swap between BOB and The Boomer, trying to keep the pressure on. It’s not enough. Hell Charles hits harder than anything I’ve faced, tearing through my armor and chewing through every scrap I have. I use my last piece of scrap for repairs, but it’s hopeless. He catches me, sending me down to my final strike. One life left. One last chance.

Second Attempt: Fire and Iron

This is it—the final fight between me and Hell Charles. One of us is walking away from this bridge, and it’s not going to be him.

This time, I play smarter. I remember how well the Bug Spray kept him at bay during egg hunts, so I double down on it. Flames roar, metal screeches, and I manage to hold him off long enough to chip away at his health. He tries teleporting around the tracks, but I’m ready for his tricks now.

His health drops bit by bit. I’m out of scrap again, the train’s on its last legs, but Hell Charles is weaker than ever. I watch his health bar disappear—only for him to keep coming. Then, the bridge looms ahead.

The charges detonate. The rails give way. Hell Charles plummets into the abyss. I don’t know how much health I had left, and honestly, I don’t care. The island is quiet for the first time in days. I exhale as the credits roll.

After the Fire

Victory tastes like engine smoke and relief. The nightmare’s over—or so I thought. Because as the screen fades, the camera pans to another cave… and far more than just three eggs. The ground trembles. Something deep beneath the island is stirring. I might’ve won the battle, but this world’s story is far from over.

Continue the Journey

Log 6 | Final Log: You Are Here

🩸 Derailed & Doomed: A Choo Choo Charles Survival Diary Log 6: Three Eggs and a Funeral (Probably)

“Two eggs to go. One murderous locomotive. And a sermon that really didn’t age well.”


🎥 Watch Log 6: Three Eggs and a Funeral (Probably)

Faith, Paint, and Poorly Sighted Cultists

With two eggs remaining, I decide I’m as ready as I’ll ever be. Time to face destiny — or at least, sprint toward it screaming.

The first target: the mine in the middle of the island. On the way, I stumble upon a church, complete with a sermon that sounds more like a cult recruitment speech than holy scripture. I also find a can of black paint — clearly divine intervention — so I treat my train to a new coat before heading inside the mine.

The cultists here… well, let’s just say the masks are doing more harm than good. One could’ve had a clean shot on me, but apparently, I was invisible. What begins as a stealth mission quickly devolves into “grab the egg and run.” I sprint out, bullets whizzing past, praying my train hasn’t wandered off without me. Once the shooting stops, I open the map, mark my train, and plan my route to the final mine.

The Bug Spray Revelation

Two mines down, two eggs in hand, one to go — and Charles knows it. His whistle cuts through the air as I make my way toward the last mine. This time, though, I’m prepared.

I’ve learned that the bug spray isn’t just for keeping his ugly mug at bay; it deals slow, steady chip damage if used sparingly. It’s not glamorous, but it’s something. I’ll need to remember this for our inevitable final showdown.

After a short skirmish, Charles retreats. I let him go — we’ll finish this soon enough.

The Final Egg

The southern mine awaits. Inside, I get another chance to show off my lockpicking skills — not that anyone’s watching. For a brief, glorious moment, I think the place might actually be abandoned.

Then I hear the whistling.

So, back to the classic strategy: Run. Grab. Run again. I burst out of the mine clutching the last egg, a cultist hot on my heels. Fortunately for me (and unfortunately for him), I reverse my train right over him. Efficient, if a little messy.

The three eggs are mine. One final stop remains — the shrine, the signal, the point of no return. Either I end Charles… or he ends me.

Next Stop: The Final Fight

I take one last look at the map. Every track, every encounter, every scrap of metal has led to this. The next log will be the last — one way or another.

It’s time to finish this.

Continue the journey:
Previous Log (Log 5) |
Final Log

🩸 Derailed & Doomed: A Choo Choo Charles Survival Diary Log 5: Bob, Cultists & Chaos

“Apparently Charles had other plans today. Which is fine — I had a date with destiny… and Gertrude.”

⚙️ Survival Status: 3 Strikes Total
Only Charles can take them away.
Each egg restores a lost strike — but I can’t exceed three.
When the last one’s gone, the run ends.

Watch: Fighting Charles twice and storming the northern mine (Steam Deck Gameplay).

The Setup — Gertrude’s Gift & Gale’s Key

I half-expected to hear that ominous whistle the second I loaded in, but the island was unusually quiet. No ambush, no chase — just eerie calm. I took it as an omen (probably a bad one) and rolled out to find my next local resident: Gertrude. She asked me to retrieve her late husband’s weapon and name it BOB in his honour. Honestly, she could’ve asked me to name it after her cat and I’d still have agreed — I need firepower more than morals at this point.

Not far down the line, I met Gale, who kindly handed over the final key I needed to access the last egg mine. Suddenly, everything clicked into place: I had all three egg locations and the coordinates for my potential final weapon. The problem? Reaching them alive. Step one: get BOB.

Round One — Collecting BOB (and Unwanted Attention)

I arrived at the scrapyard where cultists had taken BOB and barely had time to blink before that familiar whistle echoed across the valley. I slammed the train into forward and grabbed the Bug Spray. No visual — so I backed up, regrouped, and tried again.

That’s when I discovered two things. One: my train is a surprisingly effective cultist-flattening machine. Two: overshooting the area guarantees a personal visit from Charles himself.

The ensuing fight was messy. The Bug Spray pushed him back; the machine gun chipped away; the Boomer — well, let’s say my aim was more “creative fireworks” than “effective combat.” Eventually Charles retreated, but I somehow triggered a second encounter almost instantly. Double chaos for the price of one. After the rematch, he finally slunk away to lick his metallic wounds.

With the area silent again, I cleaned up the last surviving cultist (the train helped) and looted every scrap in sight. And there it was — BOB, shiny and furious. Welcome to the team, you beautiful piece of overkill.

Island Decisions — Next Stop: The Egg Mines

I debated my next step. Theodore’s mission was still on the board, Sasha’s definitely wasn’t, and the thought of climbing cliffs for a single scrap felt… inefficient. The choice was clear: time to start collecting eggs.

Egg #1 — Northern Mine Mayhem

The northernmost mine seemed like the least terrible option. A lone cultist patrolled outside — I introduced them to BOB. Inside, I discovered something new: I could actually lean left and right. Whether it’s a mine-only feature or some unintentional stealth buff, I’ll test it later.

I crept through the tunnels, listening to a cultist whistle a cheerful little tune that made the situation feel way too casual. I tried sneaking past — failed spectacularly — and took a bullet for my efforts. Panic mode engaged. I sprinted, found the glowing egg, yanked a few random levers, and bolted for daylight.

One egg secured. One strike restored. Back to three lives remaining.

Log Observations & Survival Notes

  • BOB is a beast: Best used for short, devastating bursts. Don’t overheat it.
  • Bug Spray still reigns supreme: It’s the best tool for making Charles think twice.
  • Scrap remains sacred: You will always need more than you have.
  • Cultists aren’t bulletproof: Especially not when they meet the front of a train.
  • Leaning in mines helps: It might not save you, but it makes dying funnier.

Pro Tips (Steam Deck Edition)

  • Use gyro aiming if you can — it helps land those tricky shots with the Boomer.
  • Don’t linger near cultist camps — they hear the train before you see them.
  • BOB + Bug Spray combo = panic fire supremacy.
  • Take fights on straight track when possible — easier weapon tracking, safer retreats.
  • After Charles retreats, loot nearby paths fast — his cooldown window is short.

Need a guide? Explore every stop, scrap pile, and spider sighting with the Aranearum Island Map Guide — your unofficial atlas to surviving the rails.


🩸 Derailed & Doomed: A Choo Choo Charles Survival Diary Log 4: Pickles, Papers, and Payback

Platform: Steam Deck |

Apex Predator Rule: Three strikes to start. Only Charles can take them.
Each egg restores one — never more than three total.

“I knew I shouldn’t have trusted the lady obsessed with pickles. Or the one hunting Slender Man. But hey—scrap is scrap.”

🎥 Survivor’s Reel: Log 4 – Pickles, Papers, and Payback (No Commentary)

The Pickle Lady Cometh

My first stop was a house belonging to someone I can only describe as the Pickle Lady. According to her, there’s “one last jar of pickles” hidden deep in her pickle cave. She wanted me to retrieve it, and honestly, the promise of scrap was enough for me to overlook how absolutely unhinged she seemed.

Charles, mercifully, must have agreed—because he didn’t interrupt this one. Maybe even he thought, “Yeah, she’s crazy,” and decided to give me a pass. Pickles retrieved, reward collected, and my sanity mostly intact.

The Slender Situation

Next up was Sasha, who casually informed me that the Slender Man was also apparently hanging around the island. She’d already collected eight pages and wanted me to grab the next set. Logical, right? Because clearly, one supernatural monster just isn’t enough.

Unfortunately, the universe had other plans. No sooner had I finished talking to her than that familiar whistle pierced the air. Charles. I bolted for my train, but he was faster. The beast blindsided me and shredded my health bar like paper. Charles earns his first win. Two chances left.

Still annoyed—and slightly traumatized—I decided to humor Sasha anyway. I managed to grab three pages before some unseen Slender-like presence told me to “go away.” Quest abandoned. Sanity preserved.

Bridge Over Terrifying Waters

After a quick recovery, I shifted gears and tracked down Santiago’s journal. Delivered it safely—though apparently, I could’ve snooped inside first. Missed opportunities, I guess. My next stop was Eugene’s son, who still believes his father is alive and well on the mainland. I didn’t have the heart to correct him.

He handed me a set of explosives and outlined the island’s master plan: lure Charles onto a wooden bridge, blow it sky-high, and end this nightmare once and for all. It’s a bold plan. Questionable, sure—but bold. I now have the temple key for when it’s time to place the eggs and start the final battle.

Preparing for Round Two

As the day closed, I parked the train near a resident’s home rumored to hold another weapon. After my last run-in with Charles, I’m more than ready to upgrade my firepower. Whether or not I get a moment’s peace to actually do it—that’s another story.

For now, I’ve survived long enough to plan my next move. But I can’t shake the feeling that Charles is circling again, waiting for round two.

Continue the journey:
Log 3: Explosions and Evasion |
Log 5 (Coming Soon)

SnowRunner Survival: The Permagear Diaries – Day Fifteen: Tyres, Tests, and a Tempting Task

SnowRunner Survival: The Permagear Diaries – Day 15

Truck of the Day: Frank (Fleetstar F2070A)
Primary Objective: Complete Steel River Supplies and Riverside Repair tasks

Tyres, Tests, and a Tempting Task

With Frank sporting his brand-new tyres, I couldn’t resist giving him a proper shakedown. Scanning my task list, Steel River Supplies caught my eye. Not only would it send me back to Black River, but it would also let me grab consumables from the farm here in Smithville Dam — a perfect excuse to see how he’d handle water crossings now.

The last time Frank tackled this road, the flooded section was a serious obstacle. This time? Just a mild inconvenience. Consumables loaded, I spun him around and headed for Black River.

Three Routes, One Choice

Once in Black River, I checked my map. To complete the task, I’d need to drop off consumables, pick up wooden planks, and deliver a fuel carrier trailer. My options:

  1. Consumables → Wooden Planks → Trailer
  2. Consumables → Trailer → Wooden Planks
  3. Trailer first, then haul it alongside the consumables straight to the destination

I chose Option 3. Why? Simple — I wanted to see what Frank could do now. If he’d dragged a large fuel carrier trailer to the warehouse before upgrades, surely he could do even better now.

Frank Goes Amphibious

Plotting my course, I took the same route Scout had previously tackled. It turns out Frank is now amphibious — or at least close enough that he handles water without drama. Good to know.

Reaching the trailer, we looped back toward our starting point. The mud tried to slow us, but with all his upgrades, Frank treated it like an irritating speed bump. No winching, no stalling — just steady progress.

Delivery Without Drama

We rolled into the destination without a hitch, dropped off the trailer and consumables, then headed for the lumber mill. Wooden planks loaded, one final short trip sealed the deal. Steel River Supplies completed with minimal hassle and maximum satisfaction. Frank’s test run? A resounding success.

Riverside Repair: The Real Test

I decide to tackle one more task: Riverside Repair. This would be the ultimate test of Frank’s mud and water handling. As expected, he took on the terrain slowly but steadily. Then I stumbled upon a small trick — if I angled the camera just right, I could see a path under the water. Handy.

Then came the real obstacle: barriers and a sign that read Water Over Road. Understatement of the year — it was a full-on river over the road. Frank pushed through, but the climb on the other side was another story. Thick mud locked him in place. Time passed. Progress was a crawl. I was creeping forward, sliding back, winching, and repeating. Just when I thought Frank was doomed to live here forever, this happened:

Yep, he somehow managed to free himself. I feel like he took that notification as a personal attack. The rest of the journey went off without a hitch, although I made sure to take the long way round back. Once I completed Riverside Repair, I turned off Frank’s engine and celebrated a job well done.

Continue the Journey

Day 14 | You are here | Day 16 (Coming Soon)

More from SnowRunner

🩸 Derailed & Doomed: A Choo Choo Charles Survival Diary Log 3: TNT, Torpedoes & Terrible Timing

Platform: Steam Deck
Rule: Apex Predator (Charles must kill me three times for the run to end)

⚙️ Survival Status: 3 Strikes Total
Only Charles can take them away.
Each egg restores a lost strike — but I can’t exceed three.
When the last one’s gone, the run ends.

“If there’s a bad time to use explosives, I’ll find it.”


I start by doing a quick sweep for guards near the mine that’s supposedly holding ammo for the rocket launcher. Thankfully, no one’s around — which is rare, and suspicious. The entrance itself, however, is locked. Naturally.

My map says, “Find a way in.” Okay, fair enough. I look around and find some TNT. Perfect. If that doesn’t open a door, nothing will.

Important survival lesson: stand further back when lighting TNT. I take a chunk of damage from the blast, and I’m pretty sure Charles just got a notification that I’m being an idiot. If he missed that one, don’t worry — I detonate a second explosive down the tracks. More fire, more noise, more damage to me. Subtlety is dead, but the door isn’t. Yet somehow, the mine opens, and I grab the rockets.

Back to John Smith, who hands over The Boomer. I’m officially armed and ready to make even more bad decisions.

Lighthouse Lunacy

My next bright idea: go exploring. I notice a marker close to the island’s edge. Against every instinct I have, I run for it. Turns out it’s a lighthouse, home to a woman named Claire — who needs the breakers fixed.

There’s a shed nearby with four breakers. Easy enough. I sprint over, slot them in, and head back. Apparently, I “missed a step.” Turns out I need to turn them on, and it’s a little puzzle. Thirty seconds later, lights on, job done. Claire thanks me by saying fixing the lighthouse will help others spot us more easily. Yes, Claire. Including Charles.

I make a break for the train. The moment I mark my next stop, I hear it — that whistle. Round two is on.

Round 2: Return of the Rail Demon

Charles is far more persistent this time. I test out The Boomer and land a few solid hits. He claws, rams, and screeches like he’s auditioning for the next Doom soundtrack. Twice, I think he’s gone, and twice, he charges back in. After burning through some scrap for repairs, I finally drive him off. Victory number two to me.

Feeling cocky, I decide to visit another local — Ronny, who seems like he’s gearing up to tell me his life story. Nope. He just wants me to climb some dangerously tall buildings for a box of papers, promising maybe one scrap as a reward. I climb anyway, find a tin of paint for the train (score), but fail a jump and lose a scrap.

Technically, that did count as a “death” — but since it wasn’t at the claws or wheels of Charles himself, it doesn’t break the Apex Predator Rule. Accidental gravity-assisted injuries are free passes in this run.

After a few more attempts, I decide Ronny’s box isn’t worth the spinal injuries. My train, on the other hand, gets a stylish new coat of paint — a well-earned upgrade after surviving two Charles encounters.

Danger on the Hill

Feeling brave — or stupid, jury’s out — I go for Theodore’s supply box next. Unfortunately, the area’s crawling with Cultists. I spot one and think I’ve figured out his patrol pattern. I haven’t. The second guard ambushes me from uphill. I sprint for the train, but pause to open my map — rookie mistake. The cultist scores a hit.

As I’m running, I hear that familiar whistle again. Charles is awake, and maybe it’s a blessing in disguise that I didn’t grab that box. I dive into my train, patch up, and decide both Theodore’s mission and Ronny’s tower of death can wait.

For now, the plan is simple: find the next closest survivor, avoid blowing myself up again, and maybe, just maybe, make it to Log 4 without turning into train food.


Need a guide? Explore every stop, scrap pile, and spider sighting with the Aranearum Island Map Guide — your unofficial atlas to surviving the rails.


Continue the Journey

← Log 2: Flame, Speed, and Fetch Quests | Log 4 →

🩸 Derailed & Doomed: A Choo Choo Charles Survival Diary Log 2: Flame, Speed, and Fetch Quests

🩸 Derailed & Doomed — Log 2: Flame, Speed, and Fetch Quests

“They said ‘force Charles into a fight.’ They didn’t mention the choreography involved.”

⚙️ Survival Status: 3 Strikes Total
Only Charles can take them away.
Each egg restores a lost strike — but I can’t exceed three.
When the last one’s gone, the run ends.

The Setup — Make ‘Em Fight (And Don’t Get Toasted)

After being told I need to force Charles into a fight to the death, I set out to meet the island’s next eccentric resident — a man who clearly enjoys watching things burn. Sgt. Flint greets me in front of his flaming house, which raises more questions than I’m willing to ask.

I find a water tank above his home, twist the valve, and douse the flames. That act of charity apparently doubles as an invitation, because I soon hear the dulcet, horrifying blare of Charles’ horn in the distance. I sprint for my train, ready for chaos — but he never shows. Either I scared him off or he’s waiting for a better entrance. Flint, unbothered, rewards me with his experimental weapon: the Bug Sprayer. Which, of course, is a flamethrower.

Round One — The Firestarter

Not long after, I get my wish: Charles charges in for our first real showdown. I juggle the Bug Sprayer and machine gun — one setting him ablaze, the other perforating his ego. It’s messy, loud, and absolutely glorious. Charles retreats after taking enough damage, and for the first time since stepping onto this cursed island, I feel like I’ve actually won something.

With the immediate threat gone and my train held together by scrap and spite, I decide to take advantage of the quiet. Time to meet the locals — and, inevitably, their problems.

Islanders & Errands — The To-Do List Grows

Island socialising here is just a series of fetch quests disguised as introductions. Everyone has a task, and apparently, I’m the errand boy.

  • Theodore — far too well-dressed for a place that’s one bad day away from Mad Max. Wants a box recovered from a railcar in a nearby canyon. Bandits guard it. I politely file that under “later.”
  • Santiago — prepping to leave the island as soon as rescue arrives, but he’s left his journal at home. Add another fetch quest to the growing pile.
  • John Smith — working on a rocket launcher (finally, someone useful). Needs me to collect the rocket ammo from a nearby bunker. That immediately jumps to the top of the list.
  • Greg — appears to have misplaced his clothing and sense of urgency. Used to work for the mine owner and warns that if the eggs hatch, there’ll be three more Charles-like horrors running around. He hands me the key to the second mine. Great. Just what I needed.

So far, my to-do list looks like this:

  1. Collect rocket ammo from the bunker (top priority — rocket launcher > everything else).
  2. Retrieve Theodore’s box from the canyon railcar (expect bandits).
  3. Fetch Santiago’s journal from his house (return it before he reconsiders leaving).
  4. Investigate the second mine (Greg’s key in hand, nerves not included).

Next Stop — The Bunker

With Charles licking his wounds somewhere in the wilderness, I make my way toward the bunker where John Smith’s rocket ammo supposedly waits. The island is eerily quiet now — no horn, no tracks shaking, just the wind and my engine’s occasional complaint. Perfect time to loot everything not nailed down and add more scrap to my emergency stash.

I haven’t seen Charles again since our fight, but I know he’s out there. Watching. Waiting. Probably still smouldering a little.

Log Observations & Survival Notes

  • Scrap is life: It’s your health, armour, and upgrade material all in one. Pick up every piece you see — it’s never enough.
  • Weapon swapping works: Flamethrower to make Charles back off, machine gun for consistent hits. Alternate, repair, survive.
  • Speed upgrades are essential: The faster your train, the smaller your funeral.
  • Quiet moments lie: If you don’t hear Charles, it’s because he’s planning something.

Pro Tips (Apex Rookie Friendly)

  • Always keep scrap handy — repairs and upgrades are instant, but you’ll burn through metal faster than ammo.
  • Mark every quest on your map. It’s easy to get lost between rail spurs and regret.
  • The Bug Sprayer is for Charles only. Do not waste fuel showing off. It’s not that kind of game.
  • When Charles retreats, use that window to explore. The peace never lasts long.

Need a guide? Explore every stop, scrap pile, and spider sighting with the Aranearum Island Map Guide — your unofficial atlas to surviving the rails.


SnowRunner Survival: The Permagear Diaries – Day Fourteen: Suspension Trials & Chevy Rescue Plans

SnowRunner Survival: The Permagear Diaries – Day 14: Suspension Trials & Chevy Rescue Plans


Frank’s New Legs

With Frank’s brand-new raised suspension fitted, I decide today’s the day to finish up The Essentials.
One small problem: Frank’s pointing the wrong way.
The boulder-clearing job from before opened a fresh path, so I follow it — partly to see where it goes, partly to avoid the awkward Austin Powers-style manoeuvring. It leads me to something familiar: another Chevrolet, the very same model I started my SnowRunner journey with.

The Stranded Chevy

I park Frank up alongside and jump in for a look. It’s going to need some upgrades before it’s worth driving… and then I notice the real problem.
It’s in no state to move at all — repairs come first. That makes this a job for Red. For now, I hop back into Frank, wiggle the wheel a few times, and get him facing the right way back toward the garage.

Warehouse Run

Back at the garage, I remember there’s a warehouse in this region with wooden planks. That’s exactly what I need for the farm delivery, and it’s perfect for two reasons:
1. I can see exactly how much fuel Frank burns on a long run.
2. I can avoid those soul-draining loading screens from switching regions.

The road’s a good test for the new suspension too. Frank does take a couple of damage points — entirely my fault for forgetting to flick on AWD — but otherwise glides over the bumps. By the time we reach the warehouse, the fuel gauge says I’ve burned about 45–50 litres. Not bad at all.

Planks on Board

I load Frank up with the planks and set off toward the farm, confident the suspension upgrade was worth every bolt.

The trip back is uneventful until I reach the flooded road leading to the farm. I spot an unflooded road I could have taken… and promptly ignore it, because this is a perfect water test for Frank.
The difference is night and day compared to before — he still struggles a little, but nothing like the swamp-crawling misery of old. The planks are dropped off, and The Essentials is finally complete.

Hungry Workers, Hungrier Roads

With Frank proving himself, I decide to tackle the Hungry Workers task next. Back to the garage for a full tank, then back to the farm for consumables. The road isn’t exactly Frank’s favourite terrain, but we reach the Drilling Site in one piece — and ding! Rank 6 unlocked.

That means one thing: new tyres. All we have to do is get back to the garage.

The Italian Job (SnowRunner Edition)

On the way back, I take an alternate route. Frank decides this is the perfect time to audition for a role in a remake of The Italian Job. One quick winch later, and I save him from early retirement.

Back at the garage, I reward him with a fresh set of All-Terrain Tyres — the perfect ending to a busy, productive day.


Continue the Journey

Day 13 | Day 14 (You Are Here) | Day 15

More from SnowRunner Survival: The Permagear Diaries

Submerged: A Subnautica Survival Diary – Log 2: The Depths of Progress

Submerged: A Subnautica Survival Diary – Log 2: The Depths of Progress

Difficulty: Survival (Steam Deck Survival)
Optional Features: Grav Trap Deployed for Science and Snacks

“Silver is rarer than common sense on this planet.”

After yesterday’s fire-fighting and frantic crafting, I started the day with a new radio message: Lifepod 17 had also crashed somewhere nearby — right next to the Seamoth Bay, apparently. But priorities are priorities, and since Lifepod 3 radioed me first, they got first rescue attempt.

Priorities, Podcasts, and PDAs

Lifepod 3 wasn’t exactly a rescue success.
I did, however, find a blueprint for a compass — the kind of thing that makes you wonder why your pod didn’t come with one pre-installed. I added it straight to the “to-craft-once-I-can-see-straight” list, along with a PDA I’ll read later when I’m not holding my breath underwater. No survivors… unless you count me, which I do, enthusiastically.

Back at my pod, I realised something important: I can’t see a damn thing once it gets dark. So I finally crafted a torch — apparently the galaxy’s most underrated invention — along with a survival knife because there’s nothing like a little sharp-edged comfort in an ocean full of unknown lifeforms.

Lifepod 17 and the Great Seamoth Discovery

Next stop: Lifepod 17.
Predictably, it was another empty seat arrangement, but I did strike technological gold — enough Seamoth fragments to unlock the blueprint. I just need a Mobile Vehicle Bay now, which sounds easy enough until you remember I’m surviving on cooked bladderfish and spite.

While exploring the wrecks, I also found the last few materials to upgrade my O₂ tank. More air equals more curiosity, and more curiosity usually equals more trouble, so that’s a win all around.

Incoming Messages and Explosive Warnings

Just as I was feeling productive, I got a new transmission — this time from the Sunbeam. They wanted a response, but my comms system is, and I quote, “irreparably damaged.” Translation: I’m talking to myself for the foreseeable future.

With no one to call and no Netflix subscription in sight, I built a Grav Trap and tossed it outside the Lifepod to watch it work. Instant sushi buffet. Fish helplessly drawn into an invisible vortex of doom. It’s oddly soothing.

Science in Motion

Full gameplay log below — forty minutes of exploration, crafting, and the occasional panic swim. Featuring Grav Trap testing, Lifepod 17 dives, and my ongoing battle with visibility and oxygen management.

Watch on YouTube

I even had enough parts for a Rebreather, further extending my underwater escapades. Everything was going fine… right up until the PDA told me the Aurora will explode in approximately two hours.
Sure. Two hours to stop a planet-sized reactor meltdown with nothing but a knife and optimism. Sounds totally achievable.

Silver, Sunbeam, and Sinking Realisations

I spent the rest of the day chasing one thing: silver. I’d convinced myself it didn’t exist anymore, that I’d mined the planet dry earlier. But after far too many dives and muttered curses, I finally found some glimmering salvation among the sandstone outcrops.

Back at the Lifepod, another message awaited — the Sunbeam again. They’ve spotted the wreckage of the Aurora and are coming to investigate. They’ll be here within the week.

So not all doom and gloom then. Just mild existential dread… and a new compass freshly crafted to help me get lost in the right direction next time.

Continue the Journey:
Log 1 |
Log 3

Blog at WordPress.com.

Up ↑