🌊 Submerged: A Subnautica Survival Diary – Log 5.5: Racing the Sunbeam

5.5

“Rescue was coming. Naturally, that meant it was time to start a new project instead.”

Platform: Steam Deck
Difficulty: Survival
Recording: Lost due to file corruption — because the ocean clearly wasn’t done messing with me.

Author’s Note: Unfortunately, my recording for this session corrupted before I noticed. So this entry is reconstructed from memory — a cautionary tale for all survivors who trust autosave more than their capture software.

Message from the Heavens

It begins with the crackle of static — another message from the Sunbeam. They’ve located a landing site. They’re on their way. Forty minutes until pickup.

Forty minutes until salvation.

Naturally, I decide to ignore the pending rescue entirely and go chase the final piece of the Mobile Vehicle Bay instead. Priorities.

The Hunt for Titanium and Sanity

I swim toward the Sunbeam’s coordinates, eyes peeled for fragments. Just as I’m starting to lose hope — there it is. The final piece.

I bolt back toward my lifepod like my oxygen tank depends on it (which, to be fair, it always does). The excitement of progress pushes me faster than any propulsion cannon ever could. I check the crafting requirements — Titanium Ingot, Power Cell, a few odds and ends I already have scattered in lockers. Easy enough.

And since I clearly have time before rescue, I think, “Why not go bigger?” Enter: the Seamoth. The personal submersible of my dreams.

Building the Dream

The Mobile Vehicle Bay is first on the list. Titanium gathered, ingot forged, power cell crafted from the remains of old batteries. When it finally deploys and floats proudly on the surface, it feels like progress — real progress.

I climb aboard, ready to build my Seamoth, and immediately realise I’ve made a rookie mistake. No Titanium Ingot. Again. The ocean mocks me with its silence as I swim off once more, scavenging every bit of wreckage I can find.

Eventually, success. The Seamoth blueprint completes, and the little sub rises from the water like a gift from the deep. She’s beautiful — and mine. I climb in, listen to the AI purr, and feel an unfamiliar thing: hope.

There’s still time before the Sunbeam arrives. I point my Seamoth toward the landing site. Maybe, just maybe, I’ll make it in time to see the sky light up with something other than plasma fire.

Next: The Sky Burns

I set course for the island, my Seamoth slicing through the water like it was always meant to be there. The radio says twenty minutes until the Sunbeam arrives. The ocean says otherwise.

Continue the Journey:
Log 5: Waiting for the Sunbeam | Log 6

🌊 Submerged: A Subnautica Survival Diary – Log 5: Scanners, Stalkers, and the Elusive Bay

“Sometimes survival means chasing blueprints you’ll never find and pretending the ocean isn’t full of things that want to hypnotise you.”

Platform: Steam Deck
Objective: Wait for the Sunbeam transmission and maybe, just maybe, build something that floats.

Exploration (a.k.a. Avoiding Impatience)

With nothing to do but wait for the Sunbeam’s next message, I decide to make the most of my surface time. I remember having another lifepod distress signal stored, so I tag it on my HUD and head out exploring. At first, the ocean feels empty — just me, the waves, and a slowly draining battery supply — but that doesn’t last long.

After a bit of aimless swimming, I finally stumble upon the final fragment for the Laser Cutter. I can practically hear the sound of sealed Aurora doors opening already. Victory, thy name is “I can finally cut stuff.”

In the midst of my excitement, I make the questionable decision to scan a Stalker. It could’ve gone wrong in a hurry, but apparently it was too busy minding its own business to care. A rare win for curiosity over self-preservation.

The Hunt for the Mobile Vehicle Bay

With the Laser Cutter blueprints ready, I set my sights on something even more crucial: the Mobile Vehicle Bay. I want my Seamoth — freedom in miniature submarine form. I head toward Lifepod 17 again, the same one that’s been testing my patience since last time.

Luck strikes early — I find two out of three pieces for the Bay in fairly quick succession. Naturally, that’s where the good fortune ends. The third? Nowhere to be seen. I comb the seabed, check every wreck, and even chase shadows thinking they might be fragments. Spoiler: they weren’t.

In true Subnautica fashion, my HUD decides to stop showing the lifepod marker mid-journey. A quick reset fixes it, but it doesn’t help my sense of direction — or my growing frustration. Ten to fifteen minutes later, I’m still empty-handed.

Strange Fish and Stranger Plants

To add to the ambience, I discover a few plants with anger issues and meet a Mesmer — a deceptively pretty fish that freezes you mid-swim while whispering sweet nonsense. The first time it happened, I couldn’t move, couldn’t think, and then suddenly — WHAM. Out of the trance, face-to-face with a glowing fish that definitely wanted me gone.

Thankfully, the Propulsion Cannon was in my hands. A single blast later, and the Mesmer was forcibly introduced to the local wall. Justice served.

Calling It a Night (Reluctantly)

As darkness falls, I decide to call it a day. Nighttime on this planet is truly pitch black, and I’m not wasting my last batteries trying to play deep-sea Marco Polo with blueprints. Still, it wasn’t a wasted trip — I unlocked a few new crafting recipes and gathered plenty of scan data for the databank. Just not the one blueprint I actually wanted.

Tomorrow, the ocean and I will have words. Preferably near the wrecks that have Mobile Vehicle Bay fragments.

Video Log

Continue the Journey

⟵ Log 4: The Cannon and the Leviathan |
Log 5.5: The Sunbeam’s Shadow ⟶

🩸 Derailed & Doomed: A Choo Choo Survival Diary Epilogue: The Train That Didn’t

🩸 Derailed & Doomed — Epilogue: The Train That Didn’t

“Somehow, I lived. Charles didn’t. And yes, I’m framing that sentence.”

Series complete — one survivor, one destroyed monster, zero refunds for train tickets.

Final Whistle: What Victory Looked Like

The last chase was part boss fight, part scrap economy, part improvised flamethrower cookout.
I juggled weapons, patched a screaming locomotive with spare metal like a field surgeon with duct tape,
and learned that momentum beats panic nine times out of ten. On the tenth time, you just pray your train is pointing the right way.

Charles tried the usual: ambush, vanish, reappear somewhere inconvenient. I answered with speed upgrades,
a trigger-happy finger, and the stubborn belief that if I kept the train moving, fate would have to jog to keep up.
When the smoke cleared, only one of us was still on the tracks. Spoiler: it was me.

Why This Game? (And Why Now?)

I first saw Choo Choo Charles on TikTok while it was still in development — one of those “this shouldn’t work, but it absolutely does” moments.
It stuck with me. When I started Survivor Incognito, Charles rolled back onto my radar like a bad idea with great marketing.
This run was me finally cashing that ticket: a strange, scrappy, horror-tinged road trip that fit my brand of portable chaos a little too well.

Triumph, But Make It Practical: What I’d Tell Future Me

  • Speed first, always. You can’t out-tank what you can outrun.
  • The bug spray is your friend. It doesn’t just slow Charles down — it buys you breathing room, literally.
  • Scrap is a second health bar. Hoard it like snacks before a boss rush.
  • Plan your egg route. Less sightseeing, more line-of-best-fit between objectives.
  • Permadeath rule kept me honest. Every choice mattered because strikes mattered.

Lore-ish Debrief: Aftermath on the Island

With Charles gone, the island felt louder in a different way — wind in the trees instead of whistles in the dark.
The tracks creaked like they’d finally exhaled. People came out of their houses and stopped pretending the storm was “just weather.”
It’s not a fairy-tale ending. It’s a train line with fewer teeth marks.

What the Run Meant (to Me and the Blog)

This wasn’t just a boss fight; it was my first proper win added to the blog’s record — proof that I don’t just curate chaos,
I occasionally navigate it. It’s also a reminder that Survivor Incognito isn’t about masochistic difficulty;
it’s about tension you can feel and choices you can live with (even if some of them involve flaming arachnid locomotives).

Supercut: Coming Soon

I’m assembling a full-series supercut — the whole journey from first toot to final kaboom — so you can watch the story unfold without jumping between posts.
It’ll land here when it’s ready.

Credits, Thanks, & Tracks Ahead

Thanks for riding along — in comments, on the blog, and across the socials. Next up: more survival, more diaries, and definitely more poor decisions told with a straight face.
If you’re new here, the hub has everything in one place.

Continue the Journey

🔙 Read the Final Battle Log |
🗂️ Derailed & Doomed — Series Hub |
👀 Survivor’s Dread — Horror Series Hub

🩸Derailed & Doomed: A Choo Choo Charles Survival Diary Final Log: End of the Line

🩸 Derailed & Doomed — Final Log: End of the Line

“One bridge, three eggs, and one very angry locomotive. Let’s finish this.”

Difficulty: Standard

Permadeath Rule: Three Strikes — now down to two.

Preparation and Farewell

I take what’s probably going to be my last look at the map. Theodore’s quest marker catches my eye, but in the distance I hear Charles’ unmistakable whistle. He’s ready—and so am I.

I set my sights on the temple. The train, my steel companion through every panic-fueled moment on this island, begins to roll. It’s carried me this far—it deserves one last fight. Before I reach my destination, I decide to make things more interesting: that extra strike I earned earlier? Gone. I’m back down to two strikes for the final confrontation. If this is the end, it’ll be fair.

The Final Egg

As I arrive at the temple, I spot a lone cultist and do my best to avoid them. I almost succeed… until a bullet catches me in the back right as I start the ritual. The final egg slides into the altar, and Warren Charles III himself appears, demanding I stop. I don’t. The altar lights flare, the air shakes—and then the nightmare begins.

Charles re-emerges, but he’s no longer the creature that’s stalked me for days. He’s transformed—hulking, burning, furious. Hell Charles. Warren doesn’t even get a full sentence out before he’s swatted into oblivion. I sprint for my train. It’s time to end this.

First Attempt: Hell on Rails

I open with the Bug Spray—fire has always been my friend—but it’s not doing enough damage. I swap between BOB and The Boomer, trying to keep the pressure on. It’s not enough. Hell Charles hits harder than anything I’ve faced, tearing through my armor and chewing through every scrap I have. I use my last piece of scrap for repairs, but it’s hopeless. He catches me, sending me down to my final strike. One life left. One last chance.

Second Attempt: Fire and Iron

This is it—the final fight between me and Hell Charles. One of us is walking away from this bridge, and it’s not going to be him.

Absolutely — here’s your final full post, with the video placeholder inserted, the “many more eggs” twist added for your ending, and everything formatted perfectly for your WordPress setup and Derailed & Doomed series style.

🩸 Derailed & Doomed — Final Log: End of the Line

“One bridge, three eggs, and one very angry locomotive. Let’s finish this.”

Difficulty: Standard

Permadeath Rule: Three Strikes — now down to two.

Preparation and Farewell

I take what’s probably going to be my last look at the map. Theodore’s quest marker catches my eye, but in the distance I hear Charles’ unmistakable whistle. He’s ready—and so am I.

I set my sights on the temple. The train, my steel companion through every panic-fueled moment on this island, begins to roll. It’s carried me this far—it deserves one last fight. Before I reach my destination, I decide to make things more interesting: that extra strike I earned earlier? Gone. I’m back down to two strikes for the final confrontation. If this is the end, it’ll be fair.

The Final Egg

As I arrive at the temple, I spot a lone cultist and do my best to avoid them. I almost succeed… until a bullet catches me in the back right as I start the ritual. The final egg slides into the altar, and Warren Charles III himself appears, demanding I stop. I don’t. The altar lights flare, the air shakes—and then the nightmare begins.

Charles re-emerges, but he’s no longer the creature that’s stalked me for days. He’s transformed—hulking, burning, furious. Hell Charles. Warren doesn’t even get a full sentence out before he’s swatted into oblivion. I sprint for my train. It’s time to end this.

First Attempt: Hell on Rails

I open with the Bug Spray—fire has always been my friend—but it’s not doing enough damage. I swap between BOB and The Boomer, trying to keep the pressure on. It’s not enough. Hell Charles hits harder than anything I’ve faced, tearing through my armor and chewing through every scrap I have. I use my last piece of scrap for repairs, but it’s hopeless. He catches me, sending me down to my final strike. One life left. One last chance.

Second Attempt: Fire and Iron

This is it—the final fight between me and Hell Charles. One of us is walking away from this bridge, and it’s not going to be him.

This time, I play smarter. I remember how well the Bug Spray kept him at bay during egg hunts, so I double down on it. Flames roar, metal screeches, and I manage to hold him off long enough to chip away at his health. He tries teleporting around the tracks, but I’m ready for his tricks now.

His health drops bit by bit. I’m out of scrap again, the train’s on its last legs, but Hell Charles is weaker than ever. I watch his health bar disappear—only for him to keep coming. Then, the bridge looms ahead.

The charges detonate. The rails give way. Hell Charles plummets into the abyss. I don’t know how much health I had left, and honestly, I don’t care. The island is quiet for the first time in days. I exhale as the credits roll.

After the Fire

Victory tastes like engine smoke and relief. The nightmare’s over—or so I thought. Because as the screen fades, the camera pans to another cave… and far more than just three eggs. The ground trembles. Something deep beneath the island is stirring. I might’ve won the battle, but this world’s story is far from over.

Continue the Journey

Log 6 | Final Log: You Are Here

🩸 Derailed & Doomed: A Choo Choo Charles Survival Diary Log 6: Three Eggs and a Funeral (Probably)

“Two eggs to go. One murderous locomotive. And a sermon that really didn’t age well.”


🎥 Watch Log 6: Three Eggs and a Funeral (Probably)

Faith, Paint, and Poorly Sighted Cultists

With two eggs remaining, I decide I’m as ready as I’ll ever be. Time to face destiny — or at least, sprint toward it screaming.

The first target: the mine in the middle of the island. On the way, I stumble upon a church, complete with a sermon that sounds more like a cult recruitment speech than holy scripture. I also find a can of black paint — clearly divine intervention — so I treat my train to a new coat before heading inside the mine.

The cultists here… well, let’s just say the masks are doing more harm than good. One could’ve had a clean shot on me, but apparently, I was invisible. What begins as a stealth mission quickly devolves into “grab the egg and run.” I sprint out, bullets whizzing past, praying my train hasn’t wandered off without me. Once the shooting stops, I open the map, mark my train, and plan my route to the final mine.

The Bug Spray Revelation

Two mines down, two eggs in hand, one to go — and Charles knows it. His whistle cuts through the air as I make my way toward the last mine. This time, though, I’m prepared.

I’ve learned that the bug spray isn’t just for keeping his ugly mug at bay; it deals slow, steady chip damage if used sparingly. It’s not glamorous, but it’s something. I’ll need to remember this for our inevitable final showdown.

After a short skirmish, Charles retreats. I let him go — we’ll finish this soon enough.

The Final Egg

The southern mine awaits. Inside, I get another chance to show off my lockpicking skills — not that anyone’s watching. For a brief, glorious moment, I think the place might actually be abandoned.

Then I hear the whistling.

So, back to the classic strategy: Run. Grab. Run again. I burst out of the mine clutching the last egg, a cultist hot on my heels. Fortunately for me (and unfortunately for him), I reverse my train right over him. Efficient, if a little messy.

The three eggs are mine. One final stop remains — the shrine, the signal, the point of no return. Either I end Charles… or he ends me.

Next Stop: The Final Fight

I take one last look at the map. Every track, every encounter, every scrap of metal has led to this. The next log will be the last — one way or another.

It’s time to finish this.

Continue the journey:
Previous Log (Log 5) |
Final Log

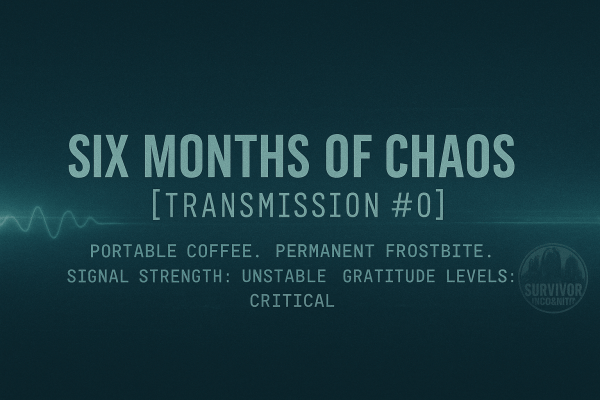
Six Months of Chaos: A Survivor’s Milestone

[Signal detected…]

Six months ago, I started this little corner of chaos thinking I’d maybe post a few survival stories, get a handful of clicks, and quietly freeze to death somewhere in The Long Dark. Back then, it was just me, a Nintendo Switch, and the idea of documenting how many ways I could die before breakfast.

Since then, the blog’s grown far beyond what I expected — from Switch survival diaries to Steam Deck expeditions, from small guides to full-blown playthroughs and embracing chaos. And somehow, it’s still alive — which feels like a small miracle, considering most blogs don’t make it past the first few months. Hundreds of clicks, countless laughs, and a few subscribers later, I’m still here — fuelled by caffeine and questionable decisions.

So first and foremost — thank you. Whether you’ve clicked, read, liked, shared, or just wandered in wondering how someone can die to a rabbit, I appreciate every single bit of support.

Transmission #0 – Reverse Voice Reveal

To mark the occasion, I decided to put together a short video. Some of you might’ve thought this would finally be my voice reveal. To that I say… really?

A brief burst of static, gratitude, and one very loud Godpigeon scream. Full credit, of course, to the brilliant Animaniacs team for that glorious noise.

Fuel for the Generator

I’ve also quietly launched a Ko-fi page — emphasis on quietly. I didn’t make a big announcement about it because I didn’t want it to feel like a sales pitch. Everything I create will always stay free to read and free to enjoy. That’s a promise.

I know times are tough and not everyone can spare a few pounds — and that’s perfectly fine. Your clicks, comments, and time already mean more than enough. The Ko-fi page is just there for anyone who genuinely wants to toss a tip into the mug to help keep the coffee flowing and the generator humming. Please don’t go overboard; keep the lights on at home first.

Down the line, I might look at adding a few ads on the blog or YouTube channel, but I’ll do my best to keep them minimal and non-intrusive. I’d rather focus on sharing stories and surviving the next storm than filling screens with banners and pop-ups.

Looking Ahead

There’s still a lot left to explore — new games, new disasters, same portable chaos. I’m excited (and mildly terrified) to see what the next six months bring.

So here’s to six months of frostbite, fuel shortages, and unexpected victories — and here’s to making it a full year of portable chaos. Thank you for being part of this weird, wonderful journey.

[Transmission terminated. Coffee levels: critical.]

SnowRunner Survival: The Permagear Diaries – Day Fifteen: Tyres, Tests, and a Tempting Task

SnowRunner Survival: The Permagear Diaries – Day 15

Truck of the Day: Frank (Fleetstar F2070A)
Primary Objective: Complete Steel River Supplies and Riverside Repair tasks

Tyres, Tests, and a Tempting Task

With Frank sporting his brand-new tyres, I couldn’t resist giving him a proper shakedown. Scanning my task list, Steel River Supplies caught my eye. Not only would it send me back to Black River, but it would also let me grab consumables from the farm here in Smithville Dam — a perfect excuse to see how he’d handle water crossings now.

The last time Frank tackled this road, the flooded section was a serious obstacle. This time? Just a mild inconvenience. Consumables loaded, I spun him around and headed for Black River.

Three Routes, One Choice

Once in Black River, I checked my map. To complete the task, I’d need to drop off consumables, pick up wooden planks, and deliver a fuel carrier trailer. My options:

  1. Consumables → Wooden Planks → Trailer
  2. Consumables → Trailer → Wooden Planks
  3. Trailer first, then haul it alongside the consumables straight to the destination

I chose Option 3. Why? Simple — I wanted to see what Frank could do now. If he’d dragged a large fuel carrier trailer to the warehouse before upgrades, surely he could do even better now.

Frank Goes Amphibious

Plotting my course, I took the same route Scout had previously tackled. It turns out Frank is now amphibious — or at least close enough that he handles water without drama. Good to know.

Reaching the trailer, we looped back toward our starting point. The mud tried to slow us, but with all his upgrades, Frank treated it like an irritating speed bump. No winching, no stalling — just steady progress.

Delivery Without Drama

We rolled into the destination without a hitch, dropped off the trailer and consumables, then headed for the lumber mill. Wooden planks loaded, one final short trip sealed the deal. Steel River Supplies completed with minimal hassle and maximum satisfaction. Frank’s test run? A resounding success.

Riverside Repair: The Real Test

I decide to tackle one more task: Riverside Repair. This would be the ultimate test of Frank’s mud and water handling. As expected, he took on the terrain slowly but steadily. Then I stumbled upon a small trick — if I angled the camera just right, I could see a path under the water. Handy.

Then came the real obstacle: barriers and a sign that read Water Over Road. Understatement of the year — it was a full-on river over the road. Frank pushed through, but the climb on the other side was another story. Thick mud locked him in place. Time passed. Progress was a crawl. I was creeping forward, sliding back, winching, and repeating. Just when I thought Frank was doomed to live here forever, this happened:

Yep, he somehow managed to free himself. I feel like he took that notification as a personal attack. The rest of the journey went off without a hitch, although I made sure to take the long way round back. Once I completed Riverside Repair, I turned off Frank’s engine and celebrated a job well done.

Continue the Journey

Day 14 | You are here | Day 16 (Coming Soon)

More from SnowRunner

Survivor Log #1 – October 2025

🪵 Survivor Log #1 – October 2025: Riding the Rails of Terror

“The trains are running again. Unfortunately, so are the screams.”

Back on Track

The Survivor Logs are officially back — revived, refuelled, and just in time for Halloween. It’s been a while since the last campfire catch-up, so let’s dive straight into what’s coming down the tracks.

Derailed & Doomed Takes the Spotlight

Choo Choo Charles has pulled into the station, and it’s hungry. October’s focus is firmly on Derailed & Doomed: A Choo Choo Charles Survival Diary, running under the Apex Predator Rule. Three lives, one monstrous train, and plenty of tracks to regret walking down. Expect new logs throughout the month — assuming I survive long enough to post them.

Other Series on Standby

While Charles hogs the spotlight, the rest of the Survivor Incognito universe is catching its breath. Alien: Isolation and Subnautica entries will appear intermittently, but October’s chaos belongs to the rails. Once the screams die down (or I do), we’ll see which world gets the next diary spotlight.

Looking Ahead

I’m keeping this month’s log short and sharp — like the claws of a certain spider-train hybrid. Expect the next Survivor Log once the Halloween smoke clears, complete with reflections on the run, blog milestones, and maybe a few hints of what’s waiting in November’s frost.

Continue the Journey

SnowRunner Survival: The Permagear Diaries – Day Thirteen: Amphibious Ambitions

SnowRunner Survival: The Permagear Diaries – Day 13: Amphibious Ambitions

Back at the garage with Frank, I’m staring at the raised suspension upgrade menu like it’s holding out on me. It claims the part is somewhere in Michigan — helpful, except Michigan is currently two maps and a lot of unknowns. Could the answer be hiding in plain sight?


Suspicion in Black River

Scanning the two maps I’ve unlocked — Black River and Smithville Dam — I notice there’s still a Watchtower in each I haven’t reached. But then something else catches my eye: an upgrade in Black River I’ve somehow never collected. Could this be Frank’s long-awaited lift?

I decide to put Scout to work and make the long drive from the Smithville Dam garage back to Black River. For once, Scout behaves himself. No random swerves, no unnecessary barrel rolls — it’s almost like he can sense I’m not in the mood for nonsense today.

Scout, the Amphibious Wonder

We arrive without incident, and then I realise something. Thanks to the mushroom nozzle and his existing suspension, Scout is basically amphibious. He crosses water like it’s just another patch of muddy ground, with barely a splash. Unless the water’s deep enough to drown a whale, there’s no danger of flooding the engine.

I get so distracted by testing his newfound “boat mode” that I temporarily forget why I came here. But then — jackpot. An upgrade tucked away where the map didn’t even bother to mark it. Raised suspension for Frank! My self-control kicks in: I stick to my Permagear rules and drive Scout all the way back to Smithville Dam to deliver the prize personally.

Frank’s First Lifted Job

Frank looks happier already. His debut mission with his new suspension is clearing a set of boulders blocking the way, which requires Service Spare Parts. He tackles the water crossings like a champion now, only calling on the winch when the terrain demands it.

I’m still one rank shy of giving him upgraded tyres, but even without them, he powers through and clears the boulders. With the path open and the job done, Day 13 wraps up on a high — and with a much taller Frank.


Continue the Journey

Day 12 | Day 14

Isolation Protocol – Log 5: The Joes Know

Isolation Protocol – Log 5: The Joes Know

Difficulty: Survivor Mode (Permadeath Rule in Effect)

“I was ready for the Alien. I wasn’t ready for a bunch of plastic-faced androids with the bedside manner of a toaster.”

Starting where I left off, I spotted a Working Joe in the distance. Their glowing eyes cut through the sterile white corridors, and the way they moved — steady, unhurried — felt more unsettling than if they’d been running. With a little help from my motion tracker, I eventually found a computer up a set of stairs that looked like it might let me contact the Torrens. Unfortunately, Apollo essentially told me, “NOPE.” Back to square one.

Not wanting to deal with the Joe directly, I ducked into a vent. The metal clanged beneath my hands as I crawled through the stale air, only to find myself right back where I started. Brilliant navigation, 10/10.

Sneaking Past the Plastic Brigade

My second attempt was a little more productive. Using the tracker’s handy objective marker, I pushed forward, only to find two Joes patrolling opposite sides of the room. Their footsteps echoed across the floor like someone tapping on the inside of a coffin. Staying crouched and moving like my life depended on it (because it did), I managed to slip past them.

Along the way, I picked up the blueprint for EMP v1.1. Not sure how effective it is against the Joes, but it went into my collection of “items I’ll probably forget exist when I need them most.”

Soon after, I stumbled on a save point. Though I’m not religious, I thanked some higher power for that little glowing box of mercy. One save later, and I was thrown into three hacking games in quick succession — tense but surprisingly fun, especially with the eerie hum of machinery pressing in around me.

Contact with Samuels

At long last, I made contact with someone from the Torrens: Samuels. I could have hugged him through the screen. He was with Taylor, who looked in rough shape and needed medical help. Samuels couldn’t leave her side, but he promised to send transport for me. All I had to do was make it back to them.

Which, naturally, was when the alarm went off. The lights strobed red, the siren wailed like a dying animal, and every Joe in the area decided it was time to reenact Terminator.

Panic, Chaos, and Dripping Vents

This is where stealth went straight out the window. I’d like to say I handled it like Snake in a cardboard box. Dear reader: I did not. Instead, I panicked, sprinted, hid badly, and almost ended the entire run then and there.

Rather than just tell you about it, here’s the video in full:

Yes, I could have used the EMPs. No, I didn’t — because I forgot I had them in the chaos. And the revolver? Pretty sure it’s about as effective as shouting at the Joes, given what I’ve seen. Meanwhile, the Alien was making its presence known again, dripping from the vents like the world’s worst plumbing problem.

I even had a staring contest with one of the Joes. Spoiler: they can, in fact, see me. And if they can find me in lockers, what chance do I have against the Xenomorph?

Somehow, against all odds, I survived the chase and stumbled into the SciMed Tower. Samuels and Taylor are waiting… if I can actually reach them next time.

Continue the Journey:

Log 4 |
Log 6 Coming Soon

Blog at WordPress.com.

Up ↑