🩸 Derailed & Doomed: A Choo Choo Charles Survival Diary Log 6: Three Eggs and a Funeral (Probably)

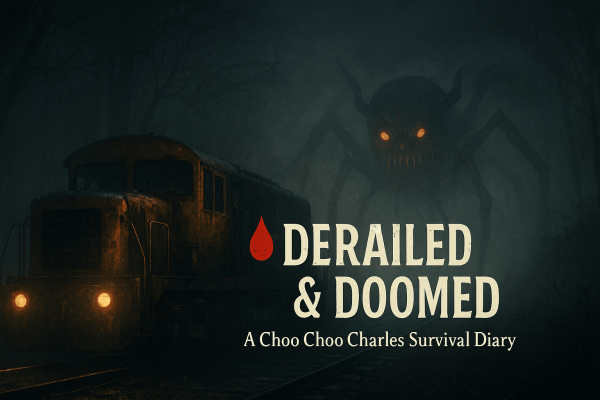
“Two eggs to go. One murderous locomotive. And a sermon that really didn’t age well.”


🎥 Watch Log 6: Three Eggs and a Funeral (Probably)

Faith, Paint, and Poorly Sighted Cultists

With two eggs remaining, I decide I’m as ready as I’ll ever be. Time to face destiny — or at least, sprint toward it screaming.

The first target: the mine in the middle of the island. On the way, I stumble upon a church, complete with a sermon that sounds more like a cult recruitment speech than holy scripture. I also find a can of black paint — clearly divine intervention — so I treat my train to a new coat before heading inside the mine.

The cultists here… well, let’s just say the masks are doing more harm than good. One could’ve had a clean shot on me, but apparently, I was invisible. What begins as a stealth mission quickly devolves into “grab the egg and run.” I sprint out, bullets whizzing past, praying my train hasn’t wandered off without me. Once the shooting stops, I open the map, mark my train, and plan my route to the final mine.

The Bug Spray Revelation

Two mines down, two eggs in hand, one to go — and Charles knows it. His whistle cuts through the air as I make my way toward the last mine. This time, though, I’m prepared.

I’ve learned that the bug spray isn’t just for keeping his ugly mug at bay; it deals slow, steady chip damage if used sparingly. It’s not glamorous, but it’s something. I’ll need to remember this for our inevitable final showdown.

After a short skirmish, Charles retreats. I let him go — we’ll finish this soon enough.

The Final Egg

The southern mine awaits. Inside, I get another chance to show off my lockpicking skills — not that anyone’s watching. For a brief, glorious moment, I think the place might actually be abandoned.

Then I hear the whistling.

So, back to the classic strategy: Run. Grab. Run again. I burst out of the mine clutching the last egg, a cultist hot on my heels. Fortunately for me (and unfortunately for him), I reverse my train right over him. Efficient, if a little messy.

The three eggs are mine. One final stop remains — the shrine, the signal, the point of no return. Either I end Charles… or he ends me.

Next Stop: The Final Fight

I take one last look at the map. Every track, every encounter, every scrap of metal has led to this. The next log will be the last — one way or another.

It’s time to finish this.

Continue the journey:
Previous Log (Log 5) |
Final Log

🩸 Derailed & Doomed: A Choo Choo Charles Survival Diary Log 3: TNT, Torpedoes & Terrible Timing

Platform: Steam Deck
Rule: Apex Predator (Charles must kill me three times for the run to end)

⚙️ Survival Status: 3 Strikes Total
Only Charles can take them away.
Each egg restores a lost strike — but I can’t exceed three.
When the last one’s gone, the run ends.

“If there’s a bad time to use explosives, I’ll find it.”


I start by doing a quick sweep for guards near the mine that’s supposedly holding ammo for the rocket launcher. Thankfully, no one’s around — which is rare, and suspicious. The entrance itself, however, is locked. Naturally.

My map says, “Find a way in.” Okay, fair enough. I look around and find some TNT. Perfect. If that doesn’t open a door, nothing will.

Important survival lesson: stand further back when lighting TNT. I take a chunk of damage from the blast, and I’m pretty sure Charles just got a notification that I’m being an idiot. If he missed that one, don’t worry — I detonate a second explosive down the tracks. More fire, more noise, more damage to me. Subtlety is dead, but the door isn’t. Yet somehow, the mine opens, and I grab the rockets.

Back to John Smith, who hands over The Boomer. I’m officially armed and ready to make even more bad decisions.

Lighthouse Lunacy

My next bright idea: go exploring. I notice a marker close to the island’s edge. Against every instinct I have, I run for it. Turns out it’s a lighthouse, home to a woman named Claire — who needs the breakers fixed.

There’s a shed nearby with four breakers. Easy enough. I sprint over, slot them in, and head back. Apparently, I “missed a step.” Turns out I need to turn them on, and it’s a little puzzle. Thirty seconds later, lights on, job done. Claire thanks me by saying fixing the lighthouse will help others spot us more easily. Yes, Claire. Including Charles.

I make a break for the train. The moment I mark my next stop, I hear it — that whistle. Round two is on.

Round 2: Return of the Rail Demon

Charles is far more persistent this time. I test out The Boomer and land a few solid hits. He claws, rams, and screeches like he’s auditioning for the next Doom soundtrack. Twice, I think he’s gone, and twice, he charges back in. After burning through some scrap for repairs, I finally drive him off. Victory number two to me.

Feeling cocky, I decide to visit another local — Ronny, who seems like he’s gearing up to tell me his life story. Nope. He just wants me to climb some dangerously tall buildings for a box of papers, promising maybe one scrap as a reward. I climb anyway, find a tin of paint for the train (score), but fail a jump and lose a scrap.

Technically, that did count as a “death” — but since it wasn’t at the claws or wheels of Charles himself, it doesn’t break the Apex Predator Rule. Accidental gravity-assisted injuries are free passes in this run.

After a few more attempts, I decide Ronny’s box isn’t worth the spinal injuries. My train, on the other hand, gets a stylish new coat of paint — a well-earned upgrade after surviving two Charles encounters.

Danger on the Hill

Feeling brave — or stupid, jury’s out — I go for Theodore’s supply box next. Unfortunately, the area’s crawling with Cultists. I spot one and think I’ve figured out his patrol pattern. I haven’t. The second guard ambushes me from uphill. I sprint for the train, but pause to open my map — rookie mistake. The cultist scores a hit.

As I’m running, I hear that familiar whistle again. Charles is awake, and maybe it’s a blessing in disguise that I didn’t grab that box. I dive into my train, patch up, and decide both Theodore’s mission and Ronny’s tower of death can wait.

For now, the plan is simple: find the next closest survivor, avoid blowing myself up again, and maybe, just maybe, make it to Log 4 without turning into train food.


Need a guide? Explore every stop, scrap pile, and spider sighting with the Aranearum Island Map Guide — your unofficial atlas to surviving the rails.


Continue the Journey

← Log 2: Flame, Speed, and Fetch Quests | Log 4 →

SnowRunner Survival: The Permagear Diaries – Day Eleven: Red’s Day Out

SnowRunner Survival: The Permagear Diaries – Day 11: Red’s Day Out

Today was Red’s time to shine. No trailers, no urgent deliveries — just exploration, practice, and a bit of light road-conquering in the name of science.


Finding the Quarry (and Trouble)

I started by taking Red along a road I hadn’t explored yet, which eventually led me to a quarry. Always good to know where the future cargo headaches will be coming from. I tried following the road deeper in, but it came to a natural stop, so I turned back and tried another route.

The “Road” That Was Mostly Water

This second route led to a flooded stretch of road. The map confirmed it was indeed a road — apparently someone at the Department of Transport here has a sense of humour. I was convinced Red would sink or stall, but to my surprise he waded through like a champ, slow but steady. On the way, I even found a raised suspension upgrade for him. I thought I already had it installed, but hey — spares are spares.

Watchtowers, Fuel Stops, and Mystery Upgrades

At the end of the flooded road, I had a choice: plunge into the unknown or head for a nearby Watchtower. No prizes for guessing which option I took. The tower revealed an upgrade, but before I could investigate, Red needed a refuel. Thankfully, I’d given him fuel cans in an earlier upgrade, so one quick pit stop later and we were good to go.

The upgrade turned out to be an engageable AWD… for something. I forgot to check which vehicle. Classic me.

Low+ and Loving It

Another Watchtower was on the map, so we headed there. This is where Red’s sweet spot revealed itself: Low+. He still bounced, but it was more of a playful hop than a chaotic pogo stick. I reached the tower, got briefly excited when I thought I’d found a second fuel station in Smithville Dam, then realised the map was upside down and it was just the same one I already knew about. Disappointment levels: high.

More Upgrades and a New Task

The tower also revealed another upgrade, perched right at the water’s edge. Given Red’s aquatic performance today, I wasn’t worried. We collected it — raised suspension for the Scout — which might just drag him out of retirement. While I was at it, Red got another refuel before heading back to the garage, where I discovered he’d been on stock suspension all this time. No wonder he’d been so bouncy. Raised suspension went on immediately.

“Boulders” and the To-Do List

Before calling it a day, I checked out a new task called Boulders. It involves two service spare parts to clear a road — easy enough in theory, but the waterlogged section leading there will be a problem until Frank gets his own raised suspension. I’m adding that one to the to-do list for now.

All in all, Red outdid himself today. From quarries to questionable road conditions, he handled everything without a tow truck rescue. He’s earned a well-deserved rest.


Continue the Journey

Day 10 |
You Are Here |
Day 12

More from SnowRunner Survival: The Permagear Diaries

SnowRunner Survival: The Permagear Diaries – Day Ten: Bridges, Bumps, and Broken Dreams

SnowRunner Survival: The Permagear Diaries – Day 10: Bridges, Bumps, and Broken Dreams

Mode: Permagear Rules | Optional Features: Winch-assisted woodland detours

Back to the Dam

I start the day by taking Red back to the Smithville Dam garage to decide on my next move. Both of my current main objectives need wooden planks, and as far as I can tell, the only viable source is back in Black River. The plan: build the bridge first, then worry about the rest.

I hop into Frank for the job, only to be faced with the first challenge — actually getting him there. Instead of taking the standard road, I opt for a less-beaten path through the trees, using the winch liberally and clambering over rocks like a determined mountain goat in truck form. If Frank had feelings, I’d say he was trying to prove something.

Frank: The Reliable Workhorse

Once in Black River, I load up the planks and head back to Smithville Dam. Along the way, I can’t help but admire Frank’s handling — reliable, sturdy, and never letting you down. He’s the truck equivalent of that one friend who always brings snacks and never cancels plans.

I top him up at the fuel station as a precaution (he probably didn’t need it, but who doesn’t like a full tank?). Crossing the Dam, I briefly flash back to the Dam level in GoldenEye 64, half-expecting to see polygons of Soviet guards wandering about.

Bridge Complete

The delivery goes smoothly, and with the wooden planks in place, the bridge is now a reality. Objective one: done. Frank earns a well-deserved rest while I swap into Red for some post-bridge exploration.

Red’s Bouncy Adventure

Immediately, I’m reminded of the difference in handling: Frank sticks to the ground like he’s got magnetic tyres; Red prefers to bounce along it like an over-caffeinated pogo stick. Past the bridge, I find a promising-looking track and decide to follow it.

The path is a mix of mud, stones, and one dodgy river crossing that all but confirms Red will need a raised exhaust if such a thing exists. After wrestling through, I spot an upgrade ahead and let my hopes soar — could this be the elusive raised suspension for Frank I’ve been searching for? In my head, I’m already firing him up for a triumphant drive back to the garage.

Reality Check

It isn’t. Instead, it’s Engageable AWD for a White Star truck — a vehicle I don’t own. Still, at least it’s unlocked for the future. I follow the road and, somewhat anticlimactically, end up back on the other side of the bridge.

That’s where I call it for the day. Tomorrow, Red will keep exploring, and maybe — just maybe — I’ll finally complete The Essentials task.

Continue the Journey

Day 9 | Day 10 (You Are Here) | Day 11

Blog at WordPress.com.

Up ↑