This is my all-in-one breakdown of every region and transition zone in The Long Dark — the good ones, the miserable ones, and the ones that exist purely to humble you. If you’re new and picking your first spawn, or you’re returning and still haven’t forgiven Timberwolves, this page is here to tell you what to expect, why you’d go there, and where you can realistically set up without being immediately punished.
—
Note:
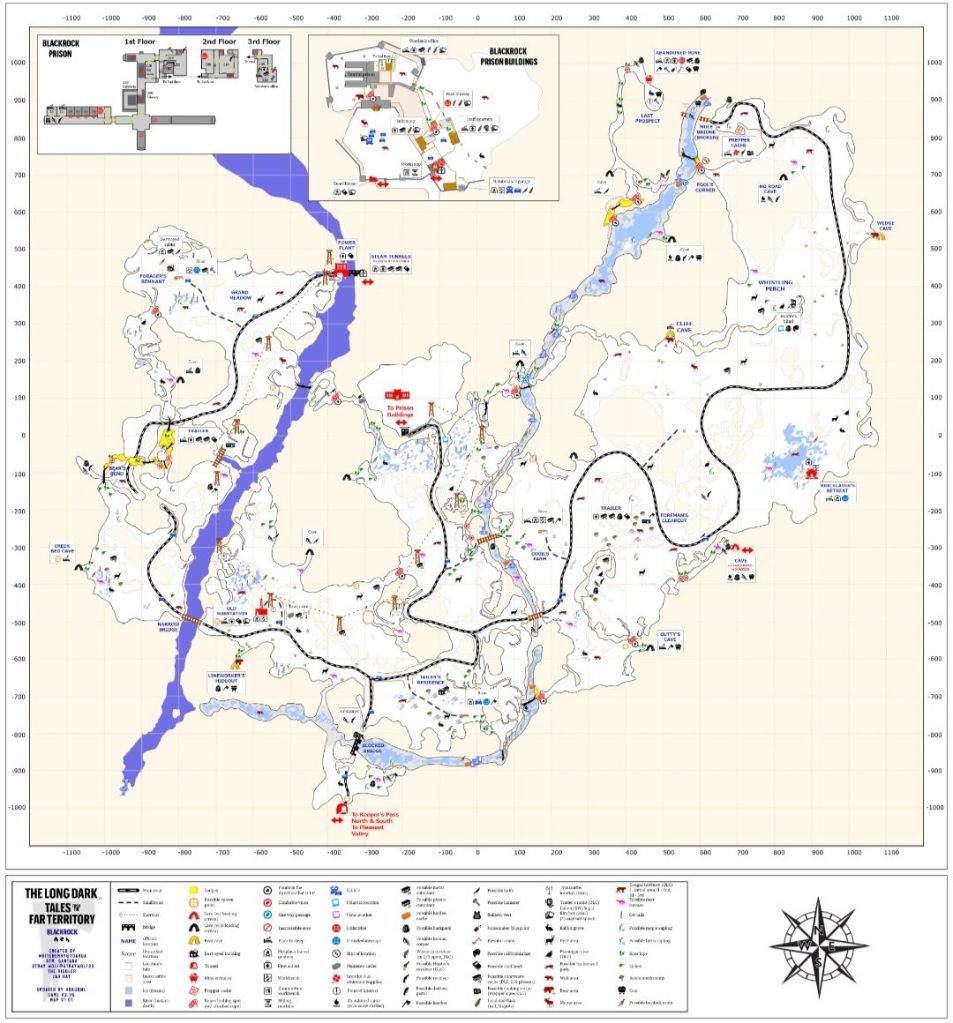
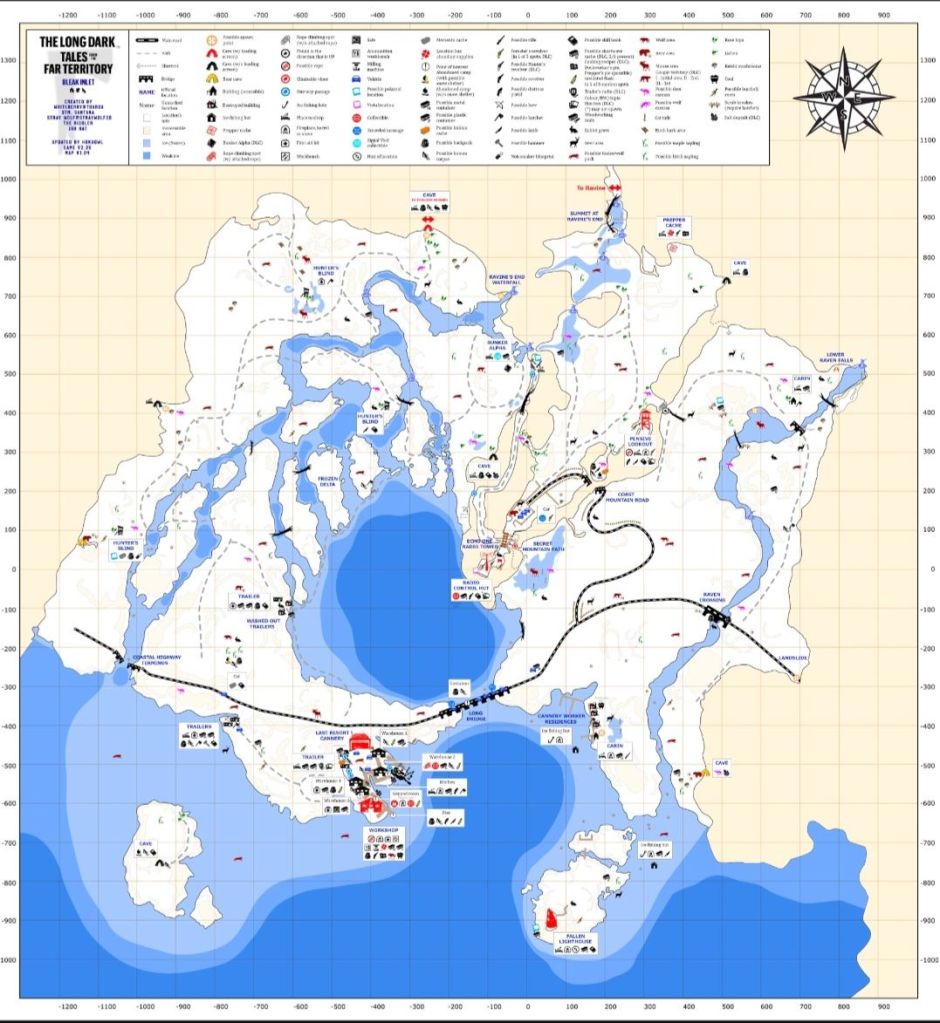
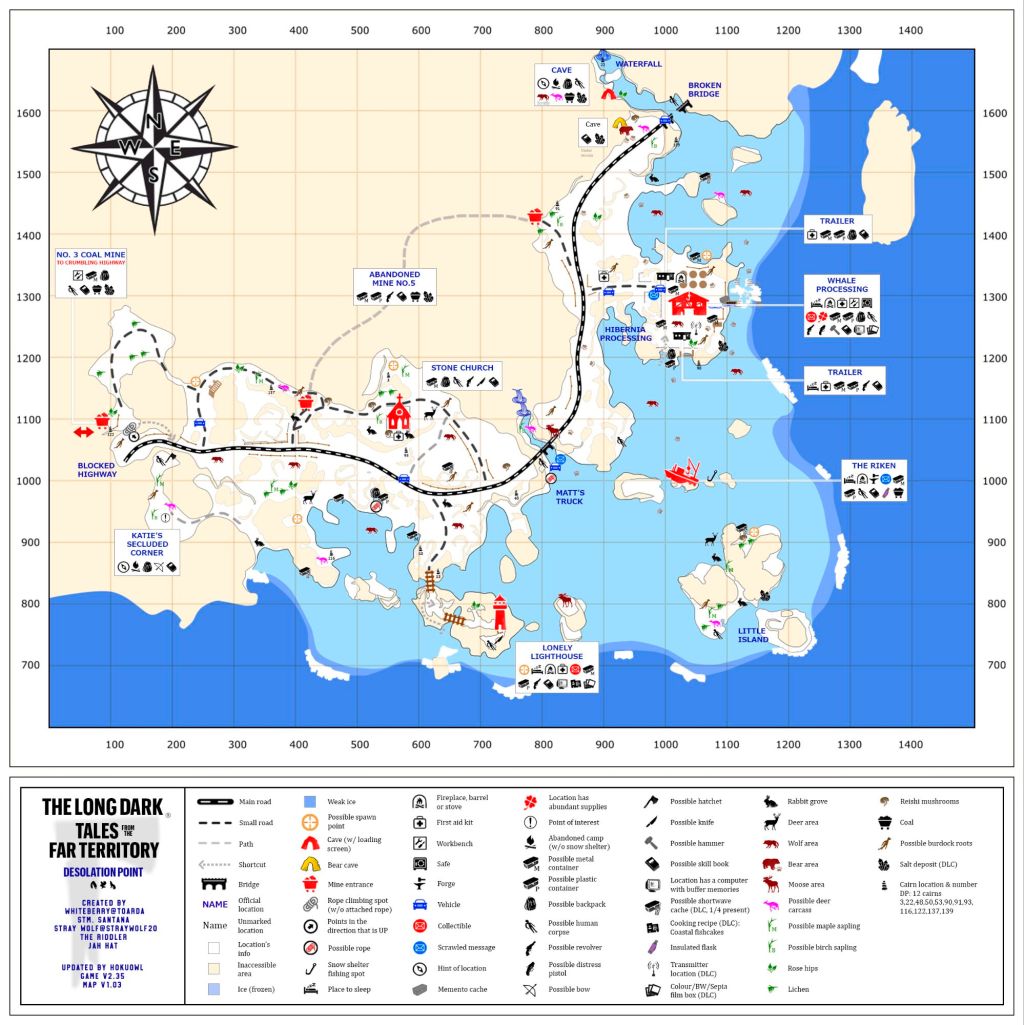
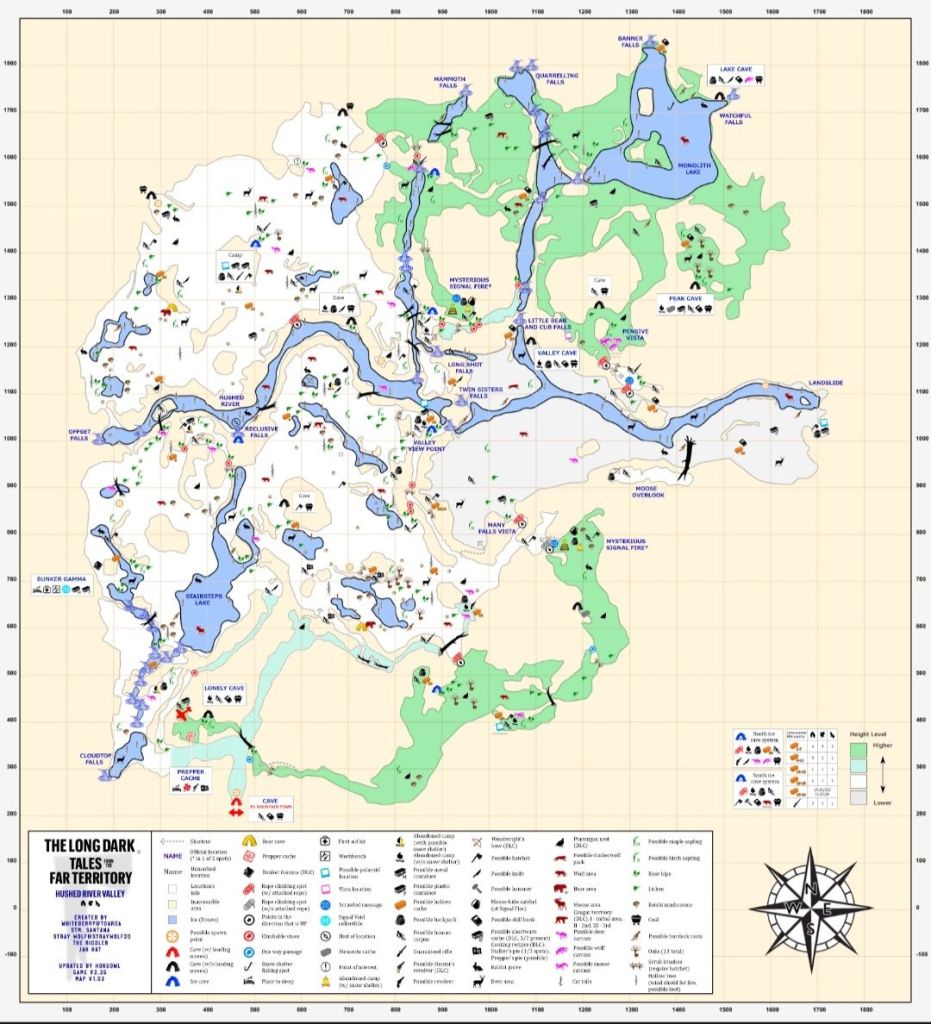
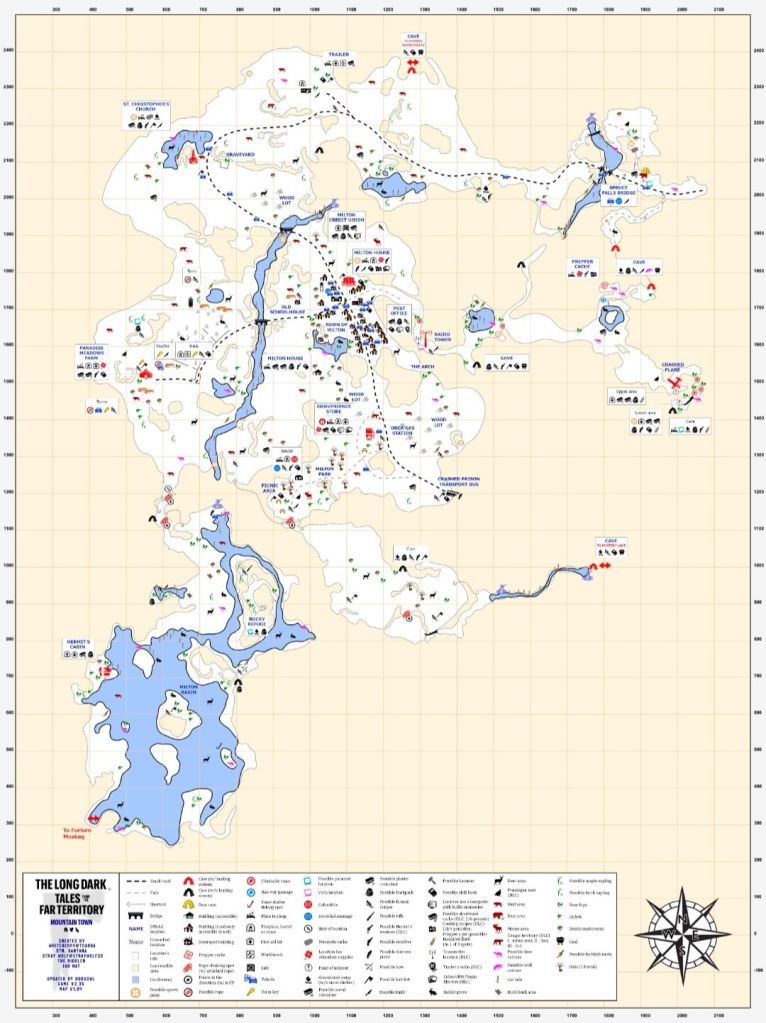
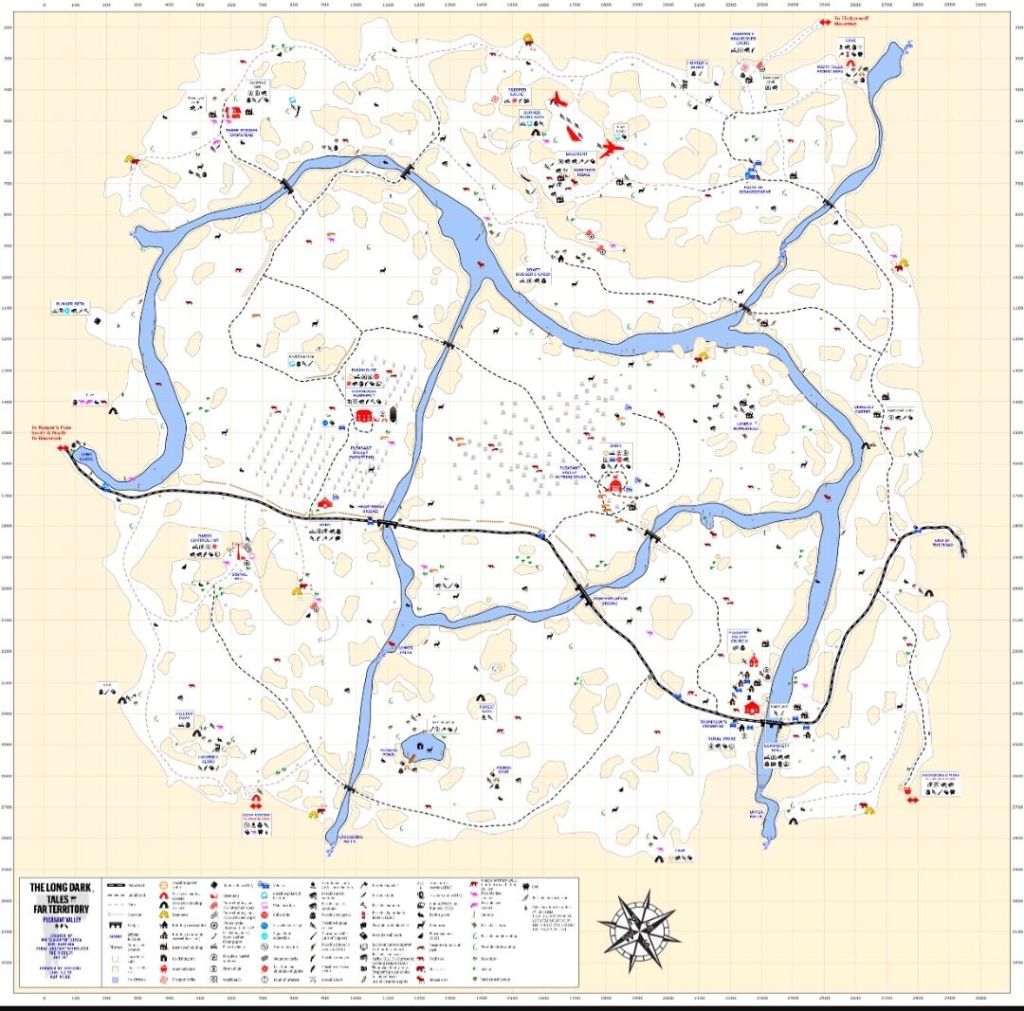
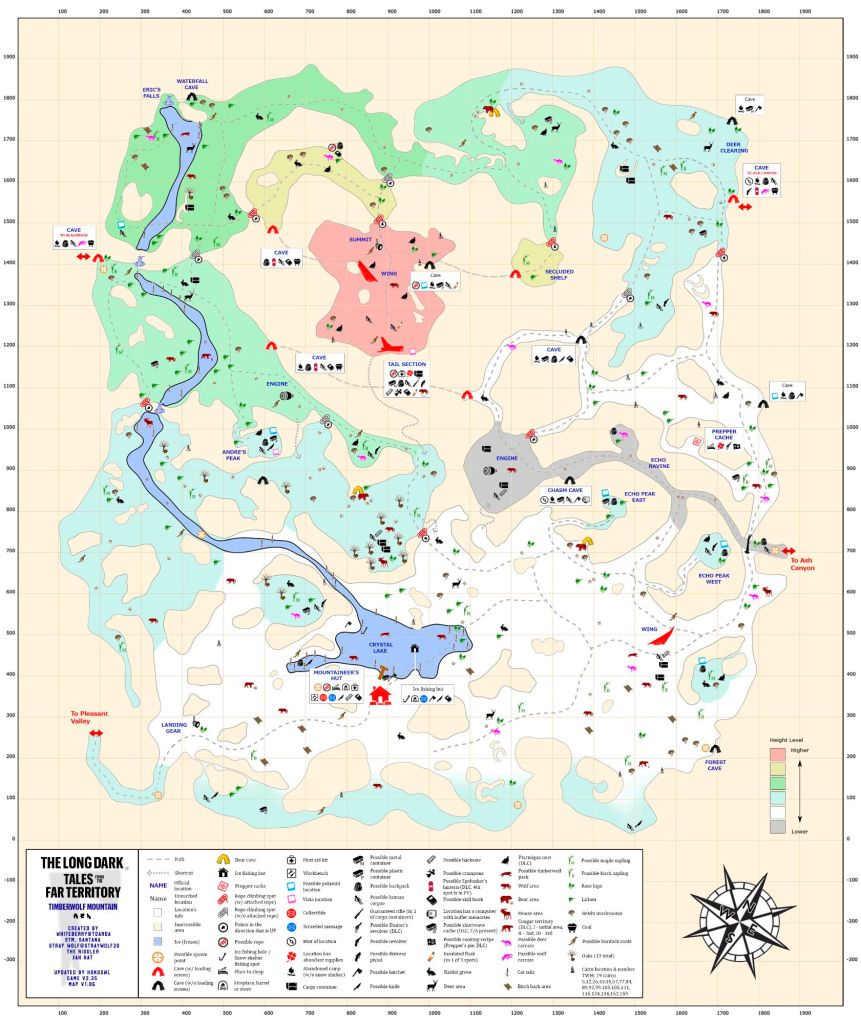
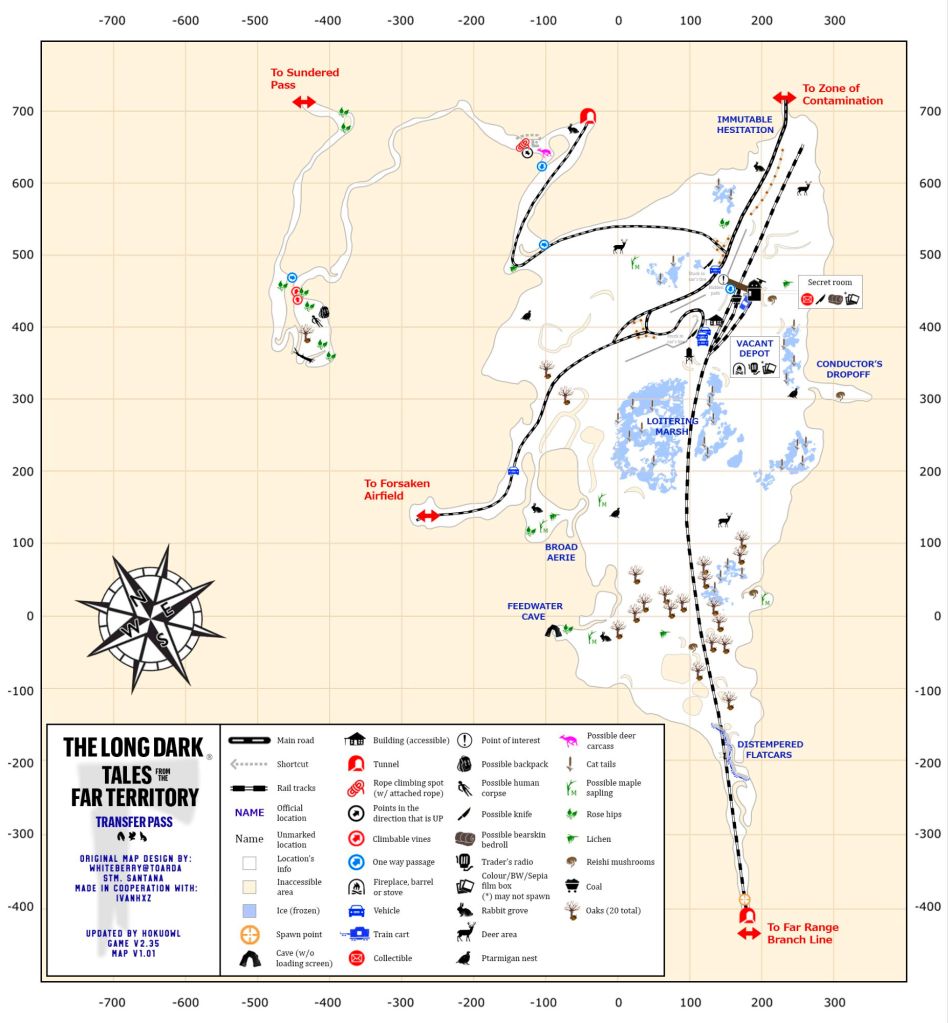
Click any map below to open the region’s write-up. Maps are available for Pilgrim, Voyageur, Stalker, Interloper, and Misery where supported.
General Tips:
The basics matter more than heroics. If you leave shelter without a plan, the game will happily write your obituary for you.
Preparation: Carry the essentials every time you step out — food, water, a way to make fire, and a bedroll if you have one. If you think “I’ll be fine,” that’s usually when you aren’t.
Navigation: Use landmarks. Use maps. Use whatever you need to avoid wandering in circles until the cold decides you’ve had enough.
Weather: Watch the sky and respect the wind. A calm walk can turn into a whiteout crossing faster than you’d like to admit.
Wildlife: Learn patrol routes and avoid fights you don’t need. “I could take it” is not the same thing as “I should.”
Crafting: Know where the workbenches and forges are before you need them. Repairs and tools don’t matter until suddenly they matter a lot.
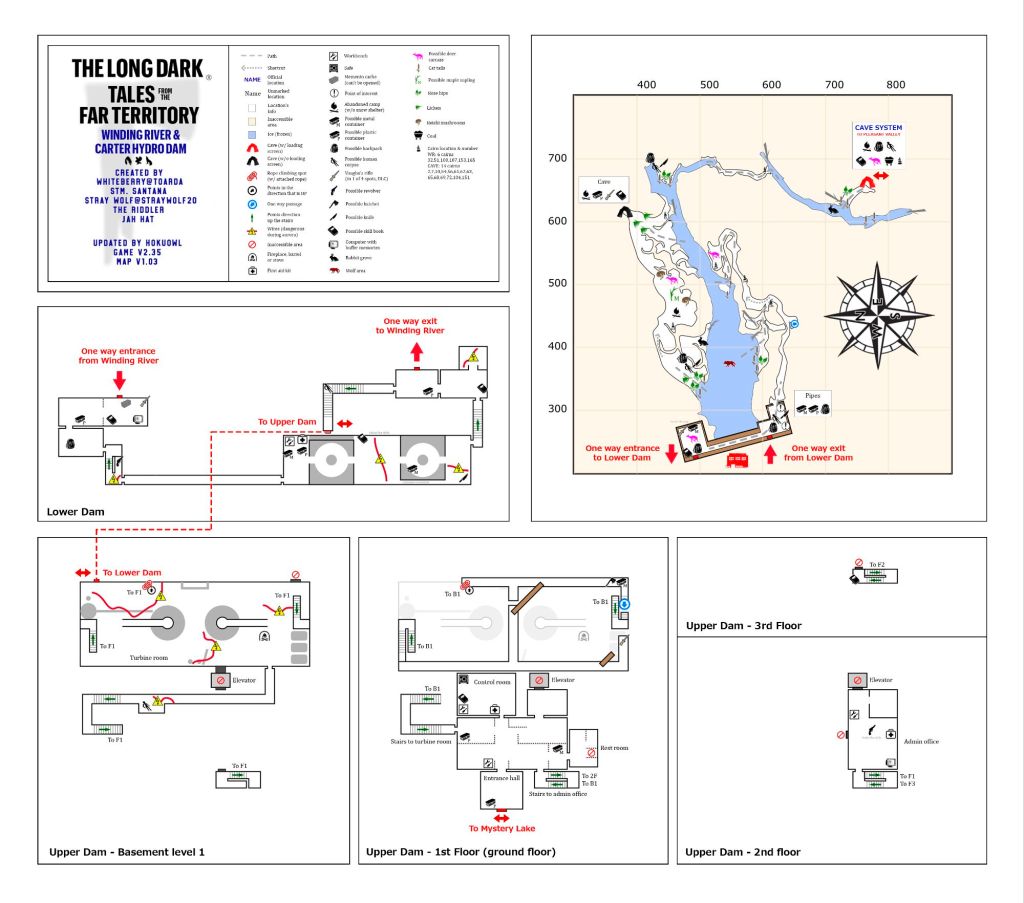
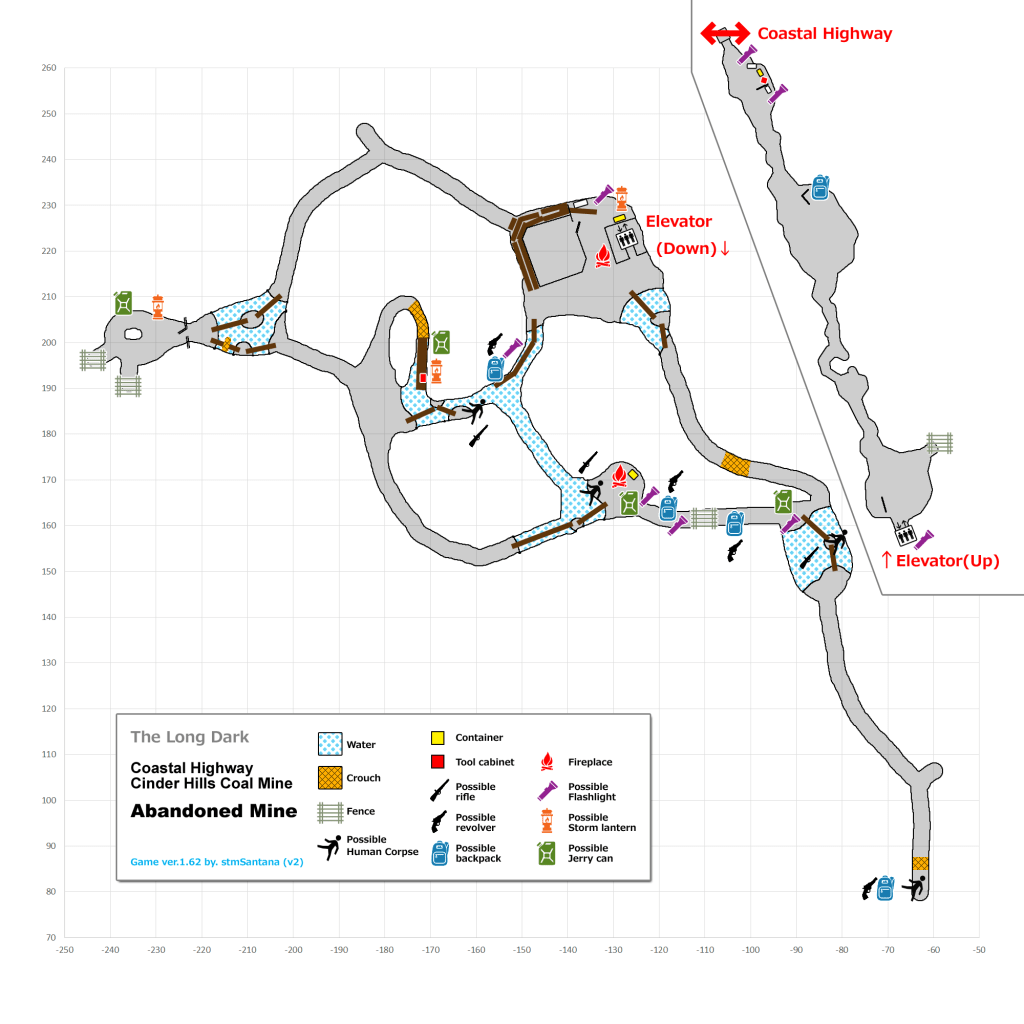
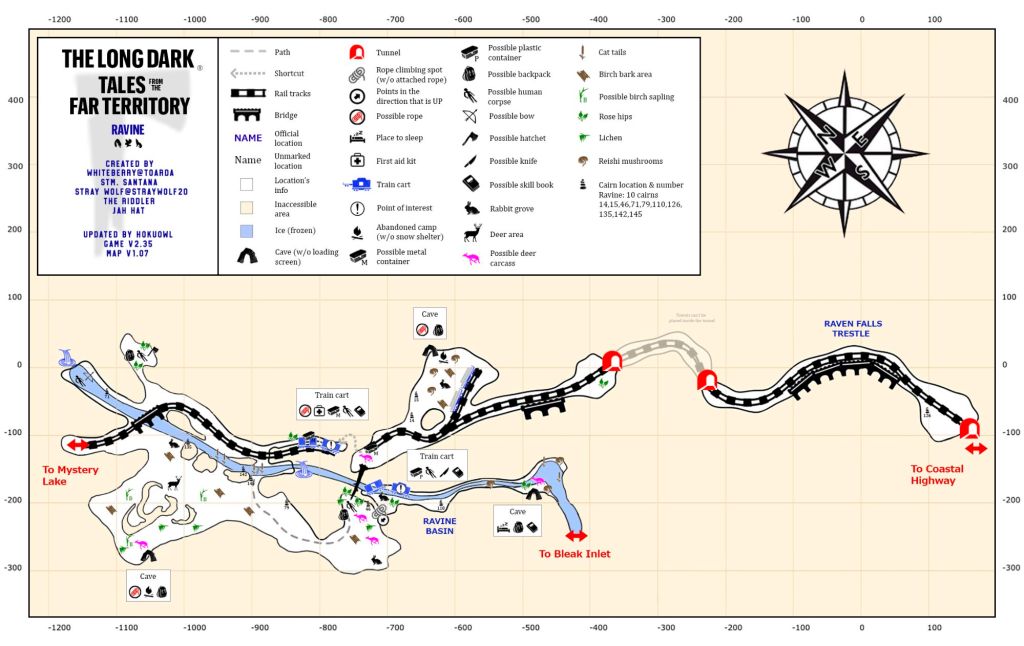
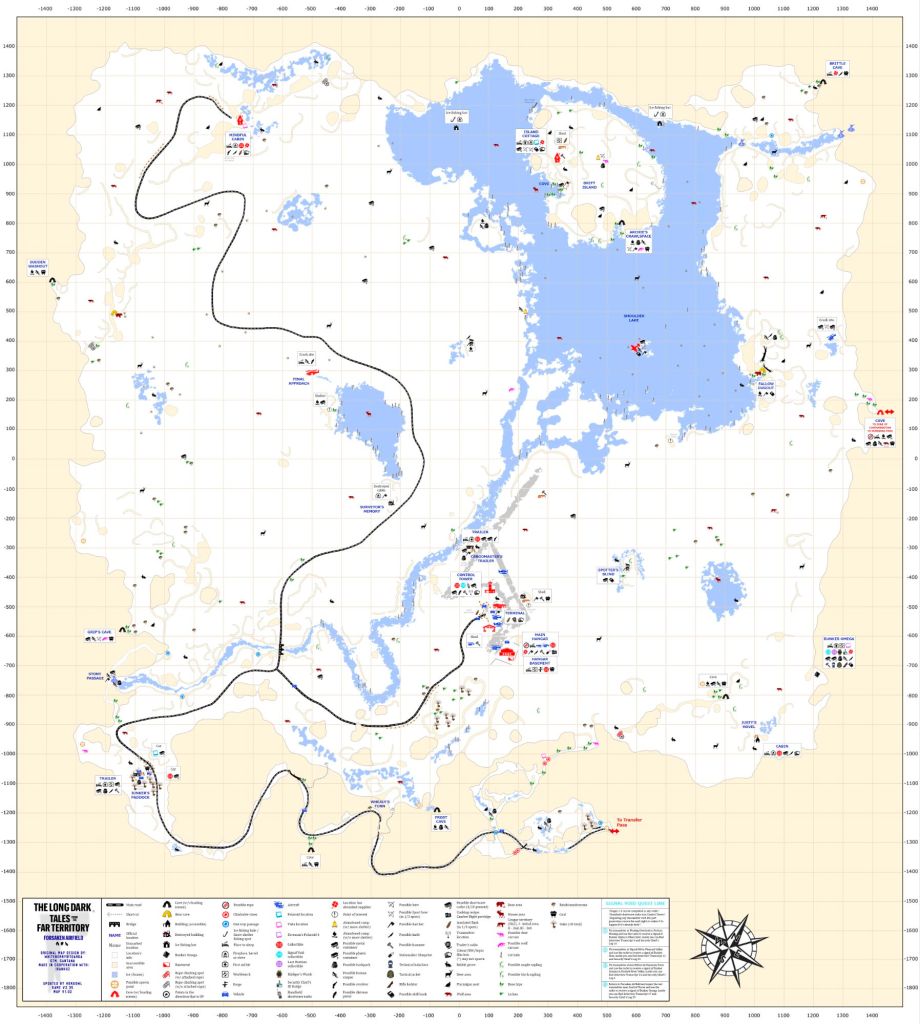
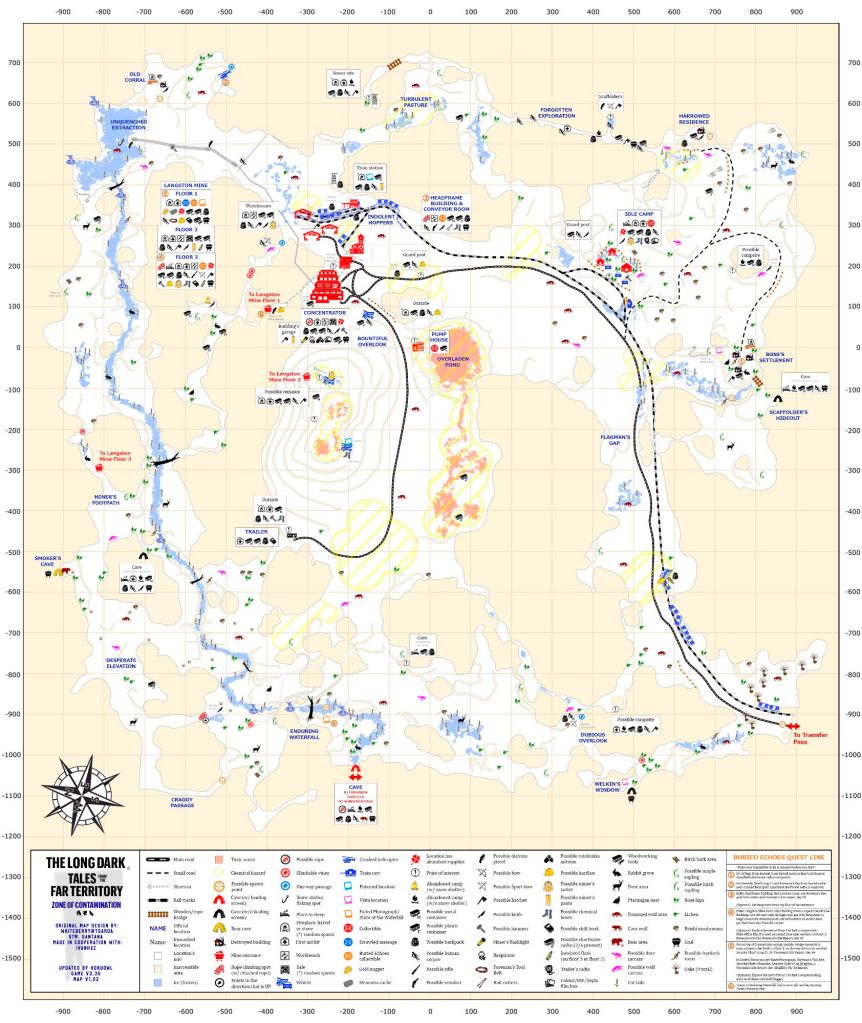
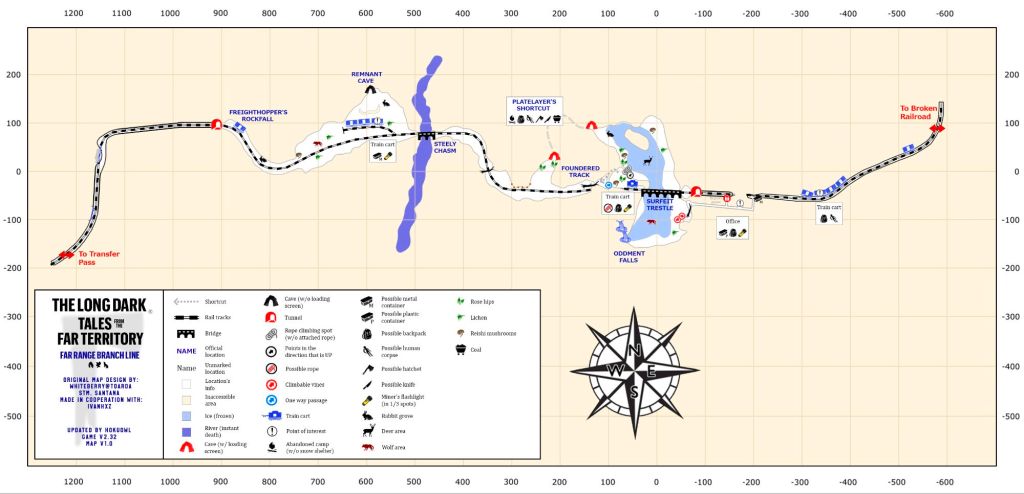
About Cave & Mine Transitions
Most caves and mines in The Long Dark act like narrow passageways between regions. They usually offer just enough to keep you moving:
Minimal loot (firewood, coal, occasional supplies)
Shelter from weather and most predators
A few branches, but usually a clear point A to point B route
Tips:
Bring a light source (lantern, torch, or flare) — guessing in the dark is how you get lost.
Cold caves can still drain you fast, so keep fire-starting gear on you.
Expect tight inventory space — loot is sparse, but coal is heavy and somehow always worth dragging anyway.
Map Accuracy & RNG
These maps are sourced from the most up-to-date versions available at the time of writing.
Some item locations shown are guaranteed spawns. Others are subject to RNG.
For example, matches may appear in a house on one save file, then be completely absent in another.
Loot distribution shifts depending on difficulty. Interloper and Misery significantly reduce, relocate, or remove key items entirely. If something isn’t where the map suggests, double-check your difficulty before assuming the map is wrong.
Use maps as navigation aids, not guarantees.
Regions
Great Bear Island Transition Regions
Far Territories Transition Regions
Great Bear Island


Great Bear Island Transition Regions

Far Territories

Far Territories Transition Regions
High-Resolution Community Maps (External)
If you want higher-resolution versions of region maps with zoom support, the community-maintained map archive on The Long Dark Fandom is available below.
View High-Resolution Maps on The Long Dark Wiki
Note: These maps are best used online for zooming and reference. For quick access, offline use, and route planning by difficulty, the static maps on this page are often more practical.
If you’re looking for more The Long Dark content, including guides, playthroughs, and survival notes, you’ll find it collected here:
Last Updated: 15th February 2026

