Location: Sevastopol Station
Sevastopol Station is not open. It is layered, locked, rerouted,
and occasionally falling apart.
I did not understand the station the first time I moved through it.
I reacted. I improvised. I followed whatever objective was placed
in front of me and hoped the route stayed open long enough to survive it.
This page break the station down sector by sector.
Not by mission number, but by physical space. Corridors.
Transit hubs. Security choke points. Places where routes fork,
seal, or collapse.
Alien: Isolation is linear in progression, but spatially complex.
Doors unlock. Transit reactivates. Entire paths reroute depending
on what you’ve triggered.
Use these maps to understand structure.
Survival still depends on how you move through it.
Campaign Sector Breakdown
Each map includes:
- Full sector map image
- Major area divisions
- Connection points to other sectors
Difficulty settings change enemy aggression and resource availability,
but the structural layout of the station remains consistent.
Sector Index
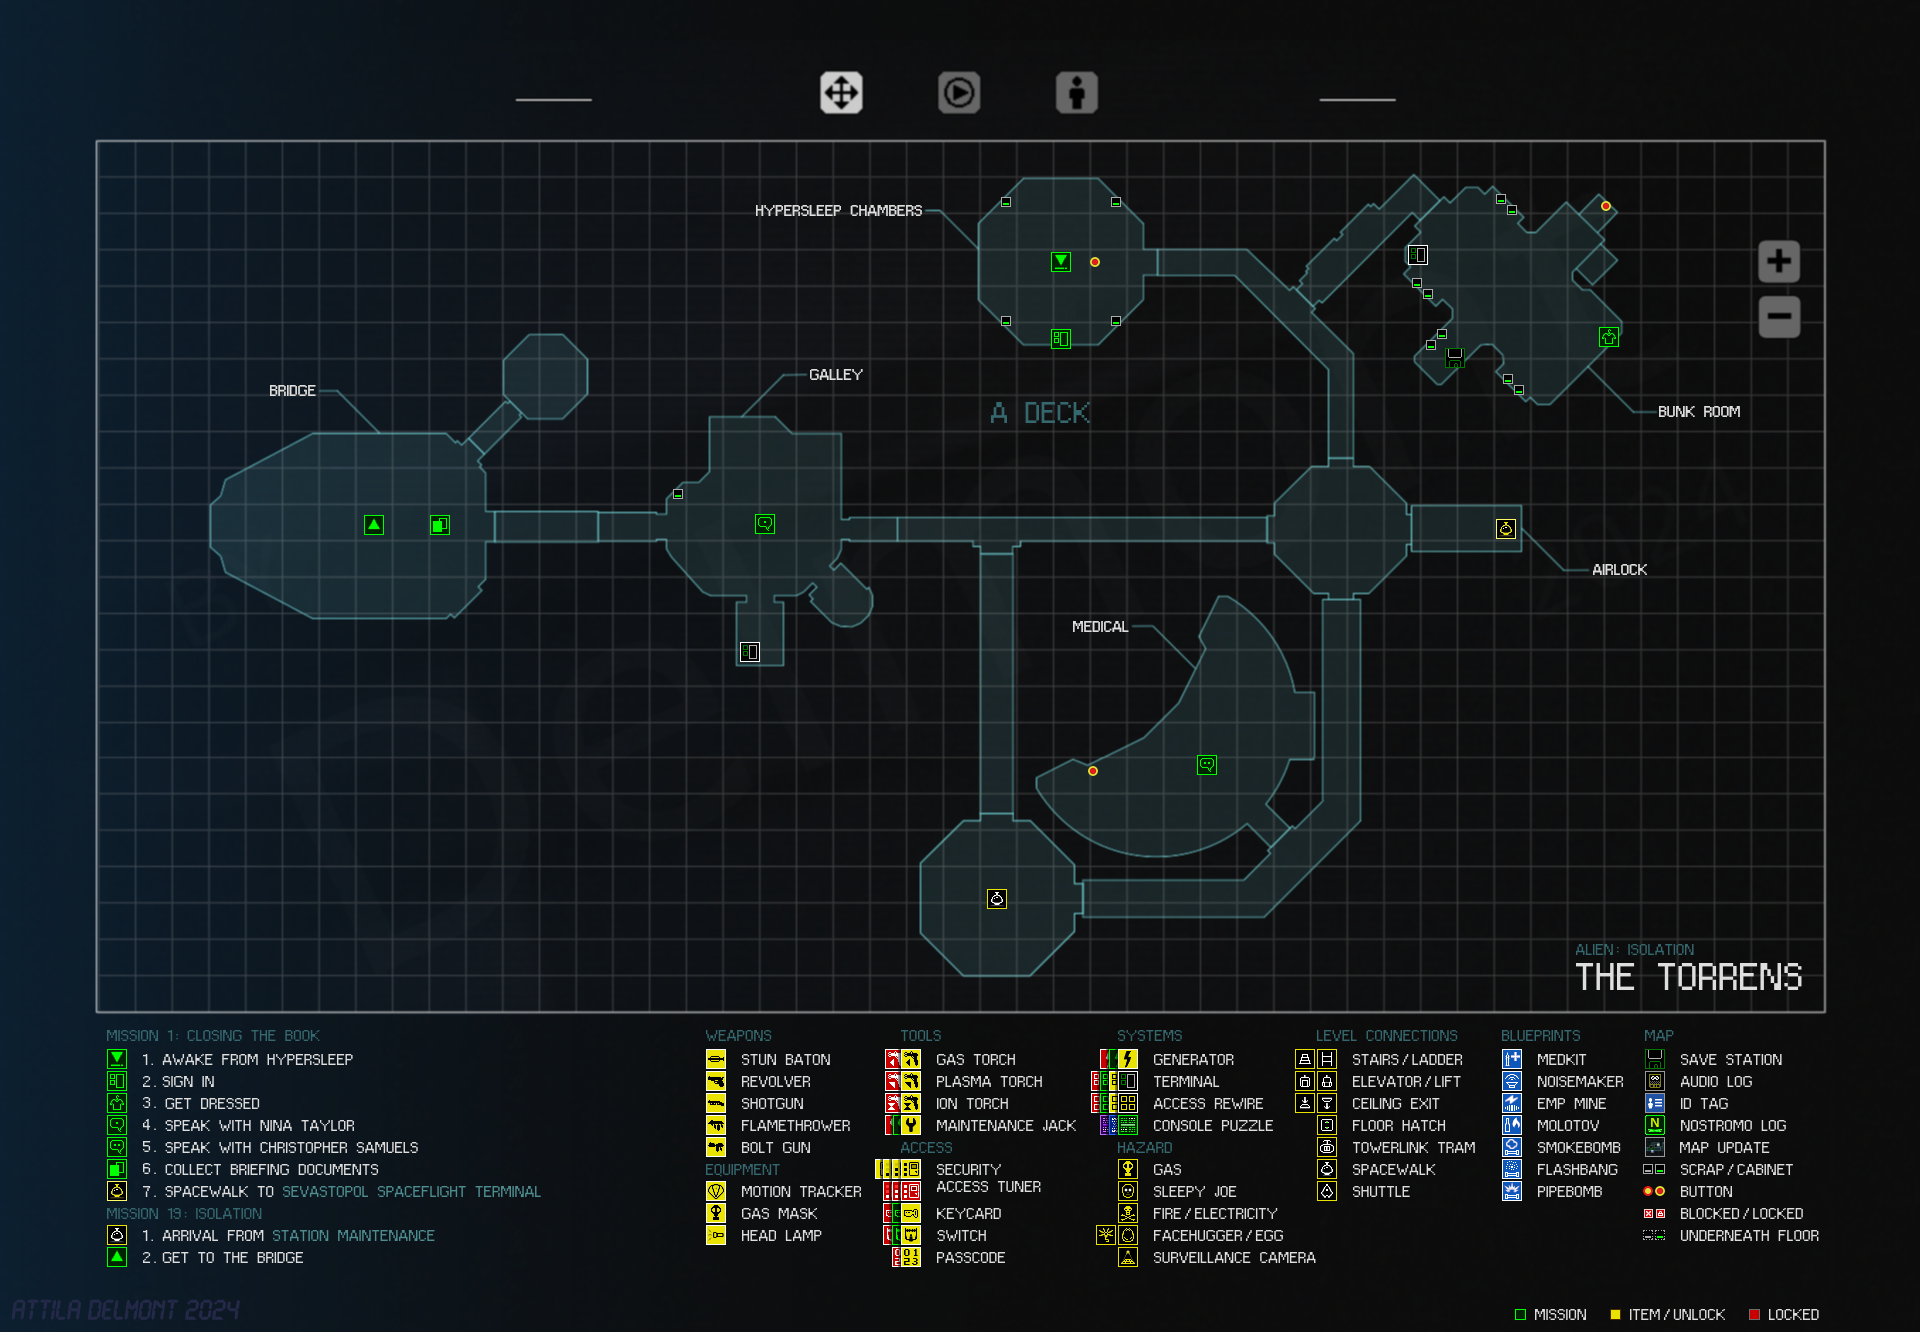
The Torrens
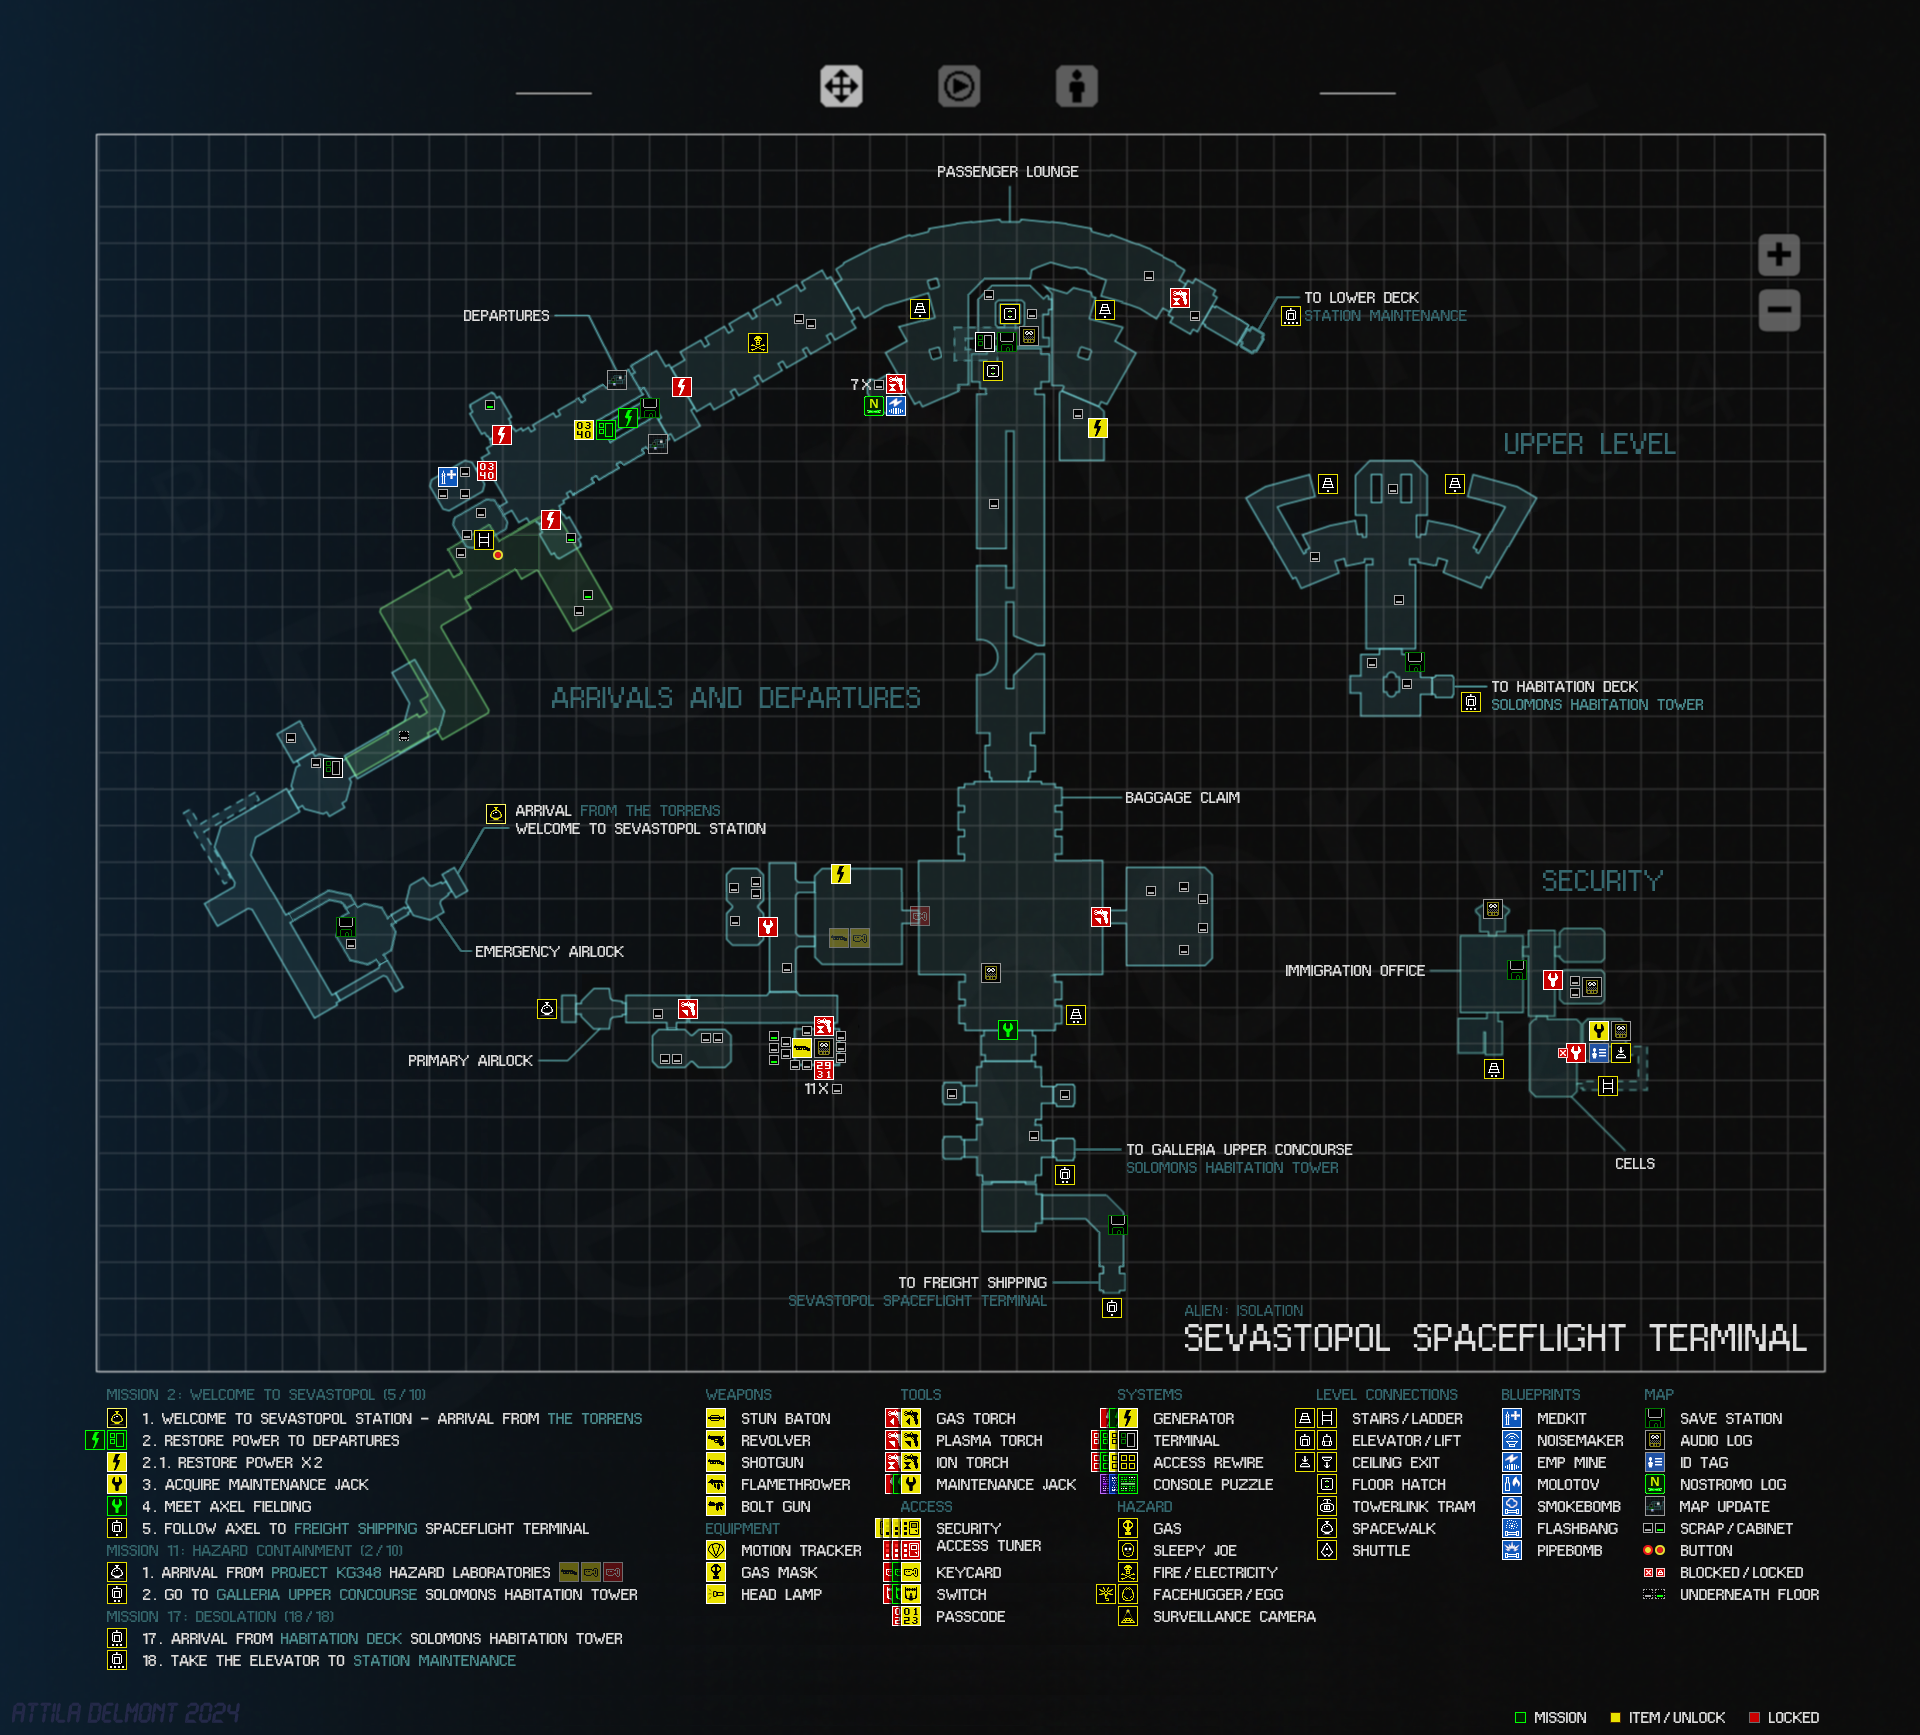
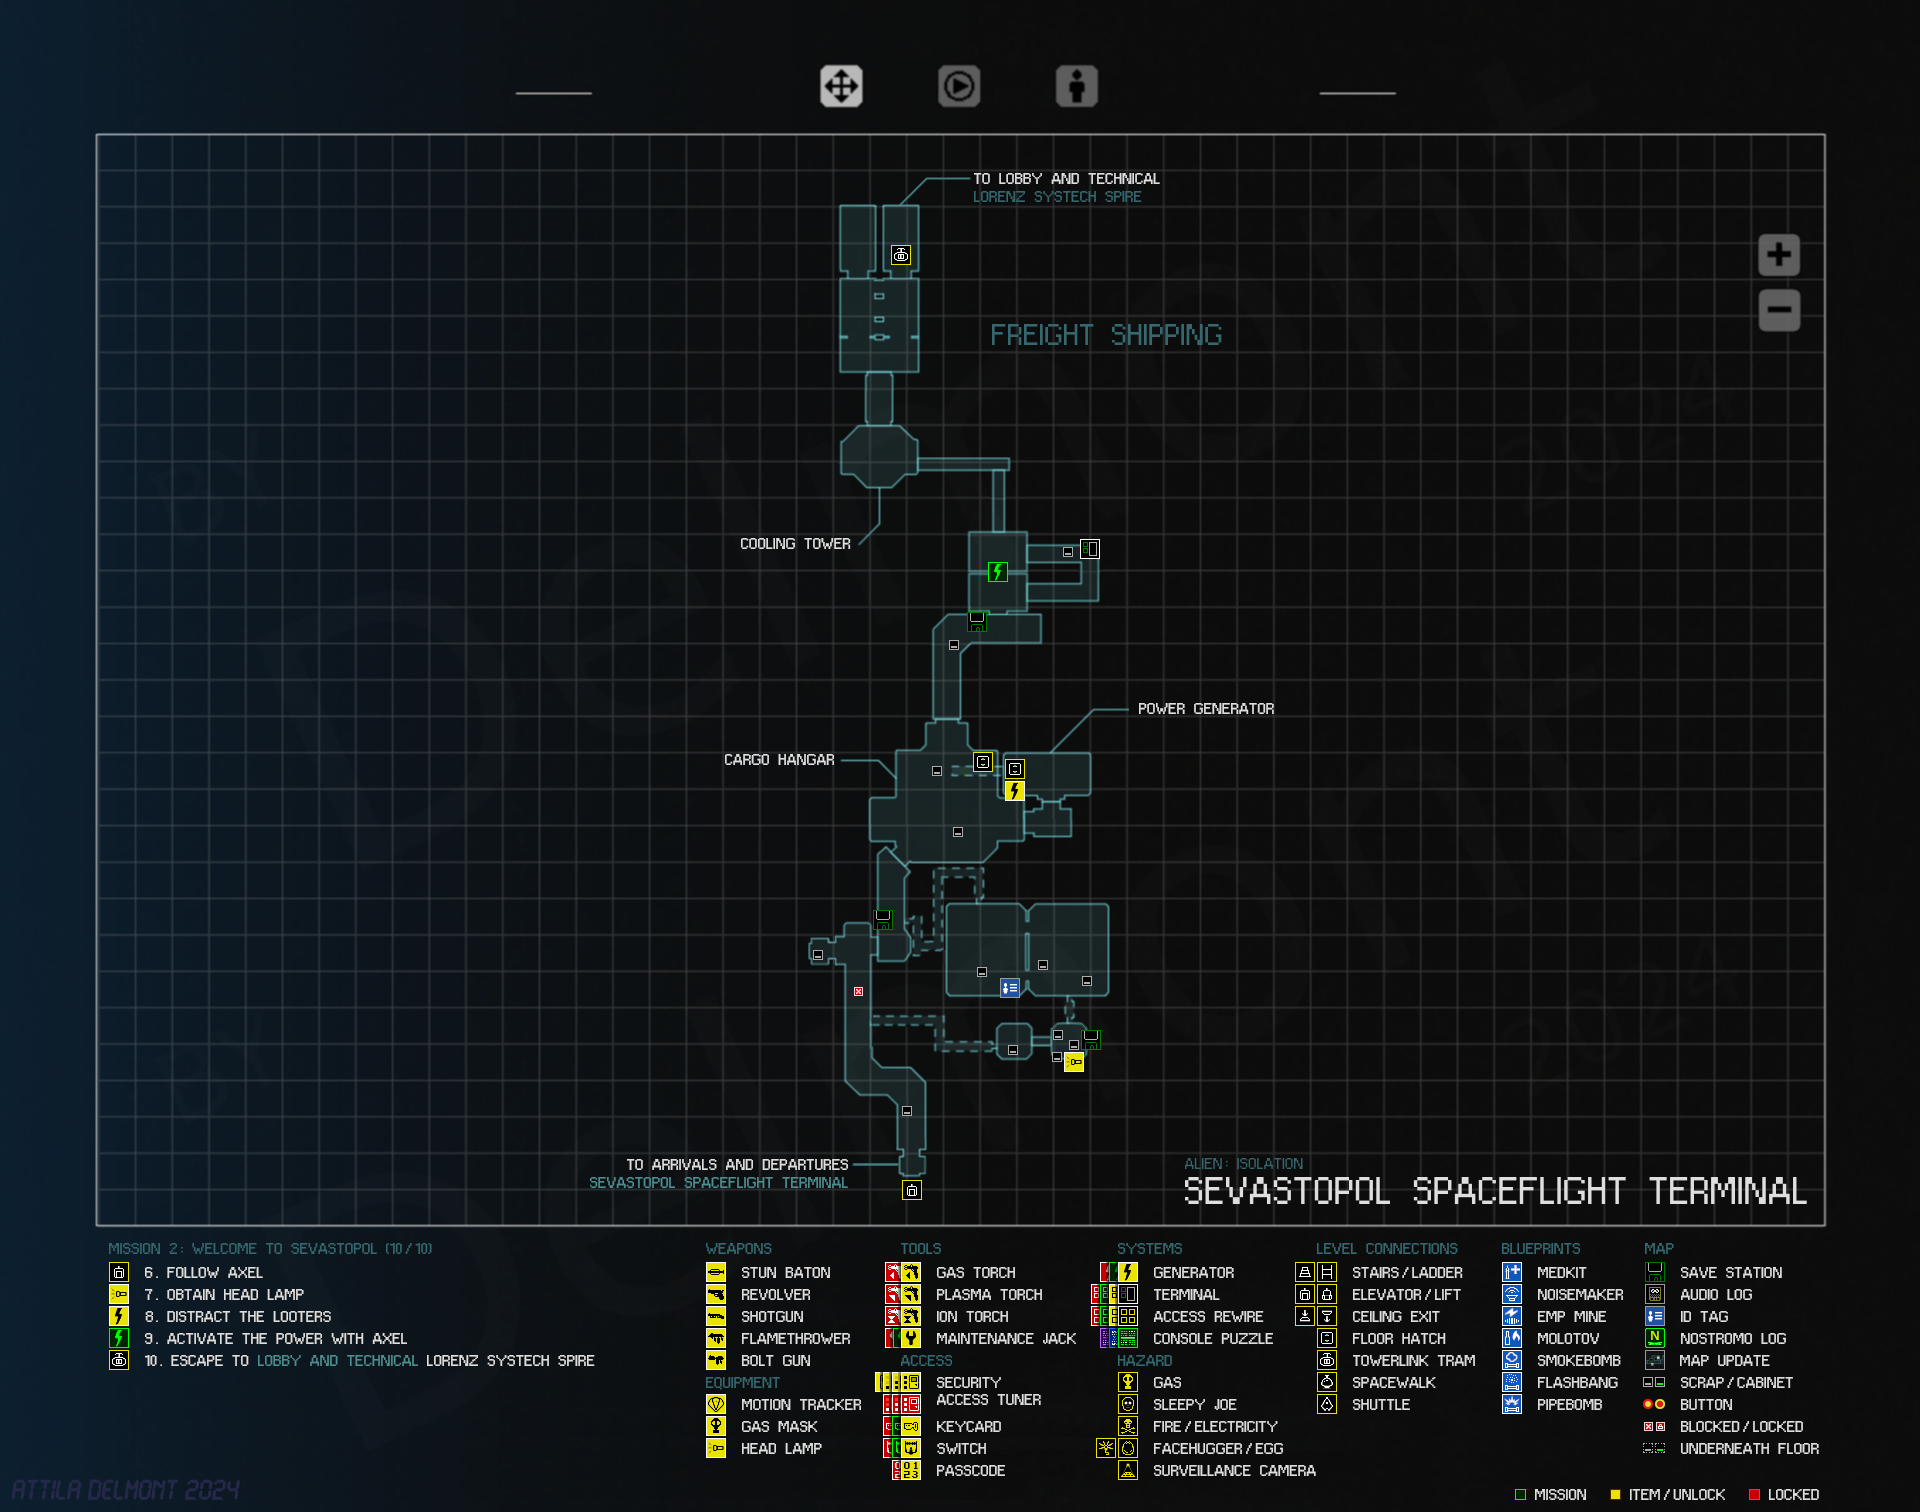
Sevastopol Spaceflight Terminal
Arrivals and Departures, Security, Upper Level
Freight Shipping
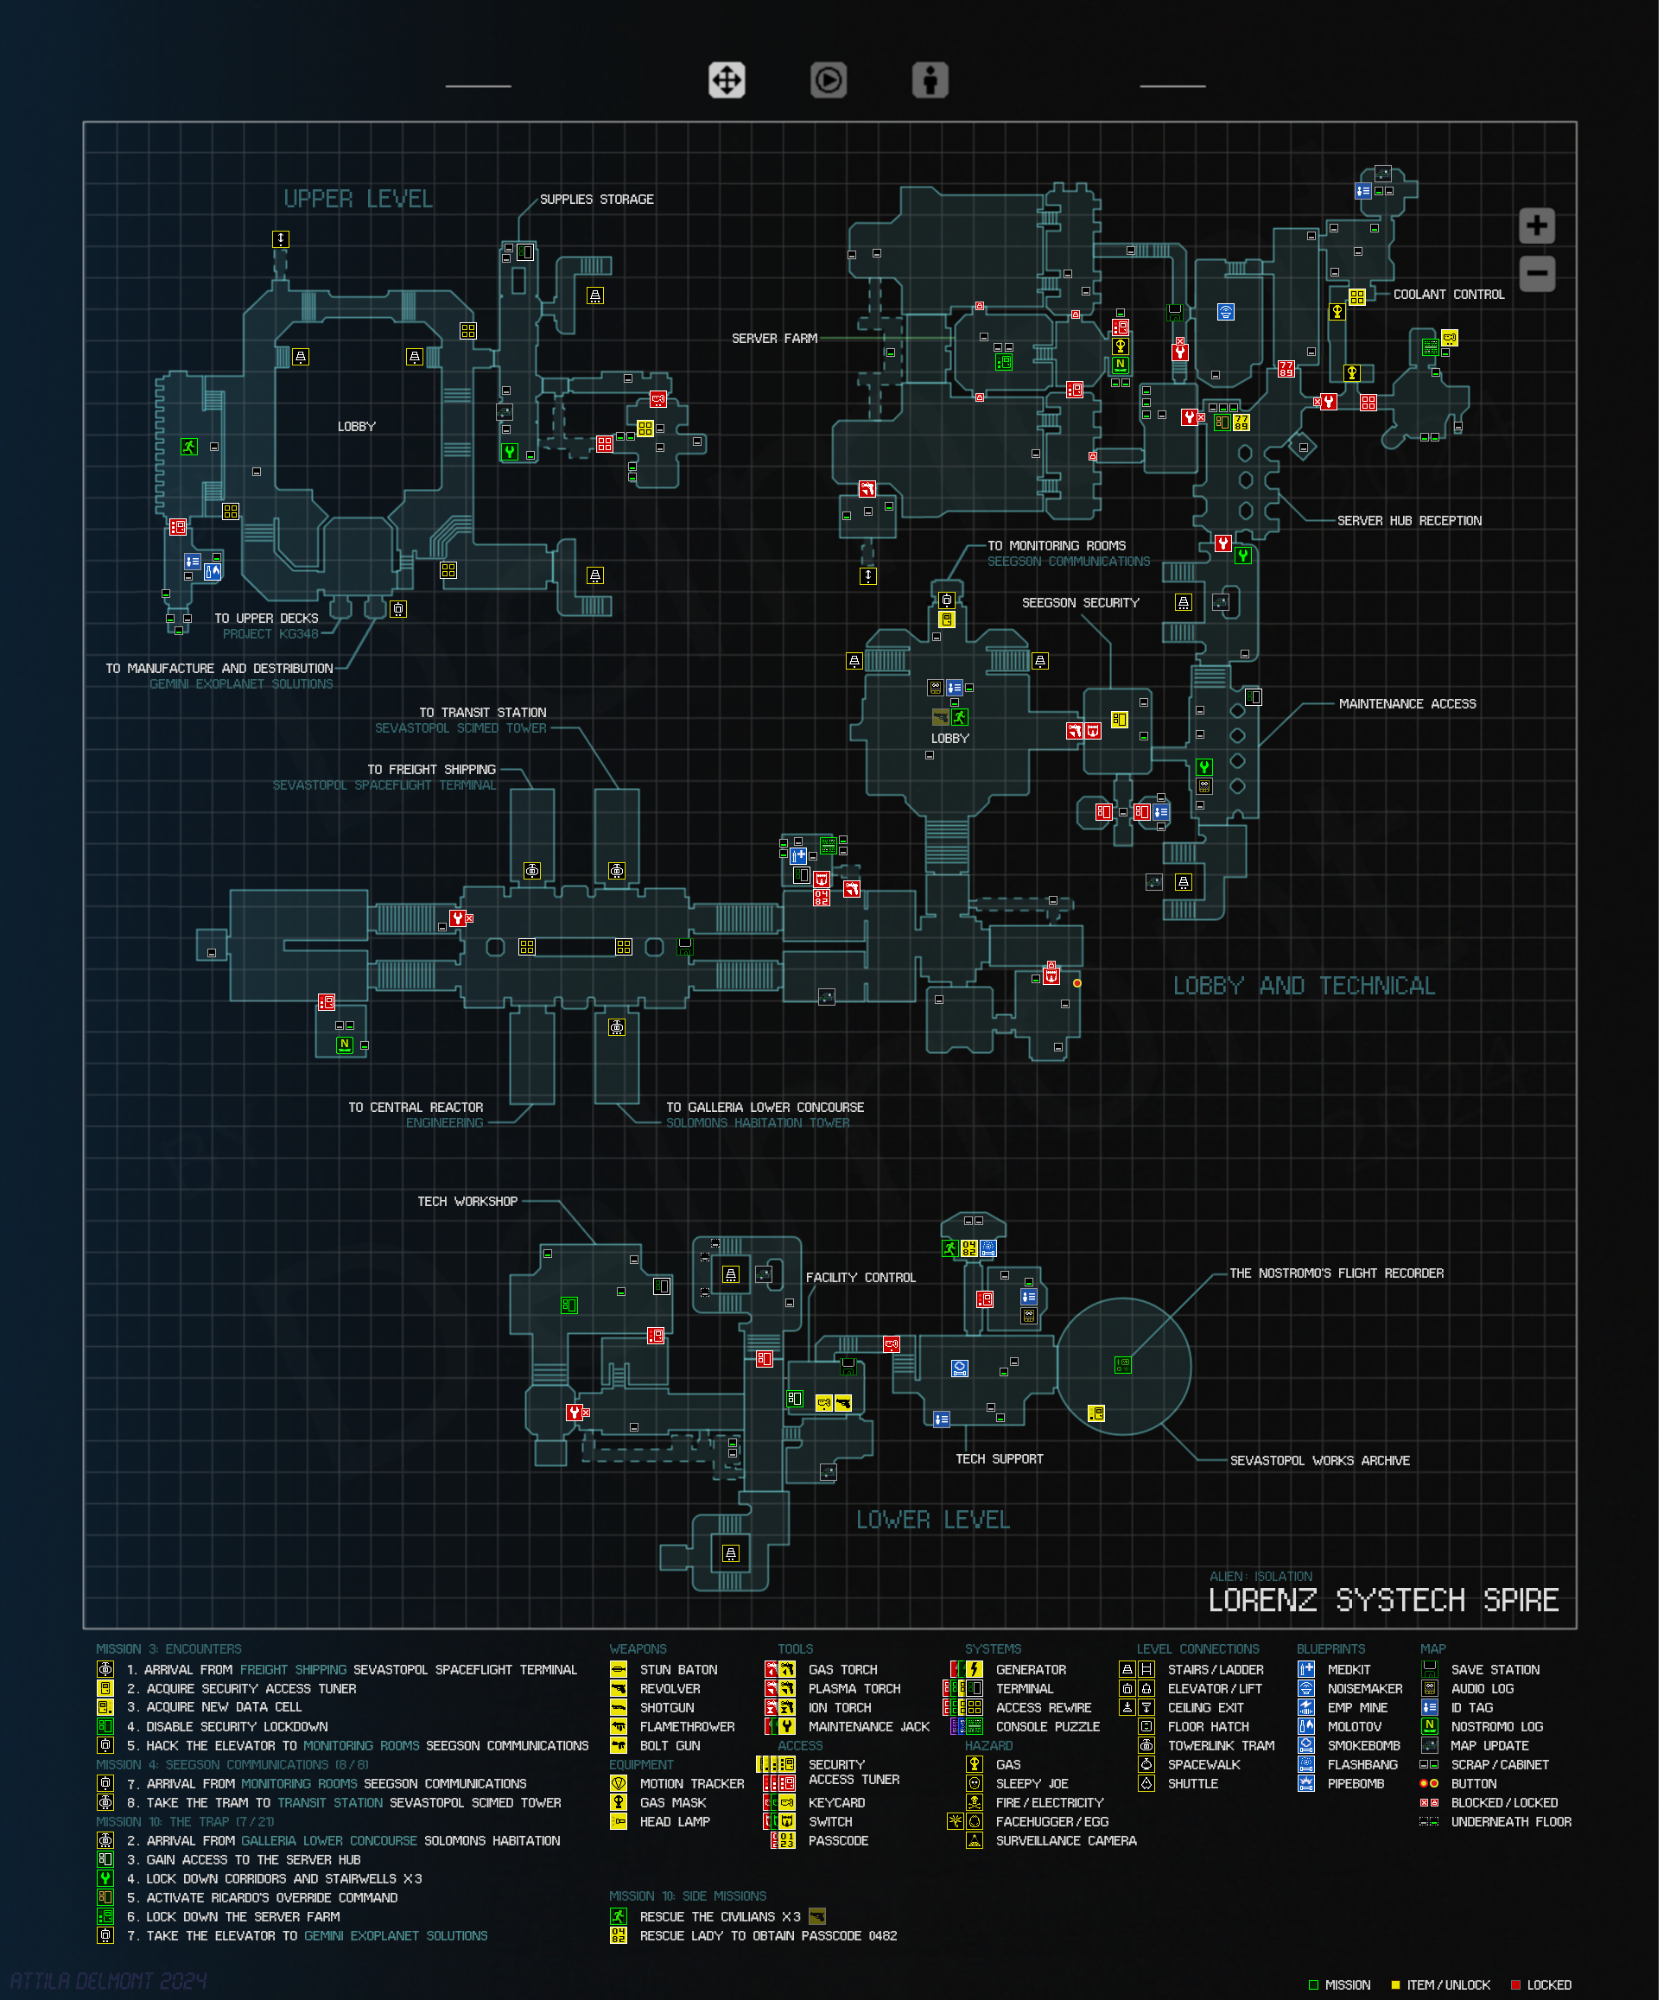
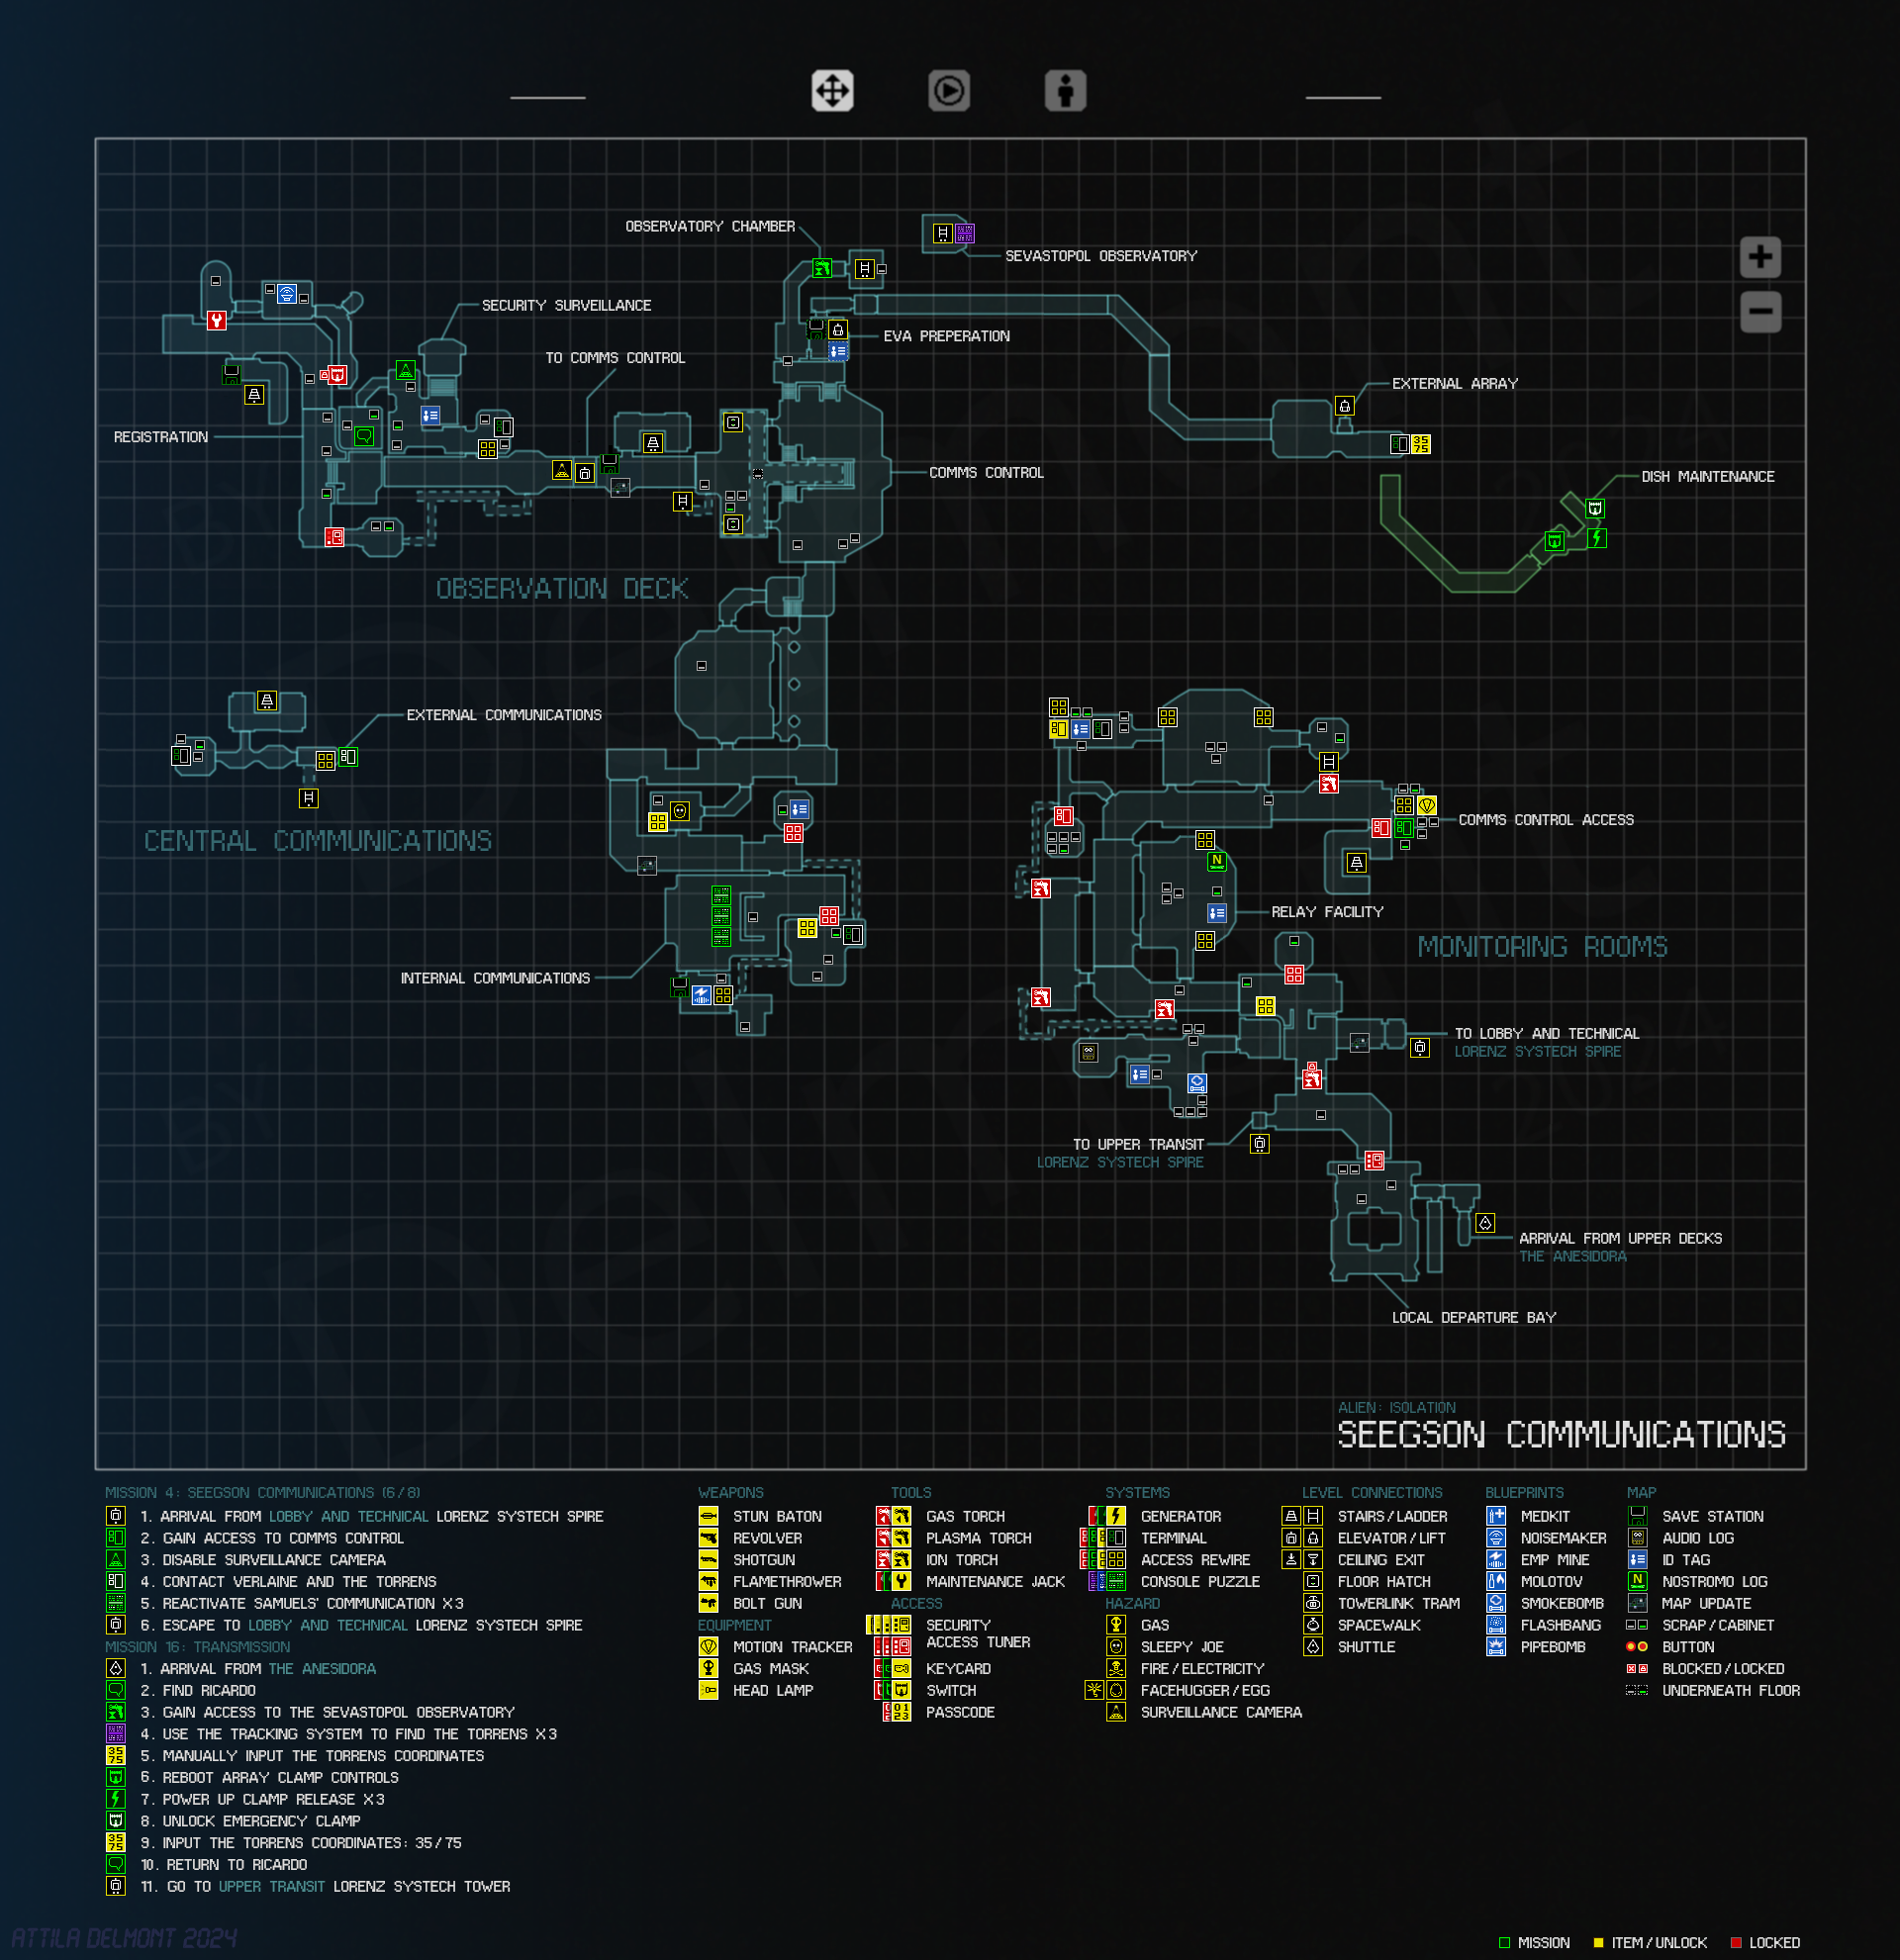
Lorenz Systech Spire
Lobby and Technical, Upper and Lower Levels
Upper Transit
Seegson Communications
Sevastopol Scimed Tower
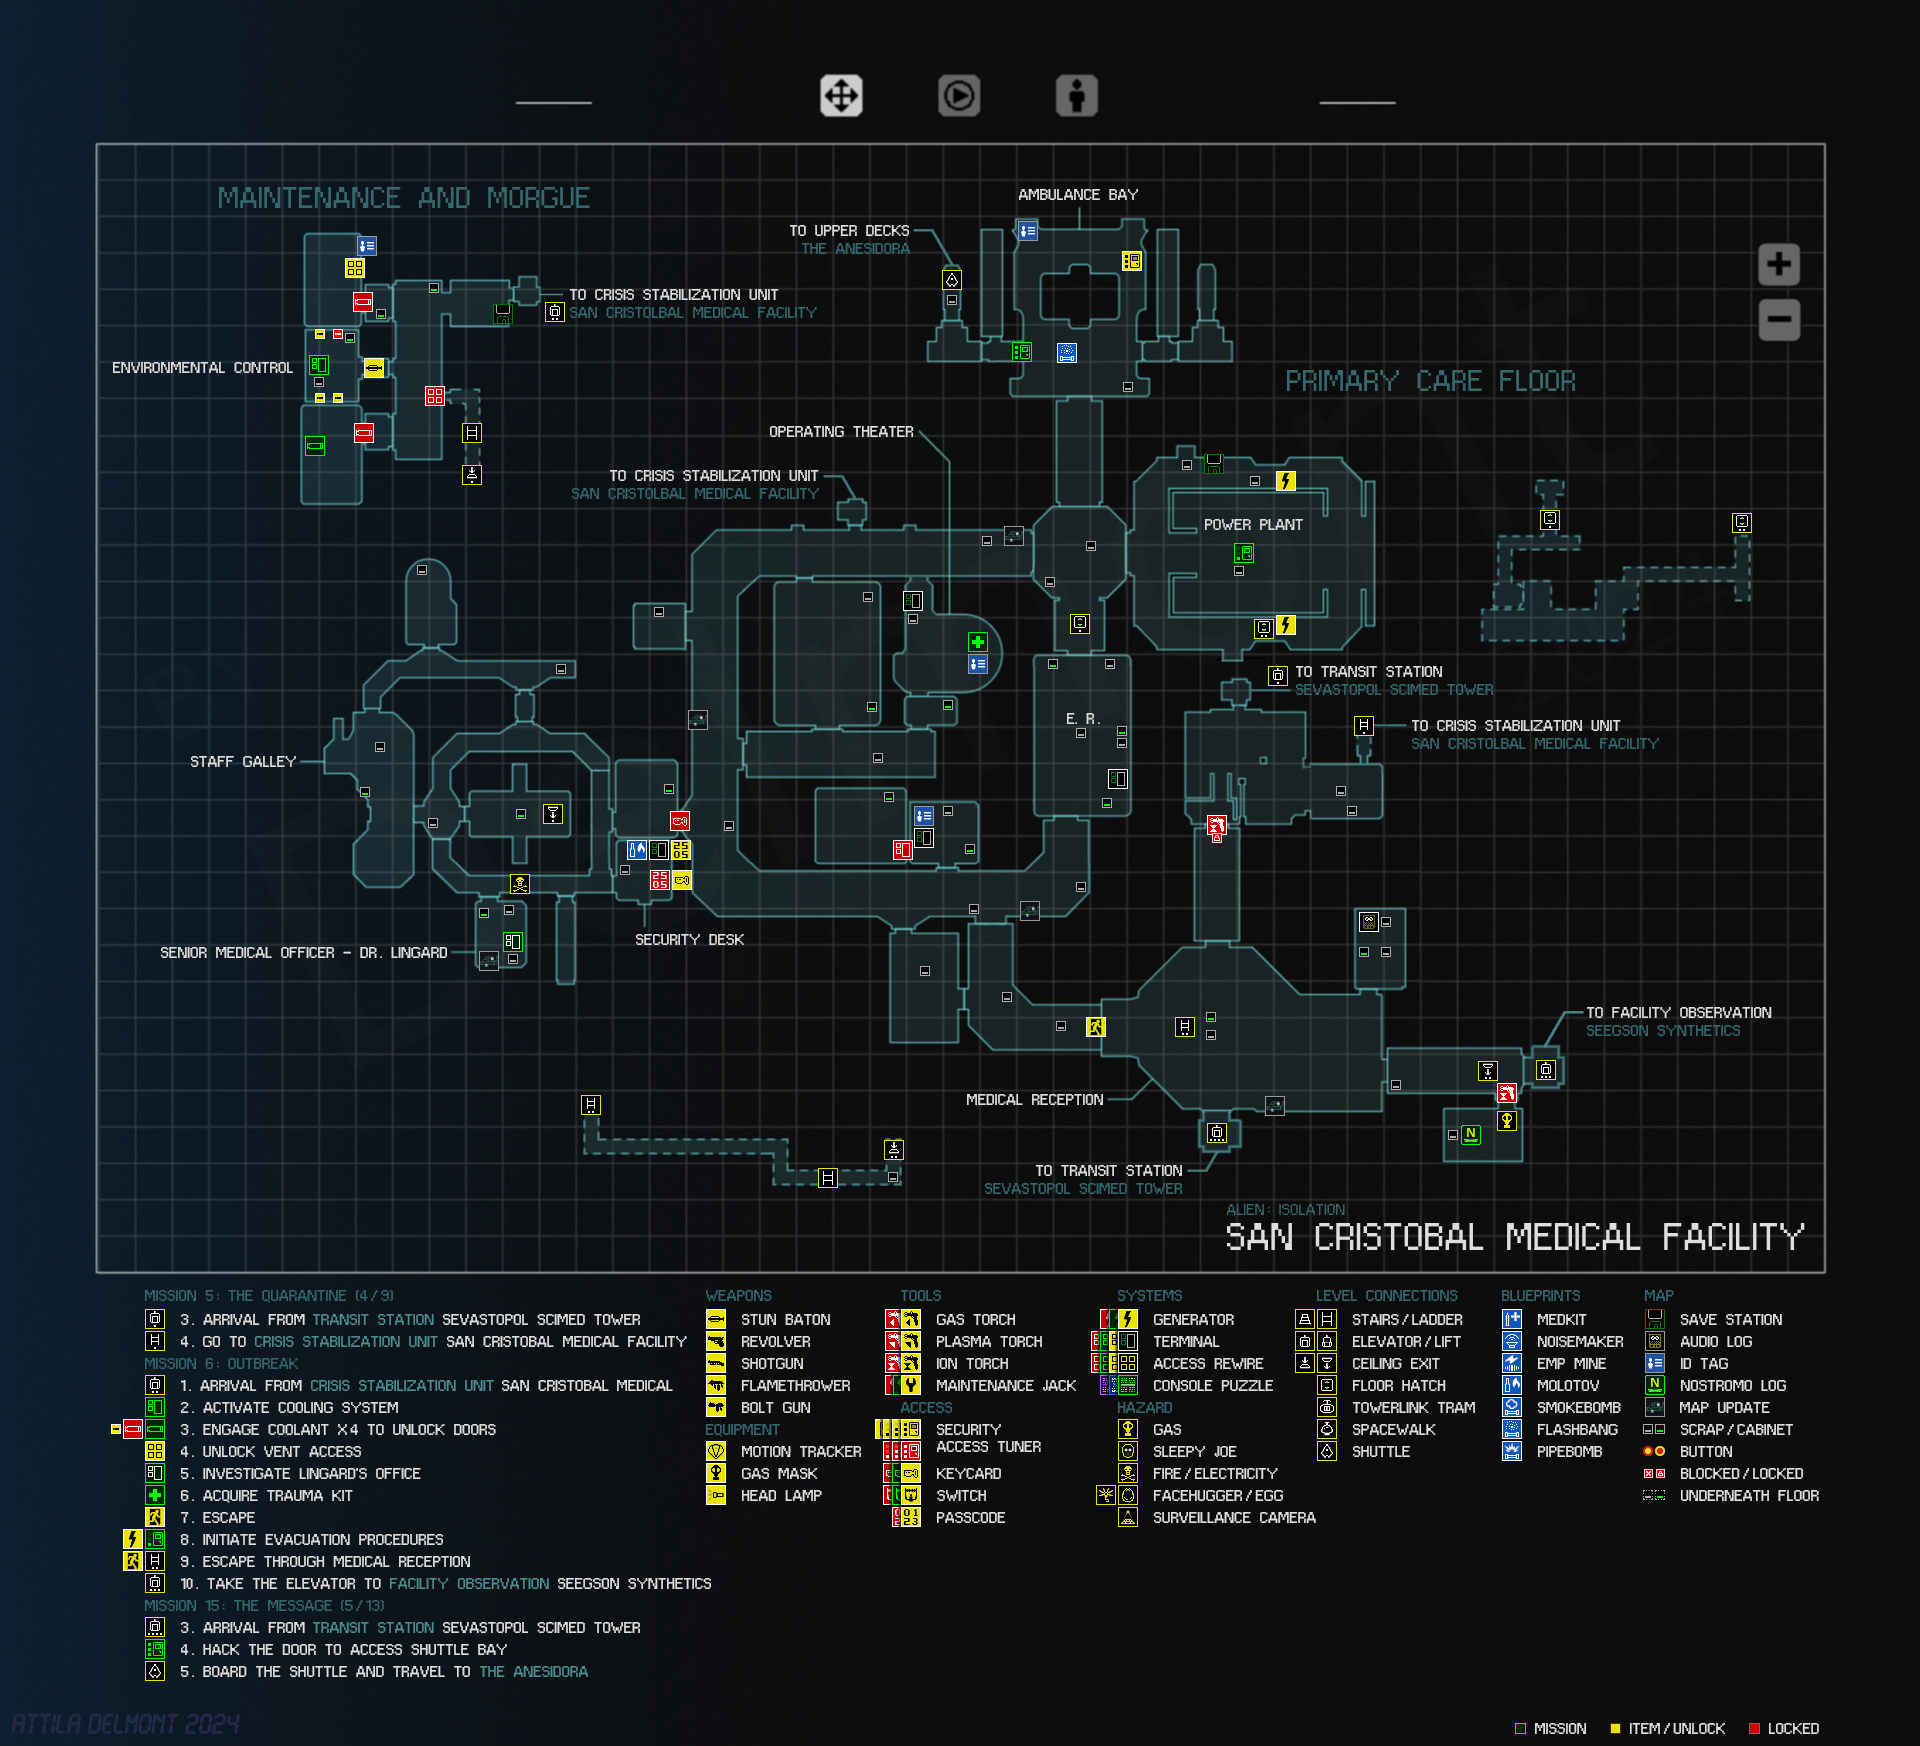
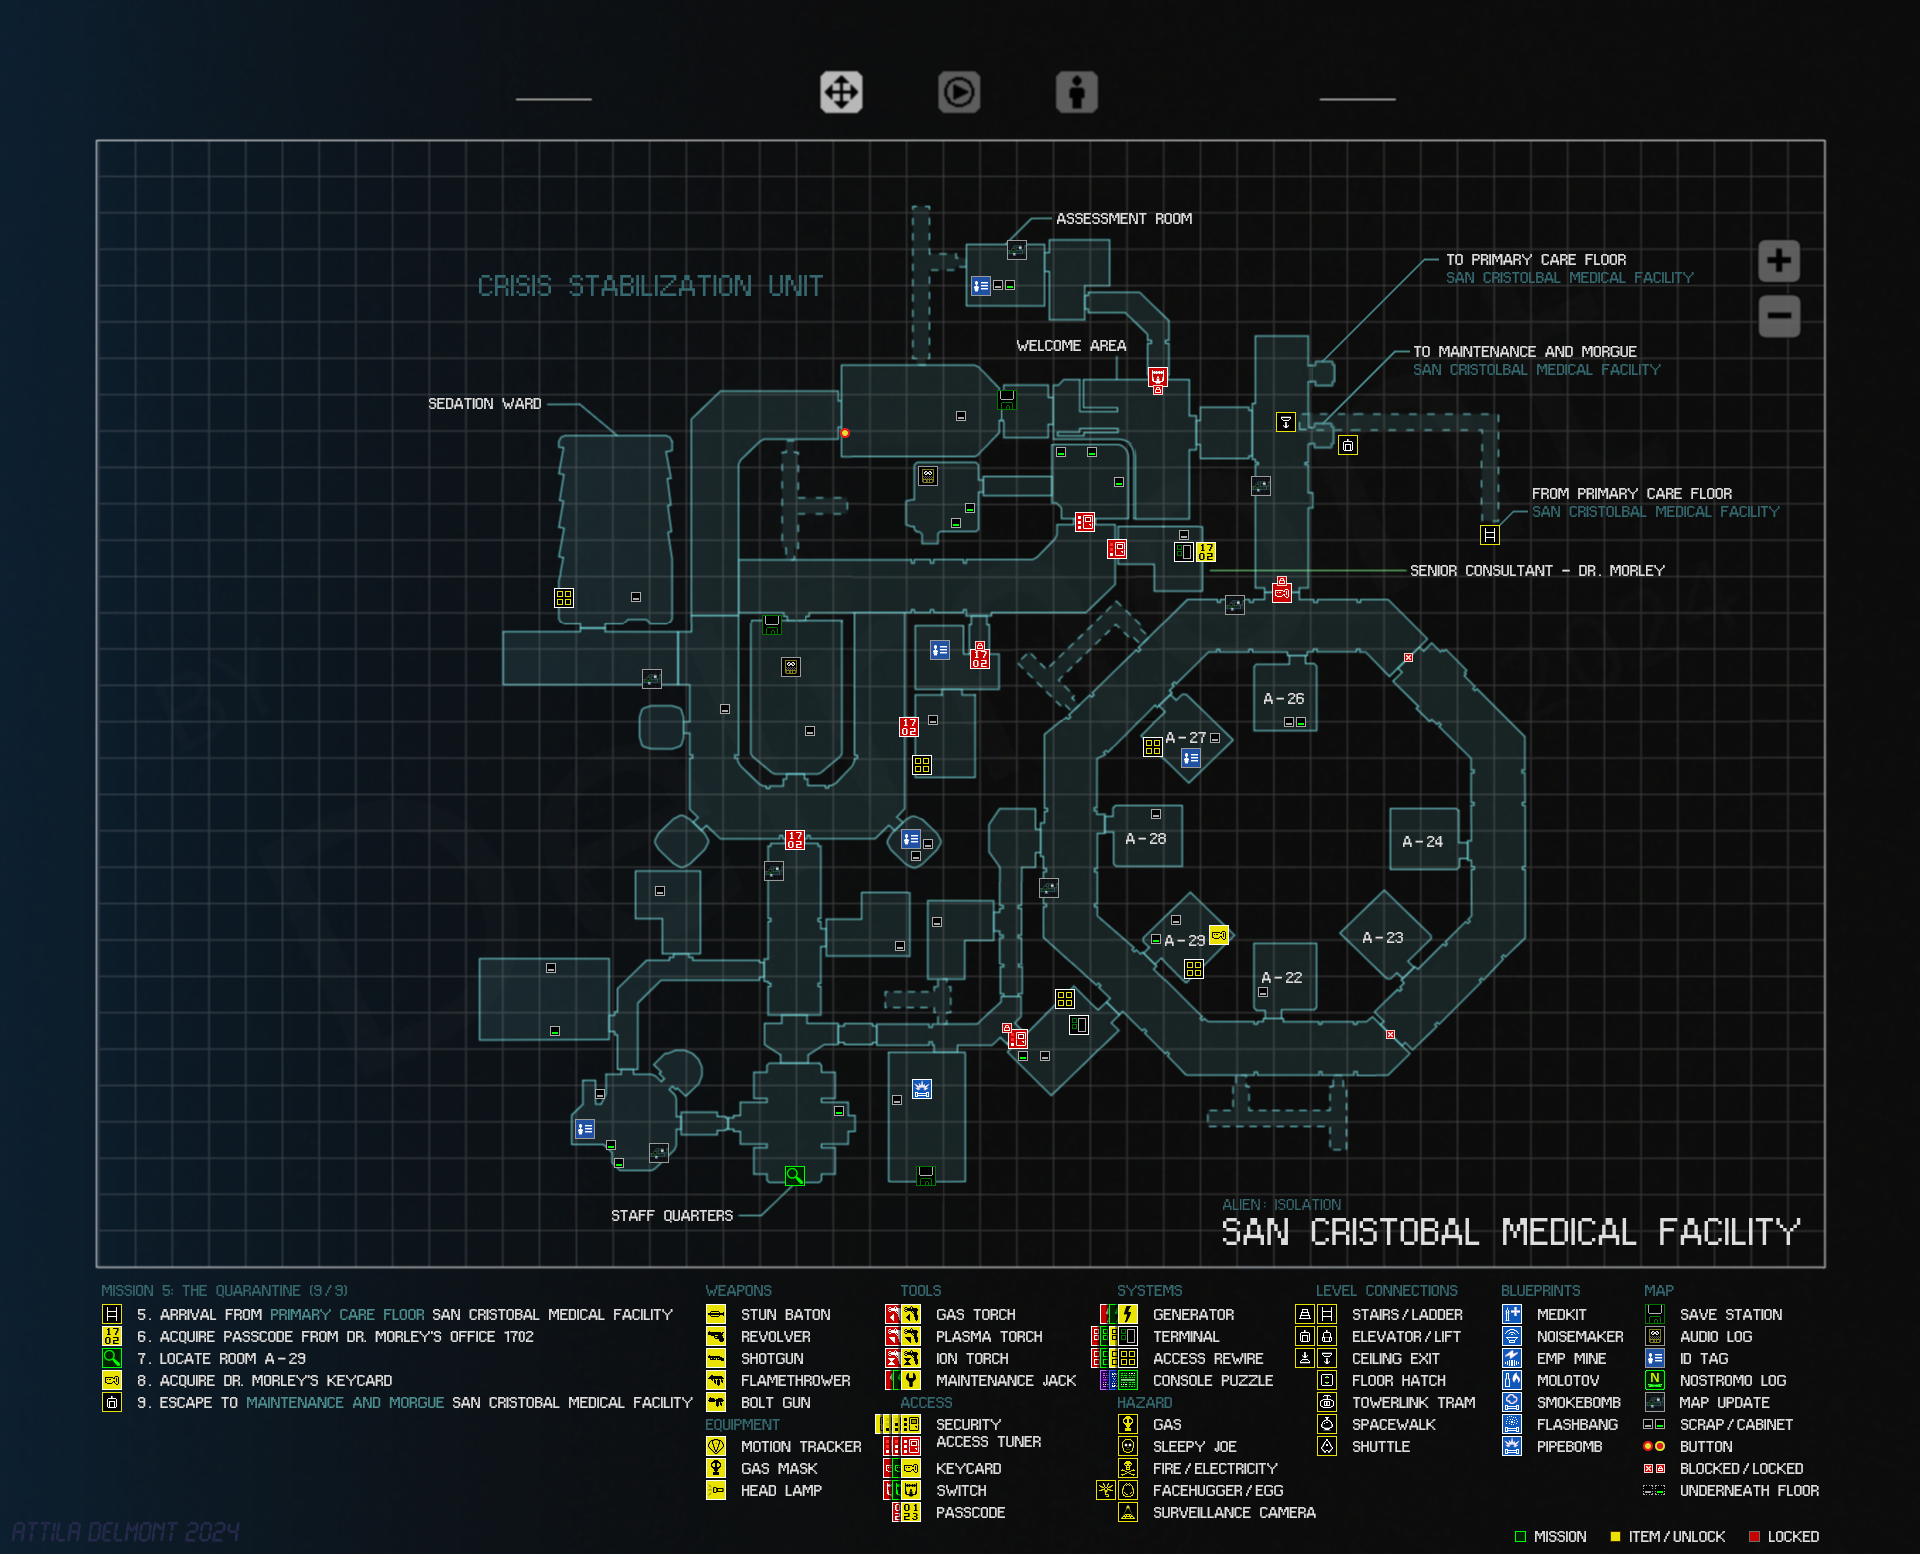
San Cristobal Medical Facility
Primary Care Floor, Maintenance and Morgue
Crisis Stabilization Unit
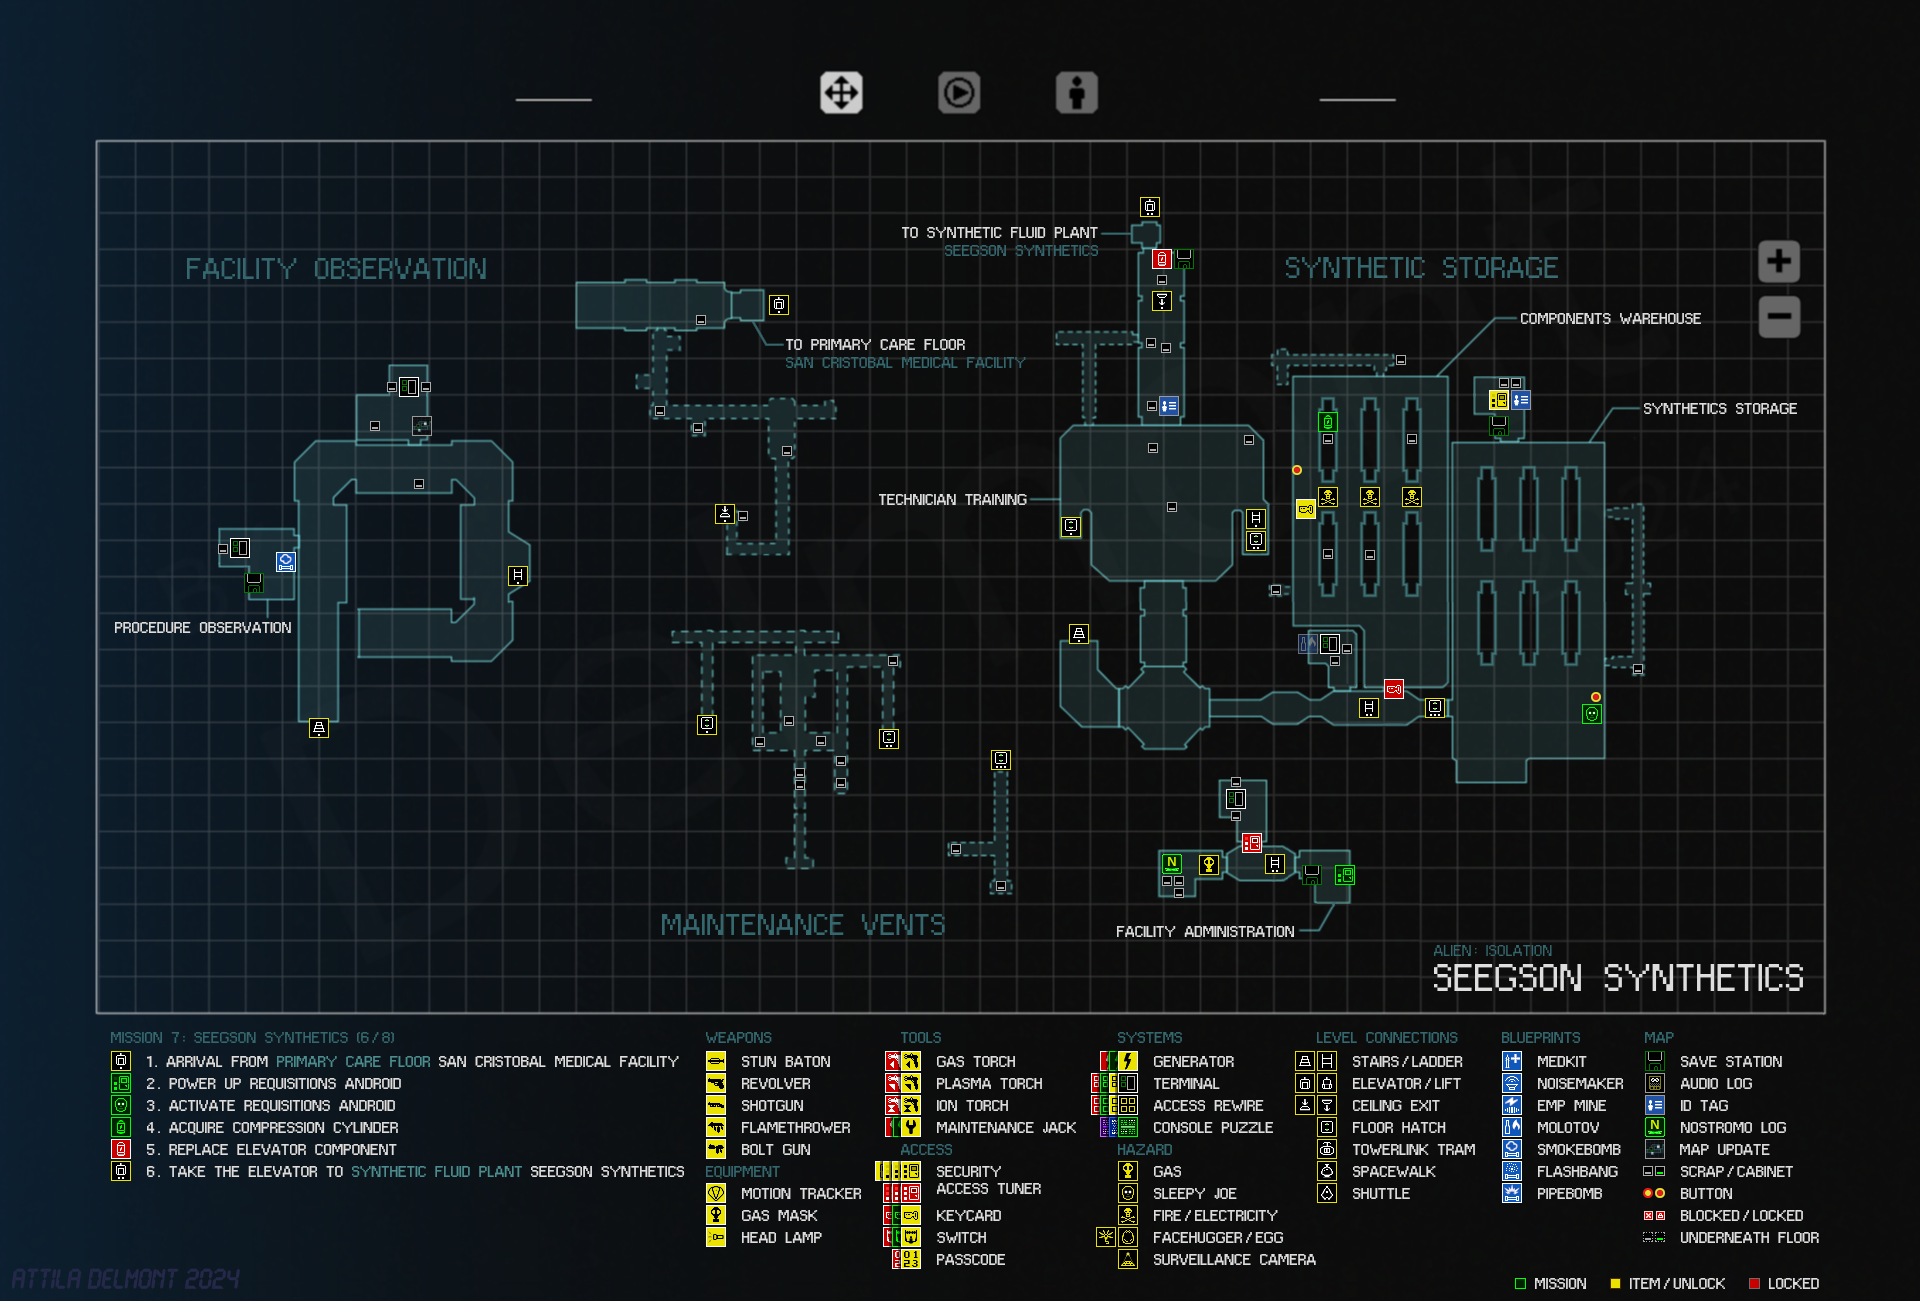
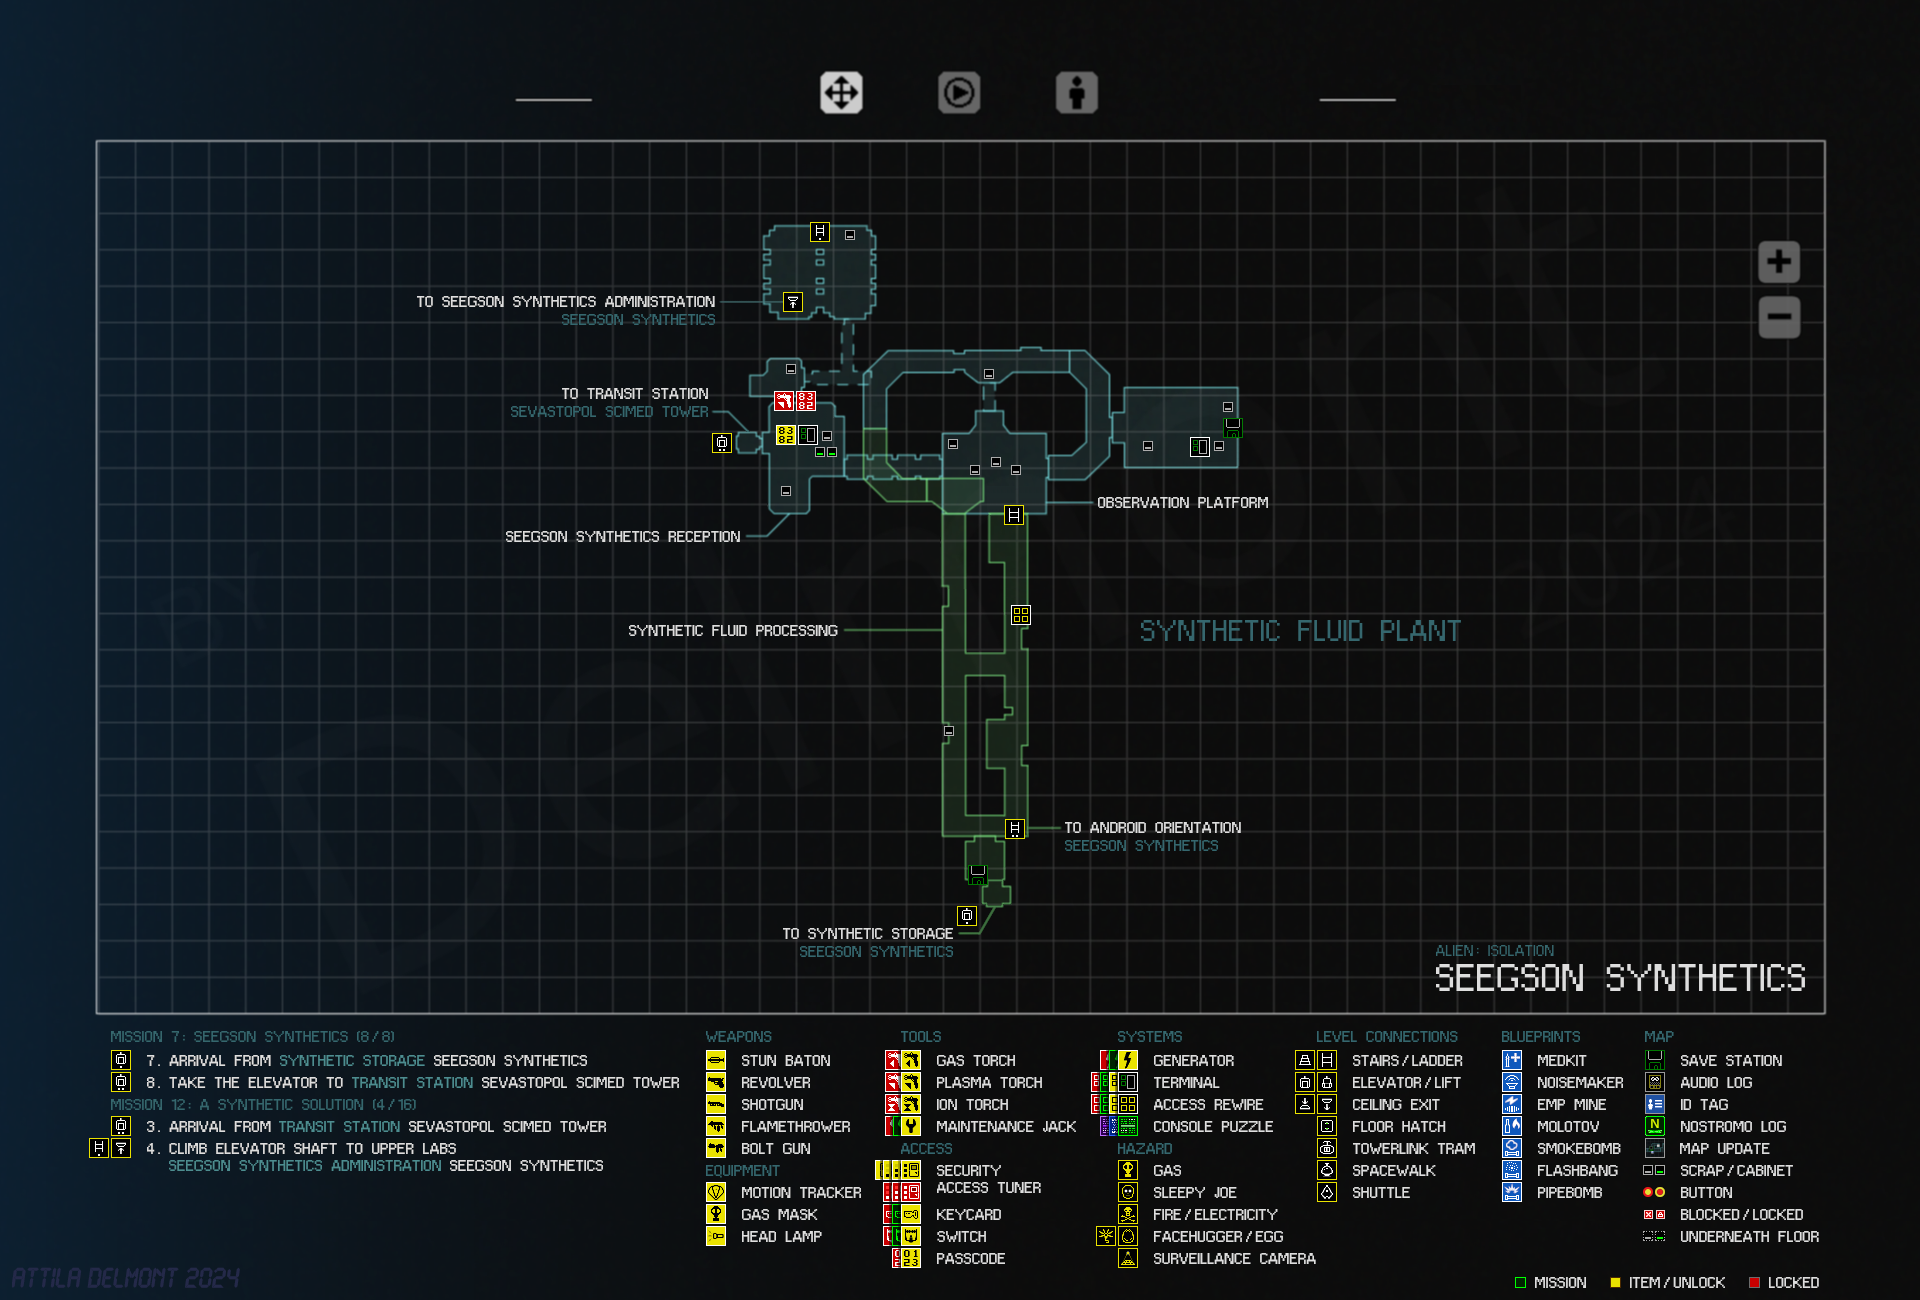
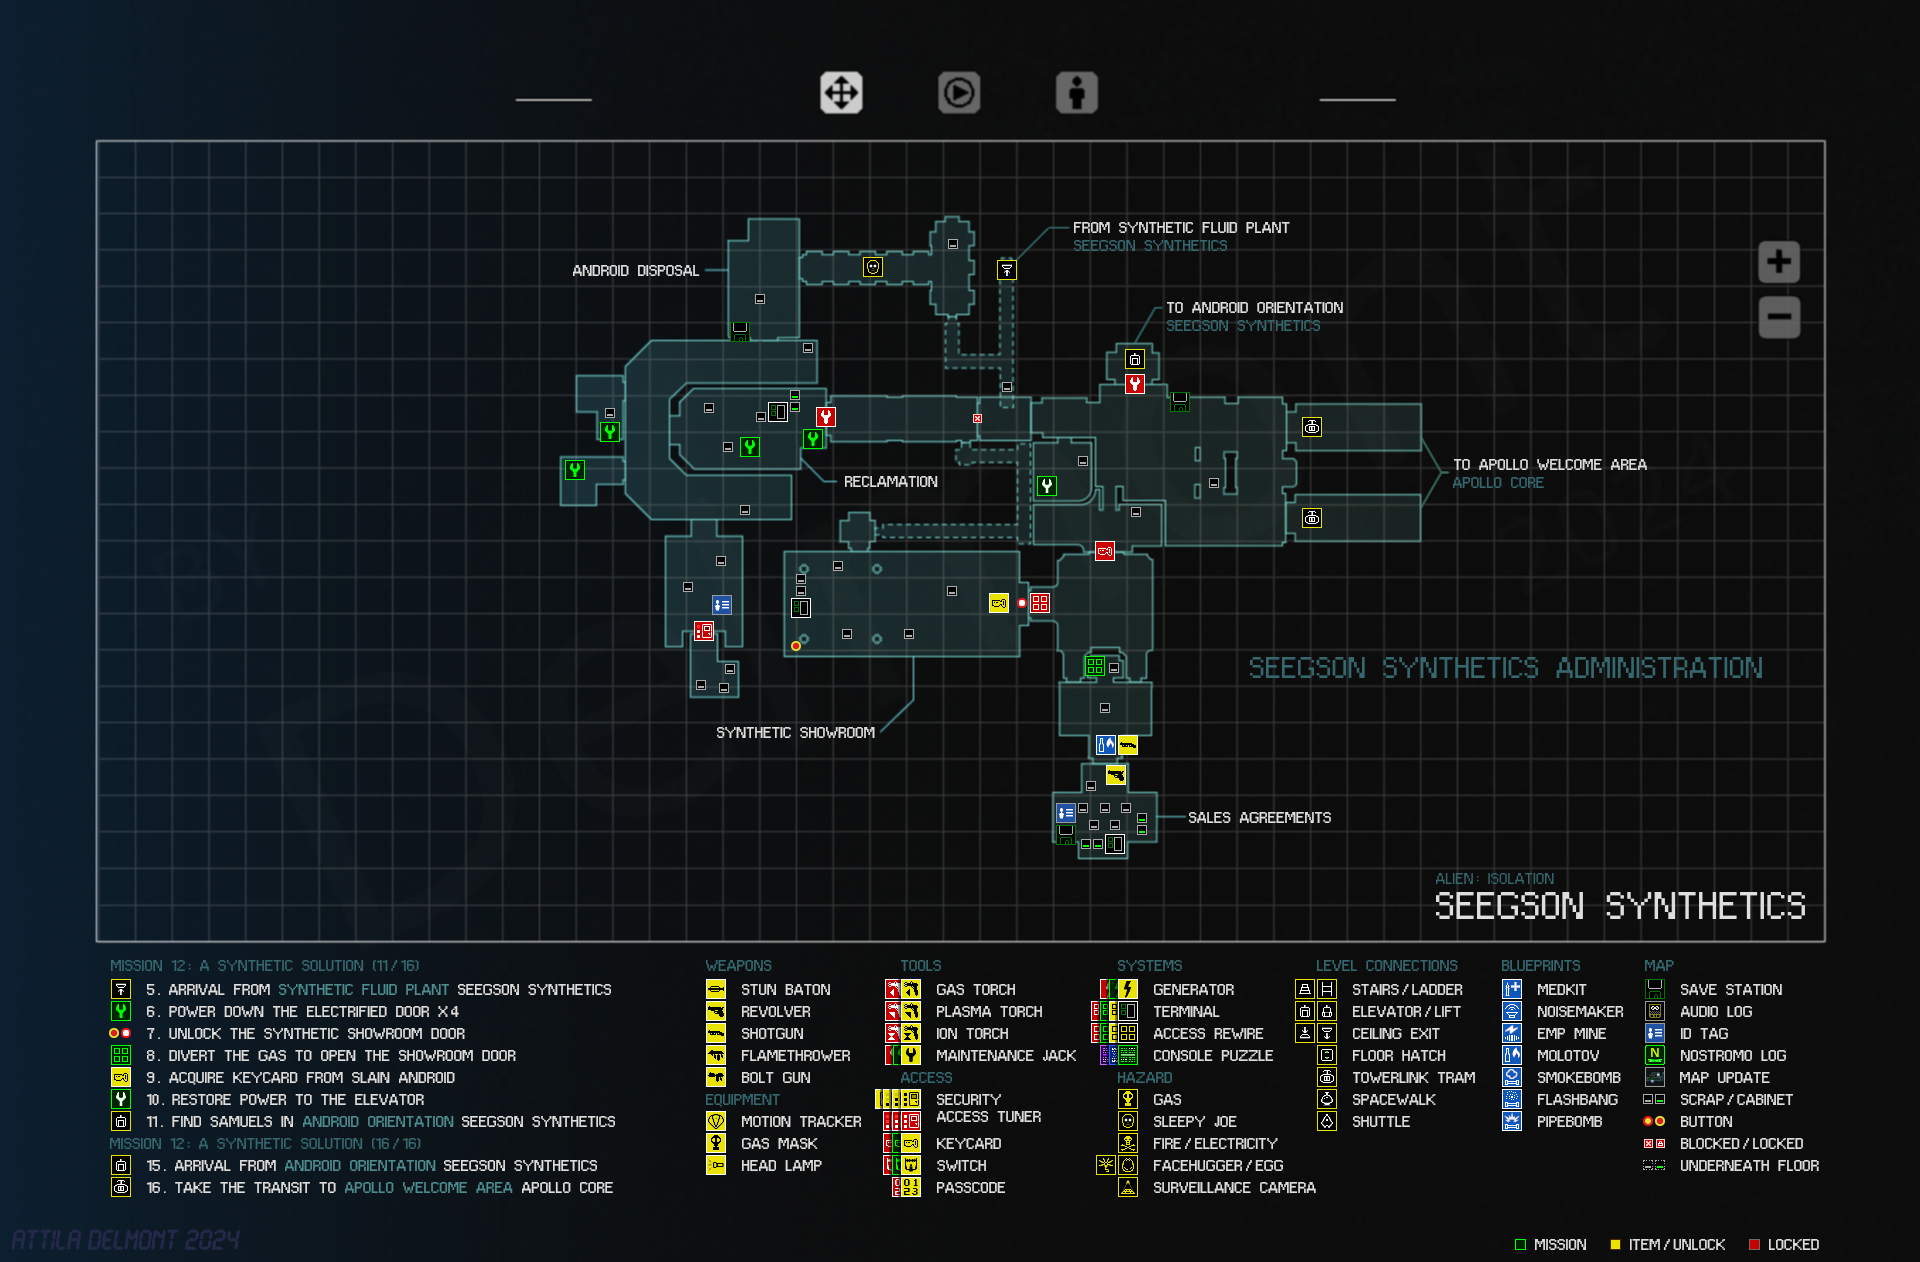
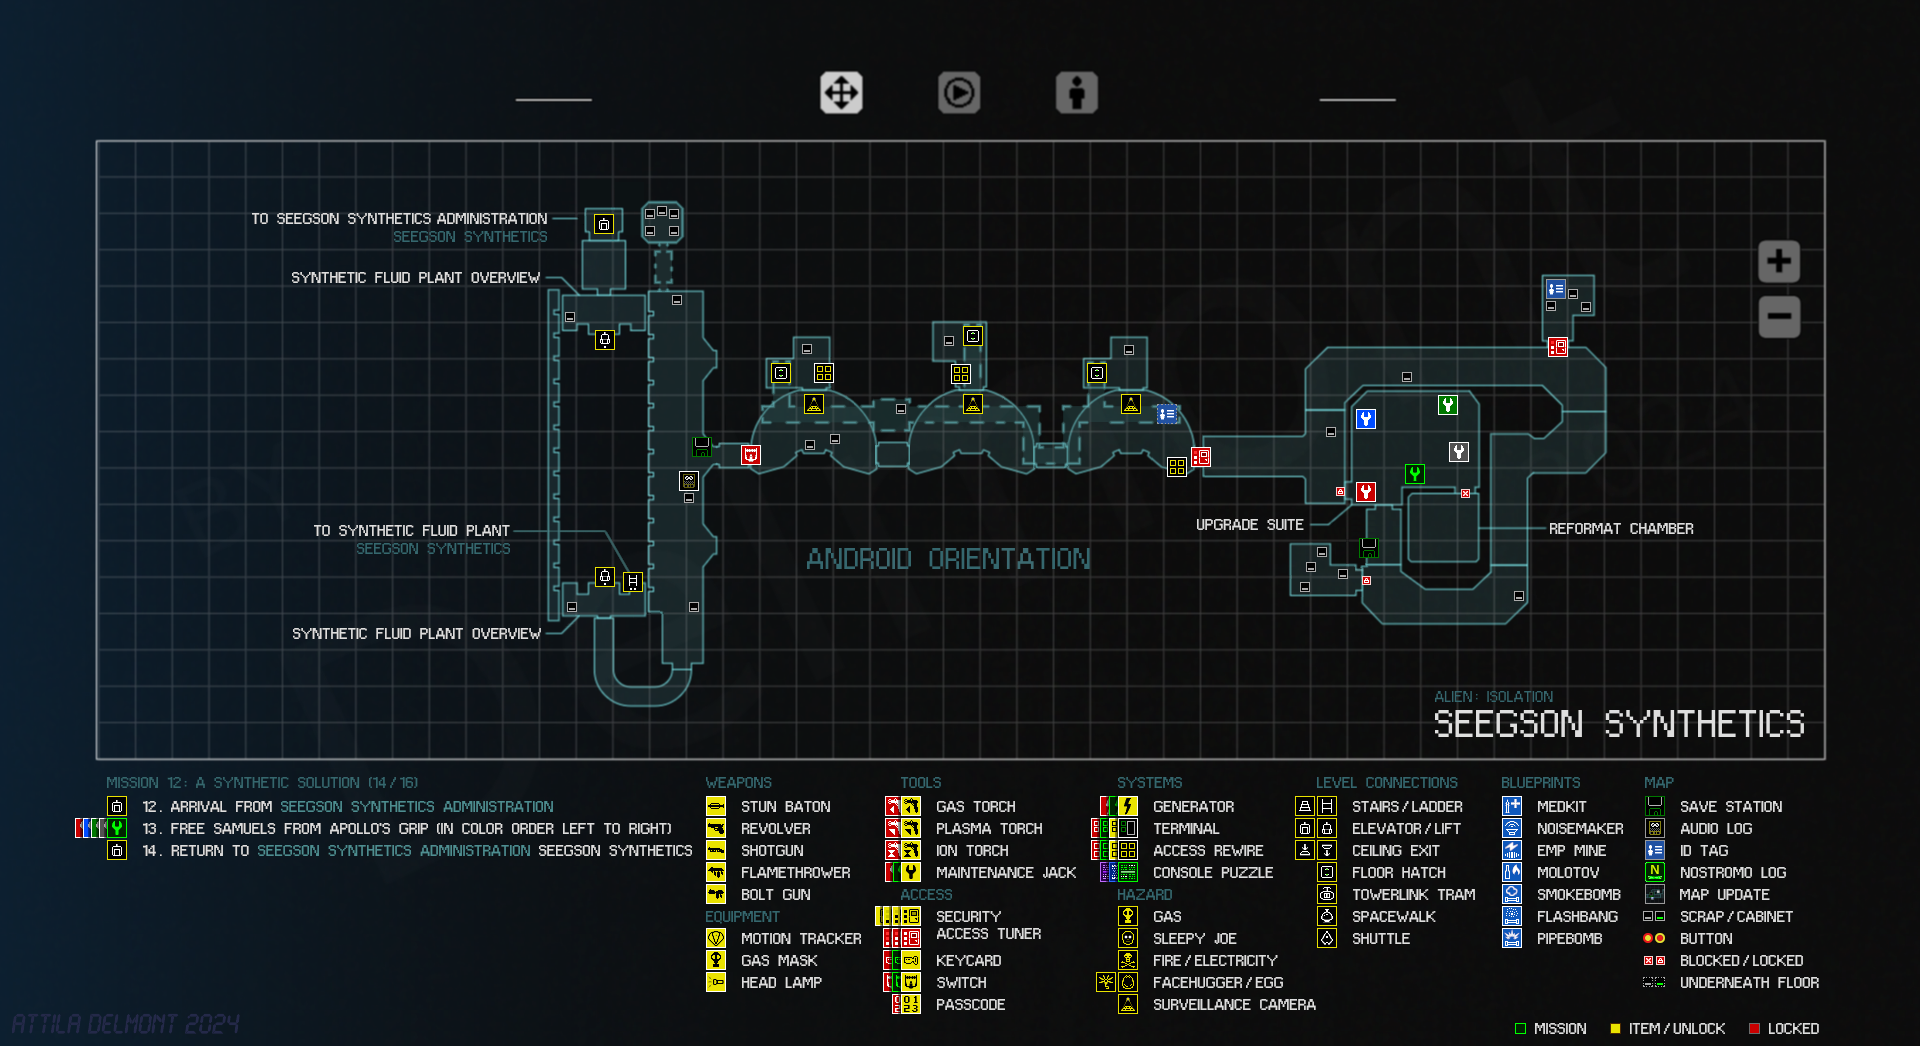
Seegson Synthetics
Synthetic Storage, Facility Observation, and Maintenance Vents
Synthetic Fluid Plant
Seegson Synthetics Administration
Android Orientation
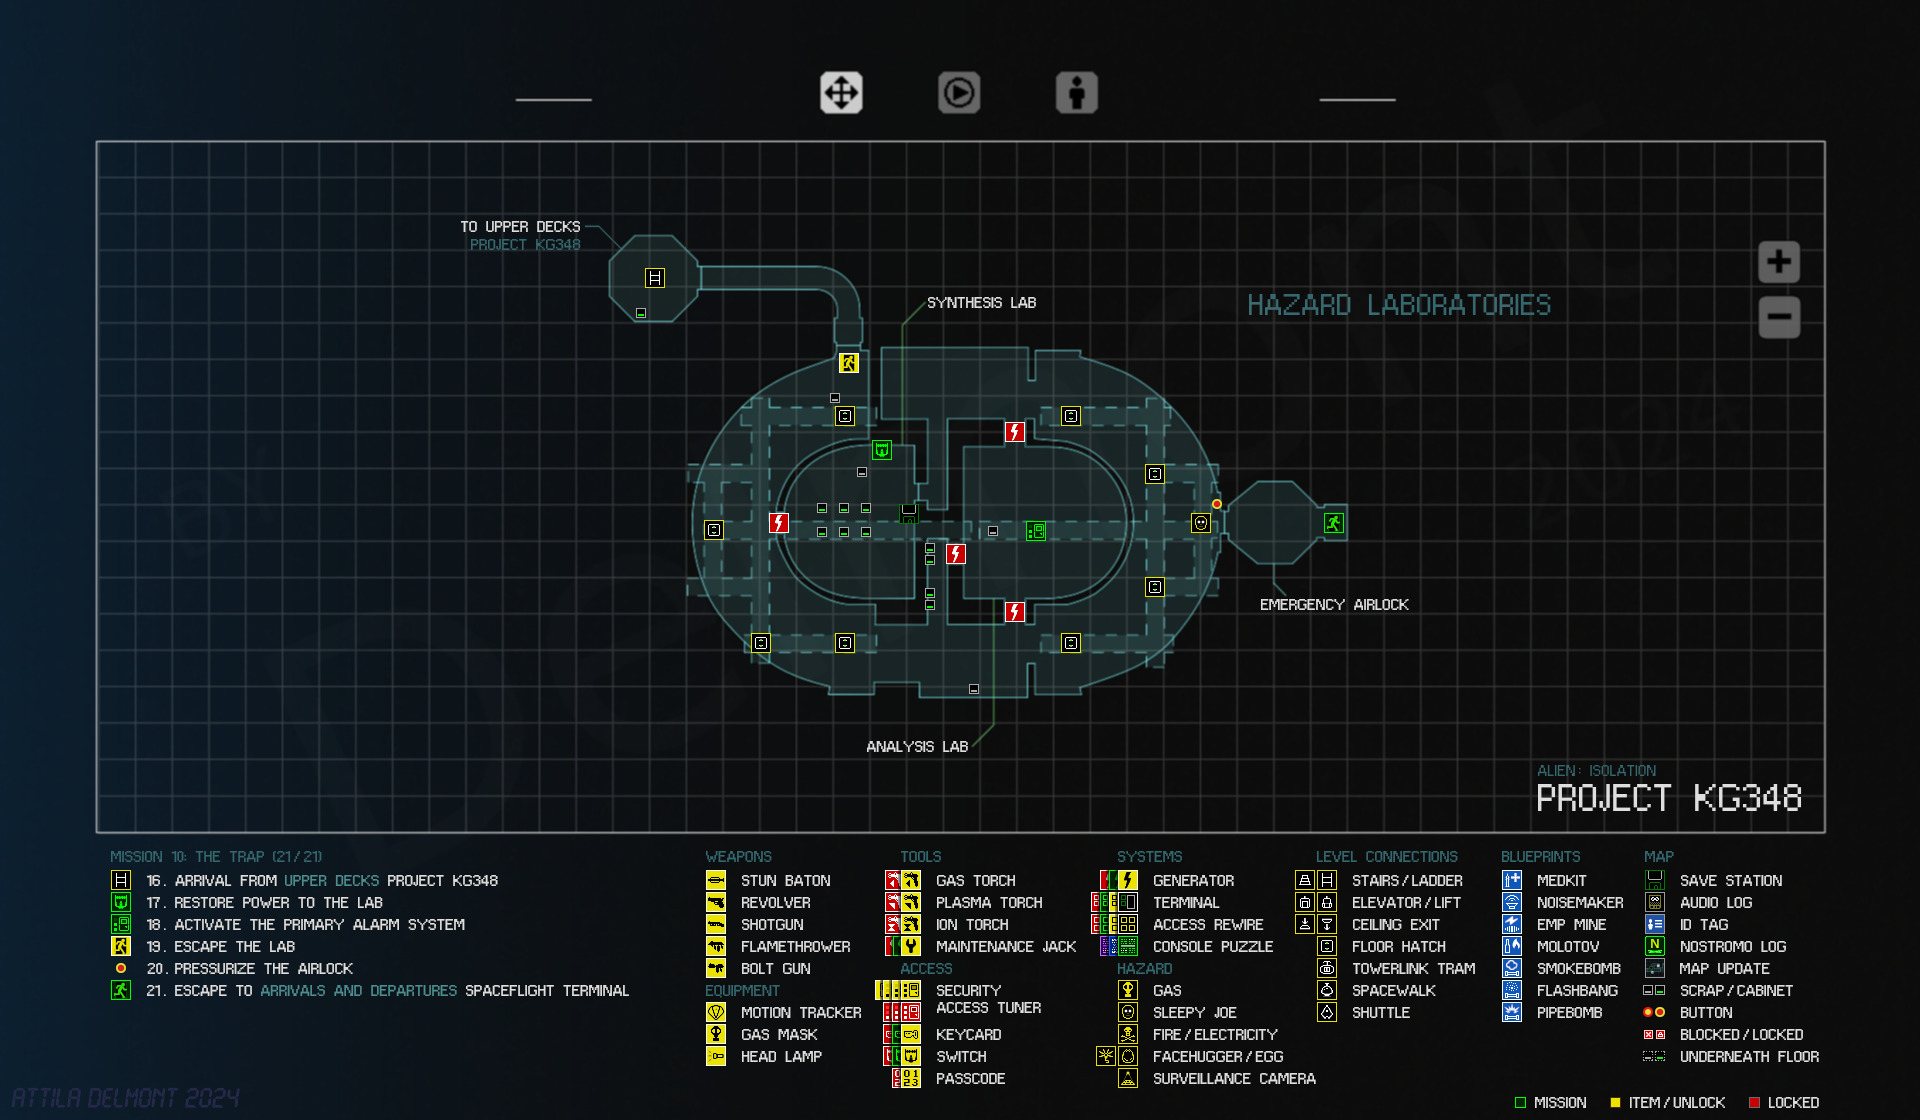
Gemini Exoplanet Solutions
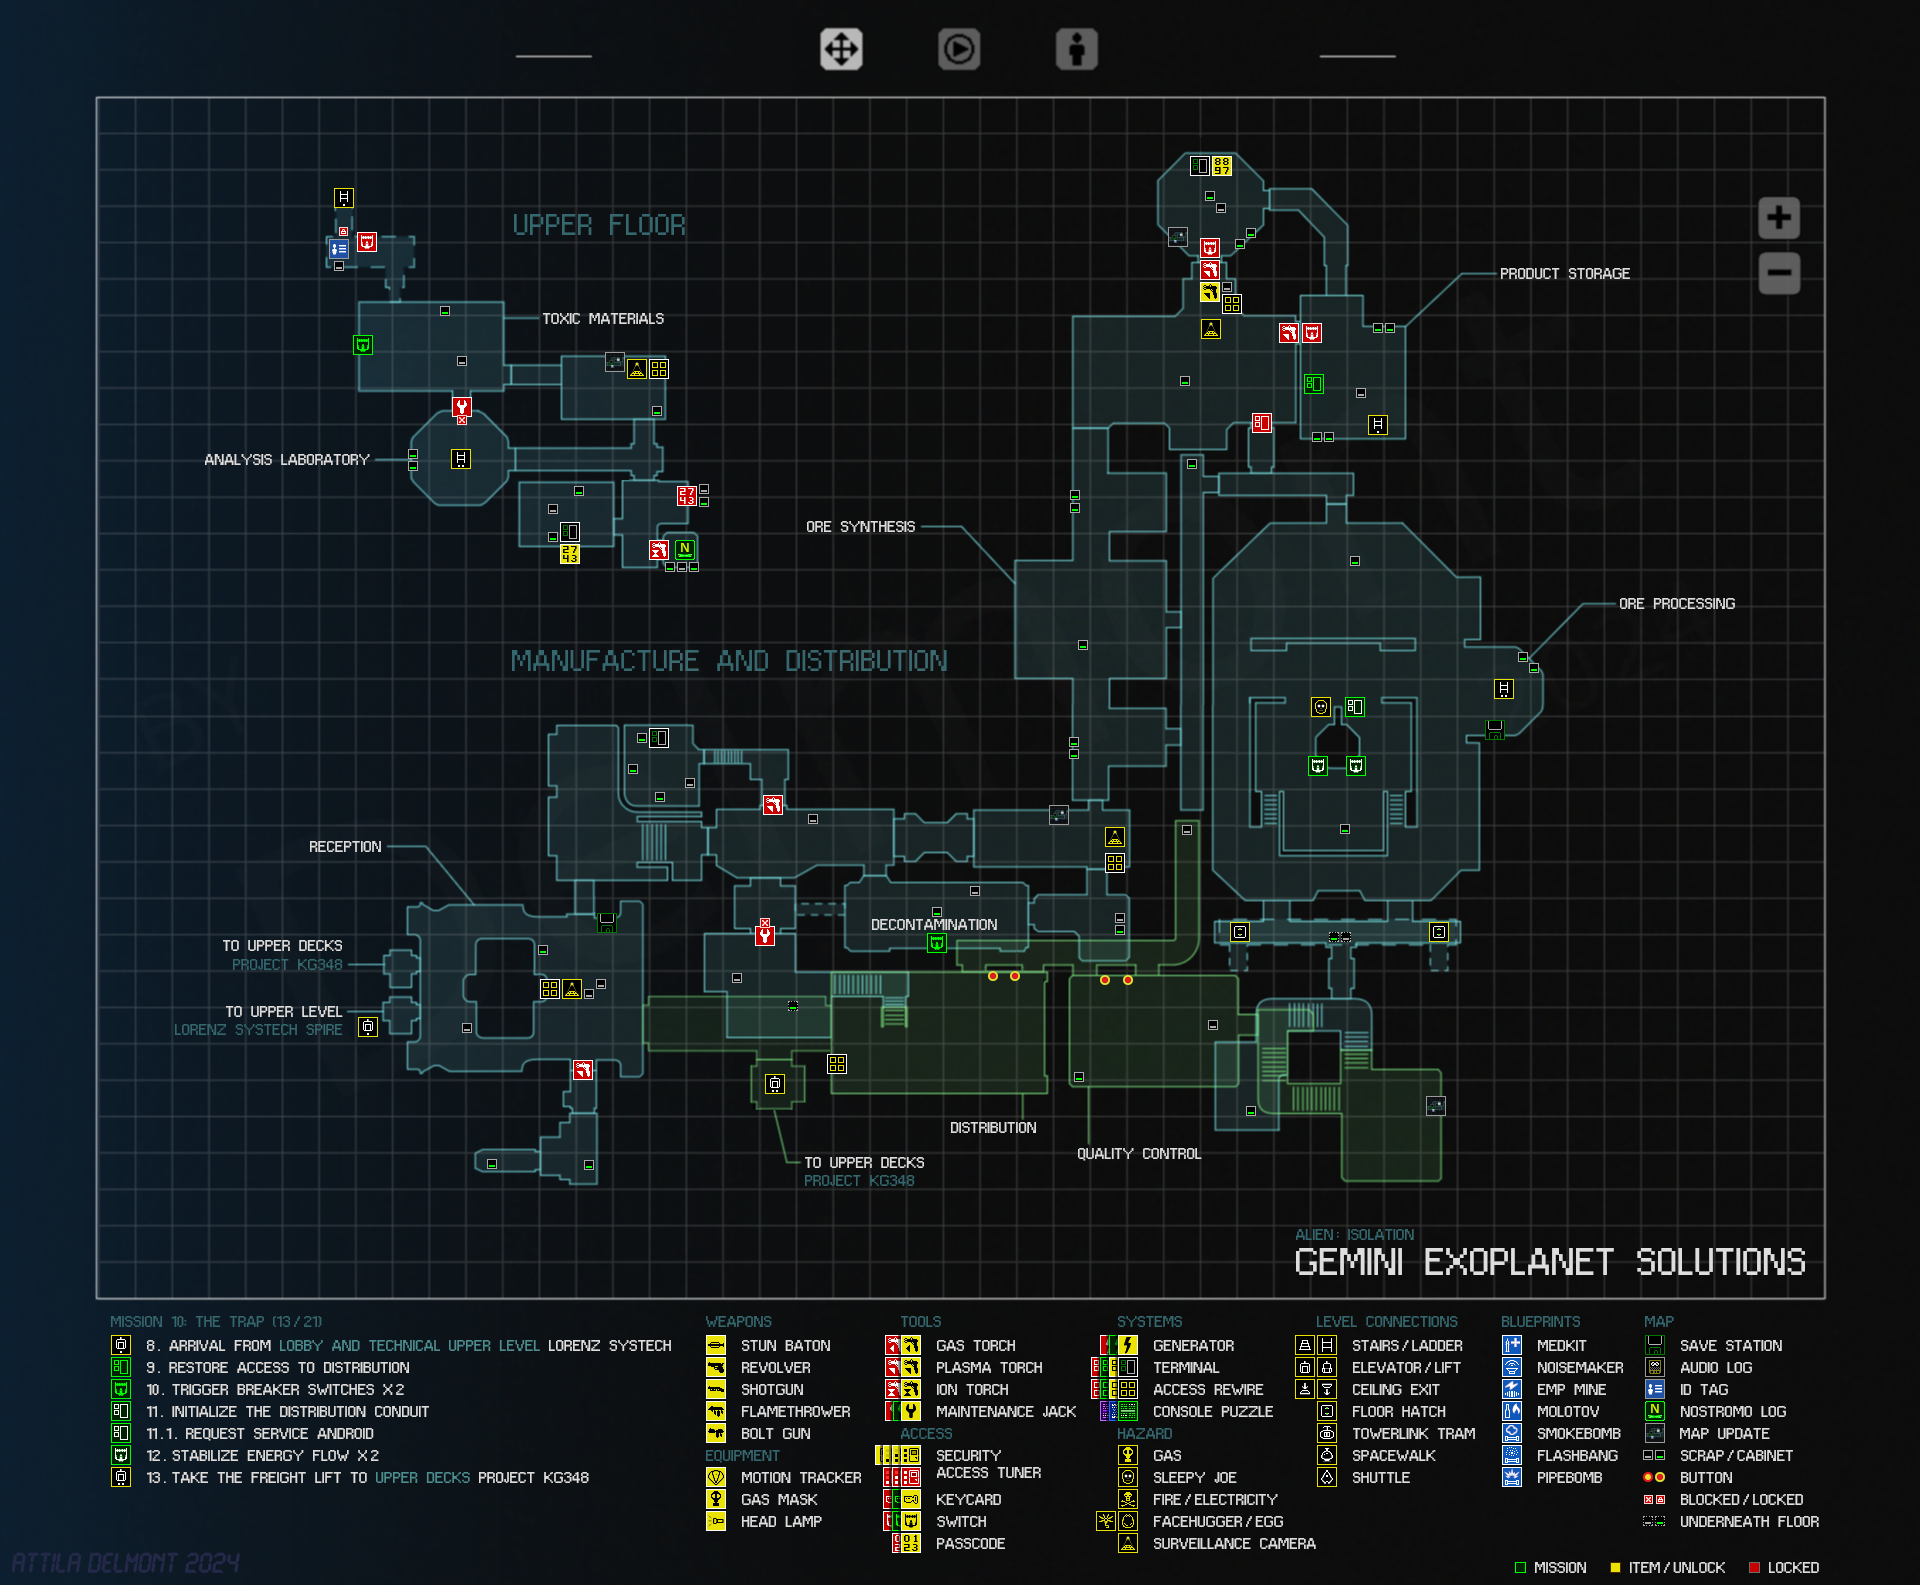
Project KG348
Upper Decks

Hazard Laboratories
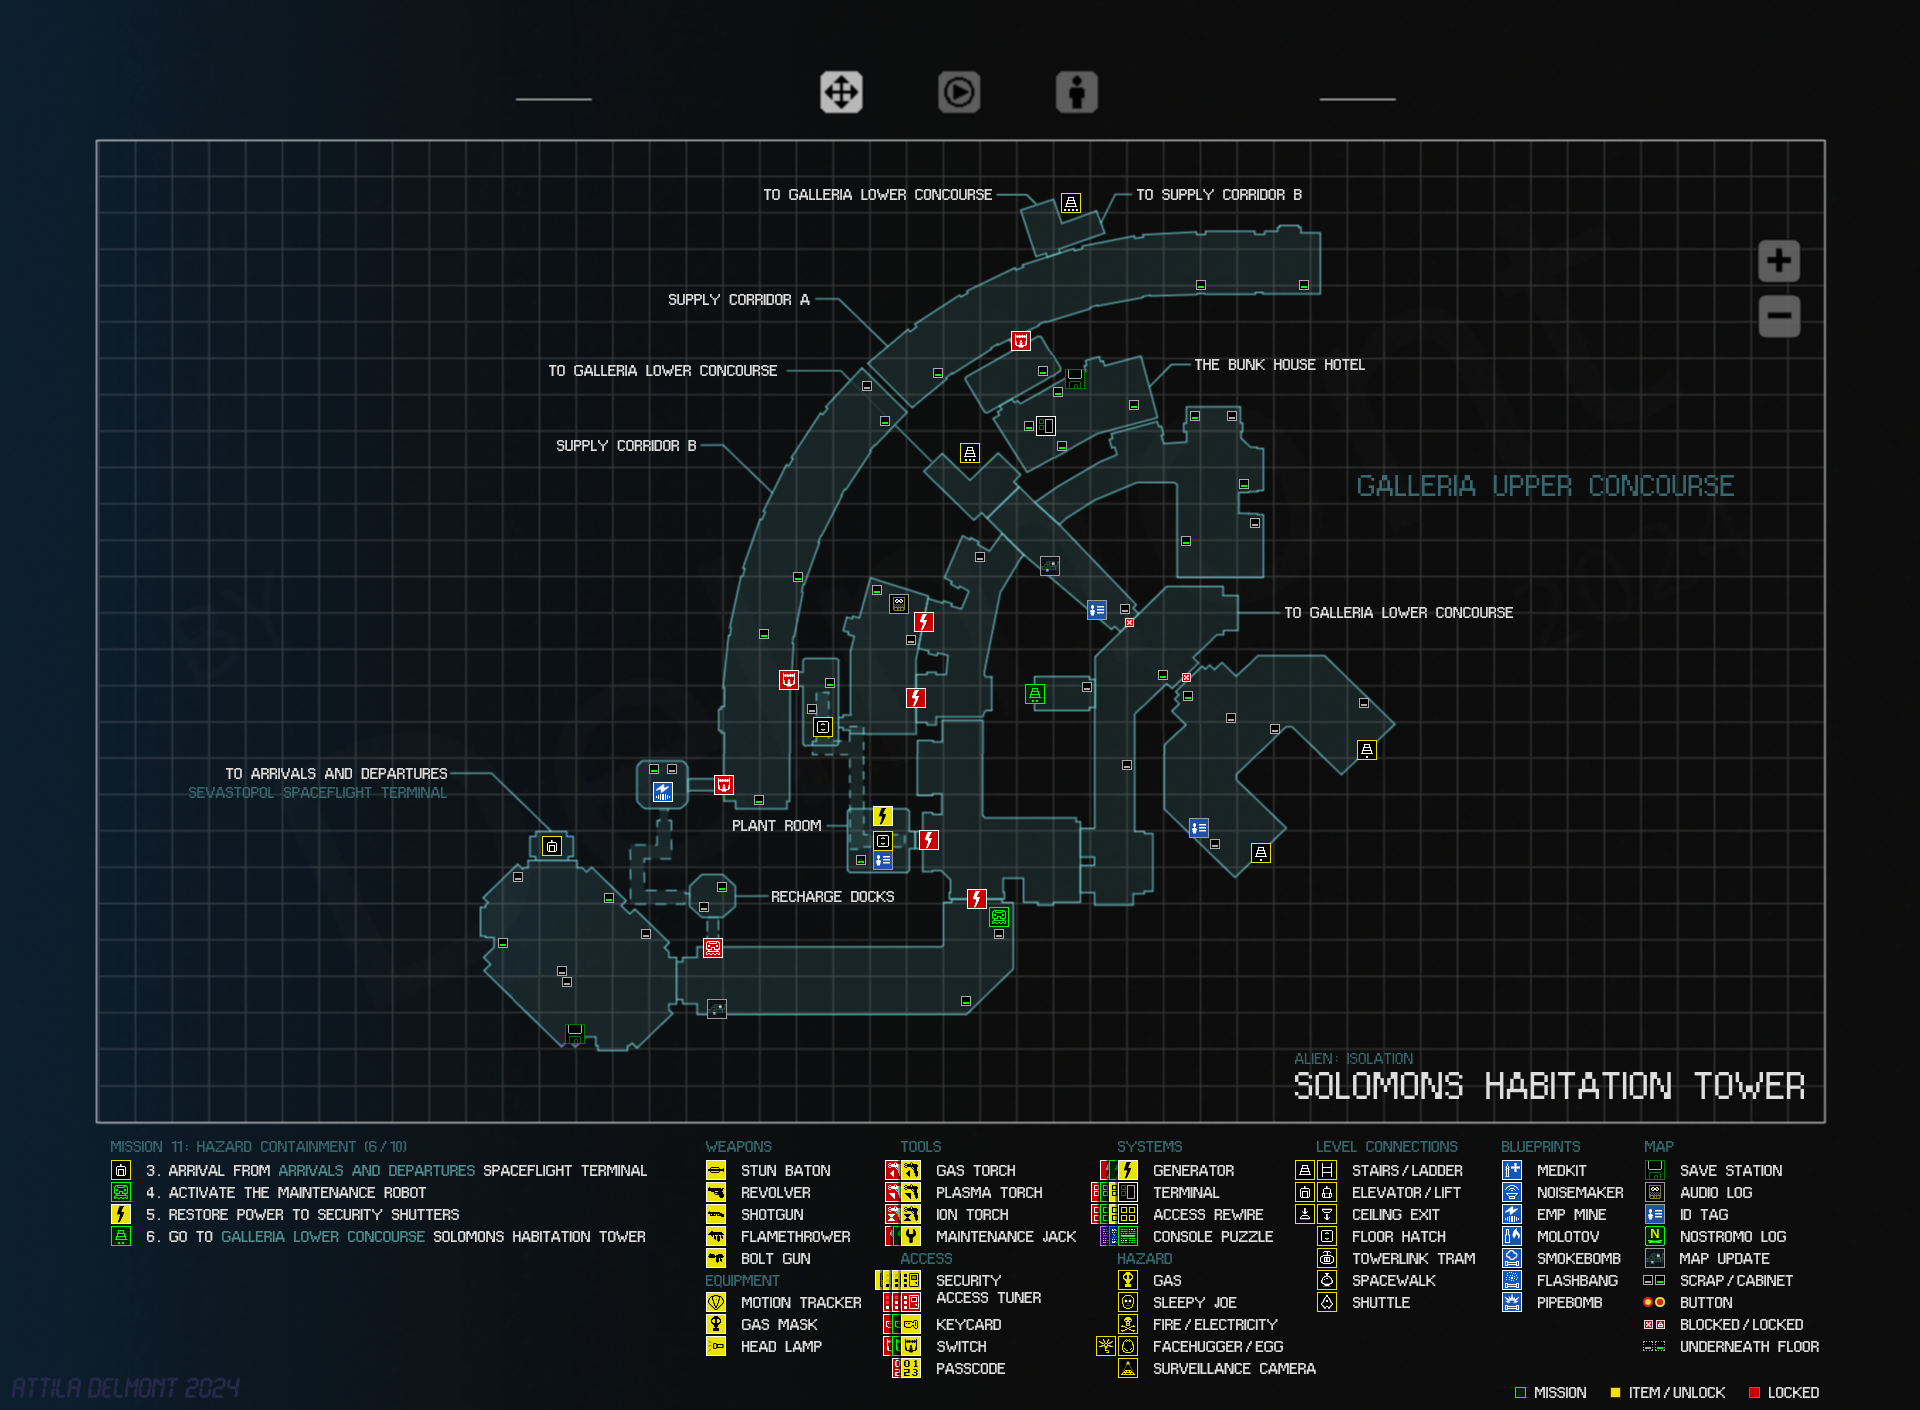
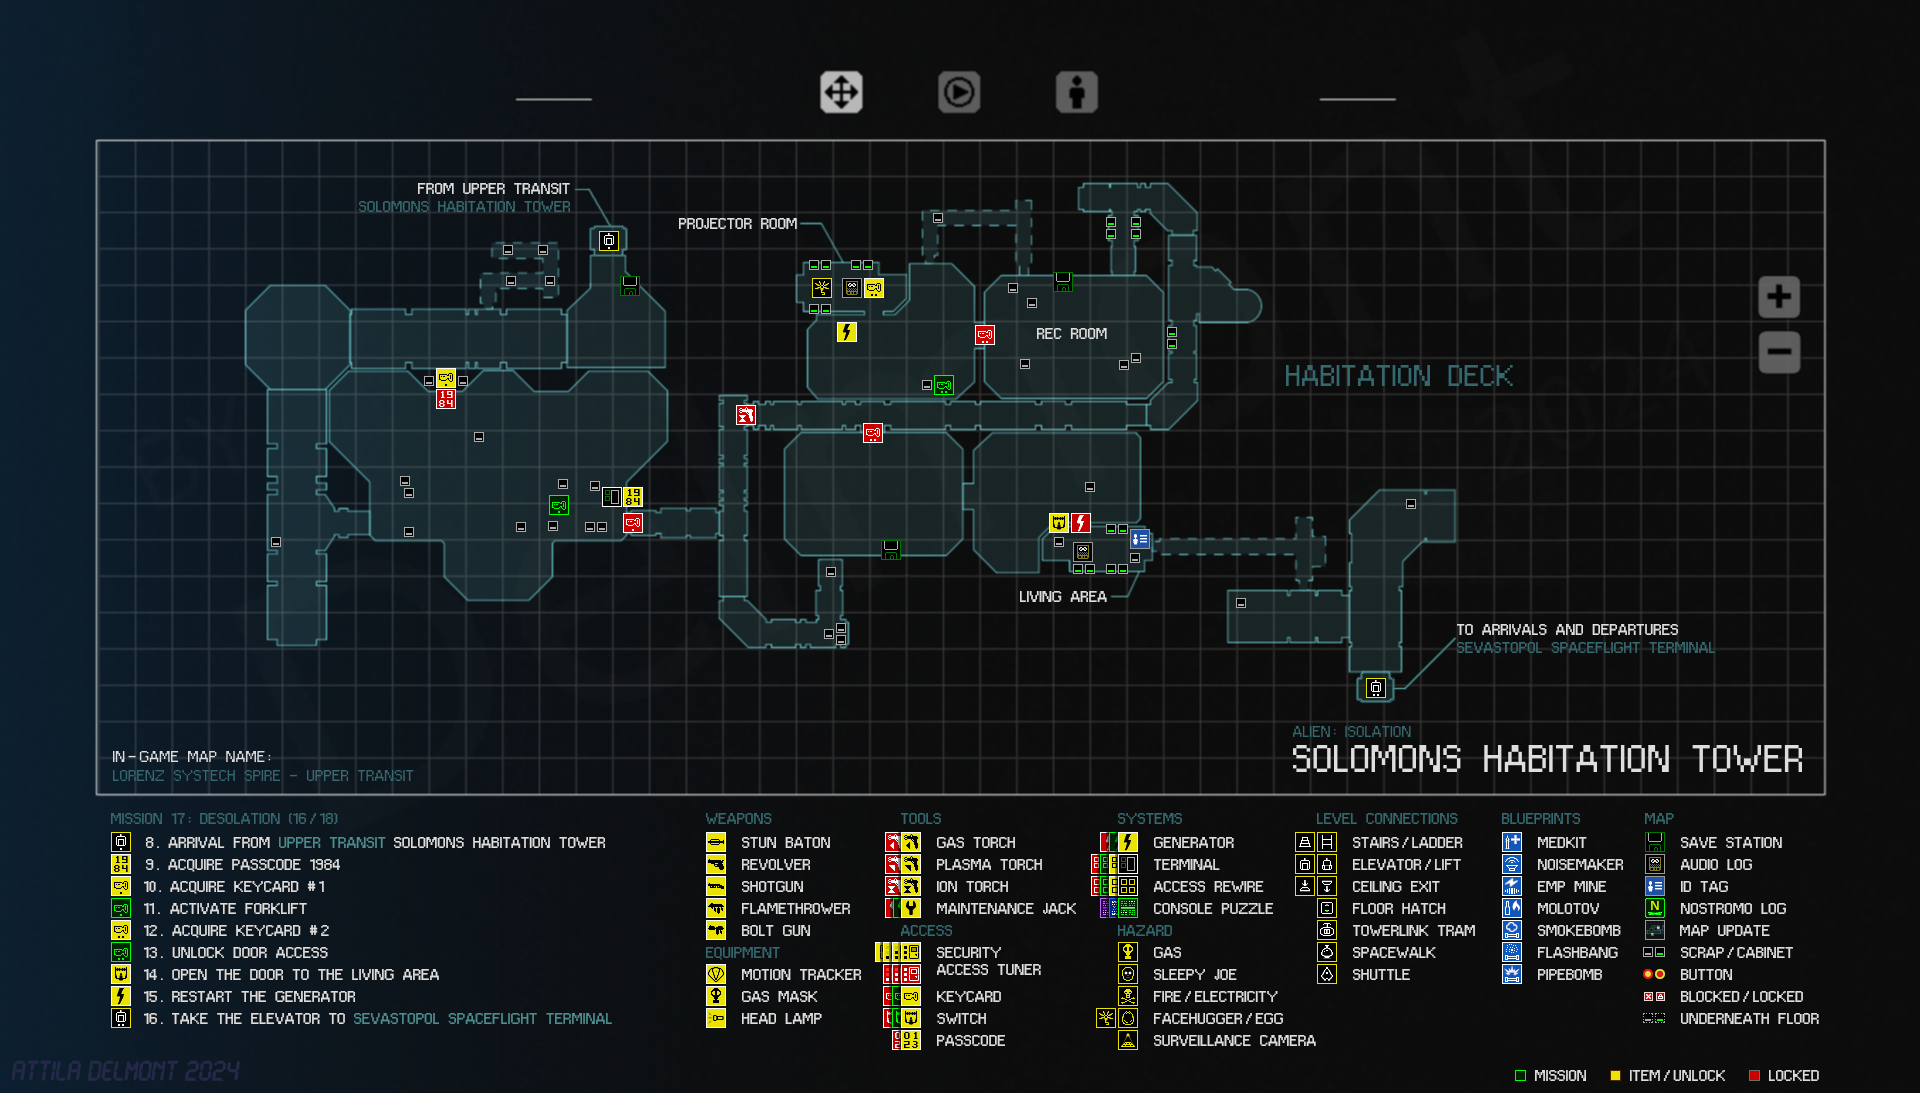
Solomon’s Habitation Tower
Galleria Lower Concourse
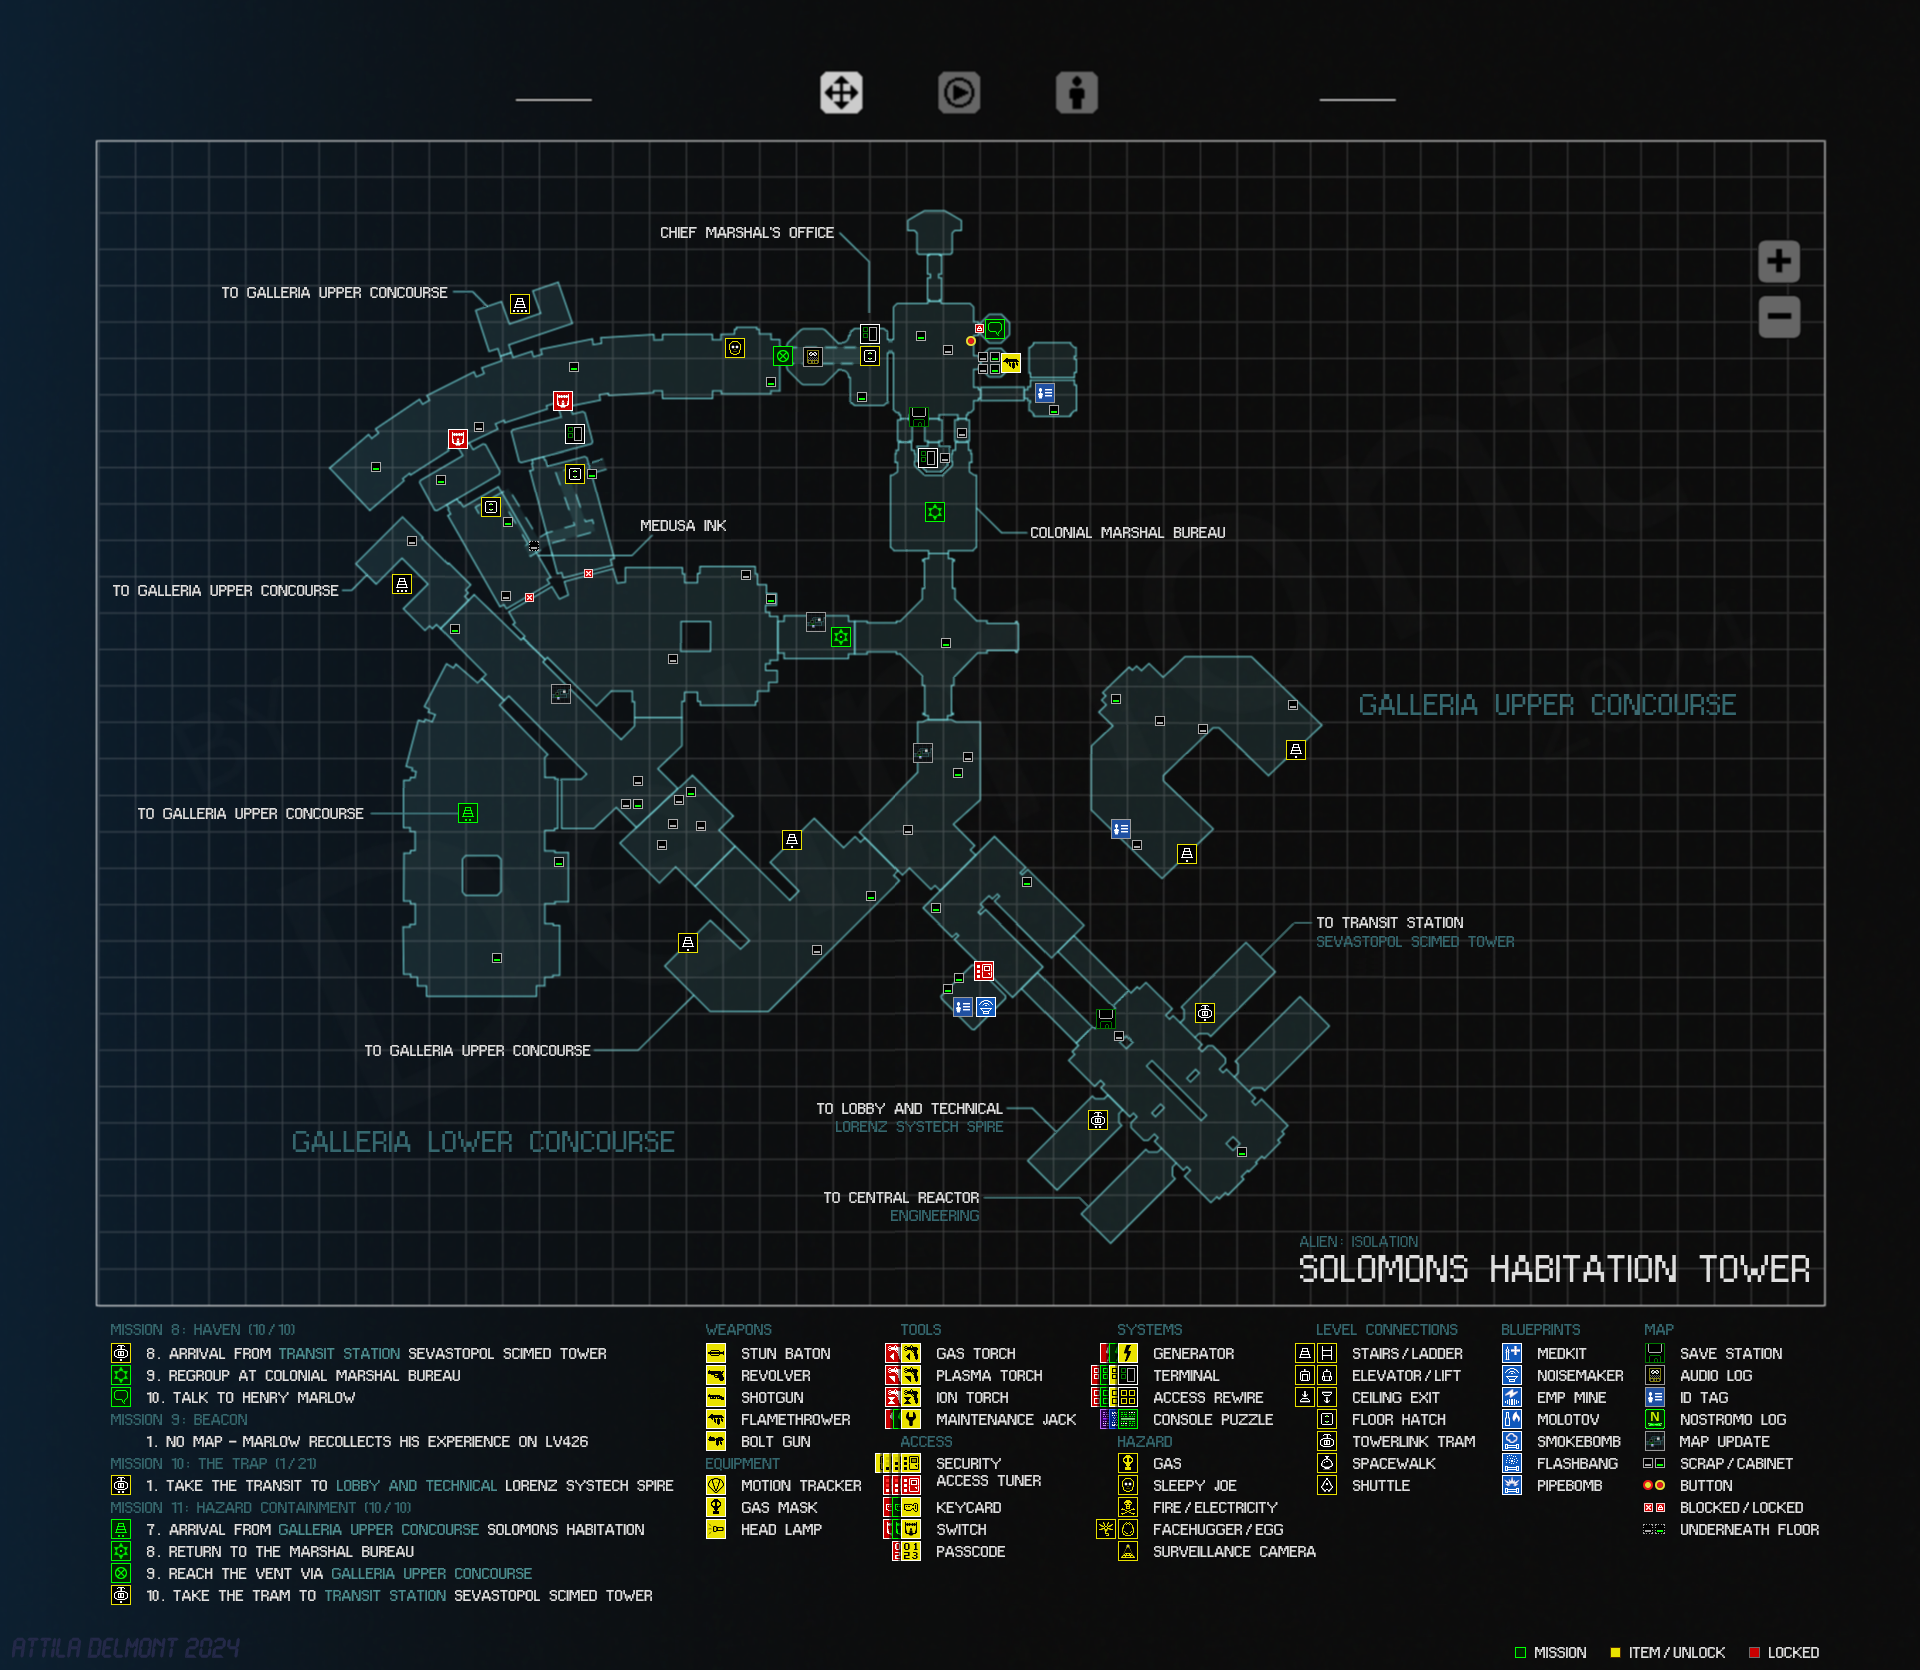
Galleria Upper Concourse
Upper Transit
Habitation Deck
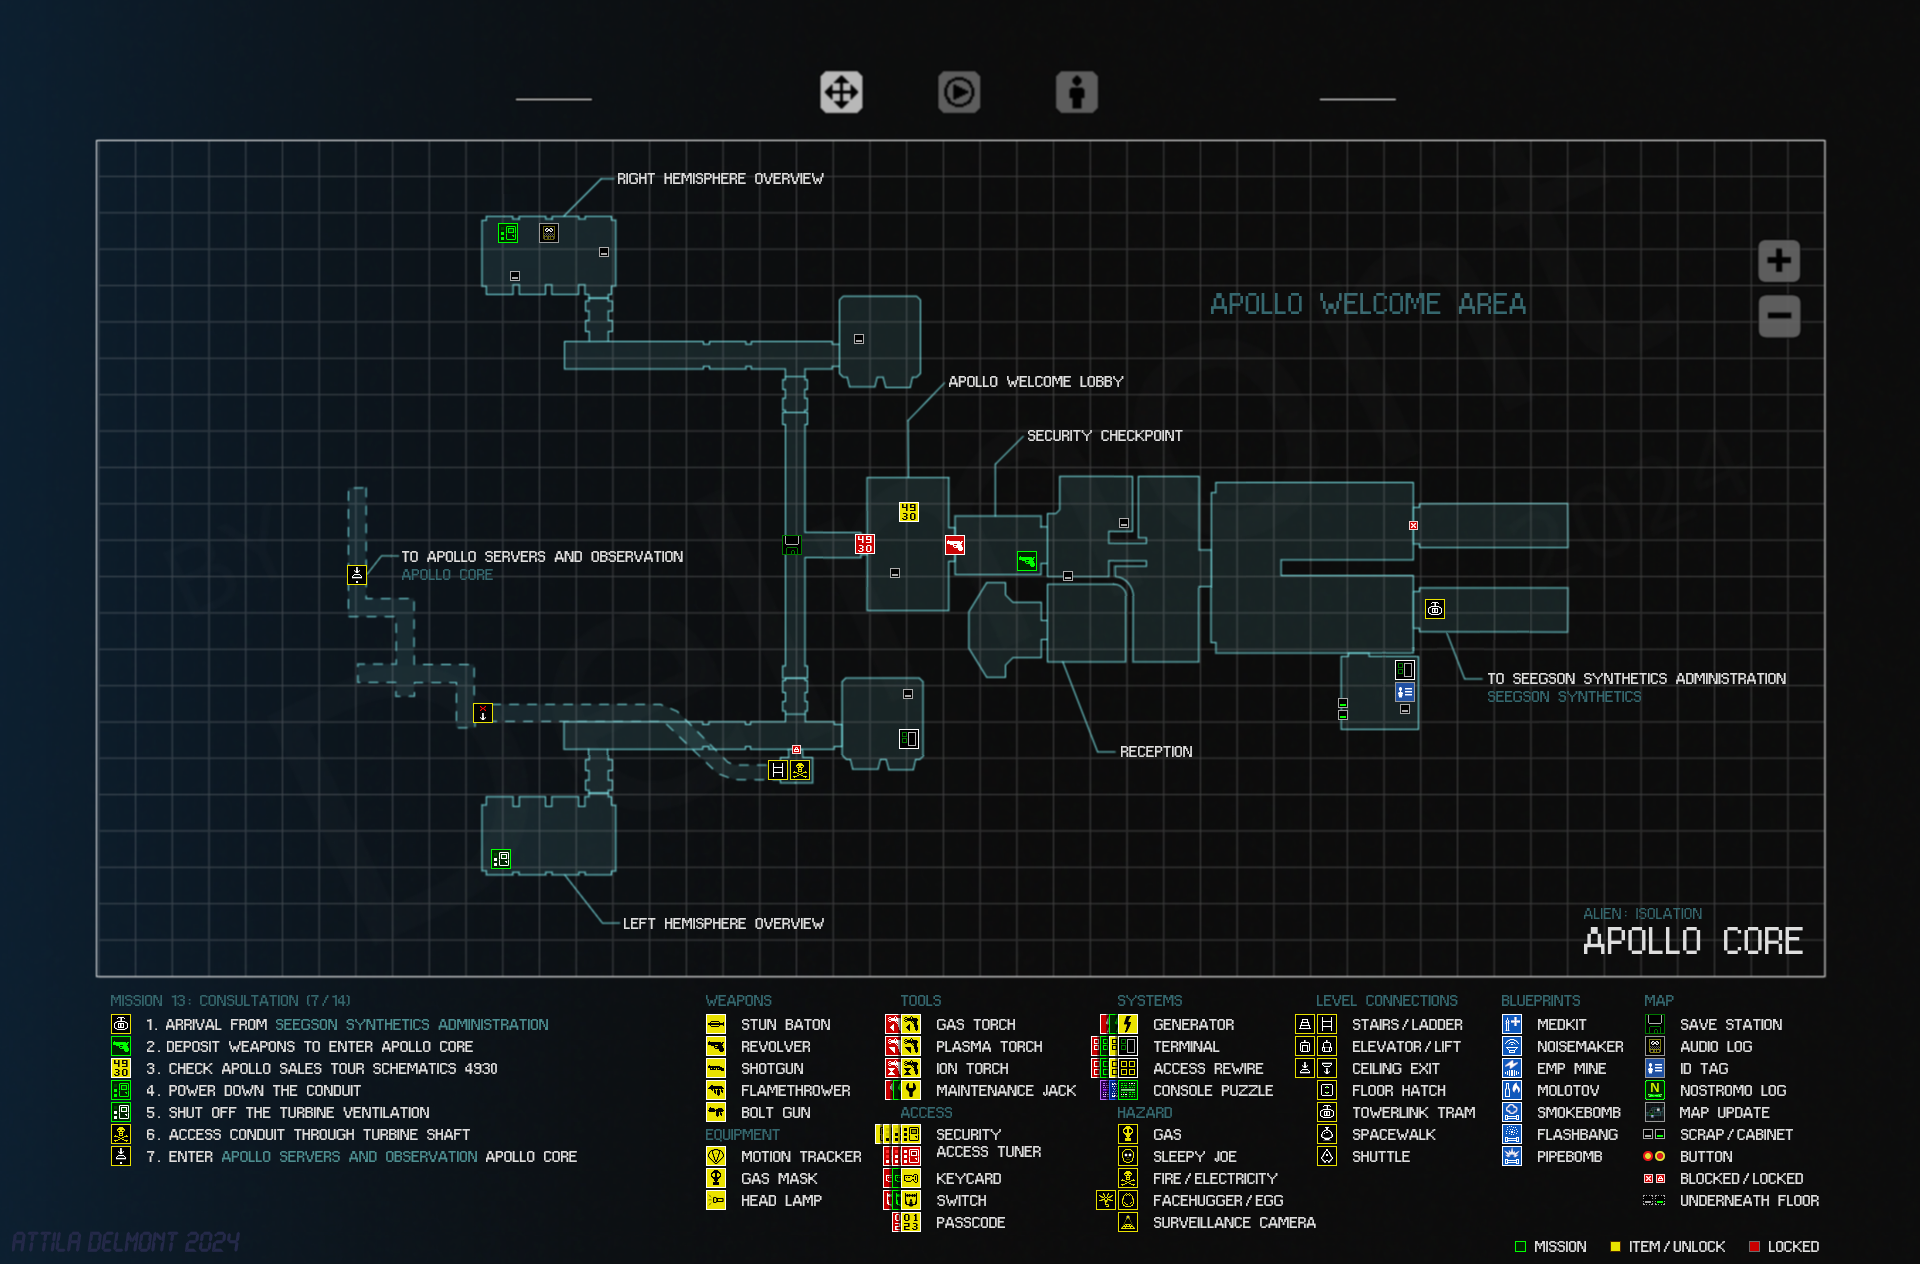
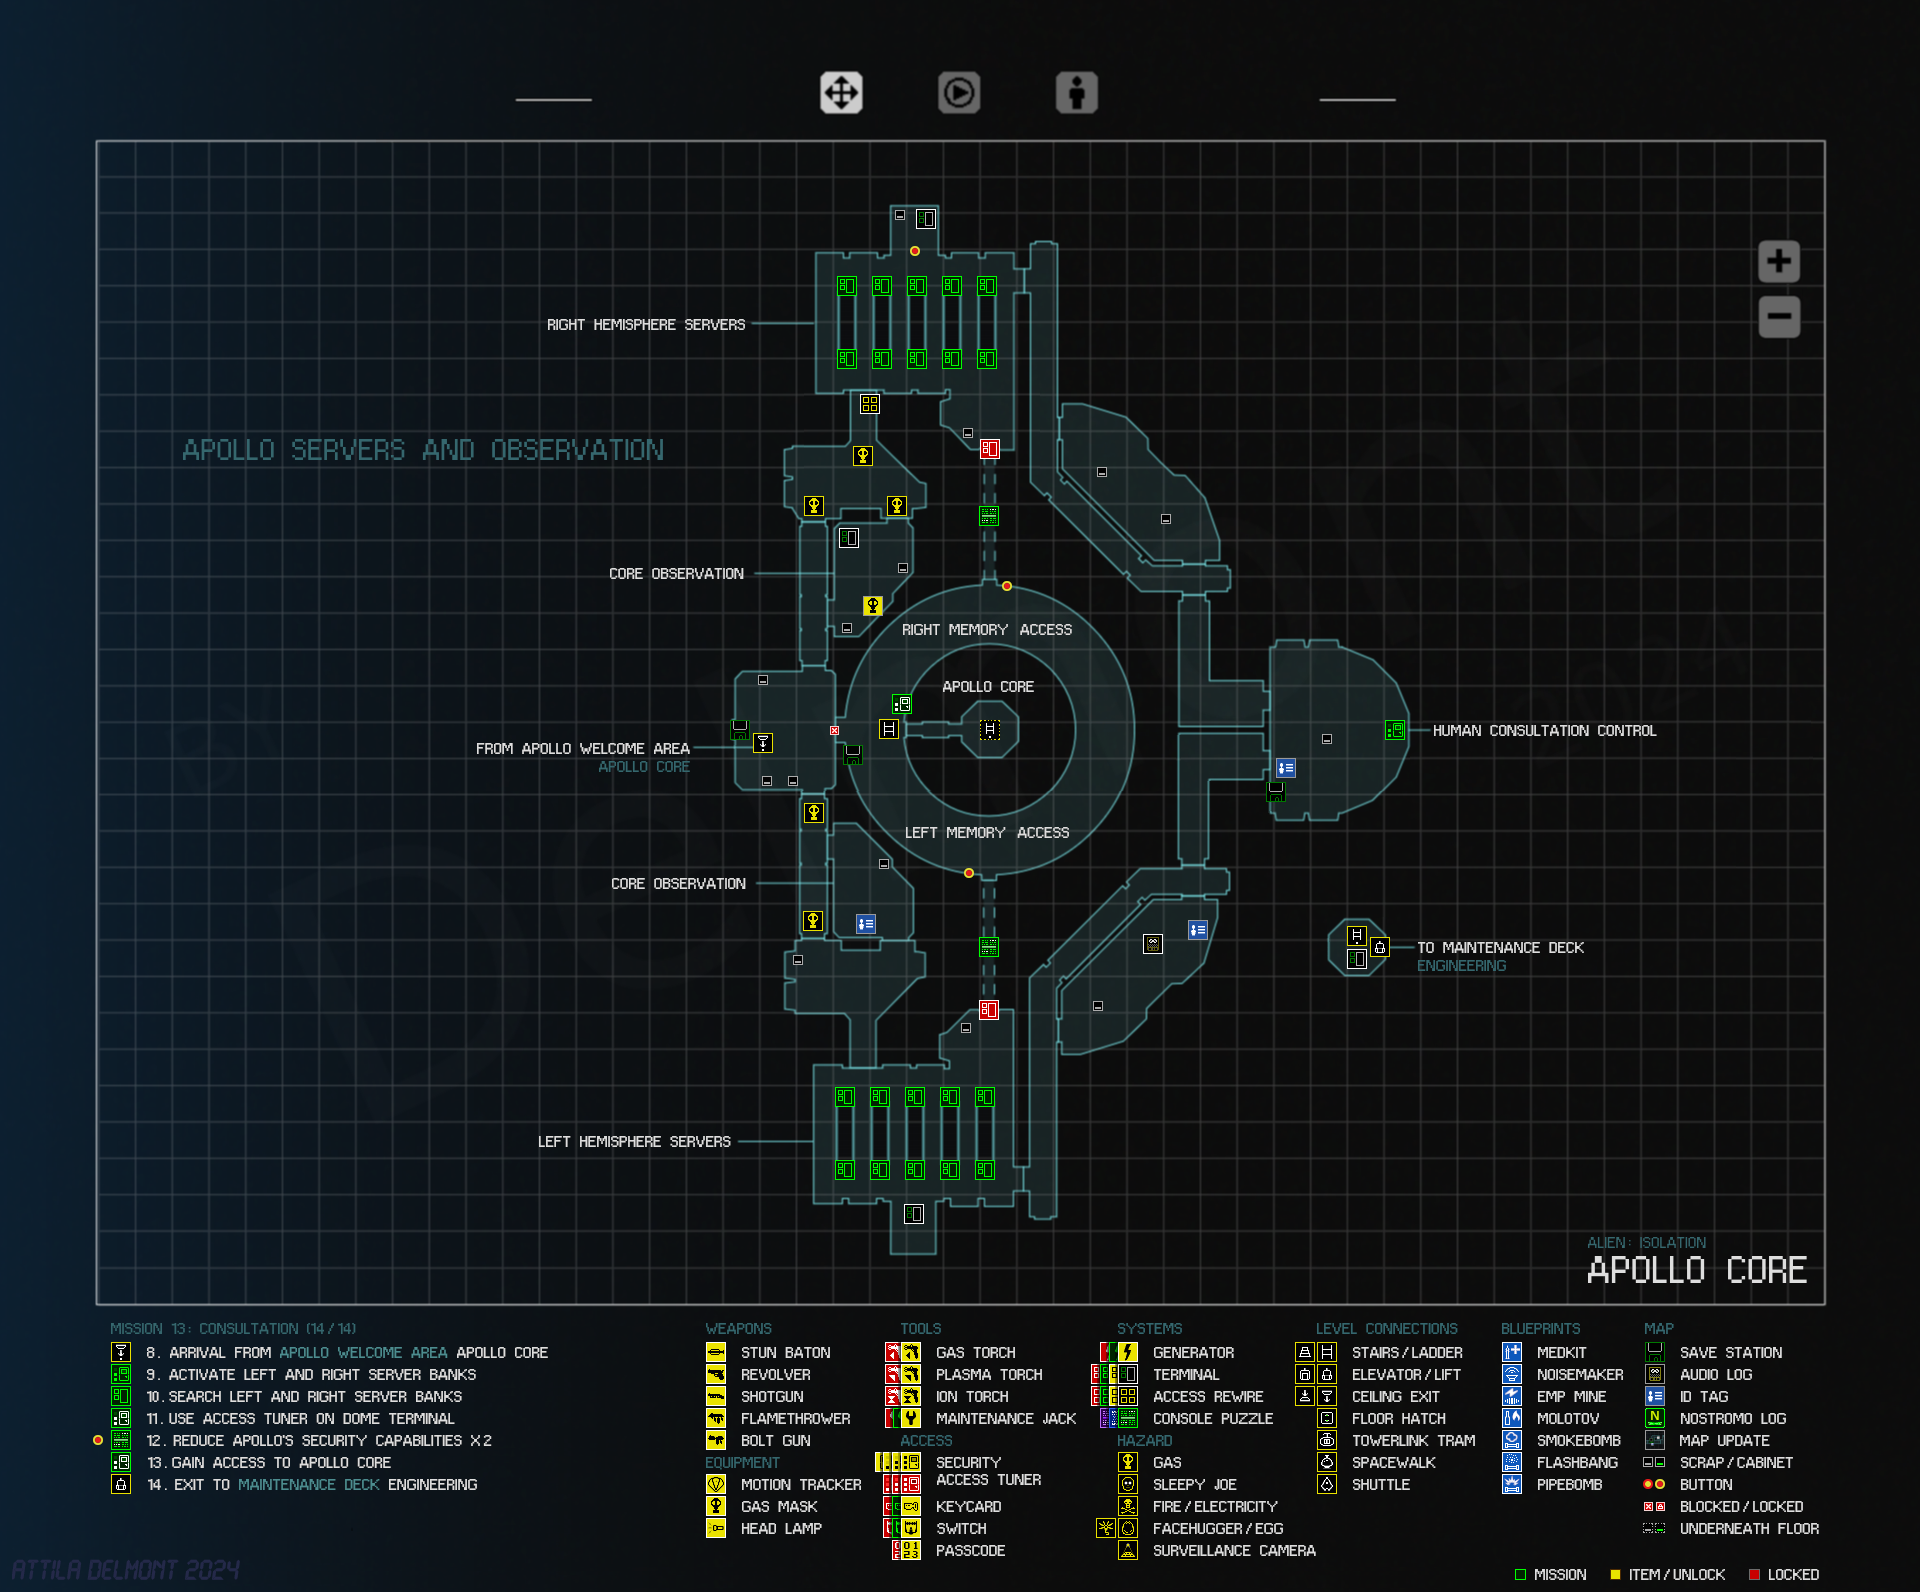
Apollo Core
Apollo Welcome Area
Apollo Servers and Observation
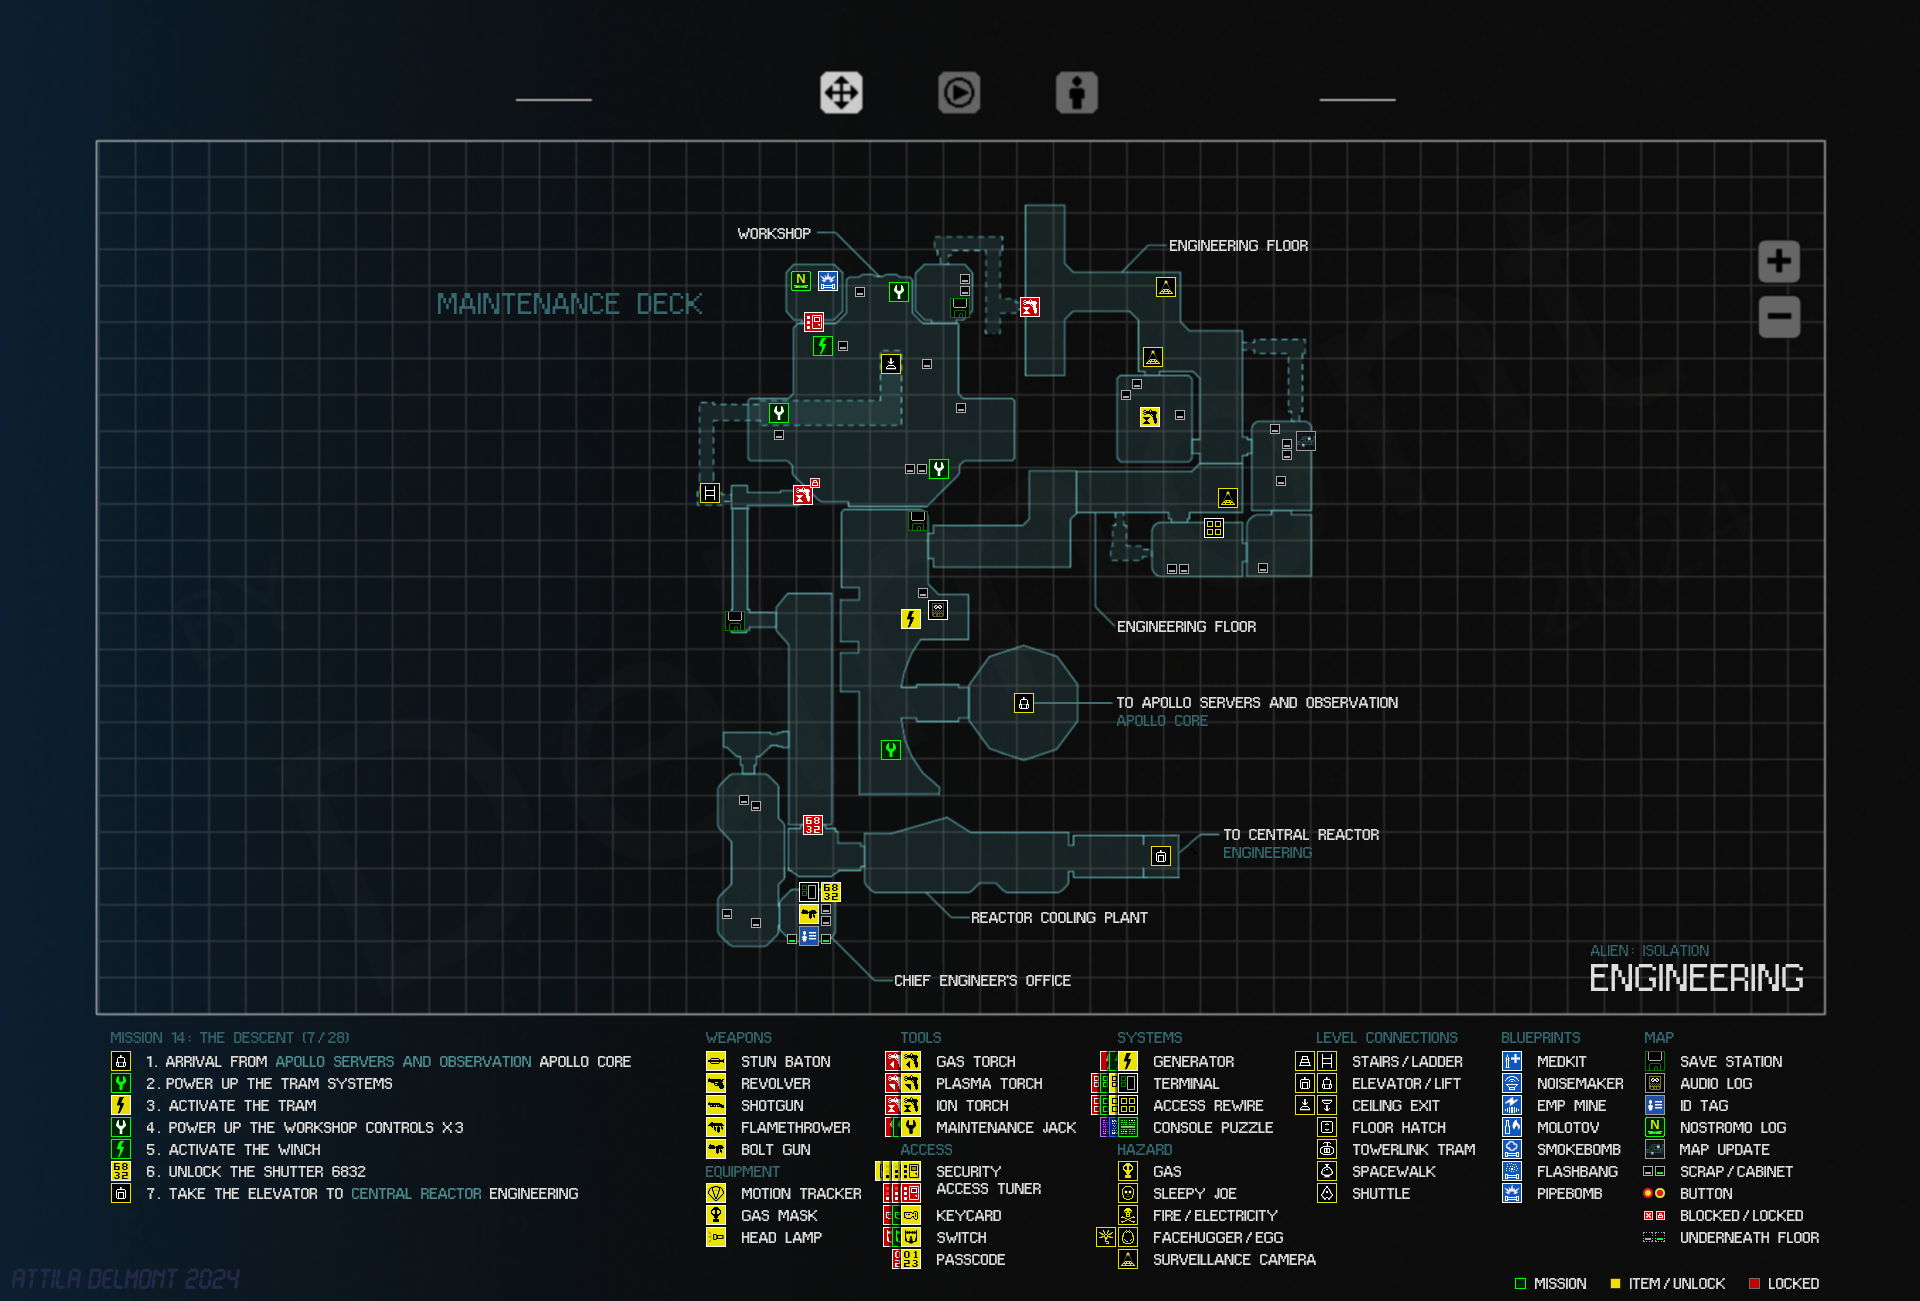
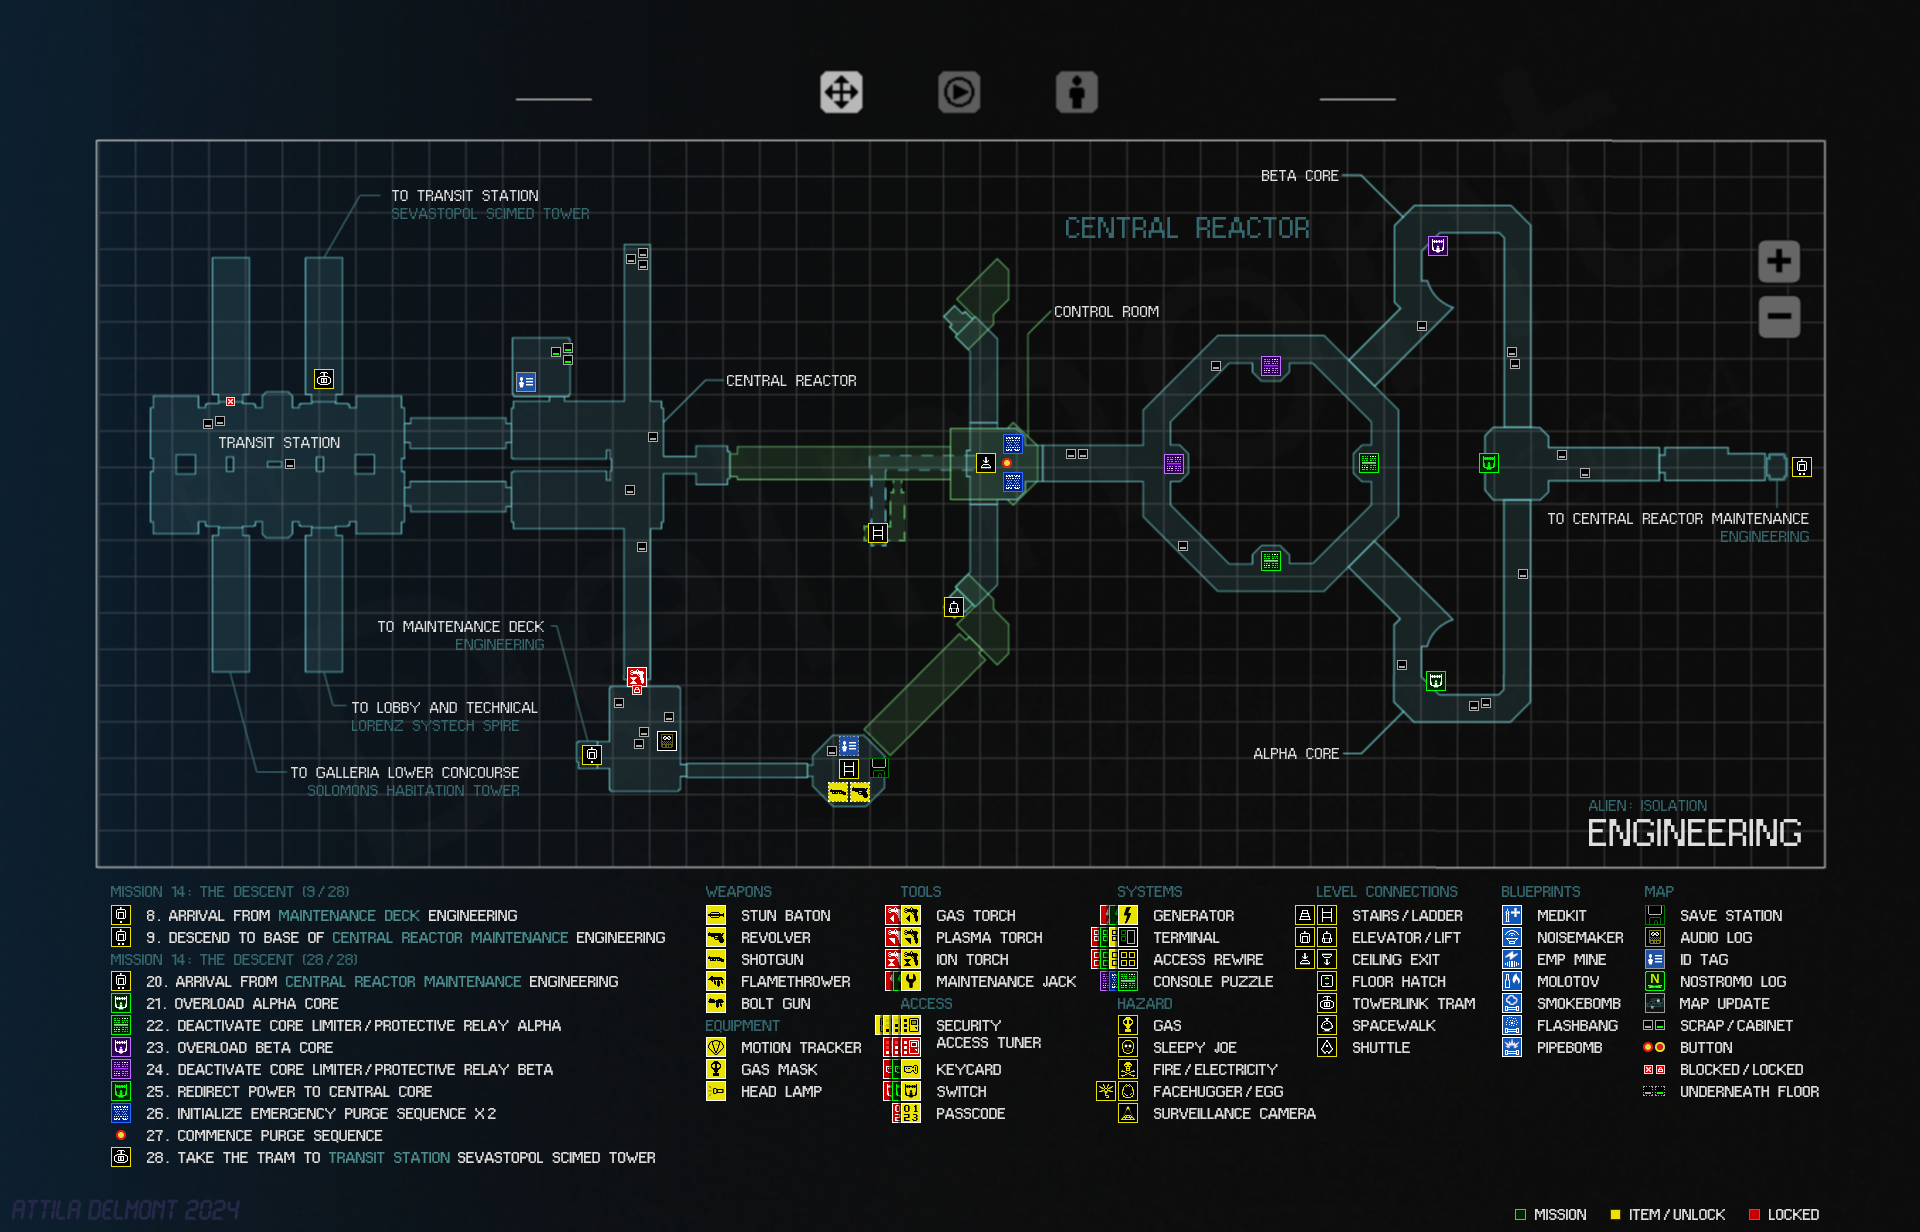
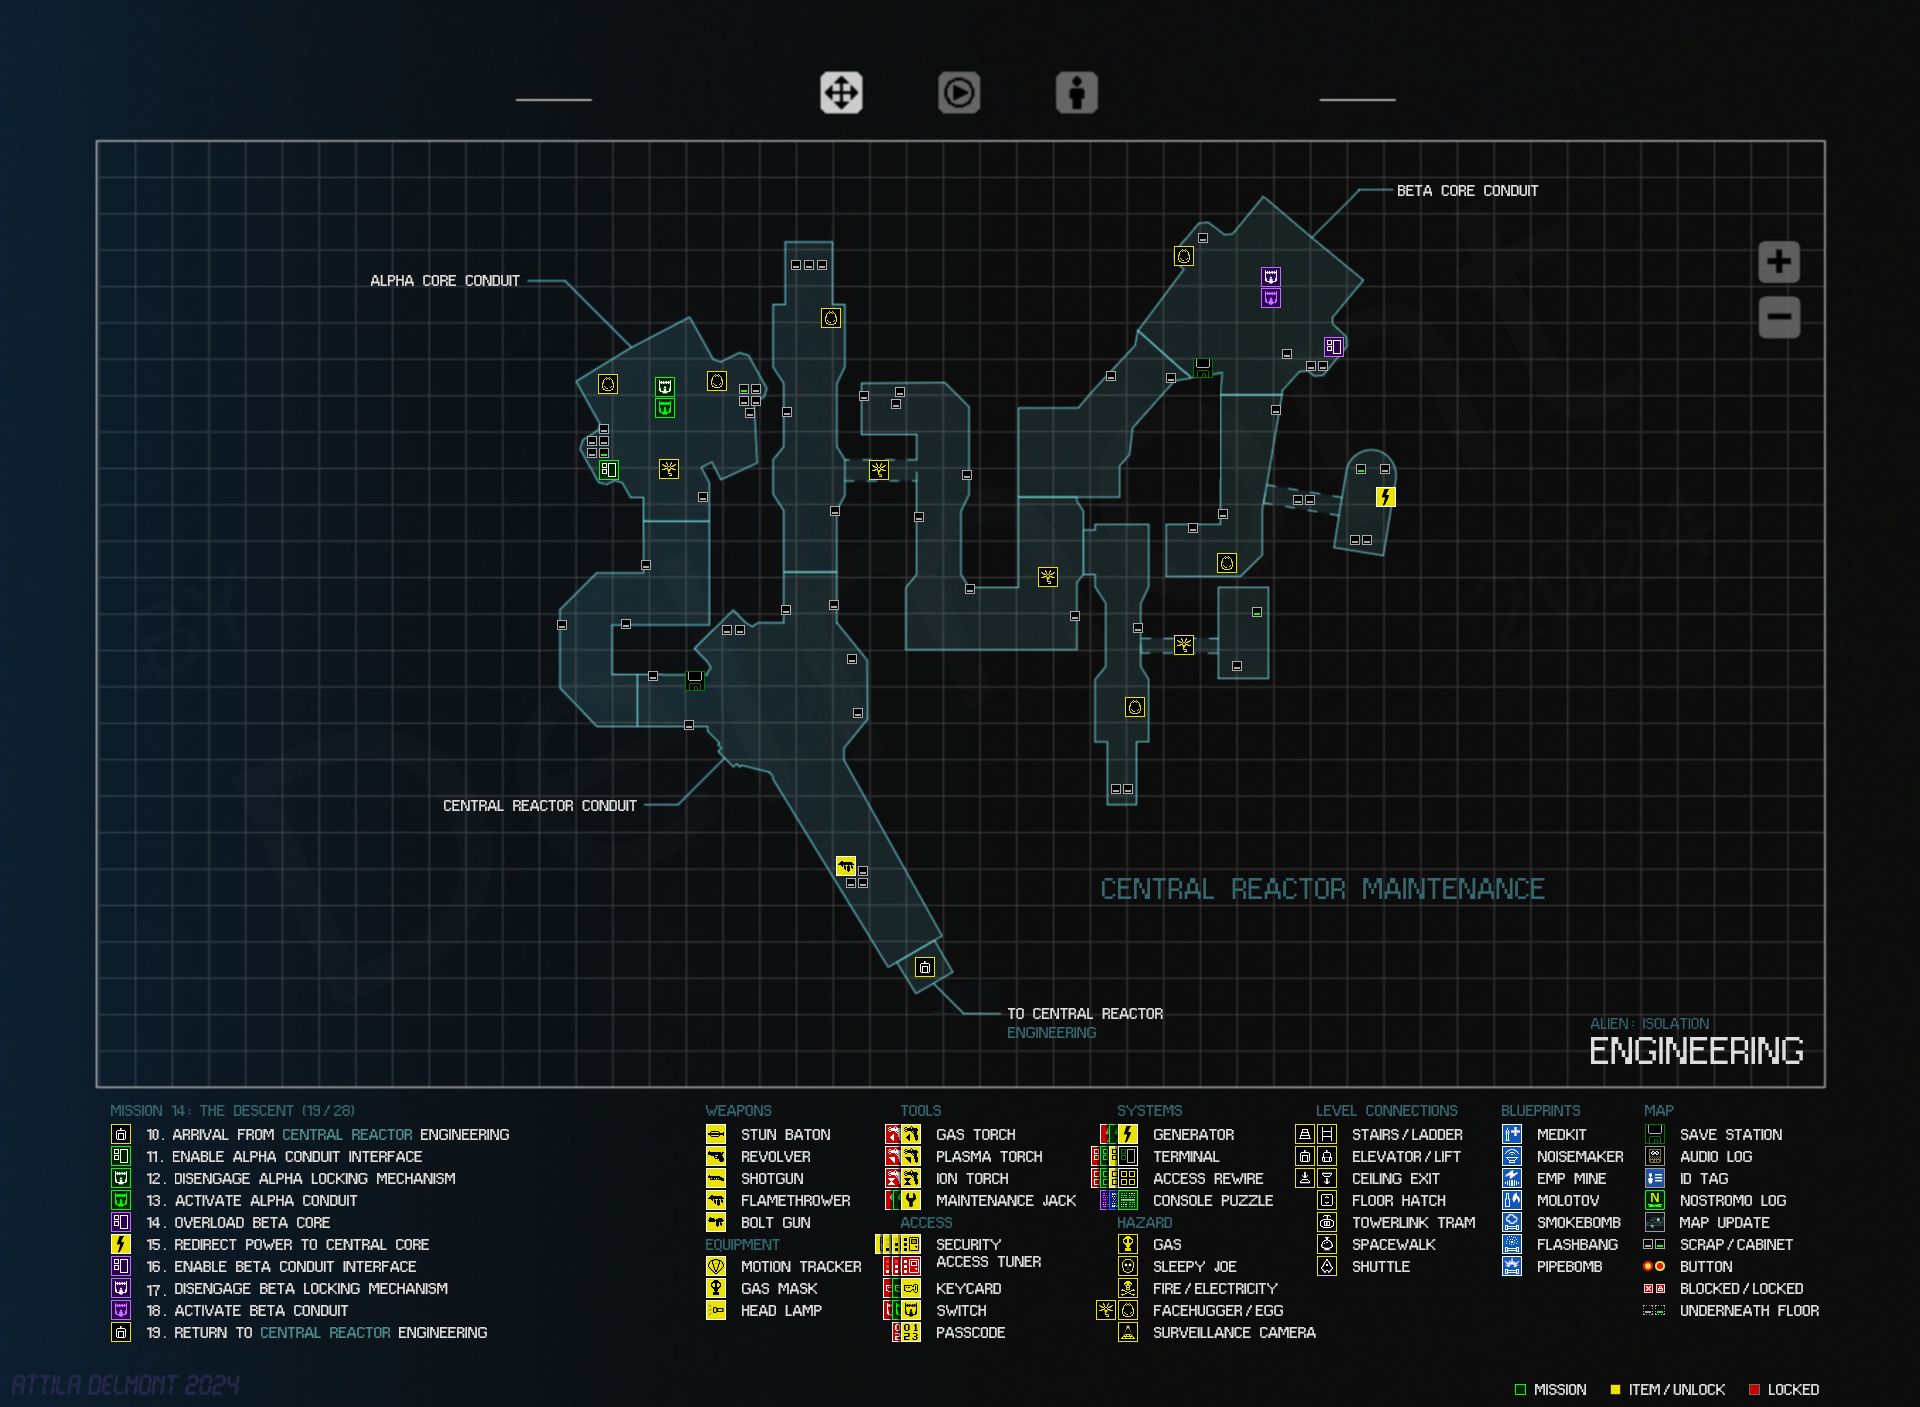
Engineering
Maintenance Deck
Central Reactor
Central Reactor Maintenance
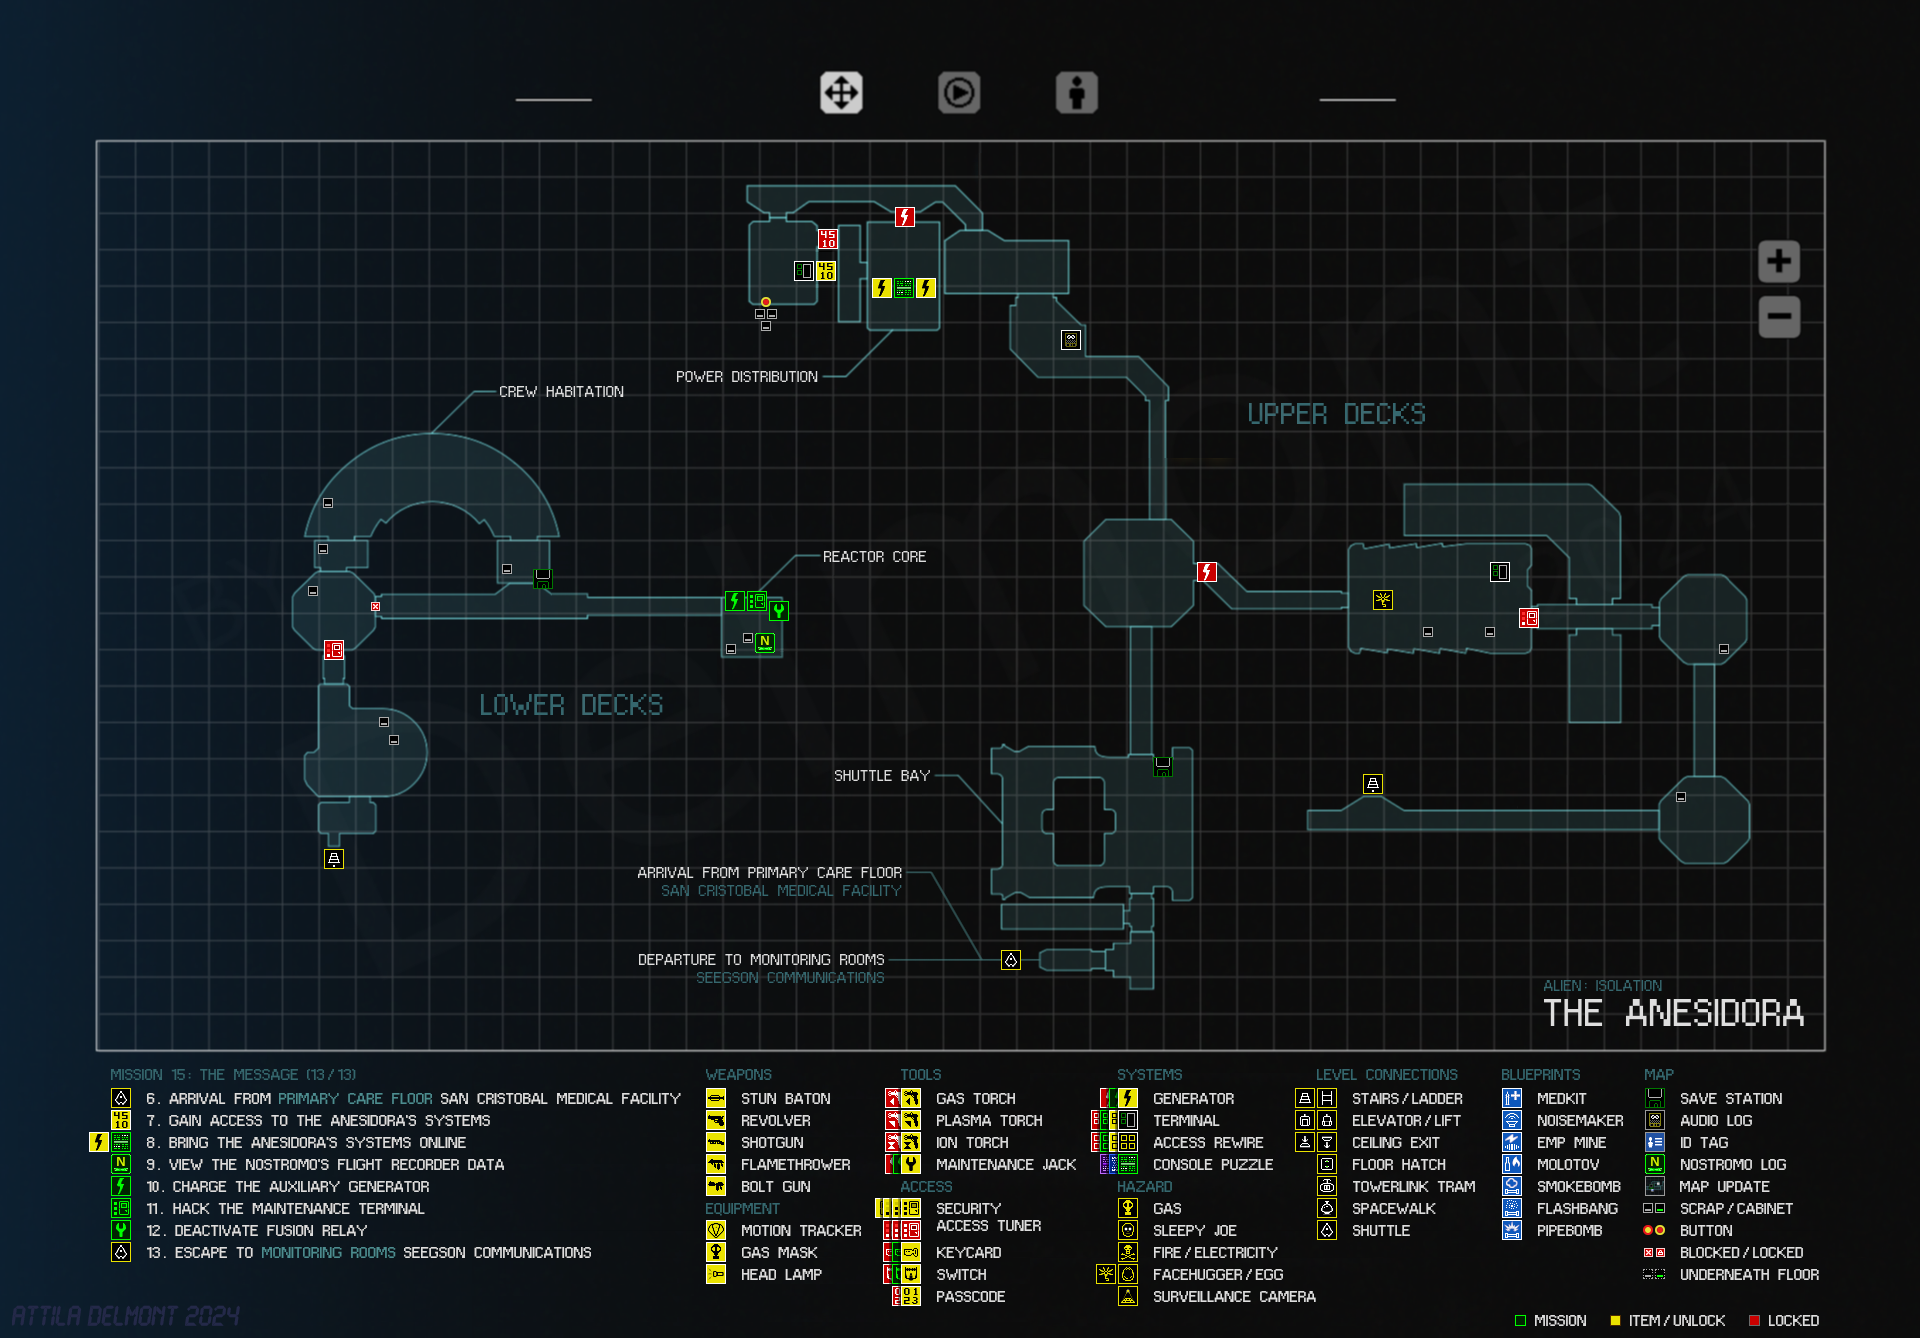
The Anesidora
Station Maintenance
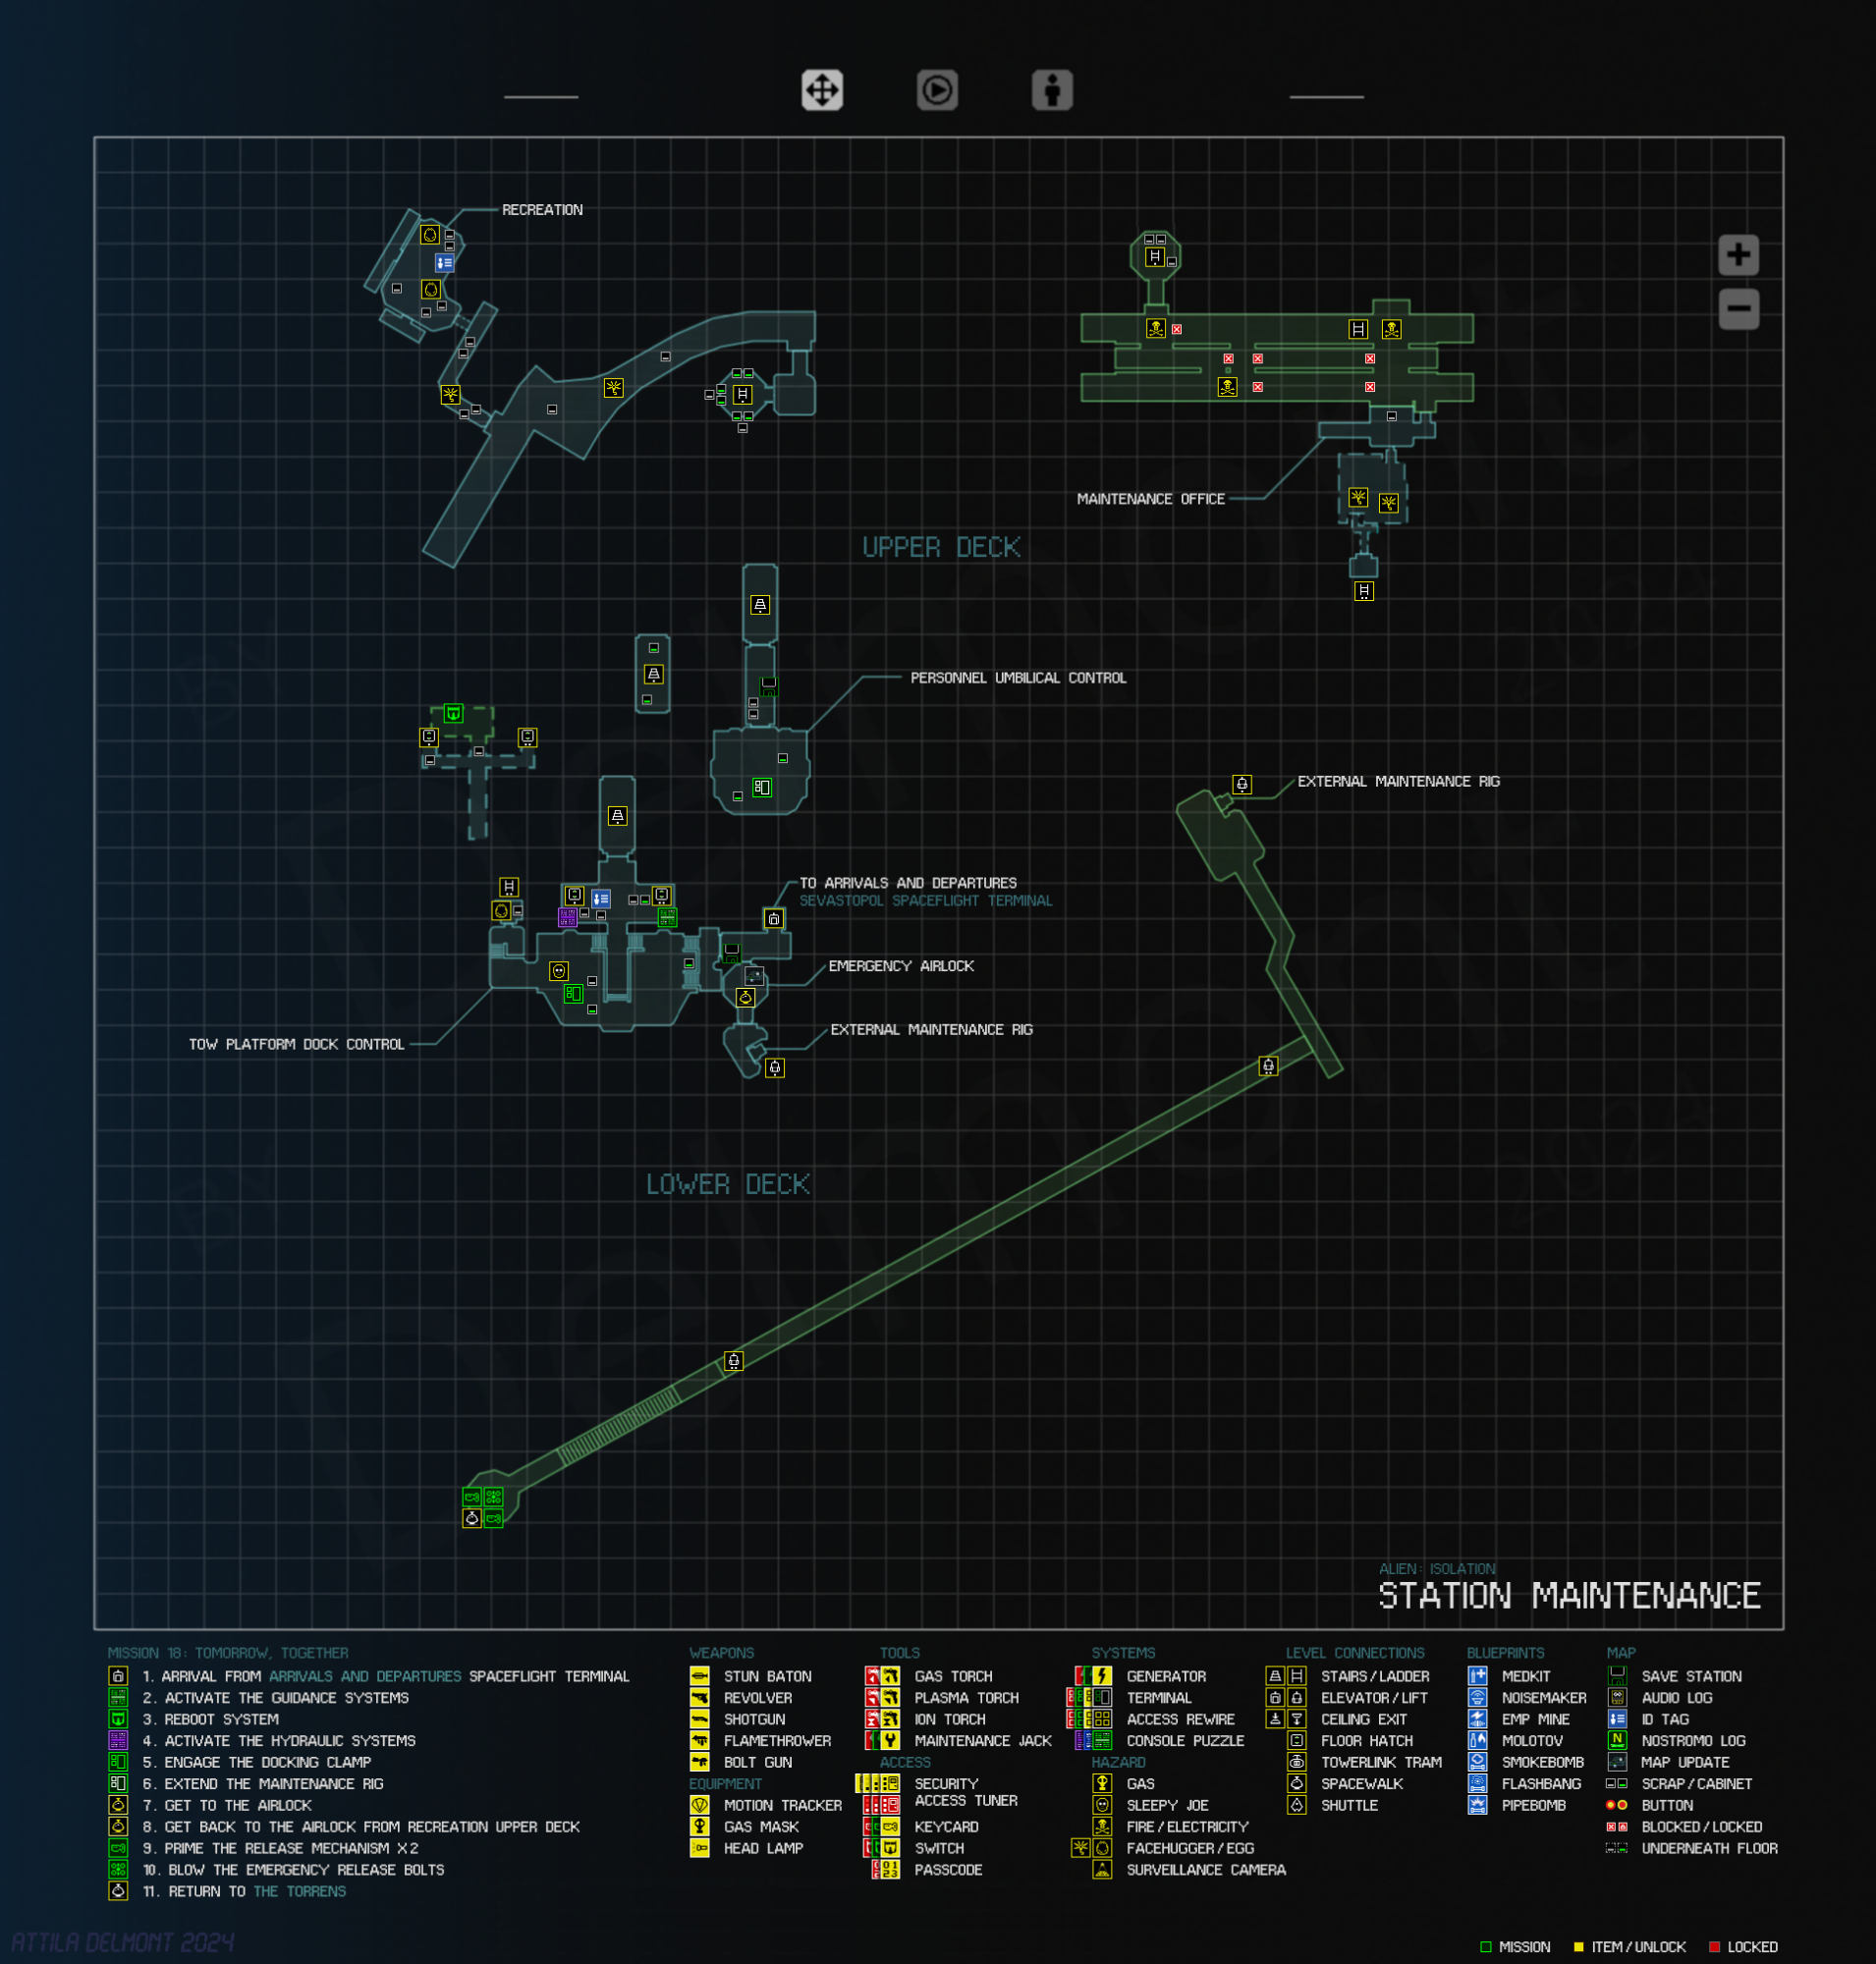
Understanding Sevastopol’s Layout
The station is built around transit hubs and security locks.
Many corridors appear open early on but are inaccessible until
later objectives are completed.
Vent networks often create secondary movement paths.
Save stations and rewire panels tend to cluster in predictable patterns.
Wide corridors feel safe. They rarely are.
Map Accuracy & Progression Notes
These maps reflect the physical layout of each sector.
Item placement and enemy patrol patterns can vary slightly
depending on difficulty and progression state.
Use this guide to understand structure.
Survival still depends on how you move through it.
Map Credits
All campaign maps featured here were created by Atilla Delmont.
Full credit for the map layouts and sector breakdowns belongs to them.
This page organises and contextualises the maps for navigation reference,
but the visual work is entirely theirs.

