Black Tides – A Dredge Survival Diary Log 5: Faster Engines, Worse Decisions

Black Tides – Log 5: Faster Engines, Worse Decisions

Platform: Steam Deck
Mode: Normal
Format: No Commentary

Video: Engine damage, night fishing, strange shrine discovered, upgrades installed, and a failed night run (no commentary)


The plan was simple this time. Head for the Gale Cliffs and see what was waiting there. Naturally, it didn’t go to plan. I decided to make use of the haste ability the Collector gave me, and while it did exactly what it promised, it also destroyed one of my engines in the process. With the boat down to half speed, I didn’t have much choice but to limp back to Greater Marrow and get it repaired.

That made the decision for me. If I’m going anywhere new, I need better equipment first. Better equipment means upgrades, and upgrades mean money. So the next few days were spent doing what I seem to do best — fishing.

I split my time between day trips and short runs at night, staying close to the coastline around Greater Marrow. I caught a few abnormal fish along the way. If I’m honest, they don’t unsettle me as much now. At this point I almost expect to pull one up every time I head out. They sell well enough, which makes it easier to justify keeping them.

After a bit of grinding, I finally had enough money saved to upgrade my engines. The plan was to replace both of my current outboards with improved ones. I bought the first, sold my old engines, and went to buy the second — only to realise the shop only had one available. Apparently I need to wait until the next day for another to come in. That one’s on me for assuming I could do it all at once.

With the new engine installed, I started getting a little more confident and began heading out at night more often, though still keeping close to the coastline. During one of those trips I came across something glowing in the water. It looked like a stone covered in carvings of fish, almost like it was asking for something to be offered to it. I had no idea what it meant, so I left it alone for the time being.

Later that night, after catching another abnormal fish, I headed back to the dock to sell it. On the way in, I noticed something moving in the water behind the boat. I couldn’t get a clear look at it, but it stayed with me long enough to make the trip back feel longer than it should have. Whatever it was, it didn’t follow me into the harbour.

The next day I continued working the coastline and found what looked like the remains of a wrecked dock. There were materials scattered around it, along with a research part and a few trinkets I could sell. Worth the detour.

While I was out that way, I remembered the Builder I helped move to Steel Point and decided to stop by. It gave me a chance to properly test the new engine, and the difference was noticeable straight away. The boat feels quicker now, which should make longer trips a bit less painful.

The Builder thanked me again for the help and handed me a book, saying I could use her dock whenever I needed. Having another safe place to stop for the night isn’t something I’m going to complain about.

Once I had enough money saved again, I upgraded the light on the boat so I could see further into the dark. That seemed like a sensible improvement, so naturally I went out to test it straight away.

While heading along the water, I spotted a red glow in the distance and decided to take a closer look. I didn’t get the chance. Something came out of the dark and started chasing the boat. The only way I can describe it is like a giant angler fish. I tried to reverse away from it, but hit the rocks instead. That was enough for it to catch up, and the next thing I knew the boat was gone.

So that answers one question. I won’t be heading out at night any time soon if that’s the sort of thing waiting out there.


Continue the Journey

Previous Entry:
Black Tides – Log 4

Black Tides Survival Diary:

View the full Black Tides series

Dredge Survival Hub:

Visit the Dredge Survival Hub

Super Mario 64 Randomizer – Log 21: The Hundredth Star

Super Mario 64 Randomizer – Log 21: The Hundredth Star

Game: Super Mario 64 Randomizer
Platform: Steam Deck
Format: No Commentary

Video: Star 100 collected in Mario Wings Over the Rainbow before exploring Hazy Maze Cave and securing the red coin star (no commentary)


Star Number One Hundred

There didn’t seem much point putting it off any longer. If I was going to collect my hundredth star, it may as well be a memorable one. That meant jumping straight into the painting hiding the Mario Wings Over the Rainbow stage.

My spawn point couldn’t have been much better. I landed on the platform with the pink Bob-Omb, the cannon, and the Wing Cap boxes all in one place. Before doing anything else I spoke to the Bob-Omb to unlock the cannon, then took a moment to scan the sky and figure out where the red coins were sitting.

I managed to count seven of them from the platform, though the eighth one remained hidden somewhere beyond my line of sight. I figured I would find it once I was in the air.

A Simple Flight Plan

The approach was straightforward. Grab a Wing Cap, fire myself out of the cannon, collect whatever coins lined up with my flight path, then return to the platform and repeat. The important thing was not risking the Wing Cap timer expiring while still in the air.

After a few passes I spotted the final coin sitting near one of the stable clouds, along with another Wing Cap box above it. Thankfully it was one of the clouds you can actually land on, which made the setup possible. The coin itself took a few attempts to grab cleanly. A triple jump would get me close enough, but I was slightly off each time.

Eventually the jump lined up properly. The coin was collected and the red coin star appeared in a position that was thankfully reachable. One final flight later and I had my hundredth star.

The Final Stretch

With star number one hundred secured, the run now sits nineteen stars away from the end. Eighteen of those are spread across three courses, while the final one waits in the Wing Cap switch area.

That makes the next destination fairly obvious. It’s time to return to Hazy Maze Cave. If I can clear that level along with the Wing Cap switch stage, it will remove what feels like the biggest remaining obstacle in this randomizer run — aside from Bowser in the Sky and the red coins waiting there.

Into Hazy Maze Cave

I didn’t plan it this way, but my first visit back to Hazy Maze Cave quickly turned into a red coin hunt. The coins are scattered throughout the level, which made it seem like the most efficient objective to tackle first.

It does mean sacrificing the chance to combine the red coin star with the 100-coin star, but mapping where the coins were located felt more valuable for the long term. While exploring the cave I also became a little fixated on the switch hidden behind the water that normally requires the Metal Cap to reach.

No matter what I tried, I couldn’t quite reach it. To make matters more interesting, I noticed several boxes sitting high up in the cavern. I have no idea how I’m meant to reach them yet, but they’ve been added to the list of things to investigate unless I can clear the level without needing them.

Finding the Star

Once the eighth red coin was collected, the star spawned somewhere in the cave. The only problem was I had no idea where it had appeared. Rather than panic, I decided the best approach was simply to search the cave methodically.

Room by room I checked each section of the level until eventually I spotted it waiting in the rolling boulder chamber. Thankfully grabbing it didn’t cause any further problems.

Confidence for the Endgame

Hazy Maze Cave still has work left to do. The 100-coin star remains, along with two other stars in the course and the Wing Cap switch stage red coin star. Once those are finished, though, the biggest hurdles in this randomizer run should be behind me.

For now, I’m feeling confident about my chances.

Continue the Journey

← Log 20
Log 22 →

🧢 Mario 64 Randomizer Hub

Super Mario 64 Randomizer logs are written after each recording session. Every star collected brings the end of the journey a little closer.

Super Mario 74: A Survivor’s Journey Log 7 – Reaching the Top

Super Mario 74 – Log 7: Reaching the Top

Platform: Steam Deck
Mode: Original Edition
Rules: No savestates (except between entries)
Format: No Commentary

Video: Tower climb, Lava-Switch of Eruption stars, wing cap flights, and Dice-Fortress completion (no commentary)


Options were starting to narrow. I still needed to unlock the remaining caps, and the next one was waiting at the very top of the tower in this area. Getting there was the problem. The only way up was a chain of triple jumps, one after another, and missing even one meant dropping all the way back to the start. It took more attempts than I care to count before I was confident enough to even start recording, so when it finally came together in one clean run, it felt earned.

At the top sat the pipe leading to Lava-Switch of Eruption, the Wing Cap switch course for this area. First priority was the switch itself. I’d rather have the cap unlocked before worrying about anything else, so I went straight for it. With that done, there were still three stars left in the course, and the first attempt didn’t go well enough to keep. A quick reset and a change of approach made more sense.

I went for the red coins next. They’re spread across towers and platforms, and in theory it’s straightforward, just a matter of planning the route. In practice, I managed to ignore my own plan and leave the highest coin until last. The course forces you to use the cannons to reach everything, and timing matters more than it first appears. On the first proper attempt, the Wing Cap ran out just as I was closing in on the final coin. Close enough to see it, not close enough to reach it.

The second attempt went better. I got the last coin, the star appeared, and then the same thing almost happened again. The Wing Cap ran out just as I was going for the star itself. This time though, I was low enough that the fall didn’t matter. No panic, no recovery needed, just a clean landing and the star collected.

Under the Tower was next, and this was the one that caused problems earlier. This time it didn’t. One clean attempt and it was done, which made a nice change. The Tallest Tower followed, and although I’d already been there, the star itself wasn’t where you’d expect it. You can go for it with the Wing Cap, but dropping down to it felt more reliable, so that’s what I stuck with.

With the Wing Cap course cleared, it was time to go back to Dice-Fortress and finish what I’d left behind. The Observation Tower was first. At the top, along with the star box, was a sign pointing out what I already suspected. To reach the platforms ahead, I’d need to start my flight from the highest point in the map. Which naturally leads into the final star: Secrets in the Sky.

Finding that highest point wasn’t as straightforward as I remembered. The video makes that fairly obvious. I ended up going in the wrong direction more than once, even managing to grab the Observation Tower star again by mistake. At one point I even tried to kill Mario just to reset my position, and somehow failed at that as well. Not exactly the cleanest part of the run.

Once I finally found the right spot, the plan was simple. Launch from the highest point, hold the jump button to glide, and keep as much height as possible on the way over. Simple on paper, less so in execution. It took several attempts before the flight lined up properly, but eventually everything clicked, the box was broken, and the final star was free.

One more flight to reach it, repeating the same route, and this time it worked without issue. With that, Dice-Fortress was complete.

That brings the total to forty stars. Still a long way to go, but progress is steady. One hundred and eleven left.


Continue the Journey

Previous Entry:
Super Mario 74 – Log 6

Next Entry:
Super Mario 74 – Log 8 (coming soon)

Super Mario 74 Hub:

Super Mario 74 – A Survivor’s Journey

Black Tides – A Dredge Survival Diary Log 4: Steel Point Before the Cliffs

Black Tides – Log 4: Steel Point Before the Cliffs

Platform: Steam Deck
Mode: Normal
Format: No Commentary

Video: Steel Point delivery, Builder relocation, new aberrations caught, reel upgraded, and engine planning (no commentary)


I know where the Collector told me to go next, but if I’m heading anywhere new, I’d rather upgrade the vessel first. I also said I’d help the Builder relocate to Steel Point, and that still needed doing. Money doesn’t appear on its own either, which means fishing, which means accepting that I’m going to see more abnormal specimens sooner or later.

Steel Point was my first priority. I was slightly surprised not to see the Builder there already. I assumed once I delivered the lumber and scrap she would appear. Instead, I found myself doing some careful inventory management while dredging for the remaining materials. There’s only so much space on the boat, and every time I have to throw fish away it feels wasteful. Fresh fish sells better, though, and if I’m out longer than planned the profit drops. With the fog hanging thick over the water, I knew there was little chance of safely making it back to Greater Marrow at night. Thankfully, Steel Point allows docking. I rested there rather than forcing the crossing in poor visibility.

Even after completing the material delivery, the Builder still wasn’t present at Steel Point. That was unexpected. I eventually returned to Greater Marrow, fishing along the way to avoid wasting the trip, and only then did I realise she was still standing exactly where I had left her.

After selling my catch and reviewing potential upgrades, I set my sights on new engines and a reel capable of handling oceanic fish. If I’m going to the Gale Cliffs, I want the boat capable of dealing with deeper waters.

When I spoke to the Builder, it turned out she required transport to Steel Point as well. Fair enough. I ferried her across and received a couple of research parts in return. That was enough to unlock a new engine upgrade. The Gale Cliffs are still a distance away, but they’re beginning to feel more reachable. The Builder also said about visiting her so that is now on the to do list.

I’ve also noticed lightning in the sky since handing the key over to the Collector. I can’t say whether the two events are linked, but the timing stands out. I’ll keep an eye on it as things progress.

The following day or two were spent building funds and materials. Fishing, dredging, refining the boat. I encountered more abnormal specimens during that time — a Lumpy Mackerel and a Horned Grouper. Whatever they are, they sell well enough. Between them and the rest of the haul, I earned enough to upgrade one of my reels. Oceanic fishing is now possible.

I still want better engines before committing to the next region. The Gale Cliffs aren’t going anywhere. Progress has been steady, and the vessel is improving piece by piece. I’d rather arrive prepared than regret rushing it.


Continue the Journey

Previous Entry:
Black Tides – Log 3

Black Tides Survival Diary:

View the full Black Tides series

Dredge Survival Hub:

Visit the Dredge Survival Hub
Cold-Blodded: A Skyrim Survival Diary – Log 10: The Climb to High Hrothgar

Cold-Blooded Log 10: The Climb to High Hrothgar

Difficulty: Survival Mode
Platform: Steam Deck
Build: Argonian Mage
Follower: Lydia

There was no putting it off any longer. The mountain wasn’t going to climb itself.

Sooner or later I was going to have to make the journey to High Hrothgar. There wasn’t much sense in delaying it any further. All I could do was hope my armour was warm enough to get me there in the first place. If the Greybeards live entirely outside, I may have made a serious mistake coming up here at all.

I didn’t even reach the steps before I overheard two people talking. Apparently my presence wasn’t subtle, as both of them turned to look at me mid-conversation.

One of them introduced himself as Klimmek. He makes regular trips up the mountain, delivering supplies to the Greybeards. I offered to take the supplies up for him, not expecting him to accept. He did.

Video Log: Cold-Blooded – Log 10 (No Commentary)


The Climb

The climb itself wasn’t particularly difficult, at least not in terms of terrain. The problem was the cold. The higher I went, the more noticeable it became. I’m still not convinced my armour is doing much to help, but at the very least I wasn’t losing health as quickly as I expected.

At some point during the climb I realised Lydia was no longer beside me. Whether she fell behind or chose a different path, I couldn’t say. Either way, I was committed to continuing upward.

I briefly considered whether bringing the horse would have made the journey easier, but that thought didn’t last long. Further up the path I noticed movement, followed by the familiar shift in music that signals something is about to go wrong. Taking a detour around it felt like the safer option. In that moment, leaving the horse behind felt like the correct decision.

Somewhere along the way I also remembered that I can, in fact, run. It took me a moment to remember how, but once I did, the climb became a mix of short sprints and cautious walking. It wasn’t elegant, but it was effective.

High Hrothgar

I reached the chest Klimmek had mentioned and dropped off the supplies before continuing on. High Hrothgar itself was at least partially indoors, which was a relief.

The Greybeards greeted me and immediately asked me to prove that I am Dragonborn. I only have one shout available, so I used Unrelenting Force. That was apparently enough to satisfy them.

They then taught me another word of Unrelenting Force and asked me to demonstrate it. Stronger, louder, and significantly more force behind it this time. That seemed to meet their expectations.

Back Into the Cold

Just as I was starting to think I might be able to stay inside, they decided it was time to go back out into the cold. Apparently learning shouts indoors isn’t an option.

Outside, they taught me part of Whirlwind Sprint. That should at least make the journey down a little faster, assuming I don’t misjudge it and launch myself off the mountain.

With that done, they gave me my next task: retrieve the Horn of Jurgen Windcaller and return it to High Hrothgar.

No Bed for the Dragonborn

After everything, I was ready to rest. Unfortunately, that wasn’t an option. There are beds here, but they all belong to the Greybeards. Apparently being Dragonborn doesn’t come with sleeping privileges.

So instead of resting, I’ll be making the journey back down the mountain in the next entry.

Continue the Journey

Cold-Blooded Log 9 |
Cold-Blooded Log 10 |
Cold-Blooded Log 11

More from Cold-Blooded


Cold-Blooded: A Skyrim Survival Diary Hub

Black Tides – A Dredge Survival Diary Log 3: Haste, Cliffs, and Loose Ends

Black Tides – Log 3: Haste, Cliffs, and Loose Ends

Platform: Steam Deck
Mode: Normal
Format: No Commentary

Video: Grotesque Mackerel caught, Little Marrow revisited, shipwreck explored, key delivered, haste unlocked, and Gale Cliffs introduced (no commentary)


I had intended to head straight to Blackstone Isle, but those plans shifted quickly. My first catch of the day was a Grotesque Mackerel. I’m not entirely convinced it counts as an aberration. It may simply be an unfortunate-looking fish. Either way, I brought it to the fishmonger. It was exactly what he wanted. He handed over a couple of research parts, told me to leave, and promptly locked the door behind me.

With the fishmonger closed for the time being, I decided to head back to Little Marrow. I had meant to speak to the trader on my last visit and forgot. He offered to buy any trinkets I dredge up, which seems practical enough. I had one item I could sell him, so the introduction was productive.

At the docks, I spoke to a grieving father. He told me of a shipwreck where his son had been lost and asked me to retrieve a belt buckle. When I asked about anything unusual happening around here, he mentioned an old mayor who used to throw items into the sea. That was as much as he was willing to share.

I made for the shipwreck location. I recovered the belt buckle along with a few materials useful for upgrading the boat. I returned the buckle to the father, then spoke to the painter about customising the vessel. I haven’t decided whether that’s necessary.

From there I returned to Greater Marrow, selected some upgrades to research, and visited the shipwright to install a new fishing line. She mentioned that the red light I had been watching for had disappeared. That answers that, for now.

I rested until dawn and then made for Blackstone Isle. I handed the key over to the Collector. In return, he read from his book and granted me the ability to cast haste. It provides a useful boost to the engines, though it increases panic while active. He then suggested I travel to the Gale Cliffs to retrieve the next artifact. I have other matters to attend to first.

Instead, I spent some time dredging for additional materials before returning toward Greater Marrow. I tested haste along the way. It works as described. Faster travel, though not without consequence.

The lighthouse keeper greeted me when I docked, though she seemed momentarily confused. She said my engine sounded like that of an old friend’s vessel. I didn’t have much to add to that.

The fishmonger had reopened, so I returned to fishing. The haul was decent, including a Snag Squid. I sold what I caught and docked for the night.

If I’m heading toward the Gale Cliffs, I want the boat properly prepared first. I still need to complete the delivery to Steel Point and secure further upgrades. There’s no reason to rush into rougher waters unprepared. That can wait until next time.


Continue the Journey

Previous Entry:
Black Tides – Log 2

Black Tides Survival Diary:

View the full Black Tides series

Dredge Survival Hub:

Visit the Dredge Survival Hub
Super Mario 74: A Survivor’s Journey Log 5 – Azure-Abyss Cleared

Super Mario 74 – Log 5: Azure Abyss Cleared

Platform: Steam Deck
Mode: Original Edition
Rules: No savestates (except between entries)
Format: No Commentary

Video: Azure Abyss red coins, 100-coin star, Metal Cap puzzle, and Wall of Failure attempts (no commentary)


Back to Azure Abyss, and straight into what I knew was going to be a longer task — the red coins, or Red Treasure Hunt as this one is called, along with the 100-coin star on top of it. The layout of this course makes it awkward to rush anything. It’s deeper than it first looks, and the last thing I wanted was to be scrambling for air because I got careless. So I took it slower, moving between the land sections and the underwater routes, trying to keep things controlled rather than efficient.

Somewhere along the way I realised my swimming had improved without me really noticing. I’m not about to claim anything close to speedrunner level, but there was a rhythm to it that I don’t remember having before. Funny how that happens just by playing more. It made the coin collection smoother, even if it didn’t make it any shorter.

The red coin star itself sits safely above the water, which helps, but by the time I had all eight coins I was still short on the total. That’s when it turned into a bit of a hunt. I hit 97 coins and started running out of places to check. I didn’t want to spend more time swimming if I could avoid it, so I went after one of the flying enemies, hoping it would drop what I needed. It dropped two coins. 99. Close enough to be frustrating.

I eventually tracked down the final coin, though it took longer than it should have, and with that both the red coin star and the 100-coin star were done. Not difficult, just drawn out enough to make every mistake feel like wasted time.

Next was Heavy Metal Required, and the name doesn’t leave much to guess. I needed the Metal Cap. I’ve seen this done without it, but I’m not interested in making things harder than they need to be, so I stuck with the intended route. With the cap active, I could sink properly underwater and push the purple switch, which brought out the timed blocks.

Everything felt fine at first. The jumps were clean, the timing felt right, and then right at the end I walked straight off the final block. No complicated mistake, no bad angle, just walked off. The second attempt went the way the first one should have, and the star was mine without any further issues.

That left one final star in the course: Wall of Failure. The name fits. I knew exactly what I needed to do — get onto the platform, long jump, grab the ledge — and in theory it’s simpler than the alternative route. In practice, it took far longer than it should have. I lost count of the attempts. Too much distance, not enough distance, missing the ledge entirely, every variation you can think of showed up at least once.

When it finally worked, it wasn’t clean or dramatic, it just… worked. Mario grabbed the ledge, pulled himself up, and the star was there. That was Azure Abyss done.

Even with the course complete, I’m still two stars short of opening the next star door in this area. That means next time I’ll be heading through the double doors instead. I already have the key from Bowser, so it’s time to open up more of the castle and see what else this hack has waiting.


Continue the Journey

Previous Entry:
Super Mario 74 – Log 4

Next Entry:
Super Mario 74 – Log 6

Super Mario 74 Hub:
Super Mario 74 – A Survivor’s Journey

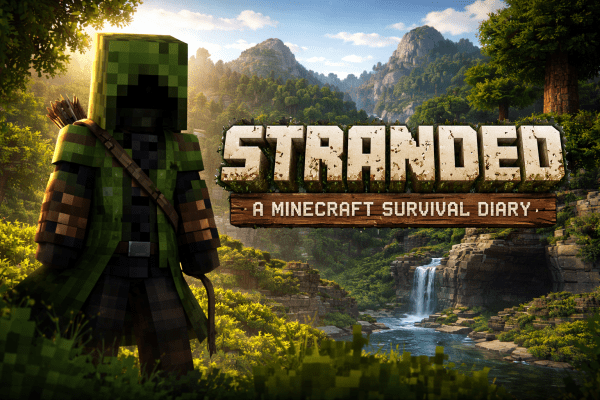
Stranded: A Minecraft Survival Diary – Log 9: Finding the Village Again

Stranded – Log 9: Finding the Village Again

Platform: Steam Deck
Mode: Survival
Format: No Commentary

Video: Mining for iron, creeper damage at the base, wandering trader visit, and finally finding the village again (no commentary)


Back to the mine again. I was determined to find at least some iron, and if I’m honest, this style of mining has become a good way of clearing my head. It’s repetitive, predictable, and for the most part nothing unexpected happens. Naturally that means I find more copper than I know what to do with. I’ve accepted at this point that copper is everywhere, but at least it means I can keep making tools and replacing armour without worrying too much about running out.

Eventually the mine gives me what I was actually looking for. Iron. Not much, only five blocks, but I’ll take what I can get. That’s enough for a better weapon and a shield, which feels like a real upgrade. I normally go straight for a sword, but while deciding what to craft I noticed the axe actually does more damage, so I decide to go with that instead. The problem is I need wood, which means going back to the house, and of course it’s night time and raining when I finally leave the mine.

I take the chance anyway and run straight across Copyright Bridge back to the house. No incidents this time, which almost feels suspicious. I spend the night inside and wait for morning.

When the sun comes up, I watch a few monsters burn away in the daylight, but some of them have armour and seem completely unaffected. I spot a creeper nearby and for a moment I consider testing the new axe on it, but a skeleton quickly convinces me that my armour isn’t good enough for that kind of experiment. I retreat back inside and decide I might need to expand the fence, add more light, or both. Things are getting a little too close to the house at night for my liking.

I head out to tend the farm and almost immediately the creeper makes another attempt at ending the run. This time it only destroys part of the fence, but it’s still enough to be annoying. I replant the wheat, grab some wood, and start repairing the damage. Past me had already made spare fence pieces, which feels like a rare moment of good planning.

While I’m fixing things, I notice a spider sitting on the roof of the house. During the day it isn’t aggressive, so I decide to leave it alone. I’m not a fan of spiders in games or in real life, but this one isn’t causing trouble, so it can stay where it is.

Not long after that, a Wandering Trader shows up with two llamas and decides my house is apparently a good place to live. I’m not sure what they expect from me, but I’m not building anyone a spare room. For now they can stand outside and do whatever wandering traders do.

With the base repaired, I decide the next goal is finding the village again. I know it exists, I just don’t know exactly which direction I went before. I remember heading right last time and getting nowhere useful, so this time I go left instead, keeping roughly the same path but changing the direction slightly.

After a short walk, I spot something in the distance that looks familiar. As I get closer, I realise it is the village. Somehow the villagers seem to be handling the monsters better than I am, or they’re very good at rebuilding after creepers visit. I don’t know much about villagers yet, or what their different outfits mean, but just finding the place again feels like a win.

I make sure I know the way back before doing anything else. The last thing I want is to lose the village again after finally finding it. This time the return trip goes smoothly, and before long I’m back at the house with no problems at all.

The Wandering Trader is still there, which makes me wonder if they’re planning to stay permanently. As far as I know they don’t get squatters’ rights unless they move inside, so for now I leave them alone.

I think about going out again to see what else is nearby, but night is coming and I don’t feel like testing my luck. There’s still plenty to do at the base anyway. I want to expand the farm, start growing cocoa beans properly, and make the fence a bit larger so things stop getting quite so close at night.

Finding the village again was enough progress for one day. I head to bed and call it there.

Continue the Journey

Previous Log |
Next Log


Stranded Hub

Submerged: A Subnautica Survival Diary – Log 12: Growing Up

Submerged – Log 12: Growing Up

Platform: Steam Deck
Mode: Survival
Format: No Commentary

Video: Floating Island farming run, lifepod sweep, wreck exploration, and base expansion (no commentary)


I had a lightbulb moment today. I’m fed up of chasing fish.

Every time my hunger dips, I stop what I’m doing, grab the knife, and head outside like I’ve never planned further than the next five minutes. It works. It keeps me alive. It also feels temporary.

The island has fruit. The fruit grows on trees. Trees can be replanted.
The solution has been sitting there the entire time.

If I’m here for the long haul, I need to act like it.

I headed back to the island with one job: harvest what I need and leave. No sightseeing. No heroic dives. Just infrastructure.

As soon as I arrived, I noticed a distress signal directly below the island. Of course there was. I added it to the list and focused on the plants first. Priorities.

I moved through the vegetation carefully. Some of it looks useful and isn’t. Then I found the Bulbo Trees.

Knife out. Controlled hits. Samples collected.

Once cut, they’re on a timer. That’s all I could think about as I made a quick detour down to the lifepod beneath the island. Inside, I picked up a PDA that helpfully informed me the Aurora meeting point was… the island I was just standing on.

Great. Glad we cleared that up.

I didn’t hang around. Back to base.

Titanium gathered. Indoor growbed fabricated. Crops planted immediately. No hesitation.

I stood there longer than I expected, watching them settle into place. It felt different. Less scrambling. More planning.

If this works, food stops being a daily chore. Water still needs attention, but solving one problem at a time is how this becomes manageable.

With farming underway, I checked my signals properly. Two lifepods stood out. One near the Aurora. Another roughly four hundred metres away and one hundred metres down.

I followed the first coordinate carefully. Adjusted for the compass. Reached it.

It was already looted.

I’ve clearly been there before. I don’t remember recording it. At some point in the past, I must have visited, taken what I could, saved, and moved on. Not ideal. From now on, cleared pods get marked properly.

On the way to the second lifepod, I found a wreck and went inside. I can’t help myself. Inside, I found a Battery Charger fragment and another Bioreactor fragment.

The charger is the real win. I’ve been rationing batteries like they’re rare artefacts. One more fragment and that changes completely.

The second lifepod was intact but empty. I had a small laugh at how it had all ended. The ocean has a sense of humour. I took what I could and left.

Back at base, I decided to expand. A tunnel. Another room. The fabricator and I had a brief disagreement about placement, but eventually it cooperated.

The base feels less like a crash shelter now and more like something intentional. At the same time, hull integrity keeps dropping with every addition. The bigger it gets, the weaker it becomes. Reinforcement is climbing the list quickly.

The crops are growing.

That alone changes the tone of everything.

I still need to head back to the Aurora and see what’s waiting in the Captain’s Quarters. That will be deliberate. Planned.

For now, though, survival feels… easier.

I don’t trust that feeling entirely.

But tonight, I’m not chasing fish.

I’m growing them out of the equation.

Continue the Journey

Previous Log |
Next Log
Submerged Hub

Black Tides – A Dredge Survival Diary Log 2: Blackstone Isle and Better Judgement

Black Tides – Log 2: Blackstone and Better Judgement

Platform: Steam Deck
Mode: Normal
Format: No Commentary

Video: Crab pots deployed, abnormal specimen caught, Blackstone Isle visited, dredging unlocked, and a key recovered at dusk (no commentary)


With the debt settled, I needed something practical to focus on. The fishmonger still wanted two different crabs, so that seemed straightforward enough. After learning how to use the crab pot properly, I dropped it in and left it to work. While moving between fishing spots, I realised I had a telescope mounted to the boat. Using it made identifying fishing locations much easier, which meant my inventory filled quickly. I made a short return trip to Greater Marrow to sell the haul. The fishmonger reminded me about the red light I’d mentioned wanting to investigate. I still didn’t know where it was exactly. I just knew I intended to find it.

A little more fishing later, I completed the sustainable fishing book. Convenient timing, as I had three more fish ready to sell. The fishmonger mentioned abnormal specimens and how sometimes you can spot them by the way the surface of the water looks. He didn’t say it like it was unusual. Just part of the job.

As daylight started to thin, I aimed the boat toward where I believed the red beam might be. I didn’t have a precise direction, only a rough idea. The fog rolled in quickly and reduced visibility to almost nothing. I couldn’t see far enough ahead to feel comfortable continuing, so I turned back toward Greater Marrow. On the way, I collected a crab from the pot, sold what I could, installed a new engine for a bit more speed, and ended the day there. No reason to get stranded trying to prove a point.

The next morning, I moved the crab pot into deeper water. I wasn’t certain it would improve the catch, but it seemed worth testing. While scanning for fishing spots, I found one emitting a strange glow beneath the surface. I didn’t have the appropriate equipment for it yet, so I left it alone, though I did retrieve a message in a bottle nearby. Not long after, I located a usable fishing spot and pulled up a Cyclopean Flounder. It matched the description of the abnormal specimens I’d been told about. It didn’t look right, but it didn’t look impossible either.

I brought it back to the fishmonger. He inspected it calmly and found a handkerchief tucked inside. He handed it to me without much comment. I sold the rest of my catch and returned to the boat.

That was when I noticed someone watching through the cabin window. He said he knew about the handkerchief and asked me to meet him at Blackstone Isle. It was close enough to reach before dark, so I agreed.

Blackstone Isle houses a mansion. The man introduced himself as a collector. I gave him the handkerchief, and he confirmed it came from a ship he was searching for. In return, he offered to upgrade my vessel with dredging equipment if I agreed to retrieve five items for him: a ring, a necklace, a watch, a music box, and a key. He didn’t provide locations, only suggested I look around shipwrecks. I accepted. The dredging equipment was fitted immediately.

Before leaving the area, I checked the crab pot again and found the second crab required for the fishmonger’s order.

Back in Greater Marrow, the mayor asked if I had encountered a photographer heading south. He suggested I introduce myself if I found her. I handed over the final crab, and the fishmonger immediately gave me another request: bring him an abnormal fish. He didn’t care which one.

I spoke to a builder who wanted to leave town. She needed two units of lumber and two units of scrap delivered to Steel Point. After that, the lighthouse keeper told me about a nearby shipwreck. By the time I reached it, dusk had almost fully settled in, but I located one of the collector’s requested items: a key.

I considered continuing on in search of the source of the red light, but the fog was already thickening and visibility was poor. I knew I would struggle to navigate safely. Instead, I turned back toward Greater Marrow and docked for the night. Blackstone Isle was within reach, but I saw no reason to risk myself for a man I had only just met.


Continue the Journey

Previous Entry:
Black Tides – Log 1

Black Tides Survival Diary:

View the full Black Tides series

Dredge Survival Hub:

Visit the Dredge Survival Hub
Blog at WordPress.com.

Up ↑