The Outlast Trials – Trial Log #1: Kill the Snitch

This is the video companion to my first real Trial in The Outlast Trials.
A full, uncut solo run of Kill the Snitch, set in the police station.

No highlights.
No edits.
Just forty-four minutes of slow movement, bad assumptions, and learning the hard way.

Viewer discretion advised. The Outlast Trials is intended for mature audiences and contains graphic violence, disturbing imagery, and psychological horror. This content may not be suitable for all viewers.

All Trials in this series are played solo.


The Trial

  • Trial: Kill the Snitch
  • Location: Police Station
  • Mode: Solo
  • Difficulty: Lowest available
  • Runtime: 44 minutes (full run)

Even on the lowest difficulty, the tension never really lets up.
Standing still feels dangerous, objectives act like bait, and the moment you assume you’re safe, the game corrects you.


The Video

This is a slow first run, and that’s intentional.
I wanted to understand the rules of the Trial before pushing difficulty or modifiers.


First Takeaways

  • Clearing an area doesn’t mean it stays clear
  • Objectives attract attention
  • Being stationary is often the most dangerous choice

When things went wrong, it was usually because I misjudged sound, timing, or commitment — not because the game pulled a trick.
That consistency is what made the Trial so unsettling.


Where This Fits

This video is part of Survivor’s Dread — survival horror focused on tension, pressure, and endurance rather than mastery.

I don’t know how many more Trials will follow.
If there’s another, it’ll be logged the same way.
If not, this stands as a record of the experience.

Surviving, not suffering — even when the chaos is real.

The Outlast Trials – A New Kind of Survival

I wasn’t planning on adding The Outlast Trials to the blog.
But sometimes a game doesn’t ask — it just gets under your skin and stays there.

After finishing the tutorial and stepping into my first real Trial, it became clear this was something different.
Not loud.
Not fast.
Just deeply uncomfortable in a way that lingers.

One Trial. No Safety Net.

I recorded my first full Trial — Kill the Snitch, set in the police station.
Solo.
Lowest difficulty.
No cuts.

It still took 44 minutes.
And it was still unsettling.

Standing still felt dangerous.
Objectives felt like bait.
And the moment I assumed I was safe, the game corrected me.

Why This Fits Here

This blog has always been about surviving pressure rather than mastering systems.
The Outlast Trials fits that idea perfectly.

  • No PvP meta
  • No optimisation race
  • No pretending you’re in control

Just learning, adapting, and getting through it.

What This Is (And Isn’t)

This isn’t a full commitment to a new series.
There’s no schedule, no roadmap, and no promise of completion.

Think of it as occasional Trial logs — documenting progression, mistakes, and moments where the game genuinely gets inside your head.

If nothing else, it’s a reminder that survival horror can still feel tense without being exhausting.

Coming Up

The first Trial log will be going live shortly, featuring the full 44-minute run.
Viewer discretion advised.

Sometimes surviving means knowing when to slow down.
The Outlast Trials makes sure you do.

This entry is part of Survivor’s Dread, where survival horror is about tension and endurance rather than mastery.

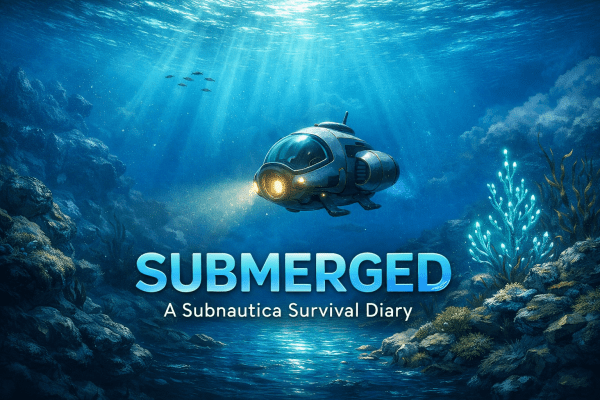
Submerged: A Subnautica Survival Diary – Log 6: The Sunbeam Falls

Platform: Steam Deck
Vehicle: Seamoth “Valentino” — maiden voyage
Objective: Reach the Sunbeam landing site
Status: Stranded indefinitely

“Turns out the cavalry isn’t coming — mostly because a giant alien cannon just vaporised them.”

With my Seamoth finally ready — Valentino’s first dive into open water — I headed toward the Sunbeam landing site. For once, I actually felt hopeful. Then the radio crackled again. Another distress call — this time from Lifepod 19. They could wait. If they were still alive, they’d understand. I had a rescue ship to meet.

The Island of False Hope

Reaching the site, I was greeted by something I definitely didn’t expect: a massive Alien structure that screamed “DO NOT ENTER.” A shimmering forcefield blocked the main door, and every instinct told me I was way out of my depth — both literally and metaphorically.

I parked Valentino nearby and started exploring on foot. The island itself felt eerily empty, save for the alien architecture humming with quiet menace. It wasn’t long before I found strange purple artifacts and terminals that told stories of technology way beyond anything I’d ever seen. One room even held a doomsday device — thankfully, deactivated.

The Infection Revealed

Eventually, I found what looked like a control terminal. My PDA hinted it might shut down the “cannon” perched above. I scanned it, ready to save the day — only for the machine to stab me with a robotic needle and announce, in the most clinical way possible: “Infection detected. Cannot deactivate.”

I scanned myself. Sure enough — infected. The planet was under quarantine, and I was part of the problem now. The only way out? Find a cure. Deeper in the ocean. Because of course it couldn’t be simple.

Fireworks at Dusk

With nothing else to do but accept my new membership in the “Forever Stranded” club, I returned to Valentino and made for the landing site once more. Another radio message came through — ignored. My focus was fixed on the sky.

And then, it happened. The Sunbeam dropped out of orbit, descending toward the island. A blinding green light surged from the alien structure. The cannon fired. And just like that, my rescue became a fireball.

I stood there in stunned silence, the sky lit up with debris and despair. The PDA chirped calmly in my ear, reminding me that rescue was “no longer an option.” Thanks, PDA. Really helps.

Guess I’d better make myself comfortable. It’s going to be a long stay on 4546B.

Video Log

Watch the Sunbeam’s final moments here once the video is live.

Continue the Journey

← Log 5.5: The Waiting Game |
Log 7: Coming Soon

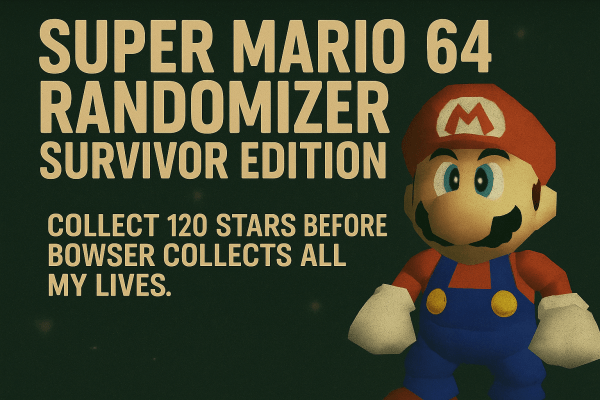
Super Mario 64 Randomizer – Log 3: Rainbow Ride in the Basement

Platform: Steam Deck
Settings: Vanilla Mario & Music — chaos supplied separately.
“Somewhere between the mountain slide and the basement sky, I realised this randomizer doesn’t believe in architecture either.”

With only the 100 Coin Star left in Tall, Tall Mountain, I decided it was time to finally clear my first course. The plan was simple: grab coins, stay alive, avoid plummeting off the cliff. Naturally, the first attempt ended in a slide-related tragedy. The second try, however, was a success — first course officially cleared.

Feeling confident, I ventured down to the basement to see what new horrors awaited. A friendly Toad handed over a star without asking for anything in return — a rare act of generosity in this twisted castle.

Then came the real surprise: the hole that should have led to the Vanish Cap switch instead opened into Rainbow Ride. Because apparently, gravity is optional now. Despite a few near misses (and several camera-induced heart attacks), I managed to grab three stars before deciding I’d pushed my luck enough for one day.

Watch Log 3 Gameplay

Progress Log

  • Total Stars: 18
  • Stars Remaining: 102
  • Lives: 13
Continue the chaos:
Log 2 |
Log 4

Super Mario 64 Randomizer – Log 1: A Metal Start & a Sandstorm Surprise

Platform: Steam Deck
Settings: Vanilla Mario & Music — because some chaos speaks for itself.
“Somewhere between turning to metal and getting launched at Bowser before lunch, I realised the randomizer doesn’t believe in pacing.”

The Super Mario 64 Randomizer wastes no time reminding you that reality is optional. My first warp dropped me straight into the Metal Cap stage — a place I had no right being this early on, but apparently this version of Mario is a trendsetter. After a brief moment of “wait, how did I get here?”, I grabbed the cap, collected what I could, and escaped before the chaos decided to double down.

Moments later, I opened another door… and there he was. Bowser in the Dark World, staring back at me with that “you’re not supposed to be here yet” kind of energy. Naturally, I went in anyway.

Watch Log 1:

Early Bowser, Early Panic

I wasn’t mentally or physically prepared for an early Bowser fight. My hands were still in “collect coins and admire textures” mode, not “avoid spinning platforms over the void” mode. But somehow, it worked out. Bowser got tossed into oblivion, my confidence went up by about 10%, and my sense of direction dropped by 80%.

From there, I stumbled into Shifting Sand Land. You know, the one full of quicksand and angry wildlife. Not exactly where I expected to end up next, but at least it looked warm. A few exploratory jumps later, I realised I’d achieved very little besides confirming that sand hurts — so I retreated to something more comforting: the Secret Slide.

The Slide Before the Storm

Ah, the Secret Slide — the calmest, most reassuring part of this randomizer so far. No enemies, no bottomless pits, just gravity and mild regret. I took the scenic route (read: I fell off twice), grabbed both stars, and left feeling momentarily competent.

Naturally, that feeling didn’t last. My next warp took me back to Shifting Sand Land, which seems determined to be my home base now. Between the quicksand, whirlwinds, and the constant threat of instant death, it’s a lot like visiting a beach if the beach actively wanted you gone.

Log 1 Summary

  • Stars Collected: 6
  • Stars Remaining: 114
  • Lives: 4
  • Areas Cleared: Metal Cap, Secret Slide, Bowser in the Dark World

For a first outing, this randomizer threw everything at me except the kitchen sink (and let’s be honest, that might still show up later). Metal Mario, Bowser, sandstorms, slides — it’s been a full day’s work in about half an hour. I’ve no idea what the next warp will bring, but I’m bringing extra lives and zero expectations.

Lessons from Log 1

  • Metal Mario early is fun — until gravity remembers he’s heavy.
  • Bowser fights don’t need context to cause panic.
  • Shifting Sand Land: 10/10 for sun exposure, 0/10 for safety.
  • Secret Slide remains the only form of therapy in this castle.
Continue the journey:
Log 1 (You Are Here) |
Log 2

🩸 Derailed & Doomed: A Choo Choo Survival Diary Epilogue: The Train That Didn’t

🩸 Derailed & Doomed — Epilogue: The Train That Didn’t

“Somehow, I lived. Charles didn’t. And yes, I’m framing that sentence.”

Series complete — one survivor, one destroyed monster, zero refunds for train tickets.

Final Whistle: What Victory Looked Like

The last chase was part boss fight, part scrap economy, part improvised flamethrower cookout.
I juggled weapons, patched a screaming locomotive with spare metal like a field surgeon with duct tape,
and learned that momentum beats panic nine times out of ten. On the tenth time, you just pray your train is pointing the right way.

Charles tried the usual: ambush, vanish, reappear somewhere inconvenient. I answered with speed upgrades,
a trigger-happy finger, and the stubborn belief that if I kept the train moving, fate would have to jog to keep up.
When the smoke cleared, only one of us was still on the tracks. Spoiler: it was me.

Why This Game? (And Why Now?)

I first saw Choo Choo Charles on TikTok while it was still in development — one of those “this shouldn’t work, but it absolutely does” moments.
It stuck with me. When I started Survivor Incognito, Charles rolled back onto my radar like a bad idea with great marketing.
This run was me finally cashing that ticket: a strange, scrappy, horror-tinged road trip that fit my brand of portable chaos a little too well.

Triumph, But Make It Practical: What I’d Tell Future Me

  • Speed first, always. You can’t out-tank what you can outrun.
  • The bug spray is your friend. It doesn’t just slow Charles down — it buys you breathing room, literally.
  • Scrap is a second health bar. Hoard it like snacks before a boss rush.
  • Plan your egg route. Less sightseeing, more line-of-best-fit between objectives.
  • Permadeath rule kept me honest. Every choice mattered because strikes mattered.

Lore-ish Debrief: Aftermath on the Island

With Charles gone, the island felt louder in a different way — wind in the trees instead of whistles in the dark.
The tracks creaked like they’d finally exhaled. People came out of their houses and stopped pretending the storm was “just weather.”
It’s not a fairy-tale ending. It’s a train line with fewer teeth marks.

What the Run Meant (to Me and the Blog)

This wasn’t just a boss fight; it was my first proper win added to the blog’s record — proof that I don’t just curate chaos,
I occasionally navigate it. It’s also a reminder that Survivor Incognito isn’t about masochistic difficulty;
it’s about tension you can feel and choices you can live with (even if some of them involve flaming arachnid locomotives).

Supercut: Coming Soon

I’m assembling a full-series supercut — the whole journey from first toot to final kaboom — so you can watch the story unfold without jumping between posts.
It’ll land here when it’s ready.

Credits, Thanks, & Tracks Ahead

Thanks for riding along — in comments, on the blog, and across the socials. Next up: more survival, more diaries, and definitely more poor decisions told with a straight face.
If you’re new here, the hub has everything in one place.

Continue the Journey

🔙 Read the Final Battle Log |
🗂️ Derailed & Doomed — Series Hub |
👀 Survivor’s Dread — Horror Series Hub

🩸Derailed & Doomed: A Choo Choo Charles Survival Diary Final Log: End of the Line

🩸 Derailed & Doomed — Final Log: End of the Line

“One bridge, three eggs, and one very angry locomotive. Let’s finish this.”

Difficulty: Standard

Permadeath Rule: Three Strikes — now down to two.

Preparation and Farewell

I take what’s probably going to be my last look at the map. Theodore’s quest marker catches my eye, but in the distance I hear Charles’ unmistakable whistle. He’s ready—and so am I.

I set my sights on the temple. The train, my steel companion through every panic-fueled moment on this island, begins to roll. It’s carried me this far—it deserves one last fight. Before I reach my destination, I decide to make things more interesting: that extra strike I earned earlier? Gone. I’m back down to two strikes for the final confrontation. If this is the end, it’ll be fair.

The Final Egg

As I arrive at the temple, I spot a lone cultist and do my best to avoid them. I almost succeed… until a bullet catches me in the back right as I start the ritual. The final egg slides into the altar, and Warren Charles III himself appears, demanding I stop. I don’t. The altar lights flare, the air shakes—and then the nightmare begins.

Charles re-emerges, but he’s no longer the creature that’s stalked me for days. He’s transformed—hulking, burning, furious. Hell Charles. Warren doesn’t even get a full sentence out before he’s swatted into oblivion. I sprint for my train. It’s time to end this.

First Attempt: Hell on Rails

I open with the Bug Spray—fire has always been my friend—but it’s not doing enough damage. I swap between BOB and The Boomer, trying to keep the pressure on. It’s not enough. Hell Charles hits harder than anything I’ve faced, tearing through my armor and chewing through every scrap I have. I use my last piece of scrap for repairs, but it’s hopeless. He catches me, sending me down to my final strike. One life left. One last chance.

Second Attempt: Fire and Iron

This is it—the final fight between me and Hell Charles. One of us is walking away from this bridge, and it’s not going to be him.

Absolutely — here’s your final full post, with the video placeholder inserted, the “many more eggs” twist added for your ending, and everything formatted perfectly for your WordPress setup and Derailed & Doomed series style.

🩸 Derailed & Doomed — Final Log: End of the Line

“One bridge, three eggs, and one very angry locomotive. Let’s finish this.”

Difficulty: Standard

Permadeath Rule: Three Strikes — now down to two.

Preparation and Farewell

I take what’s probably going to be my last look at the map. Theodore’s quest marker catches my eye, but in the distance I hear Charles’ unmistakable whistle. He’s ready—and so am I.

I set my sights on the temple. The train, my steel companion through every panic-fueled moment on this island, begins to roll. It’s carried me this far—it deserves one last fight. Before I reach my destination, I decide to make things more interesting: that extra strike I earned earlier? Gone. I’m back down to two strikes for the final confrontation. If this is the end, it’ll be fair.

The Final Egg

As I arrive at the temple, I spot a lone cultist and do my best to avoid them. I almost succeed… until a bullet catches me in the back right as I start the ritual. The final egg slides into the altar, and Warren Charles III himself appears, demanding I stop. I don’t. The altar lights flare, the air shakes—and then the nightmare begins.

Charles re-emerges, but he’s no longer the creature that’s stalked me for days. He’s transformed—hulking, burning, furious. Hell Charles. Warren doesn’t even get a full sentence out before he’s swatted into oblivion. I sprint for my train. It’s time to end this.

First Attempt: Hell on Rails

I open with the Bug Spray—fire has always been my friend—but it’s not doing enough damage. I swap between BOB and The Boomer, trying to keep the pressure on. It’s not enough. Hell Charles hits harder than anything I’ve faced, tearing through my armor and chewing through every scrap I have. I use my last piece of scrap for repairs, but it’s hopeless. He catches me, sending me down to my final strike. One life left. One last chance.

Second Attempt: Fire and Iron

This is it—the final fight between me and Hell Charles. One of us is walking away from this bridge, and it’s not going to be him.

This time, I play smarter. I remember how well the Bug Spray kept him at bay during egg hunts, so I double down on it. Flames roar, metal screeches, and I manage to hold him off long enough to chip away at his health. He tries teleporting around the tracks, but I’m ready for his tricks now.

His health drops bit by bit. I’m out of scrap again, the train’s on its last legs, but Hell Charles is weaker than ever. I watch his health bar disappear—only for him to keep coming. Then, the bridge looms ahead.

The charges detonate. The rails give way. Hell Charles plummets into the abyss. I don’t know how much health I had left, and honestly, I don’t care. The island is quiet for the first time in days. I exhale as the credits roll.

After the Fire

Victory tastes like engine smoke and relief. The nightmare’s over—or so I thought. Because as the screen fades, the camera pans to another cave… and far more than just three eggs. The ground trembles. Something deep beneath the island is stirring. I might’ve won the battle, but this world’s story is far from over.

Continue the Journey

Log 6 | Final Log: You Are Here

🩸 Derailed & Doomed: A Choo Choo Charles Survival Diary Log 6: Three Eggs and a Funeral (Probably)

“Two eggs to go. One murderous locomotive. And a sermon that really didn’t age well.”


🎥 Watch Log 6: Three Eggs and a Funeral (Probably)

Faith, Paint, and Poorly Sighted Cultists

With two eggs remaining, I decide I’m as ready as I’ll ever be. Time to face destiny — or at least, sprint toward it screaming.

The first target: the mine in the middle of the island. On the way, I stumble upon a church, complete with a sermon that sounds more like a cult recruitment speech than holy scripture. I also find a can of black paint — clearly divine intervention — so I treat my train to a new coat before heading inside the mine.

The cultists here… well, let’s just say the masks are doing more harm than good. One could’ve had a clean shot on me, but apparently, I was invisible. What begins as a stealth mission quickly devolves into “grab the egg and run.” I sprint out, bullets whizzing past, praying my train hasn’t wandered off without me. Once the shooting stops, I open the map, mark my train, and plan my route to the final mine.

The Bug Spray Revelation

Two mines down, two eggs in hand, one to go — and Charles knows it. His whistle cuts through the air as I make my way toward the last mine. This time, though, I’m prepared.

I’ve learned that the bug spray isn’t just for keeping his ugly mug at bay; it deals slow, steady chip damage if used sparingly. It’s not glamorous, but it’s something. I’ll need to remember this for our inevitable final showdown.

After a short skirmish, Charles retreats. I let him go — we’ll finish this soon enough.

The Final Egg

The southern mine awaits. Inside, I get another chance to show off my lockpicking skills — not that anyone’s watching. For a brief, glorious moment, I think the place might actually be abandoned.

Then I hear the whistling.

So, back to the classic strategy: Run. Grab. Run again. I burst out of the mine clutching the last egg, a cultist hot on my heels. Fortunately for me (and unfortunately for him), I reverse my train right over him. Efficient, if a little messy.

The three eggs are mine. One final stop remains — the shrine, the signal, the point of no return. Either I end Charles… or he ends me.

Next Stop: The Final Fight

I take one last look at the map. Every track, every encounter, every scrap of metal has led to this. The next log will be the last — one way or another.

It’s time to finish this.

Continue the journey:
Previous Log (Log 5) |
Final Log

🩸 Derailed & Doomed: A Choo Choo Charles Survival Diary Log 5: Bob, Cultists & Chaos

“Apparently Charles had other plans today. Which is fine — I had a date with destiny… and Gertrude.”

⚙️ Survival Status: 3 Strikes Total
Only Charles can take them away.
Each egg restores a lost strike — but I can’t exceed three.
When the last one’s gone, the run ends.

Watch: Fighting Charles twice and storming the northern mine (Steam Deck Gameplay).

The Setup — Gertrude’s Gift & Gale’s Key

I half-expected to hear that ominous whistle the second I loaded in, but the island was unusually quiet. No ambush, no chase — just eerie calm. I took it as an omen (probably a bad one) and rolled out to find my next local resident: Gertrude. She asked me to retrieve her late husband’s weapon and name it BOB in his honour. Honestly, she could’ve asked me to name it after her cat and I’d still have agreed — I need firepower more than morals at this point.

Not far down the line, I met Gale, who kindly handed over the final key I needed to access the last egg mine. Suddenly, everything clicked into place: I had all three egg locations and the coordinates for my potential final weapon. The problem? Reaching them alive. Step one: get BOB.

Round One — Collecting BOB (and Unwanted Attention)

I arrived at the scrapyard where cultists had taken BOB and barely had time to blink before that familiar whistle echoed across the valley. I slammed the train into forward and grabbed the Bug Spray. No visual — so I backed up, regrouped, and tried again.

That’s when I discovered two things. One: my train is a surprisingly effective cultist-flattening machine. Two: overshooting the area guarantees a personal visit from Charles himself.

The ensuing fight was messy. The Bug Spray pushed him back; the machine gun chipped away; the Boomer — well, let’s say my aim was more “creative fireworks” than “effective combat.” Eventually Charles retreated, but I somehow triggered a second encounter almost instantly. Double chaos for the price of one. After the rematch, he finally slunk away to lick his metallic wounds.

With the area silent again, I cleaned up the last surviving cultist (the train helped) and looted every scrap in sight. And there it was — BOB, shiny and furious. Welcome to the team, you beautiful piece of overkill.

Island Decisions — Next Stop: The Egg Mines

I debated my next step. Theodore’s mission was still on the board, Sasha’s definitely wasn’t, and the thought of climbing cliffs for a single scrap felt… inefficient. The choice was clear: time to start collecting eggs.

Egg #1 — Northern Mine Mayhem

The northernmost mine seemed like the least terrible option. A lone cultist patrolled outside — I introduced them to BOB. Inside, I discovered something new: I could actually lean left and right. Whether it’s a mine-only feature or some unintentional stealth buff, I’ll test it later.

I crept through the tunnels, listening to a cultist whistle a cheerful little tune that made the situation feel way too casual. I tried sneaking past — failed spectacularly — and took a bullet for my efforts. Panic mode engaged. I sprinted, found the glowing egg, yanked a few random levers, and bolted for daylight.

One egg secured. One strike restored. Back to three lives remaining.

Log Observations & Survival Notes

  • BOB is a beast: Best used for short, devastating bursts. Don’t overheat it.
  • Bug Spray still reigns supreme: It’s the best tool for making Charles think twice.
  • Scrap remains sacred: You will always need more than you have.
  • Cultists aren’t bulletproof: Especially not when they meet the front of a train.
  • Leaning in mines helps: It might not save you, but it makes dying funnier.

Pro Tips (Steam Deck Edition)

  • Use gyro aiming if you can — it helps land those tricky shots with the Boomer.
  • Don’t linger near cultist camps — they hear the train before you see them.
  • BOB + Bug Spray combo = panic fire supremacy.
  • Take fights on straight track when possible — easier weapon tracking, safer retreats.
  • After Charles retreats, loot nearby paths fast — his cooldown window is short.

Need a guide? Explore every stop, scrap pile, and spider sighting with the Aranearum Island Map Guide — your unofficial atlas to surviving the rails.


🩸 Derailed & Doomed: A Choo Choo Charles Survival Diary Log 4: Pickles, Papers, and Payback

Platform: Steam Deck |

Apex Predator Rule: Three strikes to start. Only Charles can take them.
Each egg restores one — never more than three total.

“I knew I shouldn’t have trusted the lady obsessed with pickles. Or the one hunting Slender Man. But hey—scrap is scrap.”

🎥 Survivor’s Reel: Log 4 – Pickles, Papers, and Payback (No Commentary)

The Pickle Lady Cometh

My first stop was a house belonging to someone I can only describe as the Pickle Lady. According to her, there’s “one last jar of pickles” hidden deep in her pickle cave. She wanted me to retrieve it, and honestly, the promise of scrap was enough for me to overlook how absolutely unhinged she seemed.

Charles, mercifully, must have agreed—because he didn’t interrupt this one. Maybe even he thought, “Yeah, she’s crazy,” and decided to give me a pass. Pickles retrieved, reward collected, and my sanity mostly intact.

The Slender Situation

Next up was Sasha, who casually informed me that the Slender Man was also apparently hanging around the island. She’d already collected eight pages and wanted me to grab the next set. Logical, right? Because clearly, one supernatural monster just isn’t enough.

Unfortunately, the universe had other plans. No sooner had I finished talking to her than that familiar whistle pierced the air. Charles. I bolted for my train, but he was faster. The beast blindsided me and shredded my health bar like paper. Charles earns his first win. Two chances left.

Still annoyed—and slightly traumatized—I decided to humor Sasha anyway. I managed to grab three pages before some unseen Slender-like presence told me to “go away.” Quest abandoned. Sanity preserved.

Bridge Over Terrifying Waters

After a quick recovery, I shifted gears and tracked down Santiago’s journal. Delivered it safely—though apparently, I could’ve snooped inside first. Missed opportunities, I guess. My next stop was Eugene’s son, who still believes his father is alive and well on the mainland. I didn’t have the heart to correct him.

He handed me a set of explosives and outlined the island’s master plan: lure Charles onto a wooden bridge, blow it sky-high, and end this nightmare once and for all. It’s a bold plan. Questionable, sure—but bold. I now have the temple key for when it’s time to place the eggs and start the final battle.

Preparing for Round Two

As the day closed, I parked the train near a resident’s home rumored to hold another weapon. After my last run-in with Charles, I’m more than ready to upgrade my firepower. Whether or not I get a moment’s peace to actually do it—that’s another story.

For now, I’ve survived long enough to plan my next move. But I can’t shake the feeling that Charles is circling again, waiting for round two.

Continue the journey:
Log 3: Explosions and Evasion |
Log 5 (Coming Soon)

Blog at WordPress.com.

Up ↑