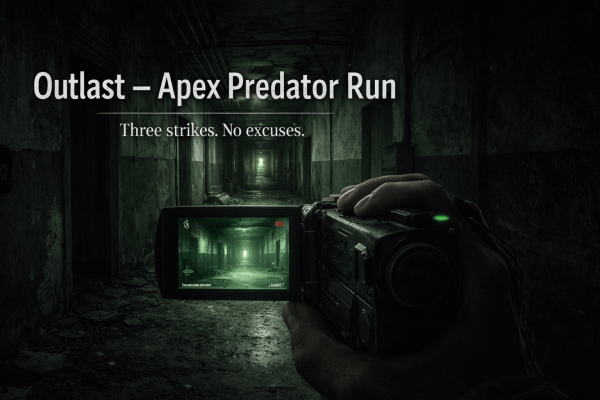
🩸 Derailed & Doomed: A Choo Choo Charles Survival Diary Log 2: Flame, Speed, and Fetch Quests

🩸 Derailed & Doomed — Log 2: Flame, Speed, and Fetch Quests

“They said ‘force Charles into a fight.’ They didn’t mention the choreography involved.”

⚙️ Survival Status: 3 Strikes Total
Only Charles can take them away.
Each egg restores a lost strike — but I can’t exceed three.
When the last one’s gone, the run ends.

The Setup — Make ‘Em Fight (And Don’t Get Toasted)

After being told I need to force Charles into a fight to the death, I set out to meet the island’s next eccentric resident — a man who clearly enjoys watching things burn. Sgt. Flint greets me in front of his flaming house, which raises more questions than I’m willing to ask.

I find a water tank above his home, twist the valve, and douse the flames. That act of charity apparently doubles as an invitation, because I soon hear the dulcet, horrifying blare of Charles’ horn in the distance. I sprint for my train, ready for chaos — but he never shows. Either I scared him off or he’s waiting for a better entrance. Flint, unbothered, rewards me with his experimental weapon: the Bug Sprayer. Which, of course, is a flamethrower.

Round One — The Firestarter

Not long after, I get my wish: Charles charges in for our first real showdown. I juggle the Bug Sprayer and machine gun — one setting him ablaze, the other perforating his ego. It’s messy, loud, and absolutely glorious. Charles retreats after taking enough damage, and for the first time since stepping onto this cursed island, I feel like I’ve actually won something.

With the immediate threat gone and my train held together by scrap and spite, I decide to take advantage of the quiet. Time to meet the locals — and, inevitably, their problems.

Islanders & Errands — The To-Do List Grows

Island socialising here is just a series of fetch quests disguised as introductions. Everyone has a task, and apparently, I’m the errand boy.

  • Theodore — far too well-dressed for a place that’s one bad day away from Mad Max. Wants a box recovered from a railcar in a nearby canyon. Bandits guard it. I politely file that under “later.”
  • Santiago — prepping to leave the island as soon as rescue arrives, but he’s left his journal at home. Add another fetch quest to the growing pile.
  • John Smith — working on a rocket launcher (finally, someone useful). Needs me to collect the rocket ammo from a nearby bunker. That immediately jumps to the top of the list.
  • Greg — appears to have misplaced his clothing and sense of urgency. Used to work for the mine owner and warns that if the eggs hatch, there’ll be three more Charles-like horrors running around. He hands me the key to the second mine. Great. Just what I needed.

So far, my to-do list looks like this:

  1. Collect rocket ammo from the bunker (top priority — rocket launcher > everything else).
  2. Retrieve Theodore’s box from the canyon railcar (expect bandits).
  3. Fetch Santiago’s journal from his house (return it before he reconsiders leaving).
  4. Investigate the second mine (Greg’s key in hand, nerves not included).

Next Stop — The Bunker

With Charles licking his wounds somewhere in the wilderness, I make my way toward the bunker where John Smith’s rocket ammo supposedly waits. The island is eerily quiet now — no horn, no tracks shaking, just the wind and my engine’s occasional complaint. Perfect time to loot everything not nailed down and add more scrap to my emergency stash.

I haven’t seen Charles again since our fight, but I know he’s out there. Watching. Waiting. Probably still smouldering a little.

Log Observations & Survival Notes

  • Scrap is life: It’s your health, armour, and upgrade material all in one. Pick up every piece you see — it’s never enough.
  • Weapon swapping works: Flamethrower to make Charles back off, machine gun for consistent hits. Alternate, repair, survive.
  • Speed upgrades are essential: The faster your train, the smaller your funeral.
  • Quiet moments lie: If you don’t hear Charles, it’s because he’s planning something.

Pro Tips (Apex Rookie Friendly)

  • Always keep scrap handy — repairs and upgrades are instant, but you’ll burn through metal faster than ammo.
  • Mark every quest on your map. It’s easy to get lost between rail spurs and regret.
  • The Bug Sprayer is for Charles only. Do not waste fuel showing off. It’s not that kind of game.
  • When Charles retreats, use that window to explore. The peace never lasts long.

Need a guide? Explore every stop, scrap pile, and spider sighting with the Aranearum Island Map Guide — your unofficial atlas to surviving the rails.


Submerged: A Subnautica Survival Diary – Log 2: The Depths of Progress

Submerged: A Subnautica Survival Diary – Log 2: The Depths of Progress

Difficulty: Survival (Steam Deck Survival)
Optional Features: Grav Trap Deployed for Science and Snacks

“Silver is rarer than common sense on this planet.”

After yesterday’s fire-fighting and frantic crafting, I started the day with a new radio message: Lifepod 17 had also crashed somewhere nearby — right next to the Seamoth Bay, apparently. But priorities are priorities, and since Lifepod 3 radioed me first, they got first rescue attempt.

Priorities, Podcasts, and PDAs

Lifepod 3 wasn’t exactly a rescue success.
I did, however, find a blueprint for a compass — the kind of thing that makes you wonder why your pod didn’t come with one pre-installed. I added it straight to the “to-craft-once-I-can-see-straight” list, along with a PDA I’ll read later when I’m not holding my breath underwater. No survivors… unless you count me, which I do, enthusiastically.

Back at my pod, I realised something important: I can’t see a damn thing once it gets dark. So I finally crafted a torch — apparently the galaxy’s most underrated invention — along with a survival knife because there’s nothing like a little sharp-edged comfort in an ocean full of unknown lifeforms.

Lifepod 17 and the Great Seamoth Discovery

Next stop: Lifepod 17.
Predictably, it was another empty seat arrangement, but I did strike technological gold — enough Seamoth fragments to unlock the blueprint. I just need a Mobile Vehicle Bay now, which sounds easy enough until you remember I’m surviving on cooked bladderfish and spite.

While exploring the wrecks, I also found the last few materials to upgrade my O₂ tank. More air equals more curiosity, and more curiosity usually equals more trouble, so that’s a win all around.

Incoming Messages and Explosive Warnings

Just as I was feeling productive, I got a new transmission — this time from the Sunbeam. They wanted a response, but my comms system is, and I quote, “irreparably damaged.” Translation: I’m talking to myself for the foreseeable future.

With no one to call and no Netflix subscription in sight, I built a Grav Trap and tossed it outside the Lifepod to watch it work. Instant sushi buffet. Fish helplessly drawn into an invisible vortex of doom. It’s oddly soothing.

Science in Motion

Full gameplay log below — forty minutes of exploration, crafting, and the occasional panic swim. Featuring Grav Trap testing, Lifepod 17 dives, and my ongoing battle with visibility and oxygen management.

Watch on YouTube

I even had enough parts for a Rebreather, further extending my underwater escapades. Everything was going fine… right up until the PDA told me the Aurora will explode in approximately two hours.
Sure. Two hours to stop a planet-sized reactor meltdown with nothing but a knife and optimism. Sounds totally achievable.

Silver, Sunbeam, and Sinking Realisations

I spent the rest of the day chasing one thing: silver. I’d convinced myself it didn’t exist anymore, that I’d mined the planet dry earlier. But after far too many dives and muttered curses, I finally found some glimmering salvation among the sandstone outcrops.

Back at the Lifepod, another message awaited — the Sunbeam again. They’ve spotted the wreckage of the Aurora and are coming to investigate. They’ll be here within the week.

So not all doom and gloom then. Just mild existential dread… and a new compass freshly crafted to help me get lost in the right direction next time.

Continue the Journey:
Log 1 |
Log 3

Derailed & Doomed: A Choo Choo Charles Survival Diary Log 1 – Welcome to the Rails

🩸 Derailed & Doomed – Log 1: Welcome to the Rails

Difficulty: Default (Steam Deck)
Rules: I start with three strikes under the Apex Predator Rule.
Only Charles can take them away. Each egg collected restores one lost chance, but I can never hold more than three at once.

“Eugene called with a ‘big find for the museum.’ I should’ve known when he refused to say what it was until the boat was already docking.”

Arrival – The Call That Should’ve Stayed Missed

Apparently Eugene has discovered something huge on Aranearum Island—something the museum “can’t ignore.” What he forgets to mention, until we’re thirty seconds from land, is that the discovery hisses, hunts, and has legs that would make a freight spider jealous. By then, of course, it’s too late to turn around.

No sooner do we dock than Eugene takes off at a sprint like he’s late for his own funeral. I grab the station key, unlock the building, and meet my transportation for this misadventure: a battered yellow locomotive that looks one patch of rust away from retirement.

First Blood – Eugene’s Farewell Tour

I test-fire the roof gun—short bursts, satisfying recoil—and then we’re moving. The honeymoon lasts roughly twenty seconds before Charles himself crashes the party. Eugene insists we “keep firing.” I oblige; Charles responds by turning Eugene into exhibit material. The monster vanishes into the trees, leaving me with a wrecked train, a dying mentor, and new marching orders: find the eggs that power this nightmare.

📺 Watch the Run – Log 1 Gameplay

Here’s the footage from this log — the moment Eugene and I make first contact with the eight-legged nightmare himself. Recorded on Steam Deck using the built-in capture tool.

Side Tracks – The Island’s Welcoming Committee

My first stop is Tony Tiddler, who generously offers the key to his barn and a stash of scrap. I call that charity; he calls it cleaning up. Next, I reverse the train, switch tracks, and meet Candece, who points me to her balcony—more scrap, fewer spiders.

Feeling brave (or stupid), I detour toward the middle of nowhere and meet the local witch, Lizbeth Murkwater. She wants swamp meat from an island guarded by something named Barry. I don’t see Barry, but I feel him—same energy as the invisible water creature from Amnesia: The Dark Descent. I retrieve the goods, vow never to swim again, and sprint back to dry land to upgrade my train’s speed. Priorities.

Locks, Luck, and Helen’s Revelation

Next up is Daryl, a man armed with lockpicks and zero clue how to use them. Fortunately, I manage. The mini-game is all timing—light on punishment, big on satisfaction. More scrap secured, more confidence gained.

My final stop of the day is Helen. As I slow the train and step off to meet her, I hear that familiar metallic shriek echoing through the forest. Instinct wins: I sprint back to the train, gun ready, waiting for the inevitable screech and charge. Nothing. Just the wind and the kind of silence that feels like it’s holding its breath. After a tense minute, I risk it—back down the path to Helen’s camp.

Helen greets me like I haven’t just done the most dramatic 100-metre dash of my life and explains that Charles can’t simply be killed; he has to be lured into a one-on-one fight to the death. To do that, I’ll need to locate the three eggs hidden in mines across the island and use them to summon him. Simple plan: collect cursed objects, trigger final boss, try not to die first.

Night Falls – The Quiet Before the Screech

I head back to my train under a sky that looks like it’s plotting. There’s another survivor nearby, but they can wait. Somewhere out in the fog, metal claws scrape against steel. Charles knows I’m here—and he wants a word.


Log 1 Pro Tips (Steam Deck Edition)

  • Speed first. Running away is still a strategy—just louder.
  • Scrap early, scrap often. Spend it before Charles taxes it.
  • Keep to the tracks. Wandering equals dying with extra steps.
  • Barry exists. Trust the ripples; they’re not friendly.
  • Fire in bursts. Overheated guns are invitations to funerals.

Need a guide? Explore every stop, scrap pile, and spider sighting with the Aranearum Island Map Guide — your unofficial atlas to surviving the rails.


Continue the journey:
Log 1 (You Are Here) | Log 2

Submerged: A Subnautica Survival Diary – Day 1: The Peeper in the Pod

Submerged: A Subnautica Survival Diary – Day 1

Difficulty: Survival Mode (Steam Deck Edition)

Welcome to 4546B

I wake to alarms, a smoking console, and one extremely calm Peeper hovering in the middle of my lifepod like it pays rent. Fire out, situation stable, roommate secured. I catch it. I cook it. Breakfast of champions.

The PDA boots into Emergency Mode with the sort of cheerful corporate tone that suggests HR wrote it. Regardless, it’s my lifeline now, so I listen.

First Steps (and First Swims)

Before diving, I pin the essentials:

  • O₂ Tank — lungs are optional, but preferred.
  • Fins — I’d rather swim fast than panic slowly.

A few quick foraging runs later and I’ve got both crafted, plus a Repair Tool and a Scanner. The ocean is being cooperative… for the moment.

Right on cue, the radio chirps in with an update: rescue ETA 9… 9… 9… 9… 9 hours. So, roughly eleven and a half years. Excellent. I’ll, uh, keep busy.

Nightfall, Notes, and New Blueprints

Scanner built, I point it at everything that moves (and several things that don’t). The shallows hum with life — coral pulsing softly beneath me, strange silhouettes drifting just beyond visibility. It’s beautiful in a way that feels like a warning.

Darkness drops quickly, and scanning in pitch black is just guessing with extra beeps, so I pin a Torch for tomorrow.

At first light I spot Seaglide fragments. One scan later and the blueprint unlocks. New goal: build it before the day ends — because slow swimming is a lifestyle choice I refuse to adopt.

Then: a ping from Lifepod 3. Marker acquired. I’ll head there once the Seaglide is humming.

Crash Fish Chaos

While hunting materials, I discover two facts in rapid succession: Crash Fish hate visitors, and they express this by exploding in your face. Two back-to-back detonations later, my health bar looks like a bad stock chart. I limp to the lifepod, patch up, and get back to work. Controlled recklessness: unlocked.

The Hunt for Copper

Finding copper is like looking for hope in a horror movie — technically present, rarely where you expect. I comb the shallows, finally crack the right limestone outcrop, and sprint-swim home to craft Copper Wire.

Moments later, the Seaglide is mine. Sleek, fast, and probably not covered by warranty. I take it for a celebratory lap around the pod and call it a day. Tomorrow: Lifepod 3.

End of Day Reflections

The sun sinks below the horizon, painting the shallows gold and the deeper water black. My vitals are stable, the pod is repaired, and I’ve managed not to die — all major wins in my book. The ocean hums quietly around me, equal parts beautiful and unnerving. Somewhere out there, Lifepod 3 is waiting. Hopefully with snacks.

Watch the Chaos

🎥 Subnautica Survival – Day 1
See the full adventure — from surprise Peeper roommate to Seaglide success — on YouTube:

Continue the Journey

Day 1 (You Are Here) |
Day 2 – The Voyage to Lifepod 3 (Coming Soon)

Isolation Protocol – Log 5: The Joes Know

Isolation Protocol – Log 5: The Joes Know

Difficulty: Survivor Mode (Permadeath Rule in Effect)

“I was ready for the Alien. I wasn’t ready for a bunch of plastic-faced androids with the bedside manner of a toaster.”

Starting where I left off, I spotted a Working Joe in the distance. Their glowing eyes cut through the sterile white corridors, and the way they moved — steady, unhurried — felt more unsettling than if they’d been running. With a little help from my motion tracker, I eventually found a computer up a set of stairs that looked like it might let me contact the Torrens. Unfortunately, Apollo essentially told me, “NOPE.” Back to square one.

Not wanting to deal with the Joe directly, I ducked into a vent. The metal clanged beneath my hands as I crawled through the stale air, only to find myself right back where I started. Brilliant navigation, 10/10.

Sneaking Past the Plastic Brigade

My second attempt was a little more productive. Using the tracker’s handy objective marker, I pushed forward, only to find two Joes patrolling opposite sides of the room. Their footsteps echoed across the floor like someone tapping on the inside of a coffin. Staying crouched and moving like my life depended on it (because it did), I managed to slip past them.

Along the way, I picked up the blueprint for EMP v1.1. Not sure how effective it is against the Joes, but it went into my collection of “items I’ll probably forget exist when I need them most.”

Soon after, I stumbled on a save point. Though I’m not religious, I thanked some higher power for that little glowing box of mercy. One save later, and I was thrown into three hacking games in quick succession — tense but surprisingly fun, especially with the eerie hum of machinery pressing in around me.

Contact with Samuels

At long last, I made contact with someone from the Torrens: Samuels. I could have hugged him through the screen. He was with Taylor, who looked in rough shape and needed medical help. Samuels couldn’t leave her side, but he promised to send transport for me. All I had to do was make it back to them.

Which, naturally, was when the alarm went off. The lights strobed red, the siren wailed like a dying animal, and every Joe in the area decided it was time to reenact Terminator.

Panic, Chaos, and Dripping Vents

This is where stealth went straight out the window. I’d like to say I handled it like Snake in a cardboard box. Dear reader: I did not. Instead, I panicked, sprinted, hid badly, and almost ended the entire run then and there.

Rather than just tell you about it, here’s the video in full:

Yes, I could have used the EMPs. No, I didn’t — because I forgot I had them in the chaos. And the revolver? Pretty sure it’s about as effective as shouting at the Joes, given what I’ve seen. Meanwhile, the Alien was making its presence known again, dripping from the vents like the world’s worst plumbing problem.

I even had a staring contest with one of the Joes. Spoiler: they can, in fact, see me. And if they can find me in lockers, what chance do I have against the Xenomorph?

Somehow, against all odds, I survived the chase and stumbled into the SciMed Tower. Samuels and Taylor are waiting… if I can actually reach them next time.

Continue the Journey:

Log 4 |
Log 6 Coming Soon

Seven Days to Survive – Day 3: Honey, Zombies, and Home Improvements

Difficulty: Default Survival
Optional Rules: Permadeath, one horde night per week
“If you ever find yourself cornered by two zombies in a stranger’s living room, just remember: honey is nature’s antibiotic. Who knew bee juice would keep me alive?”

The Fetch Quest of Doom

The morning began with me jogging toward the latest house that Trader Rekt wanted looted for supplies. From the outside, it looked quiet — shutters drawn, roof sagging slightly, just another abandoned suburban home. But this is 7 Days to Die, so I knew the interior would be less “suburban charm” and more “screaming corpses.”

Sure enough, as soon as I hit the flag at the back of the property and stepped inside, the soundscape turned into a zombie alarm clock. Two of them barreled toward me, cutting off my escape. I managed to fight my way out, but not without a parting gift: infection. Perfect.

After clearing the stragglers and pocketing the supplies, I searched my pack for antibiotics. Nothing. A return trip to Papaw Residence confirmed the same — unless you count decorative piles of junk and a near-useless jar of murky water. But buried in a chest was salvation: honey. Exactly the right cure for my low-level infection. Bee magic saves the day.

Medical Centre Run

I staggered back to Rekt’s, handed over the supplies, and chose skill books as my reward. Then I spent some coin on more honey, because clearly zombies see me as a chew toy. Another fetch quest? Why not. This one sent me toward what looked like a pop-up medical centre — white tarps, overturned stretchers, and the distinct impression that the last patients didn’t leave voluntarily.

The zombies inside were fewer and slower, which suited my still-throbbing wounds. Looting the shelves, I stumbled on something that felt like Christmas morning: a cooking grill. Finally, the days of choking down charred snake meat are behind me. Now I can prepare food that doesn’t taste like it came out of a campfire accident.

I cleared the building, snagged the supplies, and returned to Rekt. My reward? Charred meat. Honestly, I think the man is trolling me. “Here’s some food, survivor.” Yes, Rekt, I literally just looted the thing that makes your reward obsolete. Thanks for nothing, champ.

Dew Collector Dreams

Back at Papaw, I started eyeing my supplies. Between yesterday’s scavenging and today’s haul, I realised I was close to crafting a Dew Collector. After a bit more rummaging and resource-gathering, the parts came together. I placed the contraption outside, whispered a hopeful prayer to the condensation gods, and waited.

After five minutes of staring at a metal bucket with mesh, I admitted that Dew Collectors are not exciting to watch in real time. With thirst still an issue, I decided to channel my boredom into base-building. The first layer of the horde base is now fully cobblestone. The second layer is patchwork, half cobble, half wood. The third layer? Still dreams and dust. At least I can say progress is being made, even if it looks more like a construction site than a fortress.

Thirst, the Silent Killer

The Dew Collector is great in theory, but water production is glacial. By mid-afternoon I was dehydrated again — stumbling around with blurry vision like I’d been on a pub crawl with the undead. Tomorrow, water is priority number one. Either the trader sells me a stash, or I’m boiling every murky puddle I find.

Still, the looming problem isn’t just thirst. It’s the horde night clock. Day 4 is practically here, and my base is still an empty shell. If I don’t switch gears soon, the zombies will be less “contained threat” and more “unwanted guests knocking down my half-finished walls.” Tomorrow, the hammer and cobblestone get priority — fetch quests can wait.

Continue the Journey

Day 2 | Day 3 (You Are Here) | Day 4 (Coming Soon)

Isolation Protocol – Log 4: The Joes Aren’t Alright

Rule Set: Three Strikes (Xenomorph only)
Location: Seegson Communications
“I’ve seen enough sci-fi to know that when the friendly android offers you a seat, you probably shouldn’t sit down.”

Back Upstairs, Back in Trouble

After possibly releasing the galaxy’s worst houseguest, I have no choice but to keep moving toward Seegson Communications. The other survivors? They can fend for themselves—if they’re still breathing.

I creep upstairs just in time to hear the Xenomorph deal with the group who wanted me dead. That’s… justice? Karma? Either way, I don’t plan on joining the casualty list. I get a quick glimpse of the creature before ducking behind a box. No thanks, not burning Strike One yet.

Moments later, I slip into the elevator, tuner in hand, praying it doesn’t decide to test its claws on the doors.

Welcome to Seegson Communications

The elevator opens, and who’s waiting? A Working Joe android. I can tell the designers blew the budget on “creepy plastic skin” and “unsettling stare mode.” Still, the first one politely offers me a seat. I decline. I’ve already got chairs at home.

Exploring further, I try to explain I need to contact the Torrens. The Joes, in their usual customer-service-death-mask tone, tell me that Communications is off-limits. Naturally, this means I’m going to have to sneak in.

Tracker, Toys, and Trust Issues

In the middle of poking around, I find something glorious: the motion tracker. Not only does it point toward objectives, but it immediately informs me that something is behind me. Cue panic—until I realise it’s just another Joe, calmly asking if everything is alright. (No, everything is not alright, pal.)

I also stumble on a blueprint for a noisemaker. Given how much stomping and hissing I’ve heard lately, this feels like crafting salvation.

But then I see it: Joes can’t be trusted. A human survivor argues with one, pulls a gun, fires—does nothing. The Joe responds by snapping him in half like a breadstick. Great. Now I know they’re not just weird, they’re actively homicidal. Thanks, random gun guy. You doomed us all.

Shut Down the Cameras

My objective: disable the surveillance cameras so I can sneak through. Problem: I have no idea where I’m going. Solution: follow the magic beeping rectangle.

The tracker points me toward the controls, while also telling me there are two Joes nearby. Excellent—nothing like disabling security while feeling like the least secure person alive.

I find the panel, turn off the cameras, and pocket a survivor’s ID tag because looting under pressure is apparently my thing. Then I wait. And wait. And wait for the world’s slowest elevator. I swear it was coming from the far side of the station.

Hope on the Airwaves

At last, I reach Communications. And then I hear it: the voice of the Torrens, cutting through the static. Actual hope, actual contact, actual chance of escape. For a moment, Sevastopol doesn’t feel like a tomb—it feels like a finish line I might actually reach.

Of course, the Joes are still wandering the halls, the Xenomorph is still on the loose, and the whole station feels one breath away from falling apart. But right now? I’ve got a signal. And that’s enough to keep going.

Log 4 Pro Tips

  • Never assume the Joes are harmless. They’re not.
  • Motion tracker = survival MVP. Treasure it.
  • Don’t trust other survivors with guns—they’ll get you all killed.
  • If an elevator takes too long, assume it’s mocking you.
Continue the journey:
Log 3 |
Log 4 (You Are Here) |
Log 5

Seven Days to Survive – Day 2: Chickens, Bandages, and Pipe Bomb Decisions

Difficulty: Chill Solo
Optional Features: XP set to 150%

“The chicken wasn’t faster than me — it was simply playing 4D chess while I was stuck with a stone axe.”

Adjustments and Priorities

Loading back in, I realised I’d left my XP multiplier at default. Rookie mistake. Bumped it up to 150% — because if I’m going to die to zombies, I’d at least like to die while leveling a little faster.
First order of business: a buried food stash quest. Second: the elusive dew collector. The recipe calls for 100 scrap polymers, 4 short iron pipes, 4 duct tape, and ideally a water filter. Since I don’t have the filter yet, I’ll only get murky water — but with a cooking pot in the campfire, I can still boil it into something drinkable. Not glamorous, but thirst makes you less picky.

Survivor’s Tip: Dew Collector Water

  • With Water Filter: Collects clean water directly — no cooking needed.
  • Without Water Filter: Collects murky water. Use a cooking pot on the campfire to boil it safe.
  • Murky water is better than no water — just don’t forget to boil it, unless you enjoy dysentery roleplay.

The Chicken Incident

On the way, I decide to test my hunting skills. Enter: chicken. Exit: all my dignity. The little feathered gremlin zig-zagged through the grass like a professional sprinter, forcing me to waste more arrows than I care to admit.
After some zombie interference (probably hired muscle for the chicken mafia), I finally down it. A bone knife later, I had meat for dinner and a stockpile of feathers for arrows.

Blood and Bandages

At the buried stash location, a zombie ambushed me and managed to inflict a bleed. Thank you, starting bandage — you’ve earned your retirement.
Note to self: learn how to craft more. Turns out all you need is cotton → cloth fragments → bandage. Problem solved. My feather surplus also became arrow surplus. Feeling slightly more capable, I dug up the stash and headed back to Trader Rekt.

Pipe Bombs for Later

Rekt offered me a tough choice of rewards. I went with five pipe bombs, because nothing says “Horde Night insurance” like handheld explosives.
Next stop: Papaw residence to unload my loot, then scouting a new Horde base location.

First Steps Toward Horde Night

I laid out the foundations of a 6×3 base. Not glamorous, not reinforced, but it’s a start. I’ll reveal more of its design on the big night — for now, just know it exists, it’s square-ish, and it’s mine.
With daylight fading, I tried to squeeze in a fetch quest, but after one zombie fight it was already 9pm. Jogging zombies are not on my wishlist, so I postponed.

Evening at Papaw’s

Back at Papaw’s, I cooked up my chicken, learned eggs can be eaten raw (filed under: desperate measures), and salvaged what I could.
A zombie came knocking on my door uninvited, so I introduced them to my club. Afterwards, I excitedly crafted an armor crafting kit — only to immediately discover I had no clue how to use it. Survival irony at its finest.

Looking Ahead

Day 2 ends with preparations in motion but confidence on shaky legs. I’ve got pipe bombs, a half-built base, and one less chicken in the world. Tomorrow, I’ll knock out that fetch quest early and dedicate daylight to shoring up my defenses. Horde Night is coming, and I need all the help I can get.

Continue the journey:
Day 1 | Day 2 (You Are Here) | Day 3

Isolation Protocol – Log 3: Revolvers, Rewires, and the Thing in the Vents

Difficulty: Survival Diary Rule – Three Strikes
Optional Rules: NPC kills = game over, Alien kills = limited chances

“Axel didn’t make it. Now it’s just me, a ship full of strangers who want me dead, and something in the vents that definitely isn’t paying rent.”

Humans Are Worse

With Axel gone, my only hope of reaching the Torrens lies in the communications deck. Easy enough — except the moment I step into the elevator area, another survivor decides that today is a good day to introduce me to firearms, up close and personal.

I manage to grab the gadget he dropped (which, of course, is missing a power cell), but before I can even inspect it, her mates show up, heavily armed and highly motivated. Rewiring becomes my best friend: a quick distraction lures three away, but I forgot about the fourth. He has a revolver, and apparently the aim of a cowboy.

Running seems like the best life choice, and surprisingly, they don’t chase me. Probably union rules.

Scavenger’s Delight

With my heart rate only slightly higher than a microwave on full blast, I take stock. A revolver. A keycard. And a flashbang blueprint that reminds me of my Counter-Strike 2 days, where I was just as likely to blind myself as the enemy.

I find a black box from the Nostromo and for one terrible moment think I’ll finally learn what happened to my mother — except, of course, the recordings are gone. Figures.

Lockdowns and Maintenance Jacks

The room seals tight with a full lockdown. The gadget I picked up earlier? Now powered thanks to a conveniently placed cell. My shiny new Security Access Tuner opens doors like magic, but the ship clearly didn’t get the memo: it wants me stuck.

I dig around, crack open a door with my trusty maintenance jack (still my favourite tool), and finally find the terminal to lift the lockdown.

That’s when the vents begin to whisper.

The Monster Appears

It drops down from the ceiling — long, sleek, and infinitely uninterested in human conversation. The same thing that took Axel.

I crawl under a table, holding my breath as it sniffs around. That’s when I remember: I just unlocked extra exits for myself… which also means extra exits for it. Oops.

It slips into the vent and vanishes, leaving me shaken but alive. I follow at a very safe distance and then beeline for the nearest save point, head swivelling like I’m in a budget Exorcist remake.

Game saved. Nerves fried.

Log 3 Closing Thoughts

  • Survivors are hostile and revolvers hurt.
  • Rewiring saves lives.
  • Flashbangs will probably kill me, not the Alien.
  • The Xenomorph exists, it knows I exist, and we’re now on a collision course.

Next time: I find out if my revolver is a comfort, or just six shiny excuses to die loudly.

Continue the journey:
Log 2 | Log 3 (You Are Here) | Coming Soon: Log 4

Seven Days to Survive – Day 1: Punching Trees, Evicting Corpses

Seven Days to Survive – Day 1: Punching Trees, Evicting Corpses

Difficulty: Default Survival
Optional Rules: Permadeath, one horde night per week

“I woke up in front of a caravan with a few scraps, a stone-axe dream, and a passive-aggressive note from the Duke. Welcome to 7 Days to Die.”

The Duke Hates Me, Trees Hate My Fists

Like every survival game worth its salt, the tutorial goes like this: punch nature until it gives up resources. Twigs, stones, and grass became my new currency. Before long I’d cobbled together a stone axe, wooden bow, arrows, a club, and some basic armor. The Duke’s instructions? Go see Trader Rekt. Fine. But I’m docking him points for management style.

Papaw Residence: Home Sweet Maybe

On the way, I found the Papaw Residence. Inside: zombies, a cooking pot, and — after several panicked swings and one deeply ungraceful bow shot — victory. A few quick wood frames in the doorways, some repair slapdash on the windows, and I served my first eviction notice to the undead. I dropped the land-claim block because… the tutorial said so. It’s just me out here, but sure, paperwork matters.

Administrative Hostility at Trader Rekt

Rekt handed me a shovel and told me to dig. When I stepped back outside, a zombie was loitering like security had gone on break. A couple of club taps later, the parking lot was clear and my cardio stat was emotionally damaged.

Diggy Diggy Hole (ft. Immediate Zombie)

Quest in hand, shovel in pocket, I marched out to unearth supplies. Within seconds of my first swing, the dirt complained — and so did a nearby zombie, who arrived to file a noise complaint with his teeth. One frantic scuffle later, I was back to the dwarven anthem: “I’m a dwarf, and I’m digging a hole.” Every thunk felt like ringing a dinner bell for the next groaner, but the stash popped and I grabbed the goods.

Snake on a Path

On the return leg I spotted a snake. Compared to the zombies outside Rekt’s place and the dig site, this was stress relief with scales. One arrow later, dinner. The bone knife I’d made earlier turned it into tidy cuts for the pot.

Night by the Fire

Back at Papaw, I set up a campfire, boiled every drop of murky water I’d hoarded, cooked snake meat, and tossed a couple of potatoes on for good measure. The house creaked, the wind howled, and distant moans reminded me that the homeowners’ association here is very hands-on.

Day 1 Reflections

Base secured (ish). Water safe (mostly). Food cooked (definitely snake). I’ve got another buried supplies quest from Rekt lined up for tomorrow and the horde clock has quietly started ticking. One day survived. Seven? We’ll see.

Day 1 Pro Tips (7 Days to Die Edition)

  • Gather early, gather often: Grass, stones, and wood fuel your first tools and defenses.
  • Craft the basics fast: Stone axe, wooden club, wooden bow + arrows, and primitive armor.
  • Secure a roof: A fixer-upper beats the outdoors. Frame and patch doors/windows immediately.
  • Cooking pot = jackpot: Boil water safely and expand your recipe list.
  • Bone knife bonus: Butchering with it yields more meat, hides, and resources.
  • Expect company when digging: Shovels are loud. Fight, reset, keep scanning 360°.
  • Trader quests pay: Early tools, food, meds, and dukes — stack them for momentum.
  • Night jobs: Boil water, cook, sort loot, plan upgrades. Don’t waste the dark.
Continue the journey:
Day 1 (You Are Here) |
Day 2

← Back to Seven Days to Survive Hub

Blog at WordPress.com.

Up ↑