Unprepared: An Interloper Survival Diary in The Long Dark Log #3 – Day 1

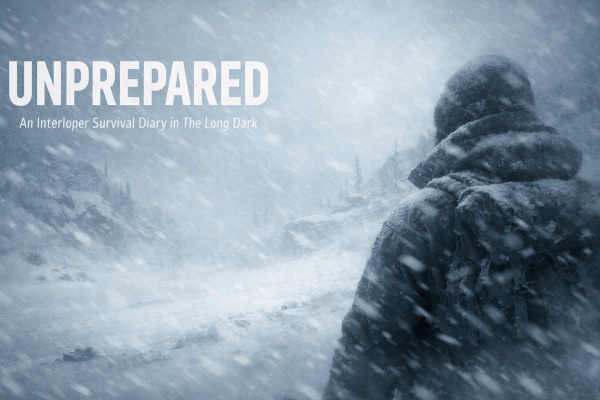
Unprepared Log 3 – Day 1: Close Enough to Matter

Difficulty: Interloper
Survivor: Astrid

I decided to mix things up and go as Astrid. The game thought the same thing and sent me to Desolation Point.

Already, this felt like a better start.

I’ve been here a few times on easier difficulties. Not confident — just familiar enough to believe I had a chance. Compared to some Interloper spawns, this felt almost reasonable.

I headed straight for the lighthouse. Closest structure. It wasn’t warm enough to keep me comfortable, but it was shelter, and at this point that was enough.

I found nothing useful inside, so I moved on.

Same Bridge, Same Problem

I considered the church, but I rated my chances higher at the Whale Processing Unit.

Then I saw the bridge.

And, of course, there was a moose on it.

I’m convinced that moose lives there. Every time I want to cross, it’s waiting. Not aggressive. Just present. Like it knows.

I rerouted to the Riken instead. It felt like a smart move right up until I stepped inside and realised I couldn’t see a thing.

No light. No fire. No patience.

I backed out and committed to the Whale Processing Unit.

0

A Small Win

I checked the trailers first. Barely warm, but warm enough to slow the temperature drop.

I searched for cloth. Nothing. Not a single scrap. Which meant no makeshift hat and an exposed head for the foreseeable future.

I stepped back outside and immediately walked into a blizzard.

Perfect timing.

The Whale Processing Unit was right there, so I made a run for it — and finally caught a break.

Matches.

Twelve of them. Actual progress. I got a fire going, made water, pulled torches, and kept that fire alive as long as I could.

I found a nearby safe. Some food. Some cash. Nothing else.

Still, for Interloper, this felt like momentum.

The Riken Mistake

Then the worst thing happened.

I got itchy feet.

I knew there was a forge on the Riken. I stood there watching water boil, convincing myself it was worth the risk.

It wasn’t.

The Riken had nothing useful. No tools. No help. Just a note and the key for a memento cache.

Then I made the mistake that quietly followed me for the rest of the run.

I slept for a couple of hours and forgot that sleeping automatically extinguishes a torch.

When I woke up, it was dark — and the only way to get moving again was to burn a match to relight it.

One small lapse. One less match. I moved on without realising how much that would matter later.

Losing the Thread

I headed back toward the Whale Processing Unit to look for the memento cache.

Something got angry out on the ice.

I never saw it, but my money was on a moose. I’ve heard them casually wandering around in blizzards before. They’re built differently.

I searched for the cache but couldn’t pinpoint it. I knew the area, just not well enough.

Rather than waste daylight, I moved on.

I eventually reached another trailer and found a fire barrel. I got it going and checked inside.

Nothing useful. There was a bed.

I ignored it.

Scruffy’s Cave

I wanted the Abandoned Mine. Surely that would pay out.

I grabbed sticks, fed the fire, took a few torches, and set off.

Along the way I picked up three wolves. As long as the torches stayed lit, they kept their distance.

I reached a cave and went inside.

The plan was simple: pick a wall, follow it, and let the cave lead me somewhere useful.

I found a deer carcass. Meat on the ground. If I could get a fire going, this run might actually stabilise.

Then the music changed.

I wasn’t alone.

I’d walked straight into Scruffy’s cave.

I still had a torch, but I was already paying for the mistake I’d made earlier on the Riken.

That wasted match meant less margin, less flexibility, and no room for hesitation.

Scruffy didn’t hesitate. He ignored the flame, charged straight through it, and ended the run.

Time survived: 17 hours.

My longest run so far.

Not ended by one bad decision — but by a small one made hours earlier.

1

Video Log

Continue the journey:
Unprepared Log 2 – Day 1 |
Unprepared Log 4 – Day 1

Survivor’s Log: The Outlast Trials – Prime Asset Roulette (Rule Update)

The Outlast Trials – Prime Asset Roulette (Rule Update)

This is a quick update for The Outlast Trials series.

Why I’m Changing the Format

After completing several trials, I realised I was falling into a pattern:
choosing what felt manageable, avoiding what didn’t, and slowly turning the Trials into something predictable.

That’s not really what this game is supposed to feel like.
And it’s definitely not what Murkoff would allow.

Prime Asset Roulette

Going forward, I’m introducing a simple twist:
I’m no longer choosing which Prime Asset I face next.

Instead, I get an external pick (because naturally I’m outsourcing my survival decisions),
and I choose my next trial based on that assignment.

  • I don’t choose the Prime Asset.
  • I choose the trial based on whoever I’m assigned.
  • If the assignment isn’t available or isn’t unlocked, I reroll.

Optimisation is no longer the point.
Unpredictability is.

Is Anyone Else Doing This?

I had a quick look around to see if anyone else was running this exact format.

People are definitely doing roulette-style runs in The Outlast Trials
randomised Trial Maker setups, and other “roulette” ideas —
but I couldn’t find anyone doing this specific version:
Prime Asset Roulette, where the Prime Asset is assigned first and the trial choice is made based on that.

So, either this is genuinely uncommon… or I’m just bad at searching.
Both are possible.

Where This Fits

This series sits under Survivor’s Dread, and the whole point is documenting survival under pressure.
Prime Asset Roulette keeps that pressure intact, even when I’d rather not deal with it.

In other words: Murkoff picks who hunts me next.
I just try to leave with my organs still inside my body.

The Outlast Trials hub:


Outlast Trials Main Hub

Surviving, not suffering.

Unprepared: An Interloper Survival Diary in The Long Dark Log #2 – Day 1

Unprepared – Log 2: Day 1 (Hushed River Valley)

Difficulty: Interloper

Run Time: 15 hours

Series:

Unprepared – An Interloper Survival Diary


“Same area. Same spawn. Slightly more knowledge. Same outcome.”

The game decided to keep things familiar.
Exact same area. Exact same spawn.
Normally that would feel cruel, but this time I wasn’t completely blind.

I’d spent time looking at maps for every possible Interloper spawn.
This was one of the few I was actually hoping for.
Not because it’s forgiving — it isn’t — but because I knew where I wanted to go first.

The Signal Fire Plan

The goal was simple: reach the mysterious signal fire.
It could spawn in one of two locations.
I picked one and committed.

Naturally, a scrub bush blocked the route.

I didn’t see another way around, so I fell back on a familiar Interloper technique:
mountain goating.
It took a few attempts, but eventually I made it over.

The reward felt significant:

  • Food
  • Shelter
  • A Mackinaw jacket

For a brief moment, it felt like progress.

The Exit Problem

The problem wasn’t getting there.
The problem was getting back.

I didn’t want to goat straight down the cliff.
I tried to goat back over the scrub bush.
That wasn’t an option either.

With daylight fading, I decided to wait it out and reassess in the morning.
That decision immediately started going wrong.

The shelter kept me warm — briefly.
Then the temperature dropped.
Then the sky lit up with an aurora.

Eventually, I accepted reality and did the thing I didn’t want to do:
I mountain goated down the cliff.

I don’t know how I survived the descent.
I just know that I did.

The Rope I Couldn’t Climb

My next destination required a rope climb.
I found the rope.
I walked up to it.
And then the game reminded me I had a sprained wrist.

You can’t climb ropes with a sprain.

With limited options, I tore up a piece of clothing,
crafted a bandage, healed the wrist, and climbed anyway.

I fully expected to fall.
Somehow, I didn’t.

Frostbite, Twice

By this point my condition was dropping fast.
I was exhausted.
I had no way to start a fire.
I needed water.

What I got instead was frostbite.

Then I got it again.

There was no recovery path left.
Interloper had finished explaining the lesson.

The End of the Run

Rather than let the cold take me slowly,
I found the nearest cliff and walked off it.

Not graceful.
But deliberate.

Survived: 15 hours
Result: More information for next time

Field Footage

This footage covers the run from spawn to exit,
including the signal fire gamble and the decisions that followed.

Day 1 Takeaways

  • Knowing the map helps, but it doesn’t guarantee exits.
  • Mountain goating solves problems and creates new ones.
  • Sprains can completely block progress.
  • Auroras turn waiting into a liability.
  • Frostbite twice is the game being very clear.

I didn’t survive the day.
But I survived long enough to learn something useful.

Continue the journey:
Unprepared – Log 1 |
Unprepared – Log 3

Unprepared: An Interloper Survival Diary in The Long Dark Log #1 – Day 1


Unprepared – Log 1: Day 1 (Hushed River Valley)

Difficulty: Interloper

Run Time: 4 hours

Series:

Unprepared – An Interloper Survival Diary

“Pro Interloper players call this a ‘great spawn’. I lasted four hours.”

I spawn in Hushed River Valley, right next to a waterfall, and immediately get the sense that this region exists
to test whether you actually deserve to keep playing.

I’ve been here before. I know there’s a moose satchel on this map.
I also know that familiarity doesn’t equal preparedness, and Interloper is very keen to prove that point.

Waterfall Spawn & Immediate Delusion

Part of me is convinced there’s a survival bow nearby. Another part of me is sure I can get past a scrub bush I spotted.
Neither belief survives contact with reality.

I stare at the scrub bush for longer than I care to admit, have no idea how to pass it,
and eventually give up. Confidence evaporates quickly out here.

Knowledge That Helps Nobody

I know Mountain Town is nearby. I know there’s a man-made snow shelter somewhere in this region.
None of this helps when you’re cold, under-equipped, and still arguing with terrain.

Ptarmigans & The Great Rock Tragedy

I come across some ptarmigans and decide to hunt.

  • Stun one
  • Eventually start a fire
  • Cook something warm

I throw my rock and miss by an impressive margin.
Worse, I’ve now lost my only stone.

Hunting attempt: failed.
Inventory: actively worse.

The Torch Plan (That Never Happens)

I collect sticks with purpose. I have a plan:

  • Start a fire
  • Pull torches
  • Use fire to keep wolves honest

The problem is simple.

I have no way to start a fire. No matches. No striker.
I forgot the key Interloper detail where you spawn with absolutely nothing.

Smoke, Wolves, and Accidental Skill

I spot smoke drifting from the direction of the moose satchel location.
It feels less like a hint and more like mockery.

A wolf appears. I panic. I improvise. I end up mountain goating away from it.
Somehow, it works.

I survive that encounter, which honestly feels like a mistake the game will correct later.

Field Footage

This footage shows the full run, ending exactly where it ended for me.
First ever Interloper attempt. No practice runs. No warm-up.

The log ends with confirmation of what this was:
my first attempt on Interloper, lasting four hours in Hushed River Valley.

Darkness, Blizzard, Wolf

Night rolls in. A blizzard follows.
I make one last push to find shelter or an exit.

I don’t find either.

A wolf does.

Four hours in, the run ends.

Day 1 Takeaways

  • Four hours in Hushed River Valley is not nothing.
  • One rock is not a plan.
  • A fire plan without ignition is fiction.
  • Smoke in the distance can feel personal.
  • Mountain goating worked once. I will abuse that lesson.

I didn’t survive the day.
But I survived long enough to understand the problem.

Next attempt, I come in less blind.

Continue the journey:

Unprepared – Series Hub
|
Unprepared – Log 2

The Outlast Trials – Log 7: Feed the Children


Location: Orphanage
Trial: Feed the Children
Difficulty: Standard
Grade: A


Back to The Outlast Trials hub

After spending some points upgrading my X-ray rig, I decided to stick with Standard difficulty for one more trial.

I’ll be honest — this decision was influenced by having a fairly miserable time on Day 5 of my
Stalker Instinct run in The Long Dark.
Sometimes you don’t need to make things harder.

This time, the trial was Feed the Children.

Going purely by the name, this one sounded… nice.

It was not.

I was tasked with feeding the children soup.
Not just any soup — one made with a corpse, and finished off with a generous amount of bleach.

My upgraded X-ray rig helped a lot here.
I’d upgraded it enough that it recharged my night vision and provided objective information.

What it didn’t help with was the ex-pop.

Every time I spotted a bottle, an ex-pop seemed to appear out of nowhere.
They got hold of me more than once, and did a fair amount of damage.

Thankfully, Hide and Heal pulled its weight.
The X-ray rig did too.
I’ll need to experiment with the other rigs eventually, but this one definitely earned its keep.

I’d like to say things got easier after collecting two bottles.

They did not.

I somehow managed to walk into the same ex-pop at least twice —
both times in the exact same area.

Once I finally fed the children, I had a feeling Mother Gooseberry was going to make an appearance.

She did.

I managed to sneak past her once again, and make my way out.

After everything that happened, I was genuinely surprised to walk away with an A.

I was fully expecting a B at best.

Watch the Trial

Surviving, not suffering.

The Outlast Trials – Log 6: Cleanse the Orphans


Location: Orphanage
Trial: Cleanse the Orphans
Difficulty: Standard
Grade: A+


Back to The Outlast Trials hub

I’m getting a bit fed up of the police station.

I know I still have a couple of trials to do there, but I’m ready for a change —
and, if I’m honest, I’m ready for a break from Coyle.
I want to meet some of the other Prime Assets.

So I head to the Orphanage and decide to properly meet
Mother Gooseberry.
I encountered her during the tutorial, but this would be my first real trial with her.

I only have one option available: Cleanse the Orphans.
I’m not entirely sure what that means, but I’m about to find out.

My first task is to enter the Orphanage.
Easy enough.

Mother Gooseberry is there to welcome me.
Helpful of her to make sure I know she’s around.

Next, I need to broadcast the religious station,
followed by tuning radio receivers in the dorms.
I check the map more than once here — mostly to make sure I know where I actually am.

I even get a brief appearance from Mother Gooseberry during this section,
but I’m hiding in the dark and she doesn’t see me.

After that, I’m tasked with swapping film reels.
I struggle with this for a bit, mostly because I have no idea where they are.

Eventually, the game takes pity on me and points me in the right direction.

Next up is stopping the blasphemers in the church.
That part is simple enough — just smash the jukebox.

I’m a little concerned about how much noise I made,
so I hide.
Probably unnecessary, as the next thing I know,
a man appears on a cross and gives me my next objectives.

I’m told to power the generator and find the saw handle keys.

This time, I make sure to check the TVs before heading out —
mostly because there are no Big Grunts chasing me around this time.

I struggle a bit with the generator,
but during that process I discover a random button.
The game tells me that if I find a second button,
I’ll unlock a secret room.

It takes a few attempts thanks to being chased and juggling the generator,
but I eventually find both buttons and access the secret room.

Once again, the game helps me by showing possible key locations.
I head back to the chapel and prepare to
Serve the Body of Christ.

I thought electrocuting the Snitch was bad.
This felt worse.
Probably even more so if I were religious.

Once that’s done, it’s time to head for the shuttle —
but not before Mother Gooseberry makes another appearance.

I throw an item at her.
No idea if it connected,
because I immediately ran out of the chapel and shut the door behind me.

I eventually make my way back to the shuttle,
getting one final look at Mother Gooseberry before leaving.

Grade: A+

My first one.

More importantly, this trial taught me something:
I think it’s time to increase the difficulty for the next run.

Video

Surviving, not suffering.

The Outlast Trials – Log 5: Release the Prisoners


Difficulty: Standard
Trial: Release the Prisoners
Grade: B+


Back to The Outlast Trials hub

I’m still sticking with Standard difficulty.
This time the trial was Release the Prisoners.

The first problem was finding the key to the security room.
It reached the point where the game had to tell me exactly where it was —
all I had to do was bash a door down to get it.

The second problem was finding the security room itself.
I got lost.
Completely.

That meant dealing with various ex-pop along the way,
including the fire-wielding lunatic from the previous trial,
and someone who claimed they could see me in the dark.

Thankfully, not in my hiding spot.

No trial in the police station would be complete without Coyle,
but before I got to see him again,
an ex-pop decided to give me an extreme dose of hallucinogenics.

I genuinely thought I was going to need to find an antidote,
but thankfully it wore off on its own.

Eventually, I found a sign — an actual sign — with an arrow pointing to the security room.
From there, I managed to free the prisoners.

Then it was time to leave.

Naturally, I was given another dose of hallucinogenics.
Entirely my fault.
I could see the box was trapped.
I chose to ignore it.

I somehow survived that.
I nearly didn’t survive a third dose,
until I remembered I still had a bandage and used it to heal.

I have no idea how I found the exit area.
I just did.

Of course, Coyle was waiting for me.
I called the shuttle and got zapped by him yet again.
One more hit and I would have been done.

While waiting for the shuttle, I ran him around a parked car and hoped for the best.

In the end, I finished with a B+.

I could have done better.
But it could have been a whole lot worse.

Video

The Outlast Trials – Trial Log #4: Sabotage the Lockdown

Difficulty: Standard
Trial: Sabotage the Lockdown
Prime Asset: Coyle
Grade: A-


Back to The Outlast Trials hub

I’m sticking with Standard difficulty for another trial.
No need to press my luck yet.

This time it’s Sabotage the Lockdown.
The task sounds simple enough: reach the exit.

What the briefing neglected to mention is that I’d be carrying a gas canister the entire way.
Or that Coyle would be on my tail for the whole trial.

I didn’t even make it two rooms in before Coyle spotted me.
So I did the sensible thing.
I ran straight back to the start and hid.

Once I was sure he was gone, I went back for the canister.
Naturally, an ex-pop decided to appear at that exact moment,
so I returned to my hiding spot again.

Progress was slow, but methodical.

At one point, I was convinced I’d have to throw something at Coyle and make a break for it.
All he had to do was turn left.

He didn’t.

I’m choosing to believe the sunglasses aren’t helping him.

I eventually reached the generator, but even then, the slightest noise had me diving into corners to hide.
Once it was powered up, the exit was right there.

Somehow, after all that, I finished with an A-.
I was close to an A+, but I’ll take it.

Video

This run continues to reinforce the same lesson:
slow progress beats reckless confidence.

Related series:

Outlast – Apex Predator Run

Surviving, not suffering.

Surviving, Not Suffering

If you had a freeway billboard, what would it say?

If I had a freeway billboard…

SURVIVING, NOT SUFFERING.
(Keep driving.)

That’s the idea behind Survivor Incognito.

I play survival games on whatever settings make sense at the time, make mistakes, adapt, and try to keep it fun rather than punishing.

No bravado. No misery for the sake of it. Just seeing how long I last and enjoying the ride.

The Outlast Trials – Trial Log #3: Cancel the Autopsy

This Trial was my first run on Standard difficulty.
I completed it.
How cleanly is debatable.

Viewer discretion advised. The Outlast Trials is intended for mature audiences and contains graphic violence, disturbing imagery, and psychological horror.

Full Trial recording:


Cancel the Autopsy

The first key was straightforward.
No issues there.

The problems started after picking up the second key.
I thought I’d avoided one of the larger enemies.
I had not.

He spotted me and gave chase.
I ran for the gymnasium, assuming I’d shaken him.
I hadn’t.
He followed me in.


Losing the Thread

After finally finding somewhere safe, I realised I’d made a simple mistake:
I hadn’t checked the clue for the third key.

That meant backtracking.
More movement.
More risk.

Once I did find the clue, the third key turned up in the first place I checked.
Naturally.


The Exit

When it came time to leave, Coyle decided to get involved.
He chased me most of the way to the exit.

I called the subway and tried to hide in a locker.
Coyle immediately pulled me out and shocked me for the effort.

As soon as I had the chance, I ran.


Afterwards

Despite everything — the chase, the backtracking, the locker incident — I somehow finished the Trial with an A rating.
I’m still not entirely sure how.

What I am sure of is that it was a lot of fun.

Standard difficulty already feels like the right place to be.
There’s pressure, but there’s still room for things to go wrong without the run collapsing entirely.


Series Notes

This was a single attempt, recorded as it happened.
There were no retries for recording purposes.

Mistakes stayed in.
Chases stayed in.
The rating was whatever the game decided it was.


Continue the Series

Blog at WordPress.com.

Up ↑