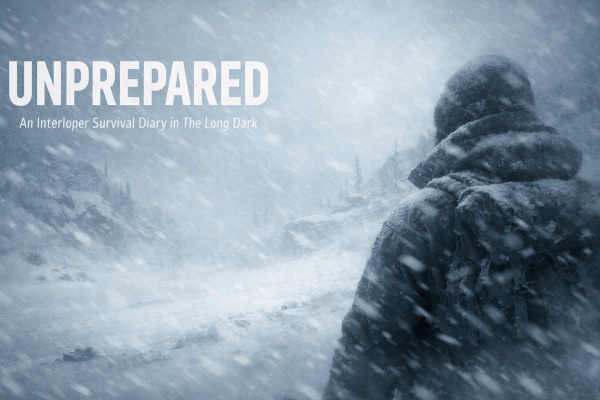
🩸Derailed & Doomed: A Choo Choo Charles Survival Diary Final Log: End of the Line

🩸 Derailed & Doomed — Final Log: End of the Line

“One bridge, three eggs, and one very angry locomotive. Let’s finish this.”

Difficulty: Standard

Permadeath Rule: Three Strikes — now down to two.

Preparation and Farewell

I take what’s probably going to be my last look at the map. Theodore’s quest marker catches my eye, but in the distance I hear Charles’ unmistakable whistle. He’s ready—and so am I.

I set my sights on the temple. The train, my steel companion through every panic-fueled moment on this island, begins to roll. It’s carried me this far—it deserves one last fight. Before I reach my destination, I decide to make things more interesting: that extra strike I earned earlier? Gone. I’m back down to two strikes for the final confrontation. If this is the end, it’ll be fair.

The Final Egg

As I arrive at the temple, I spot a lone cultist and do my best to avoid them. I almost succeed… until a bullet catches me in the back right as I start the ritual. The final egg slides into the altar, and Warren Charles III himself appears, demanding I stop. I don’t. The altar lights flare, the air shakes—and then the nightmare begins.

Charles re-emerges, but he’s no longer the creature that’s stalked me for days. He’s transformed—hulking, burning, furious. Hell Charles. Warren doesn’t even get a full sentence out before he’s swatted into oblivion. I sprint for my train. It’s time to end this.

First Attempt: Hell on Rails

I open with the Bug Spray—fire has always been my friend—but it’s not doing enough damage. I swap between BOB and The Boomer, trying to keep the pressure on. It’s not enough. Hell Charles hits harder than anything I’ve faced, tearing through my armor and chewing through every scrap I have. I use my last piece of scrap for repairs, but it’s hopeless. He catches me, sending me down to my final strike. One life left. One last chance.

Second Attempt: Fire and Iron

This is it—the final fight between me and Hell Charles. One of us is walking away from this bridge, and it’s not going to be him.

Absolutely — here’s your final full post, with the video placeholder inserted, the “many more eggs” twist added for your ending, and everything formatted perfectly for your WordPress setup and Derailed & Doomed series style.

🩸 Derailed & Doomed — Final Log: End of the Line

“One bridge, three eggs, and one very angry locomotive. Let’s finish this.”

Difficulty: Standard

Permadeath Rule: Three Strikes — now down to two.

Preparation and Farewell

I take what’s probably going to be my last look at the map. Theodore’s quest marker catches my eye, but in the distance I hear Charles’ unmistakable whistle. He’s ready—and so am I.

I set my sights on the temple. The train, my steel companion through every panic-fueled moment on this island, begins to roll. It’s carried me this far—it deserves one last fight. Before I reach my destination, I decide to make things more interesting: that extra strike I earned earlier? Gone. I’m back down to two strikes for the final confrontation. If this is the end, it’ll be fair.

The Final Egg

As I arrive at the temple, I spot a lone cultist and do my best to avoid them. I almost succeed… until a bullet catches me in the back right as I start the ritual. The final egg slides into the altar, and Warren Charles III himself appears, demanding I stop. I don’t. The altar lights flare, the air shakes—and then the nightmare begins.

Charles re-emerges, but he’s no longer the creature that’s stalked me for days. He’s transformed—hulking, burning, furious. Hell Charles. Warren doesn’t even get a full sentence out before he’s swatted into oblivion. I sprint for my train. It’s time to end this.

First Attempt: Hell on Rails

I open with the Bug Spray—fire has always been my friend—but it’s not doing enough damage. I swap between BOB and The Boomer, trying to keep the pressure on. It’s not enough. Hell Charles hits harder than anything I’ve faced, tearing through my armor and chewing through every scrap I have. I use my last piece of scrap for repairs, but it’s hopeless. He catches me, sending me down to my final strike. One life left. One last chance.

Second Attempt: Fire and Iron

This is it—the final fight between me and Hell Charles. One of us is walking away from this bridge, and it’s not going to be him.

This time, I play smarter. I remember how well the Bug Spray kept him at bay during egg hunts, so I double down on it. Flames roar, metal screeches, and I manage to hold him off long enough to chip away at his health. He tries teleporting around the tracks, but I’m ready for his tricks now.

His health drops bit by bit. I’m out of scrap again, the train’s on its last legs, but Hell Charles is weaker than ever. I watch his health bar disappear—only for him to keep coming. Then, the bridge looms ahead.

The charges detonate. The rails give way. Hell Charles plummets into the abyss. I don’t know how much health I had left, and honestly, I don’t care. The island is quiet for the first time in days. I exhale as the credits roll.

After the Fire

Victory tastes like engine smoke and relief. The nightmare’s over—or so I thought. Because as the screen fades, the camera pans to another cave… and far more than just three eggs. The ground trembles. Something deep beneath the island is stirring. I might’ve won the battle, but this world’s story is far from over.

Continue the Journey

Log 6 | Final Log: You Are Here

🩸 Derailed & Doomed: A Choo Choo Charles Survival Diary Log 6: Three Eggs and a Funeral (Probably)

“Two eggs to go. One murderous locomotive. And a sermon that really didn’t age well.”


🎥 Watch Log 6: Three Eggs and a Funeral (Probably)

Faith, Paint, and Poorly Sighted Cultists

With two eggs remaining, I decide I’m as ready as I’ll ever be. Time to face destiny — or at least, sprint toward it screaming.

The first target: the mine in the middle of the island. On the way, I stumble upon a church, complete with a sermon that sounds more like a cult recruitment speech than holy scripture. I also find a can of black paint — clearly divine intervention — so I treat my train to a new coat before heading inside the mine.

The cultists here… well, let’s just say the masks are doing more harm than good. One could’ve had a clean shot on me, but apparently, I was invisible. What begins as a stealth mission quickly devolves into “grab the egg and run.” I sprint out, bullets whizzing past, praying my train hasn’t wandered off without me. Once the shooting stops, I open the map, mark my train, and plan my route to the final mine.

The Bug Spray Revelation

Two mines down, two eggs in hand, one to go — and Charles knows it. His whistle cuts through the air as I make my way toward the last mine. This time, though, I’m prepared.

I’ve learned that the bug spray isn’t just for keeping his ugly mug at bay; it deals slow, steady chip damage if used sparingly. It’s not glamorous, but it’s something. I’ll need to remember this for our inevitable final showdown.

After a short skirmish, Charles retreats. I let him go — we’ll finish this soon enough.

The Final Egg

The southern mine awaits. Inside, I get another chance to show off my lockpicking skills — not that anyone’s watching. For a brief, glorious moment, I think the place might actually be abandoned.

Then I hear the whistling.

So, back to the classic strategy: Run. Grab. Run again. I burst out of the mine clutching the last egg, a cultist hot on my heels. Fortunately for me (and unfortunately for him), I reverse my train right over him. Efficient, if a little messy.

The three eggs are mine. One final stop remains — the shrine, the signal, the point of no return. Either I end Charles… or he ends me.

Next Stop: The Final Fight

I take one last look at the map. Every track, every encounter, every scrap of metal has led to this. The next log will be the last — one way or another.

It’s time to finish this.

Continue the journey:
Previous Log (Log 5) |
Final Log

🩸 Derailed & Doomed: A Choo Choo Charles Survival Diary Log 3: TNT, Torpedoes & Terrible Timing

Platform: Steam Deck
Rule: Apex Predator (Charles must kill me three times for the run to end)

⚙️ Survival Status: 3 Strikes Total
Only Charles can take them away.
Each egg restores a lost strike — but I can’t exceed three.
When the last one’s gone, the run ends.

“If there’s a bad time to use explosives, I’ll find it.”


I start by doing a quick sweep for guards near the mine that’s supposedly holding ammo for the rocket launcher. Thankfully, no one’s around — which is rare, and suspicious. The entrance itself, however, is locked. Naturally.

My map says, “Find a way in.” Okay, fair enough. I look around and find some TNT. Perfect. If that doesn’t open a door, nothing will.

Important survival lesson: stand further back when lighting TNT. I take a chunk of damage from the blast, and I’m pretty sure Charles just got a notification that I’m being an idiot. If he missed that one, don’t worry — I detonate a second explosive down the tracks. More fire, more noise, more damage to me. Subtlety is dead, but the door isn’t. Yet somehow, the mine opens, and I grab the rockets.

Back to John Smith, who hands over The Boomer. I’m officially armed and ready to make even more bad decisions.

Lighthouse Lunacy

My next bright idea: go exploring. I notice a marker close to the island’s edge. Against every instinct I have, I run for it. Turns out it’s a lighthouse, home to a woman named Claire — who needs the breakers fixed.

There’s a shed nearby with four breakers. Easy enough. I sprint over, slot them in, and head back. Apparently, I “missed a step.” Turns out I need to turn them on, and it’s a little puzzle. Thirty seconds later, lights on, job done. Claire thanks me by saying fixing the lighthouse will help others spot us more easily. Yes, Claire. Including Charles.

I make a break for the train. The moment I mark my next stop, I hear it — that whistle. Round two is on.

Round 2: Return of the Rail Demon

Charles is far more persistent this time. I test out The Boomer and land a few solid hits. He claws, rams, and screeches like he’s auditioning for the next Doom soundtrack. Twice, I think he’s gone, and twice, he charges back in. After burning through some scrap for repairs, I finally drive him off. Victory number two to me.

Feeling cocky, I decide to visit another local — Ronny, who seems like he’s gearing up to tell me his life story. Nope. He just wants me to climb some dangerously tall buildings for a box of papers, promising maybe one scrap as a reward. I climb anyway, find a tin of paint for the train (score), but fail a jump and lose a scrap.

Technically, that did count as a “death” — but since it wasn’t at the claws or wheels of Charles himself, it doesn’t break the Apex Predator Rule. Accidental gravity-assisted injuries are free passes in this run.

After a few more attempts, I decide Ronny’s box isn’t worth the spinal injuries. My train, on the other hand, gets a stylish new coat of paint — a well-earned upgrade after surviving two Charles encounters.

Danger on the Hill

Feeling brave — or stupid, jury’s out — I go for Theodore’s supply box next. Unfortunately, the area’s crawling with Cultists. I spot one and think I’ve figured out his patrol pattern. I haven’t. The second guard ambushes me from uphill. I sprint for the train, but pause to open my map — rookie mistake. The cultist scores a hit.

As I’m running, I hear that familiar whistle again. Charles is awake, and maybe it’s a blessing in disguise that I didn’t grab that box. I dive into my train, patch up, and decide both Theodore’s mission and Ronny’s tower of death can wait.

For now, the plan is simple: find the next closest survivor, avoid blowing myself up again, and maybe, just maybe, make it to Log 4 without turning into train food.


Need a guide? Explore every stop, scrap pile, and spider sighting with the Aranearum Island Map Guide — your unofficial atlas to surviving the rails.


Continue the Journey

← Log 2: Flame, Speed, and Fetch Quests | Log 4 →

🩸 Derailed & Doomed: A Choo Choo Charles Survival Diary Log 2: Flame, Speed, and Fetch Quests

🩸 Derailed & Doomed — Log 2: Flame, Speed, and Fetch Quests

“They said ‘force Charles into a fight.’ They didn’t mention the choreography involved.”

⚙️ Survival Status: 3 Strikes Total
Only Charles can take them away.
Each egg restores a lost strike — but I can’t exceed three.
When the last one’s gone, the run ends.

The Setup — Make ‘Em Fight (And Don’t Get Toasted)

After being told I need to force Charles into a fight to the death, I set out to meet the island’s next eccentric resident — a man who clearly enjoys watching things burn. Sgt. Flint greets me in front of his flaming house, which raises more questions than I’m willing to ask.

I find a water tank above his home, twist the valve, and douse the flames. That act of charity apparently doubles as an invitation, because I soon hear the dulcet, horrifying blare of Charles’ horn in the distance. I sprint for my train, ready for chaos — but he never shows. Either I scared him off or he’s waiting for a better entrance. Flint, unbothered, rewards me with his experimental weapon: the Bug Sprayer. Which, of course, is a flamethrower.

Round One — The Firestarter

Not long after, I get my wish: Charles charges in for our first real showdown. I juggle the Bug Sprayer and machine gun — one setting him ablaze, the other perforating his ego. It’s messy, loud, and absolutely glorious. Charles retreats after taking enough damage, and for the first time since stepping onto this cursed island, I feel like I’ve actually won something.

With the immediate threat gone and my train held together by scrap and spite, I decide to take advantage of the quiet. Time to meet the locals — and, inevitably, their problems.

Islanders & Errands — The To-Do List Grows

Island socialising here is just a series of fetch quests disguised as introductions. Everyone has a task, and apparently, I’m the errand boy.

  • Theodore — far too well-dressed for a place that’s one bad day away from Mad Max. Wants a box recovered from a railcar in a nearby canyon. Bandits guard it. I politely file that under “later.”
  • Santiago — prepping to leave the island as soon as rescue arrives, but he’s left his journal at home. Add another fetch quest to the growing pile.
  • John Smith — working on a rocket launcher (finally, someone useful). Needs me to collect the rocket ammo from a nearby bunker. That immediately jumps to the top of the list.
  • Greg — appears to have misplaced his clothing and sense of urgency. Used to work for the mine owner and warns that if the eggs hatch, there’ll be three more Charles-like horrors running around. He hands me the key to the second mine. Great. Just what I needed.

So far, my to-do list looks like this:

  1. Collect rocket ammo from the bunker (top priority — rocket launcher > everything else).
  2. Retrieve Theodore’s box from the canyon railcar (expect bandits).
  3. Fetch Santiago’s journal from his house (return it before he reconsiders leaving).
  4. Investigate the second mine (Greg’s key in hand, nerves not included).

Next Stop — The Bunker

With Charles licking his wounds somewhere in the wilderness, I make my way toward the bunker where John Smith’s rocket ammo supposedly waits. The island is eerily quiet now — no horn, no tracks shaking, just the wind and my engine’s occasional complaint. Perfect time to loot everything not nailed down and add more scrap to my emergency stash.

I haven’t seen Charles again since our fight, but I know he’s out there. Watching. Waiting. Probably still smouldering a little.

Log Observations & Survival Notes

  • Scrap is life: It’s your health, armour, and upgrade material all in one. Pick up every piece you see — it’s never enough.
  • Weapon swapping works: Flamethrower to make Charles back off, machine gun for consistent hits. Alternate, repair, survive.
  • Speed upgrades are essential: The faster your train, the smaller your funeral.
  • Quiet moments lie: If you don’t hear Charles, it’s because he’s planning something.

Pro Tips (Apex Rookie Friendly)

  • Always keep scrap handy — repairs and upgrades are instant, but you’ll burn through metal faster than ammo.
  • Mark every quest on your map. It’s easy to get lost between rail spurs and regret.
  • The Bug Sprayer is for Charles only. Do not waste fuel showing off. It’s not that kind of game.
  • When Charles retreats, use that window to explore. The peace never lasts long.

Need a guide? Explore every stop, scrap pile, and spider sighting with the Aranearum Island Map Guide — your unofficial atlas to surviving the rails.


Submerged: A Subnautica Survival Diary – Log 2: The Depths of Progress

Submerged: A Subnautica Survival Diary – Log 2: The Depths of Progress

Difficulty: Survival (Steam Deck Survival)
Optional Features: Grav Trap Deployed for Science and Snacks

“Silver is rarer than common sense on this planet.”

After yesterday’s fire-fighting and frantic crafting, I started the day with a new radio message: Lifepod 17 had also crashed somewhere nearby — right next to the Seamoth Bay, apparently. But priorities are priorities, and since Lifepod 3 radioed me first, they got first rescue attempt.

Priorities, Podcasts, and PDAs

Lifepod 3 wasn’t exactly a rescue success.
I did, however, find a blueprint for a compass — the kind of thing that makes you wonder why your pod didn’t come with one pre-installed. I added it straight to the “to-craft-once-I-can-see-straight” list, along with a PDA I’ll read later when I’m not holding my breath underwater. No survivors… unless you count me, which I do, enthusiastically.

Back at my pod, I realised something important: I can’t see a damn thing once it gets dark. So I finally crafted a torch — apparently the galaxy’s most underrated invention — along with a survival knife because there’s nothing like a little sharp-edged comfort in an ocean full of unknown lifeforms.

Lifepod 17 and the Great Seamoth Discovery

Next stop: Lifepod 17.
Predictably, it was another empty seat arrangement, but I did strike technological gold — enough Seamoth fragments to unlock the blueprint. I just need a Mobile Vehicle Bay now, which sounds easy enough until you remember I’m surviving on cooked bladderfish and spite.

While exploring the wrecks, I also found the last few materials to upgrade my O₂ tank. More air equals more curiosity, and more curiosity usually equals more trouble, so that’s a win all around.

Incoming Messages and Explosive Warnings

Just as I was feeling productive, I got a new transmission — this time from the Sunbeam. They wanted a response, but my comms system is, and I quote, “irreparably damaged.” Translation: I’m talking to myself for the foreseeable future.

With no one to call and no Netflix subscription in sight, I built a Grav Trap and tossed it outside the Lifepod to watch it work. Instant sushi buffet. Fish helplessly drawn into an invisible vortex of doom. It’s oddly soothing.

Science in Motion

Full gameplay log below — forty minutes of exploration, crafting, and the occasional panic swim. Featuring Grav Trap testing, Lifepod 17 dives, and my ongoing battle with visibility and oxygen management.

Watch on YouTube

I even had enough parts for a Rebreather, further extending my underwater escapades. Everything was going fine… right up until the PDA told me the Aurora will explode in approximately two hours.
Sure. Two hours to stop a planet-sized reactor meltdown with nothing but a knife and optimism. Sounds totally achievable.

Silver, Sunbeam, and Sinking Realisations

I spent the rest of the day chasing one thing: silver. I’d convinced myself it didn’t exist anymore, that I’d mined the planet dry earlier. But after far too many dives and muttered curses, I finally found some glimmering salvation among the sandstone outcrops.

Back at the Lifepod, another message awaited — the Sunbeam again. They’ve spotted the wreckage of the Aurora and are coming to investigate. They’ll be here within the week.

So not all doom and gloom then. Just mild existential dread… and a new compass freshly crafted to help me get lost in the right direction next time.

Continue the Journey:
Log 1 |
Log 3

Submerged: A Subnautica Survival Diary – Day 1: The Peeper in the Pod

Submerged: A Subnautica Survival Diary – Day 1

Difficulty: Survival Mode (Steam Deck Edition)

Welcome to 4546B

I wake to alarms, a smoking console, and one extremely calm Peeper hovering in the middle of my lifepod like it pays rent. Fire out, situation stable, roommate secured. I catch it. I cook it. Breakfast of champions.

The PDA boots into Emergency Mode with the sort of cheerful corporate tone that suggests HR wrote it. Regardless, it’s my lifeline now, so I listen.

First Steps (and First Swims)

Before diving, I pin the essentials:

  • O₂ Tank — lungs are optional, but preferred.
  • Fins — I’d rather swim fast than panic slowly.

A few quick foraging runs later and I’ve got both crafted, plus a Repair Tool and a Scanner. The ocean is being cooperative… for the moment.

Right on cue, the radio chirps in with an update: rescue ETA 9… 9… 9… 9… 9 hours. So, roughly eleven and a half years. Excellent. I’ll, uh, keep busy.

Nightfall, Notes, and New Blueprints

Scanner built, I point it at everything that moves (and several things that don’t). The shallows hum with life — coral pulsing softly beneath me, strange silhouettes drifting just beyond visibility. It’s beautiful in a way that feels like a warning.

Darkness drops quickly, and scanning in pitch black is just guessing with extra beeps, so I pin a Torch for tomorrow.

At first light I spot Seaglide fragments. One scan later and the blueprint unlocks. New goal: build it before the day ends — because slow swimming is a lifestyle choice I refuse to adopt.

Then: a ping from Lifepod 3. Marker acquired. I’ll head there once the Seaglide is humming.

Crash Fish Chaos

While hunting materials, I discover two facts in rapid succession: Crash Fish hate visitors, and they express this by exploding in your face. Two back-to-back detonations later, my health bar looks like a bad stock chart. I limp to the lifepod, patch up, and get back to work. Controlled recklessness: unlocked.

The Hunt for Copper

Finding copper is like looking for hope in a horror movie — technically present, rarely where you expect. I comb the shallows, finally crack the right limestone outcrop, and sprint-swim home to craft Copper Wire.

Moments later, the Seaglide is mine. Sleek, fast, and probably not covered by warranty. I take it for a celebratory lap around the pod and call it a day. Tomorrow: Lifepod 3.

End of Day Reflections

The sun sinks below the horizon, painting the shallows gold and the deeper water black. My vitals are stable, the pod is repaired, and I’ve managed not to die — all major wins in my book. The ocean hums quietly around me, equal parts beautiful and unnerving. Somewhere out there, Lifepod 3 is waiting. Hopefully with snacks.

Watch the Chaos

🎥 Subnautica Survival – Day 1
See the full adventure — from surprise Peeper roommate to Seaglide success — on YouTube:

Continue the Journey

Day 1 (You Are Here) |
Day 2 – The Voyage to Lifepod 3 (Coming Soon)

Seven Days to Survive – Day 3: Honey, Zombies, and Home Improvements

Difficulty: Default Survival
Optional Rules: Permadeath, one horde night per week
“If you ever find yourself cornered by two zombies in a stranger’s living room, just remember: honey is nature’s antibiotic. Who knew bee juice would keep me alive?”

The Fetch Quest of Doom

The morning began with me jogging toward the latest house that Trader Rekt wanted looted for supplies. From the outside, it looked quiet — shutters drawn, roof sagging slightly, just another abandoned suburban home. But this is 7 Days to Die, so I knew the interior would be less “suburban charm” and more “screaming corpses.”

Sure enough, as soon as I hit the flag at the back of the property and stepped inside, the soundscape turned into a zombie alarm clock. Two of them barreled toward me, cutting off my escape. I managed to fight my way out, but not without a parting gift: infection. Perfect.

After clearing the stragglers and pocketing the supplies, I searched my pack for antibiotics. Nothing. A return trip to Papaw Residence confirmed the same — unless you count decorative piles of junk and a near-useless jar of murky water. But buried in a chest was salvation: honey. Exactly the right cure for my low-level infection. Bee magic saves the day.

Medical Centre Run

I staggered back to Rekt’s, handed over the supplies, and chose skill books as my reward. Then I spent some coin on more honey, because clearly zombies see me as a chew toy. Another fetch quest? Why not. This one sent me toward what looked like a pop-up medical centre — white tarps, overturned stretchers, and the distinct impression that the last patients didn’t leave voluntarily.

The zombies inside were fewer and slower, which suited my still-throbbing wounds. Looting the shelves, I stumbled on something that felt like Christmas morning: a cooking grill. Finally, the days of choking down charred snake meat are behind me. Now I can prepare food that doesn’t taste like it came out of a campfire accident.

I cleared the building, snagged the supplies, and returned to Rekt. My reward? Charred meat. Honestly, I think the man is trolling me. “Here’s some food, survivor.” Yes, Rekt, I literally just looted the thing that makes your reward obsolete. Thanks for nothing, champ.

Dew Collector Dreams

Back at Papaw, I started eyeing my supplies. Between yesterday’s scavenging and today’s haul, I realised I was close to crafting a Dew Collector. After a bit more rummaging and resource-gathering, the parts came together. I placed the contraption outside, whispered a hopeful prayer to the condensation gods, and waited.

After five minutes of staring at a metal bucket with mesh, I admitted that Dew Collectors are not exciting to watch in real time. With thirst still an issue, I decided to channel my boredom into base-building. The first layer of the horde base is now fully cobblestone. The second layer is patchwork, half cobble, half wood. The third layer? Still dreams and dust. At least I can say progress is being made, even if it looks more like a construction site than a fortress.

Thirst, the Silent Killer

The Dew Collector is great in theory, but water production is glacial. By mid-afternoon I was dehydrated again — stumbling around with blurry vision like I’d been on a pub crawl with the undead. Tomorrow, water is priority number one. Either the trader sells me a stash, or I’m boiling every murky puddle I find.

Still, the looming problem isn’t just thirst. It’s the horde night clock. Day 4 is practically here, and my base is still an empty shell. If I don’t switch gears soon, the zombies will be less “contained threat” and more “unwanted guests knocking down my half-finished walls.” Tomorrow, the hammer and cobblestone get priority — fetch quests can wait.

Continue the Journey

Day 2 | Day 3 (You Are Here) | Day 4 (Coming Soon)

Seven Days to Survive – Day 2: Chickens, Bandages, and Pipe Bomb Decisions

Difficulty: Chill Solo
Optional Features: XP set to 150%

“The chicken wasn’t faster than me — it was simply playing 4D chess while I was stuck with a stone axe.”

Adjustments and Priorities

Loading back in, I realised I’d left my XP multiplier at default. Rookie mistake. Bumped it up to 150% — because if I’m going to die to zombies, I’d at least like to die while leveling a little faster.
First order of business: a buried food stash quest. Second: the elusive dew collector. The recipe calls for 100 scrap polymers, 4 short iron pipes, 4 duct tape, and ideally a water filter. Since I don’t have the filter yet, I’ll only get murky water — but with a cooking pot in the campfire, I can still boil it into something drinkable. Not glamorous, but thirst makes you less picky.

Survivor’s Tip: Dew Collector Water

  • With Water Filter: Collects clean water directly — no cooking needed.
  • Without Water Filter: Collects murky water. Use a cooking pot on the campfire to boil it safe.
  • Murky water is better than no water — just don’t forget to boil it, unless you enjoy dysentery roleplay.

The Chicken Incident

On the way, I decide to test my hunting skills. Enter: chicken. Exit: all my dignity. The little feathered gremlin zig-zagged through the grass like a professional sprinter, forcing me to waste more arrows than I care to admit.
After some zombie interference (probably hired muscle for the chicken mafia), I finally down it. A bone knife later, I had meat for dinner and a stockpile of feathers for arrows.

Blood and Bandages

At the buried stash location, a zombie ambushed me and managed to inflict a bleed. Thank you, starting bandage — you’ve earned your retirement.
Note to self: learn how to craft more. Turns out all you need is cotton → cloth fragments → bandage. Problem solved. My feather surplus also became arrow surplus. Feeling slightly more capable, I dug up the stash and headed back to Trader Rekt.

Pipe Bombs for Later

Rekt offered me a tough choice of rewards. I went with five pipe bombs, because nothing says “Horde Night insurance” like handheld explosives.
Next stop: Papaw residence to unload my loot, then scouting a new Horde base location.

First Steps Toward Horde Night

I laid out the foundations of a 6×3 base. Not glamorous, not reinforced, but it’s a start. I’ll reveal more of its design on the big night — for now, just know it exists, it’s square-ish, and it’s mine.
With daylight fading, I tried to squeeze in a fetch quest, but after one zombie fight it was already 9pm. Jogging zombies are not on my wishlist, so I postponed.

Evening at Papaw’s

Back at Papaw’s, I cooked up my chicken, learned eggs can be eaten raw (filed under: desperate measures), and salvaged what I could.
A zombie came knocking on my door uninvited, so I introduced them to my club. Afterwards, I excitedly crafted an armor crafting kit — only to immediately discover I had no clue how to use it. Survival irony at its finest.

Looking Ahead

Day 2 ends with preparations in motion but confidence on shaky legs. I’ve got pipe bombs, a half-built base, and one less chicken in the world. Tomorrow, I’ll knock out that fetch quest early and dedicate daylight to shoring up my defenses. Horde Night is coming, and I need all the help I can get.

Continue the journey:
Day 1 | Day 2 (You Are Here) | Day 3

Seven Days to Survive – Day 1: Punching Trees, Evicting Corpses

Seven Days to Survive – Day 1: Punching Trees, Evicting Corpses

Difficulty: Default Survival
Optional Rules: Permadeath, one horde night per week

“I woke up in front of a caravan with a few scraps, a stone-axe dream, and a passive-aggressive note from the Duke. Welcome to 7 Days to Die.”

The Duke Hates Me, Trees Hate My Fists

Like every survival game worth its salt, the tutorial goes like this: punch nature until it gives up resources. Twigs, stones, and grass became my new currency. Before long I’d cobbled together a stone axe, wooden bow, arrows, a club, and some basic armor. The Duke’s instructions? Go see Trader Rekt. Fine. But I’m docking him points for management style.

Papaw Residence: Home Sweet Maybe

On the way, I found the Papaw Residence. Inside: zombies, a cooking pot, and — after several panicked swings and one deeply ungraceful bow shot — victory. A few quick wood frames in the doorways, some repair slapdash on the windows, and I served my first eviction notice to the undead. I dropped the land-claim block because… the tutorial said so. It’s just me out here, but sure, paperwork matters.

Administrative Hostility at Trader Rekt

Rekt handed me a shovel and told me to dig. When I stepped back outside, a zombie was loitering like security had gone on break. A couple of club taps later, the parking lot was clear and my cardio stat was emotionally damaged.

Diggy Diggy Hole (ft. Immediate Zombie)

Quest in hand, shovel in pocket, I marched out to unearth supplies. Within seconds of my first swing, the dirt complained — and so did a nearby zombie, who arrived to file a noise complaint with his teeth. One frantic scuffle later, I was back to the dwarven anthem: “I’m a dwarf, and I’m digging a hole.” Every thunk felt like ringing a dinner bell for the next groaner, but the stash popped and I grabbed the goods.

Snake on a Path

On the return leg I spotted a snake. Compared to the zombies outside Rekt’s place and the dig site, this was stress relief with scales. One arrow later, dinner. The bone knife I’d made earlier turned it into tidy cuts for the pot.

Night by the Fire

Back at Papaw, I set up a campfire, boiled every drop of murky water I’d hoarded, cooked snake meat, and tossed a couple of potatoes on for good measure. The house creaked, the wind howled, and distant moans reminded me that the homeowners’ association here is very hands-on.

Day 1 Reflections

Base secured (ish). Water safe (mostly). Food cooked (definitely snake). I’ve got another buried supplies quest from Rekt lined up for tomorrow and the horde clock has quietly started ticking. One day survived. Seven? We’ll see.

Day 1 Pro Tips (7 Days to Die Edition)

  • Gather early, gather often: Grass, stones, and wood fuel your first tools and defenses.
  • Craft the basics fast: Stone axe, wooden club, wooden bow + arrows, and primitive armor.
  • Secure a roof: A fixer-upper beats the outdoors. Frame and patch doors/windows immediately.
  • Cooking pot = jackpot: Boil water safely and expand your recipe list.
  • Bone knife bonus: Butchering with it yields more meat, hides, and resources.
  • Expect company when digging: Shovels are loud. Fight, reset, keep scanning 360°.
  • Trader quests pay: Early tools, food, meds, and dukes — stack them for momentum.
  • Night jobs: Boil water, cook, sort loot, plan upgrades. Don’t waste the dark.
Continue the journey:
Day 1 (You Are Here) |
Day 2

← Back to Seven Days to Survive Hub

Survivor’s Dread: Platform 8 – Last Train to Nowhere

“The train keeps moving. Every carriage promises freedom. Every anomaly promises erasure.”

The Setup

Platform 8 is the companion nightmare to Exit 8. Same rules: walk, notice anomalies, survive. Miss them and the world resets. Only this time, you’re trapped on a subway train that never stops. Played on the Steam Deck with Loop = Life: every reset is a dead survivor. Only one makes it off the train. Like Exit 8, this was my very first time playing — learning the rules on the fly, with resets as my only teachers.

The Diary

First survivor: Reached the end of the carriage and saw a figure standing at the exit. I didn’t realise you’re meant to move when the lights flick on. The lights came, the figure moved faster than me, and I was erased.

Second survivor: This time the exit door stood wide open, platform beckoning. I trusted it. I stepped toward freedom. The world snapped back to the first carriage, and so did I. Survivors don’t get second chances for gullibility.

Third survivor: Red water pooled in the aisle. The right move was to sprint. I didn’t. Instead, I shut the door on the carriage like that would help. The reset came anyway, cruel and quiet.

Fourth survivor: I let curiosity win. Instead of spotting the anomaly, I pushed through to the next carriage just to see what would happen. The answer: reset. Straight back to carriage one, another survivor erased for being too nosy.

Final survivor: Paranoia sharpened me. I ran when I had to, stopped when the lights demanded it, and turned back from lies. At last, the train gave up its prisoner. I stepped onto the real platform, escaped the loop, and lived. Luck played its part too. Some of the anomalies repeated from earlier failures, familiar traps I finally knew how to dodge. That memory, plus paranoia, was enough to carry me to the platform.

The Video

Here’s the full successful run, captured on Steam Deck:

Survivor’s Thoughts

The corridor in Exit 8 felt endless. The train in Platform 8 feels worse — claustrophobic, restless, each carriage identical until it isn’t. Four survivors erased before one finally broke free. That’s the real distinction: Exit 8 is a test of attention, Platform 8 is a puzzle box. Both erase you for mistakes, but in different ways.

Continue the Journey

See where it started with Exit 8 – Lost in the Corridor, or browse more nightmares in the Survivor’s Dread Hub.

Blog at WordPress.com.

Up ↑