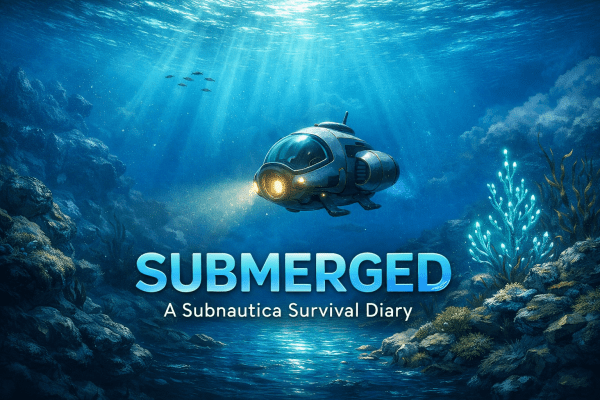
Super Mario 64 Randomizer – Log 7: Bowser in the Fire Sea Was Not the Plan

Super Mario 64 Randomizer Log 7: Bowser in the Fire Sea Was Not the Plan

Mode: Randomizer
Lives Remaining: 17
Stars Collected: 38
Stars Remaining: 82

With Tick Tock Clock finally behind me, I head back downstairs to see what’s lurking behind the entrance that should lead to Hazy Maze Cave. The answer, apparently, is Bowser in the Fire Sea.

To make matters worse, a quick look around confirms the red coins are floating over lava. That problem can wait.

Bowser First, Questions Later

After a few failed attempts getting my bearings, I respawn right next to the Bowser fight entrance. I briefly consider going for the red coins first, then decide against it. Survival comes first.

This somehow turns into the only time I’ve ever failed this fight. I misjudge my position, step where I shouldn’t, and Mario drops straight into the lava.

The second attempt goes as expected. Bowser goes down, the key is mine, and we all agree not to talk about the first try.

The Red Coins Problem

With upstairs now unlocked, I return to the Fire Sea red coins. Several attempts later, it’s clear this set is going to be a nuisance. Precision jumps over lava with a randomizer twist are not something to rush.

I leave them for another session — and another video.

Video

Run Status

  • Lives Remaining: 17
  • Stars Collected: 38
  • Stars Remaining: 82
  • Next Goal: Explore upstairs and see what the randomizer has moved.

Continue the Randomizer

Randomizer Hub |
Log 6: Time Stops for No Mario |
Log 7 |
Log 8: Coming Soon

Dead by Daylight Isn’t Dead — But It Is Wearing Me Down

Dead by Daylight Isn’t Dead — But It Is Wearing Me Down

This is a harder post to write than I expected.
Not because I’m angry, but because Dead by Daylight is a game I used to genuinely love.
That’s what makes this year stand out — not one disaster, but how many small issues stacked up until enthusiasm quietly drained away.

On paper, Behaviour had a strong year.
In practice, it felt messy, defensive, and increasingly disconnected from the people actually playing the game.

Big Swings, Weak Follow-Through

There were real wins:

  • Major crossover moments
  • Long-requested licenses
  • Continued visibility and solid player numbers

But almost every win came with friction.
Momentum rarely turned into confidence.

The PTBs That Didn’t Listen

Twice this year, Behaviour tried to address slugging and tunnelling through PTBs.

The community response was immediate and consistent:

  • This won’t fix the problem
  • This adds frustration
  • This targets symptoms, not causes

Disagreement is normal.
Unified feedback being ignored is not.

When PTBs stop feeling like tests and start feeling like rehearsals for decisions already made, trust erodes fast.

The Livestream That Became a Case Study

The Walking Dead livestream should have been simple:

  • High-profile guest
  • One of the biggest DBD creators
  • A crossover meant to rebuild hype

Instead, it unravelled live.

Technical issues happen.
What mattered was watching the creator actively offer practical solutions — and being shut down by the developers on air.

That moment did more damage than the outage itself.
Flexibility gave way to control, and the optics flipped instantly.

Losing Michael Myers Changes Everything

This is no longer hypothetical.

Michael Myers — Dead by Daylight’s first licensed killer — is confirmed to be leaving the store.

Yes, if you own the chapter, you keep it.
The character will not disappear from existing accounts.

That does not soften the impact.

  • Myers isn’t just another license
  • He’s part of the game’s foundation
  • He proved licensed horror could work long-term in DBD

After Hellraiser, this confirms a pattern rather than an exception.
The unspoken promise that some things were permanent is gone.

“You Keep What You Bought” Isn’t Reassuring Anymore

Nothing is being taken away from existing players.
But the consequences are real:

  • New players lose access to a core horror icon
  • Foundational killers become legacy content
  • The game’s identity fragments over time

Live service games rely on trust that long-term investment matters.
That trust took a direct hit this year.

Licenses Won’t Fix Systems

Jason Voorhees would help.

  • Huge recognition
  • Immediate hype
  • A short-term surge in attention

But licenses don’t solve:

  • Tunnelling incentives
  • Slugging as pressure
  • Solo queue frustration
  • Meta fatigue

Without structural change, a new killer is a sugar rush — not a recovery.

This Isn’t Death. It’s Erosion.

Dead by Daylight isn’t dying.

What’s happening is quieter:

  • Players log in less
  • Defend the game less
  • Recommend it less
  • Shrug when things go wrong

That’s more dangerous than a loud collapse.

Why I’m Stepping Back — And Why That Makes Me Sad

This isn’t a goodbye post.

It’s a pause — and one I didn’t expect to need.

I wasn’t expecting to write a Dead by Daylight post for this blog at all.
At one point, I’d even planned a full page dedicated solely to DBD maps — layouts, loops, dead zones, the works.

That idea felt exciting then.
Now, it feels like a ship that sailed while I was still deciding whether to board.

Not because the maps stopped being interesting, but because my confidence in the game staying stable long-term quietly faded.
Without that confidence, it’s hard to justify investing that kind of time and care.

Maybe that changes one day.
I’d like it to.
But right now, this post exists not because I planned it — but because I needed to be honest about where things stand.

If Behaviour wants to steady the ship:

  • Announce less
  • Ship more
  • Fix incentives, not behaviour
  • Close the loop on feedback

Do that, and goodwill returns.

Without it, the game won’t collapse.
It’ll coast — carried by licenses and habit — while the people who cared most slowly disengage.

And that’s the part that genuinely makes me sad to write.

Clarification Note

  • Licensed content removed from sale is not removed from existing accounts
  • This post focuses on access, stability, and trust
  • Michael Myers’ removal is confirmed; broader concerns are based on precedent

Super Mario 64 Randomizer – Log 6: Time Stops for No Mario

Progress: 38 Stars Collected | 82 Remaining | 21 Lives
Platform: Steam Deck
Settings: Vanilla Mario & Music

“When I looked into the light expecting peace and found Tick Tock Clock instead, I realised this run has no mercy.”

With Whomp’s Fortress cleared, I headed back to the basement to see what chaos was waiting this time. First win of the day: MIPS went down without a fight. One clean grab. One clean star.

Next stop: the Secret Aquarium. Straightforward as always. Then I spotted a platform that needed the Wing Cap. I don’t have it. I took the loss and moved on.

The big basement door — the one that may or may not lead to Hazy Maze Cave — is still locked. No key. No access. Back upstairs it was.

YouTube – Log 6 Video

Tick Tock Clock: Early, Unwanted, but Done

I looked into the light expecting the Wing Cap trial. I got Tick Tock Clock instead.

Shockingly, it wasn’t a disaster. Star placements were forgiving. No awkward jumps on tiny gears. No close calls over the void. The only real struggle was:

  • Grinding out the 100 Coin Star
  • Backtracking to collect the Red Coin Star

Annoying, sure, but manageable. And now the whole level is finished and off the board.

Rainbow Ride: Another Early Win

Like Tick Tock Clock, Rainbow Ride popped up early in this seed. Getting both out of the way now is a massive relief. Two of the most awkward courses cleaned up long before they can cause havoc.

Log 6 Summary

Lives 21
Stars Collected 38
Stars Remaining 82
Nightmares Cleared Early Tick Tock Clock, Rainbow Ride

Two tough courses gone. One rabbit caught. One fake Wing Cap entrance. A solid session.

Continue the Journey

Previous Log | Next Log

Super Mario 64 Randomizer Hub

Super Mario 64 Randomizer – Log 5: Rainbow Ride Conquered

Progress: 29 Stars Collected | 89 Remaining | 18 Lives
Platform: Steam Deck
Settings: Vanilla Mario & Music — the chaos provides its own soundtrack.

“Somewhere between leaping across spinning triangles and landing on an airship, I accepted that gravity in this randomizer is more of a guideline.”

With two stars left in Rainbow Ride, I decided to finish what I started and clear the hardest course so far. I remembered spotting one on the airship last time, so that was the first target.

The final star was a guess, so I followed instinct and headed for the triangle platforms. For once, instinct didn’t betray me. Two clean grabs later, Rainbow Ride is officially complete.

The Basement Surprise: Whomp’s Fortress

Expecting Dire Dire Docks, I stepped into its usual spot and instead landed in Whomp’s Fortress. The twist? The water level in this version doesn’t lower, so the passage to Bowser in the Fire Sea stayed sealed.

Which leaves one option: I need to find Dire Dire Docks somewhere else. Because of course the randomizer wasn’t going to make boss access simple.

Whomp’s Fortress: Smooth Climbing

Despite the odd placement, Whomp’s Fortress went down without much resistance. No weird geometry, no star placements that require a physics degree — just straightforward platforming for once.

By the time I exited, I sat at 29 stars and 18 lives, still needing to hunt down Dire Dire Docks and, eventually, Bowser.

Today’s Video

Continue the journey:
Log 4 | Log 6

Super Mario 64 Randomizer – Log 4: Double Trouble in Rainbow Ride

Platform: Steam Deck
Settings: Vanilla Mario & Music — chaos, but classy.
“They say patience is a virtue, but after chasing red coins in Rainbow Ride, I’m pretty sure it’s a myth.”

Back to Rainbow Ride — because apparently, I didn’t learn my lesson last time. This time I decided to be bold (read: reckless) and go for both the Red Coin Star and the 100 Coin Star together.

Collecting 100 coins went surprisingly smoothly, which immediately made me suspicious. And rightly so — the red coins were spread across moving platforms that seemed determined to throw me into the void.
When I finally gathered them all, the Red Coin Star spawned on the flying ship — nowhere near any of the coins. Several failed leaps and existential sighs later, I finally snagged it.

Only two stars this time, but both felt like boss fights. Rainbow Ride remains the chaotic crown jewel of frustration.

Watch Log 4 Gameplay

Progress Log

  • Total Stars: 20
  • Stars Remaining: 100
  • Lives: 14
Continue the chaos:
Log 3 |
Log 5 (Coming Soon)

Super Mario 64 Randomizer – Log 3: Rainbow Ride in the Basement

Platform: Steam Deck
Settings: Vanilla Mario & Music — chaos supplied separately.
“Somewhere between the mountain slide and the basement sky, I realised this randomizer doesn’t believe in architecture either.”

With only the 100 Coin Star left in Tall, Tall Mountain, I decided it was time to finally clear my first course. The plan was simple: grab coins, stay alive, avoid plummeting off the cliff. Naturally, the first attempt ended in a slide-related tragedy. The second try, however, was a success — first course officially cleared.

Feeling confident, I ventured down to the basement to see what new horrors awaited. A friendly Toad handed over a star without asking for anything in return — a rare act of generosity in this twisted castle.

Then came the real surprise: the hole that should have led to the Vanish Cap switch instead opened into Rainbow Ride. Because apparently, gravity is optional now. Despite a few near misses (and several camera-induced heart attacks), I managed to grab three stars before deciding I’d pushed my luck enough for one day.

Watch Log 3 Gameplay

Progress Log

  • Total Stars: 18
  • Stars Remaining: 102
  • Lives: 13
Continue the chaos:
Log 2 |
Log 4

Super Mario 64 Randomizer – Log 2: Chuckya’s Revenge

Platform: Steam Deck
Settings: Vanilla Mario & Music — chaos left entirely intact.

“Gravity and Chuckya joined forces today. I call it a hate crime.”

Fresh off the high of conquering Bowser and the Secret Slide, I decided to revisit Shifting Sand Land. One more star there couldn’t hurt, right? A quick trip across some quicksand later, I added another to the tally and figured it was time to see what lay below the castle.

That’s when I wandered into the Boo garden — home to ghostly giggles, hidden secrets, and one particularly smug Boo concealing a course entrance. I gave chase, stomped the spook, and jumped straight into the portal. The result? Tall, Tall Mountain. Great name. Terrible welcome.

Watch Log 2:

Thrown Off the Deep End

My very first spawn placed me in arm’s reach of a Chuckya. Before I could even process what I was looking at, the purple menace grabbed me and threw me off the mountain. Ten seconds in, one life down, ego shattered. I went back in for a rematch because apparently I enjoy suffering.

Round two went much better. I methodically climbed the slopes, dodged monkey theft, narrowly avoided falling logs, and picked up six of the seven available stars. Not bad for a course that literally tried to throw me away on entry.

The lone survivor is the 100 Coin Star, which I’ll tackle next time—assuming I can convince myself that collecting loose change while balancing on ledges is “fun.”

Log 2 Summary

  • Stars Collected: 13
  • Stars Remaining: 107
  • Lives: 8

After the sandstorms and the mountain’s murderous intent, I’m learning that no amount of preparation can outmatch the randomizer’s sense of humour. Still, progress is progress—and at least this time I didn’t get flung into the void twice in a row.

Lessons from Log 2

  • Chuckya exists solely to ruin your day.
  • Always expect ledges to betray you.
  • Boos are pranksters, not friends.
  • Six stars and a grudge is still a win.
Continue the journey:
Log 1 |
Log 2 (You Are Here) |
Log 3

SnowRunner Survival: The Permagear Diaries – Day Fifteen: Tyres, Tests, and a Tempting Task

SnowRunner Survival: The Permagear Diaries – Day 15

Truck of the Day: Frank (Fleetstar F2070A)
Primary Objective: Complete Steel River Supplies and Riverside Repair tasks

Tyres, Tests, and a Tempting Task

With Frank sporting his brand-new tyres, I couldn’t resist giving him a proper shakedown. Scanning my task list, Steel River Supplies caught my eye. Not only would it send me back to Black River, but it would also let me grab consumables from the farm here in Smithville Dam — a perfect excuse to see how he’d handle water crossings now.

The last time Frank tackled this road, the flooded section was a serious obstacle. This time? Just a mild inconvenience. Consumables loaded, I spun him around and headed for Black River.

Three Routes, One Choice

Once in Black River, I checked my map. To complete the task, I’d need to drop off consumables, pick up wooden planks, and deliver a fuel carrier trailer. My options:

  1. Consumables → Wooden Planks → Trailer
  2. Consumables → Trailer → Wooden Planks
  3. Trailer first, then haul it alongside the consumables straight to the destination

I chose Option 3. Why? Simple — I wanted to see what Frank could do now. If he’d dragged a large fuel carrier trailer to the warehouse before upgrades, surely he could do even better now.

Frank Goes Amphibious

Plotting my course, I took the same route Scout had previously tackled. It turns out Frank is now amphibious — or at least close enough that he handles water without drama. Good to know.

Reaching the trailer, we looped back toward our starting point. The mud tried to slow us, but with all his upgrades, Frank treated it like an irritating speed bump. No winching, no stalling — just steady progress.

Delivery Without Drama

We rolled into the destination without a hitch, dropped off the trailer and consumables, then headed for the lumber mill. Wooden planks loaded, one final short trip sealed the deal. Steel River Supplies completed with minimal hassle and maximum satisfaction. Frank’s test run? A resounding success.

Riverside Repair: The Real Test

I decide to tackle one more task: Riverside Repair. This would be the ultimate test of Frank’s mud and water handling. As expected, he took on the terrain slowly but steadily. Then I stumbled upon a small trick — if I angled the camera just right, I could see a path under the water. Handy.

Then came the real obstacle: barriers and a sign that read Water Over Road. Understatement of the year — it was a full-on river over the road. Frank pushed through, but the climb on the other side was another story. Thick mud locked him in place. Time passed. Progress was a crawl. I was creeping forward, sliding back, winching, and repeating. Just when I thought Frank was doomed to live here forever, this happened:

Yep, he somehow managed to free himself. I feel like he took that notification as a personal attack. The rest of the journey went off without a hitch, although I made sure to take the long way round back. Once I completed Riverside Repair, I turned off Frank’s engine and celebrated a job well done.

Continue the Journey

Day 14 | You are here | Day 16 (Coming Soon)

More from SnowRunner

Submerged: A Subnautica Survival Diary – Day 1: The Peeper in the Pod

Submerged: A Subnautica Survival Diary – Day 1

Difficulty: Survival Mode (Steam Deck Edition)

Welcome to 4546B

I wake to alarms, a smoking console, and one extremely calm Peeper hovering in the middle of my lifepod like it pays rent. Fire out, situation stable, roommate secured. I catch it. I cook it. Breakfast of champions.

The PDA boots into Emergency Mode with the sort of cheerful corporate tone that suggests HR wrote it. Regardless, it’s my lifeline now, so I listen.

First Steps (and First Swims)

Before diving, I pin the essentials:

  • O₂ Tank — lungs are optional, but preferred.
  • Fins — I’d rather swim fast than panic slowly.

A few quick foraging runs later and I’ve got both crafted, plus a Repair Tool and a Scanner. The ocean is being cooperative… for the moment.

Right on cue, the radio chirps in with an update: rescue ETA 9… 9… 9… 9… 9 hours. So, roughly eleven and a half years. Excellent. I’ll, uh, keep busy.

Nightfall, Notes, and New Blueprints

Scanner built, I point it at everything that moves (and several things that don’t). The shallows hum with life — coral pulsing softly beneath me, strange silhouettes drifting just beyond visibility. It’s beautiful in a way that feels like a warning.

Darkness drops quickly, and scanning in pitch black is just guessing with extra beeps, so I pin a Torch for tomorrow.

At first light I spot Seaglide fragments. One scan later and the blueprint unlocks. New goal: build it before the day ends — because slow swimming is a lifestyle choice I refuse to adopt.

Then: a ping from Lifepod 3. Marker acquired. I’ll head there once the Seaglide is humming.

Crash Fish Chaos

While hunting materials, I discover two facts in rapid succession: Crash Fish hate visitors, and they express this by exploding in your face. Two back-to-back detonations later, my health bar looks like a bad stock chart. I limp to the lifepod, patch up, and get back to work. Controlled recklessness: unlocked.

The Hunt for Copper

Finding copper is like looking for hope in a horror movie — technically present, rarely where you expect. I comb the shallows, finally crack the right limestone outcrop, and sprint-swim home to craft Copper Wire.

Moments later, the Seaglide is mine. Sleek, fast, and probably not covered by warranty. I take it for a celebratory lap around the pod and call it a day. Tomorrow: Lifepod 3.

End of Day Reflections

The sun sinks below the horizon, painting the shallows gold and the deeper water black. My vitals are stable, the pod is repaired, and I’ve managed not to die — all major wins in my book. The ocean hums quietly around me, equal parts beautiful and unnerving. Somewhere out there, Lifepod 3 is waiting. Hopefully with snacks.

Watch the Chaos

🎥 Subnautica Survival – Day 1
See the full adventure — from surprise Peeper roommate to Seaglide success — on YouTube:

Continue the Journey

Day 1 (You Are Here) |
Day 2 – The Voyage to Lifepod 3 (Coming Soon)

Isolation Protocol – Log 5: The Joes Know

Isolation Protocol – Log 5: The Joes Know

Difficulty: Survivor Mode (Permadeath Rule in Effect)

“I was ready for the Alien. I wasn’t ready for a bunch of plastic-faced androids with the bedside manner of a toaster.”

Starting where I left off, I spotted a Working Joe in the distance. Their glowing eyes cut through the sterile white corridors, and the way they moved — steady, unhurried — felt more unsettling than if they’d been running. With a little help from my motion tracker, I eventually found a computer up a set of stairs that looked like it might let me contact the Torrens. Unfortunately, Apollo essentially told me, “NOPE.” Back to square one.

Not wanting to deal with the Joe directly, I ducked into a vent. The metal clanged beneath my hands as I crawled through the stale air, only to find myself right back where I started. Brilliant navigation, 10/10.

Sneaking Past the Plastic Brigade

My second attempt was a little more productive. Using the tracker’s handy objective marker, I pushed forward, only to find two Joes patrolling opposite sides of the room. Their footsteps echoed across the floor like someone tapping on the inside of a coffin. Staying crouched and moving like my life depended on it (because it did), I managed to slip past them.

Along the way, I picked up the blueprint for EMP v1.1. Not sure how effective it is against the Joes, but it went into my collection of “items I’ll probably forget exist when I need them most.”

Soon after, I stumbled on a save point. Though I’m not religious, I thanked some higher power for that little glowing box of mercy. One save later, and I was thrown into three hacking games in quick succession — tense but surprisingly fun, especially with the eerie hum of machinery pressing in around me.

Contact with Samuels

At long last, I made contact with someone from the Torrens: Samuels. I could have hugged him through the screen. He was with Taylor, who looked in rough shape and needed medical help. Samuels couldn’t leave her side, but he promised to send transport for me. All I had to do was make it back to them.

Which, naturally, was when the alarm went off. The lights strobed red, the siren wailed like a dying animal, and every Joe in the area decided it was time to reenact Terminator.

Panic, Chaos, and Dripping Vents

This is where stealth went straight out the window. I’d like to say I handled it like Snake in a cardboard box. Dear reader: I did not. Instead, I panicked, sprinted, hid badly, and almost ended the entire run then and there.

Rather than just tell you about it, here’s the video in full:

Yes, I could have used the EMPs. No, I didn’t — because I forgot I had them in the chaos. And the revolver? Pretty sure it’s about as effective as shouting at the Joes, given what I’ve seen. Meanwhile, the Alien was making its presence known again, dripping from the vents like the world’s worst plumbing problem.

I even had a staring contest with one of the Joes. Spoiler: they can, in fact, see me. And if they can find me in lockers, what chance do I have against the Xenomorph?

Somehow, against all odds, I survived the chase and stumbled into the SciMed Tower. Samuels and Taylor are waiting… if I can actually reach them next time.

Continue the Journey:

Log 4 |
Log 6 Coming Soon

Blog at WordPress.com.

Up ↑