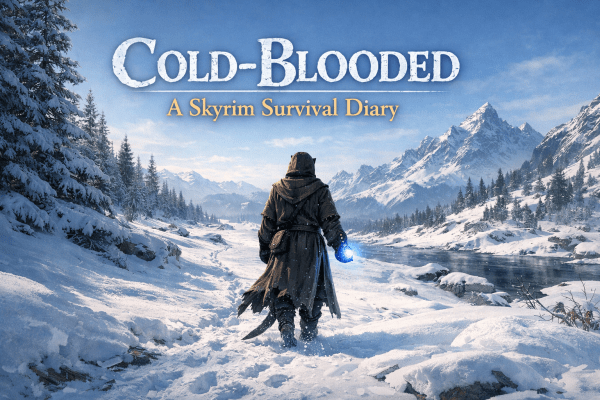
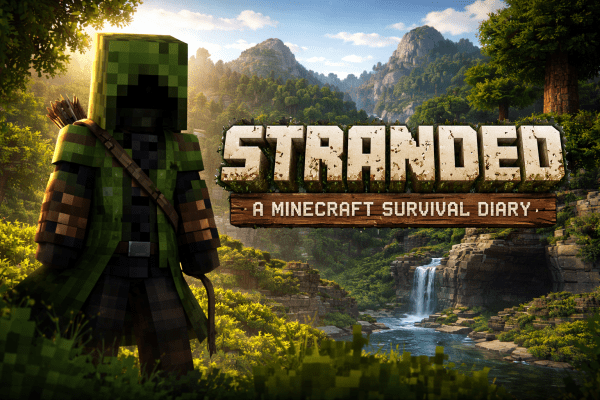
The Outlast Trials – Log 7: Feed the Children


Location: Orphanage
Trial: Feed the Children
Difficulty: Standard
Grade: A


Back to The Outlast Trials hub

After spending some points upgrading my X-ray rig, I decided to stick with Standard difficulty for one more trial.

I’ll be honest — this decision was influenced by having a fairly miserable time on Day 5 of my
Stalker Instinct run in The Long Dark.
Sometimes you don’t need to make things harder.

This time, the trial was Feed the Children.

Going purely by the name, this one sounded… nice.

It was not.

I was tasked with feeding the children soup.
Not just any soup — one made with a corpse, and finished off with a generous amount of bleach.

My upgraded X-ray rig helped a lot here.
I’d upgraded it enough that it recharged my night vision and provided objective information.

What it didn’t help with was the ex-pop.

Every time I spotted a bottle, an ex-pop seemed to appear out of nowhere.
They got hold of me more than once, and did a fair amount of damage.

Thankfully, Hide and Heal pulled its weight.
The X-ray rig did too.
I’ll need to experiment with the other rigs eventually, but this one definitely earned its keep.

I’d like to say things got easier after collecting two bottles.

They did not.

I somehow managed to walk into the same ex-pop at least twice —
both times in the exact same area.

Once I finally fed the children, I had a feeling Mother Gooseberry was going to make an appearance.

She did.

I managed to sneak past her once again, and make my way out.

After everything that happened, I was genuinely surprised to walk away with an A.

I was fully expecting a B at best.

Watch the Trial

Surviving, not suffering.

The Outlast Trials – Log 6: Cleanse the Orphans


Location: Orphanage
Trial: Cleanse the Orphans
Difficulty: Standard
Grade: A+


Back to The Outlast Trials hub

I’m getting a bit fed up of the police station.

I know I still have a couple of trials to do there, but I’m ready for a change —
and, if I’m honest, I’m ready for a break from Coyle.
I want to meet some of the other Prime Assets.

So I head to the Orphanage and decide to properly meet
Mother Gooseberry.
I encountered her during the tutorial, but this would be my first real trial with her.

I only have one option available: Cleanse the Orphans.
I’m not entirely sure what that means, but I’m about to find out.

My first task is to enter the Orphanage.
Easy enough.

Mother Gooseberry is there to welcome me.
Helpful of her to make sure I know she’s around.

Next, I need to broadcast the religious station,
followed by tuning radio receivers in the dorms.
I check the map more than once here — mostly to make sure I know where I actually am.

I even get a brief appearance from Mother Gooseberry during this section,
but I’m hiding in the dark and she doesn’t see me.

After that, I’m tasked with swapping film reels.
I struggle with this for a bit, mostly because I have no idea where they are.

Eventually, the game takes pity on me and points me in the right direction.

Next up is stopping the blasphemers in the church.
That part is simple enough — just smash the jukebox.

I’m a little concerned about how much noise I made,
so I hide.
Probably unnecessary, as the next thing I know,
a man appears on a cross and gives me my next objectives.

I’m told to power the generator and find the saw handle keys.

This time, I make sure to check the TVs before heading out —
mostly because there are no Big Grunts chasing me around this time.

I struggle a bit with the generator,
but during that process I discover a random button.
The game tells me that if I find a second button,
I’ll unlock a secret room.

It takes a few attempts thanks to being chased and juggling the generator,
but I eventually find both buttons and access the secret room.

Once again, the game helps me by showing possible key locations.
I head back to the chapel and prepare to
Serve the Body of Christ.

I thought electrocuting the Snitch was bad.
This felt worse.
Probably even more so if I were religious.

Once that’s done, it’s time to head for the shuttle —
but not before Mother Gooseberry makes another appearance.

I throw an item at her.
No idea if it connected,
because I immediately ran out of the chapel and shut the door behind me.

I eventually make my way back to the shuttle,
getting one final look at Mother Gooseberry before leaving.

Grade: A+

My first one.

More importantly, this trial taught me something:
I think it’s time to increase the difficulty for the next run.

Video

Surviving, not suffering.

The Long Dark – Stalker Instinct Log #2: The Prepper Cache Jackpot (I’ve Peaked)

Difficulty: Stalker
Optional Features: Cougar enabled, Scurvy enabled, Trader enabled

Today’s goal is straightforward: check the nearby prepper cache.

There are nine prepper caches scattered around Great Bear. Only three are stocked. The other six are abandoned. Unless you’re on Interloper or Misery, in which case the game simply laughs and leaves them all empty.

My reasoning is dangerously optimistic:

  • If I find a stocked cache, I win the lottery.
  • If I find an abandoned one, my odds improve for the next.

Either way, it feels like progress. Which should have been my first warning sign.

The Torchless Mistake

I head out without a torch.

Yesterday, the wolves kept their distance. So I make the bold assumption they’ll continue to be polite today.

They do not.

A wolf appears, and I immediately realise I’ve left my best “please don’t eat me” tool back at the Camp Office.

No torch. No flare. Just a lantern.

I’ve never used a lantern to stop a wolf before, but today is the day we test that theory.

It works. The wolf backs off.

I don’t want to rely on it too much though. Lantern fuel is going to be a problem until I can fish. This is an emergency option, not a long-term solution.

Rope Climb and the Cache Reveal

I climb the rope and find the cache.

It’s stocked.

Not barely stocked. Properly stocked.

Inside I find:

  • Warm clothing
  • Food and water
  • Medical supplies
  • A revolver
  • Enough materials to craft a bow and arrows

I immediately go into full hoarder mode. I must carry everything. Logic takes a short break.

Regaining Some Self-Control

After a few minutes of loot-induced madness, I calm down.

This cache isn’t going anywhere. I know where it is. I know how to reach it. That alone changes the tone of this run.

I take what actually makes sense:

  • A couple of snares
  • The revolver

Then I head out to scout the area.

The Cave and the Corpse

Nearby, I find a cave. Birds are circling, which is never subtle.

There’s a corpse inside. No useful loot, but the cave itself matters. If cabin fever becomes an issue later, this place could save me.

Getting Lost on Purpose (Sort Of)

I’m convinced there’s another way down from up here besides the rope.

I can’t find it.

Rather than keep wandering until something eats me, I start placing markers and testing them. If a blizzard ever hits while I’m up here, at least I’ll have some guidance.

It’s dull work, but it’s future-proofing.

Skill Books and Bow Work

I stay outside long enough to finish reading my rifle mastery book. I don’t know if I’ll ever use a rifle, but I prefer having options.

Back at the cache, I work on my bow until it gets dark. I’m not entirely sure how I keep working once it’s already dark, but I’m not questioning it.

Then I head to bed.

End of Day 2

I found a stocked prepper cache on Day 2.

That’s the peak.

From here on out, it’s just The Long Dark correcting the balance.

I honestly have no idea what tomorrow’s plan is. Everything after this feels like borrowed time.

Video

Day 2 Notes

  • Prepper caches are pure luck, not planning.
  • Lanterns can deter wolves, but fuel matters.
  • Marking routes is boring until it saves your life.
  • Caves are valuable even without loot.
  • Hoarding feels good right up until you try to walk.
Continue the journey:
Log #1 | Log #2 (You are here) | Log #3

The Outlast Trials – Log 5: Release the Prisoners


Difficulty: Standard
Trial: Release the Prisoners
Grade: B+


Back to The Outlast Trials hub

I’m still sticking with Standard difficulty.
This time the trial was Release the Prisoners.

The first problem was finding the key to the security room.
It reached the point where the game had to tell me exactly where it was —
all I had to do was bash a door down to get it.

The second problem was finding the security room itself.
I got lost.
Completely.

That meant dealing with various ex-pop along the way,
including the fire-wielding lunatic from the previous trial,
and someone who claimed they could see me in the dark.

Thankfully, not in my hiding spot.

No trial in the police station would be complete without Coyle,
but before I got to see him again,
an ex-pop decided to give me an extreme dose of hallucinogenics.

I genuinely thought I was going to need to find an antidote,
but thankfully it wore off on its own.

Eventually, I found a sign — an actual sign — with an arrow pointing to the security room.
From there, I managed to free the prisoners.

Then it was time to leave.

Naturally, I was given another dose of hallucinogenics.
Entirely my fault.
I could see the box was trapped.
I chose to ignore it.

I somehow survived that.
I nearly didn’t survive a third dose,
until I remembered I still had a bandage and used it to heal.

I have no idea how I found the exit area.
I just did.

Of course, Coyle was waiting for me.
I called the shuttle and got zapped by him yet again.
One more hit and I would have been done.

While waiting for the shuttle, I ran him around a parked car and hoped for the best.

In the end, I finished with a B+.

I could have done better.
But it could have been a whole lot worse.

Video

The Outlast Trials – Trial Log #4: Sabotage the Lockdown

Difficulty: Standard
Trial: Sabotage the Lockdown
Prime Asset: Coyle
Grade: A-


Back to The Outlast Trials hub

I’m sticking with Standard difficulty for another trial.
No need to press my luck yet.

This time it’s Sabotage the Lockdown.
The task sounds simple enough: reach the exit.

What the briefing neglected to mention is that I’d be carrying a gas canister the entire way.
Or that Coyle would be on my tail for the whole trial.

I didn’t even make it two rooms in before Coyle spotted me.
So I did the sensible thing.
I ran straight back to the start and hid.

Once I was sure he was gone, I went back for the canister.
Naturally, an ex-pop decided to appear at that exact moment,
so I returned to my hiding spot again.

Progress was slow, but methodical.

At one point, I was convinced I’d have to throw something at Coyle and make a break for it.
All he had to do was turn left.

He didn’t.

I’m choosing to believe the sunglasses aren’t helping him.

I eventually reached the generator, but even then, the slightest noise had me diving into corners to hide.
Once it was powered up, the exit was right there.

Somehow, after all that, I finished with an A-.
I was close to an A+, but I’ll take it.

Video

This run continues to reinforce the same lesson:
slow progress beats reckless confidence.

Related series:

Outlast – Apex Predator Run

Surviving, not suffering.

Surviving, Not Suffering

If you had a freeway billboard, what would it say?

If I had a freeway billboard…

SURVIVING, NOT SUFFERING.
(Keep driving.)

That’s the idea behind Survivor Incognito.

I play survival games on whatever settings make sense at the time, make mistakes, adapt, and try to keep it fun rather than punishing.

No bravado. No misery for the sake of it. Just seeing how long I last and enjoying the ride.

The Outlast Trials – Trial Log #3: Cancel the Autopsy

This Trial was my first run on Standard difficulty.
I completed it.
How cleanly is debatable.

Viewer discretion advised. The Outlast Trials is intended for mature audiences and contains graphic violence, disturbing imagery, and psychological horror.

Full Trial recording:


Cancel the Autopsy

The first key was straightforward.
No issues there.

The problems started after picking up the second key.
I thought I’d avoided one of the larger enemies.
I had not.

He spotted me and gave chase.
I ran for the gymnasium, assuming I’d shaken him.
I hadn’t.
He followed me in.


Losing the Thread

After finally finding somewhere safe, I realised I’d made a simple mistake:
I hadn’t checked the clue for the third key.

That meant backtracking.
More movement.
More risk.

Once I did find the clue, the third key turned up in the first place I checked.
Naturally.


The Exit

When it came time to leave, Coyle decided to get involved.
He chased me most of the way to the exit.

I called the subway and tried to hide in a locker.
Coyle immediately pulled me out and shocked me for the effort.

As soon as I had the chance, I ran.


Afterwards

Despite everything — the chase, the backtracking, the locker incident — I somehow finished the Trial with an A rating.
I’m still not entirely sure how.

What I am sure of is that it was a lot of fun.

Standard difficulty already feels like the right place to be.
There’s pressure, but there’s still room for things to go wrong without the run collapsing entirely.


Series Notes

This was a single attempt, recorded as it happened.
There were no retries for recording purposes.

Mistakes stayed in.
Chases stayed in.
The rating was whatever the game decided it was.


Continue the Series

Staying Connected


A quick housekeeping note.

If you want to keep up with what I’m playing, recording, or writing between blog posts,
the easiest way is to follow me on social media.

I share short clips, updates, and moments there —
sometimes things that never quite justify a full blog entry.

Recent Short

A brief moment from The Outlast Trials, shared as a short.
These clips usually capture instinctive reactions, close calls, or situations where stopping to think would have been a mistake.

You’ll find links to all my social platforms at the top and bottom of the site.
That’s intentional.

I’d rather keep everything visible and easy to find than rely on pop-ups or constant reminders.

No pressure.
No expectations.
Just another way to follow along if you want to.

Surviving, not suffering.

Super Mario 64 Randomizer – Log 9: Penguins, Battlefield, and Missing Wings


Progress: Stars Increasing | Lives Intact (Somehow)
Platform: Steam Deck
Settings: Vanilla Mario & Music

“Sometimes progress is skill. Sometimes it’s guessing the right penguin and hoping for the best.”

With only four stars left in Cool, Cool Mountain, I decided to finish the job before the seed could get any funny ideas.

Cool, Cool Mountain: Cleanup Duty

First target: the Red Coin Star. I knew where six coins were. The last two? Found them easily enough. Getting them was another matter.

That’s when I remembered an old trick. The first attempt failed — badly — but that was fine. Sometimes a failed run resets the rhythm. The second attempt clicked. Clean movement. No panic. Star secured.

Next problem: the baby penguin.

A straight 50/50 guess. I picked one. It was the right one. No skill involved. I’ll take it.

Big Penguin Race and Snowman’s Lost His Head followed without drama. Just solid execution. One course fully cleared and crossed off the list.

YouTube – Log 9 Video

Red coins, penguin roulette, and a continued refusal by the Wing Cap to reveal itself.

Secret Slide Surprise: Not What I Expected

With CCM done, I checked what was hiding behind the Secret Slide entrance.

The answer: Bob-Omb Battlefield.

Still no Wing Cap switch. That’s becoming a theme.

I handled King Bob-omb first and grabbed his star. While scouting the rest of the level, it became clear that full completion here absolutely requires the Wing Cap.

Rather than force it, I settled for Koopa the Quick, grabbed the star, and called it. No point bleeding lives for stubborn pride.

Log 9 Summary

Course Cleared Cool, Cool Mountain
Risk Taken Red Coins via old-school trick
Luck Factor Correct baby penguin (first try)
Wing Cap Status Still missing
Bob-Omb Battlefield Partially cleared

One full course done. One classic stage half-finished. The Wing Cap continues to dodge me.

Continue the Journey

Previous Log | Next Log

Super Mario 64 Randomizer Hub

Announcement: Outlast – Apex Predator Run

I’m starting a new playthrough of Outlast, using what I’m calling the Apex Predator ruleset.

The idea is simple:
every death counts.
Three strikes, and the run ends.

Outlast isn’t a power fantasy.
You can’t fight back.
You can’t overpower anything.
Survival comes down to awareness, restraint, and not making the wrong decision at the wrong time.

The Apex Predator ruleset exists to give those moments weight.
It allows room to learn without encouraging recklessness.

This run sits under Survivor’s Dread and has its own hub:

Outlast – Apex Predator Run Hub
.

It will run alongside my ongoing work in
The Outlast Trials,
which has its own hub here:

The Outlast Trials Hub
.

Where possible, the two series will alternate, keeping the focus on survival horror as endurance rather than performance.

There’s no guarantee of success.
If the run ends, it ends.
That’s part of the design.

Surviving, not suffering.

Blog at WordPress.com.

Up ↑